blackshadowsoftwareltd / Windows-Installer-with-MSIX-and-Certificate

Windows Installer with MSIX and Certificate

Geek Repo:Geek Repo

Github PK Tool:Github PK Tool

Please read the all documentation if this doc is not working. The documentation linked below step by step

package config

pubspec.yaml

msix_config:
  publisher: CN=Blackshadow
  display_name: Blackshadow
  publisher_display_name: Blackshadow
  identity_name: MyCompany.MySuite.MyApp
  msix_version: 1.0.0.0
  logo_path: G:\Windows-Installer-with-NSIX-and-Certificate\assets\utils\logo.png
  certificate_path: G:\Windows-Installer-with-NSIX-and-Certificate\assets\utils\cert.pfx
  certificate_password: 1234 

First step

Screenshot 1

PowerShell

New-SelfSignedCertificate -Type Custom -Subject "CN=Contoso Software, O=Contoso Corporation, C=US" -KeyUsage DigitalSignature -FriendlyName "Your friendly name goes here" -CertStoreLocation "Cert:\CurrentUser\My" -TextExtension @("2.5.29.37={text}1.3.6.1.5.5.7.3.3", "2.5.29.19={text}")
Screenshot 1

PowerShell

Set-Location Cert:\CurrentUser\My
Get-ChildItem | Format-Table Subject, FriendlyName, Thumbprint
Screenshot 1

predefined certificate path

G:\Windows-Installer-with-NSIX-and-Certificate\assets\utils\cert.pfx

Thumbprint

4E846D68B6C60EB6B86D5DEFF34EC3739AA03508

Export a certificate. Password usage

doc have to replace the thumbprint & certificate path

$password = ConvertTo-SecureString -String <Your Password> -Force -AsPlainText 
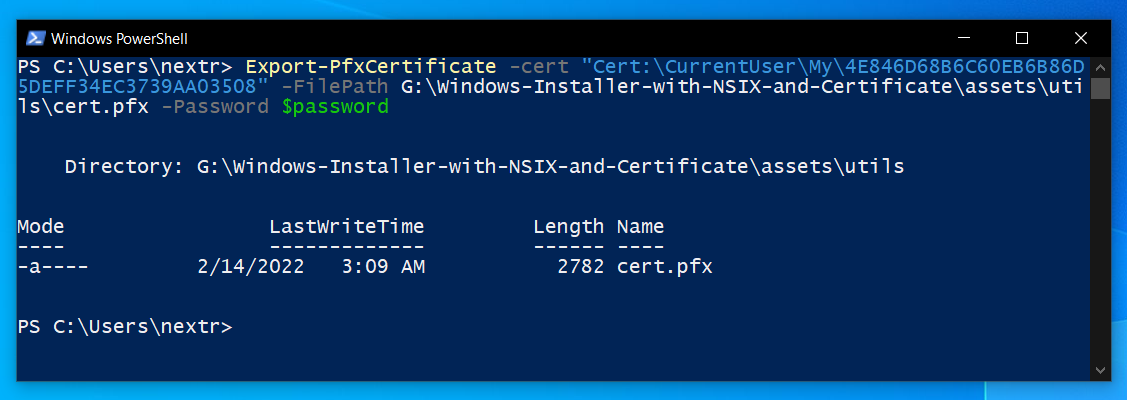
Export-PfxCertificate -cert "Cert:\CurrentUser\My\<Certificate Thumbprint>" -FilePath < FilePath >.pfx -Password $password

ready to run

$password = ConvertTo-SecureString -String 1234 -Force -AsPlainText 
Export-PfxCertificate -cert "Cert:\CurrentUser\My\4E846D68B6C60EB6B86D5DEFF34EC3739AA03508" -FilePath G:\Windows-Installer-with-NSIX-and-Certificate\assets\utils\cert.pfx -Password $password
Screenshot 1

Second step

https://community.flexera.com/t5/InstallShield-Knowledge-Base/How-to-add-certificates-to-the-Trusted-Root-Certification/ta-p/4118

1. Click Start, click Start Search, type mmc, and then press ENTER.

Screenshot 1

2. On the File menu, click Add/Remove Snap-in.

Screenshot 1

3. Under Available snap-ins, click Certificates,and then click Add.

4. Under This snap-in will always manage certificates for, click Computer account, and then click Next.

5. Click Local computer, and click Finish.

6. If you have no more snap-ins to add to the console, click OK.

7. In the console tree, double-click Certificates (Local Computer). double-click Certificates.

8. Right-click the Trusted Root Certification Authorities store - select All Tasks.

9. Click Import to import the certificates and follow the steps in the Certificate Import Wizard.

Screenshot 1

10 Browse and navigate to the .pfx file. and next

Screenshot 1

11 Password 1234 and next => next => Finish => OK

Screenshot 1 Screenshot 1

Third step

flutter clean
flutter build windows --release
flutter pub run msix:create
### msix created: build\windows\runner\Release\windows_installer_msix_dertificate.msix

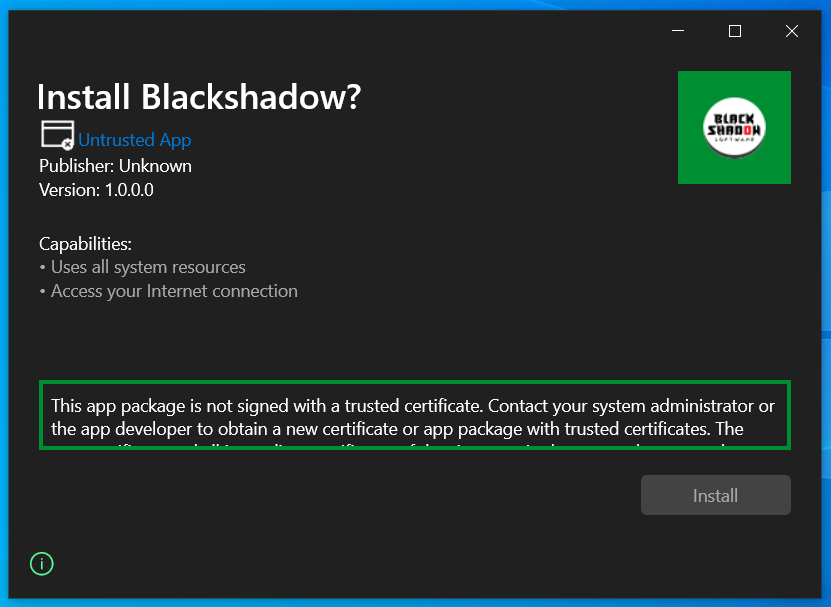
ERROR

If you follow my process.

I hope this error will not face the: This app package is not signed with a trusted certificate.

Screenshot 1

About

Windows Installer with MSIX and Certificate


Languages

Language:C++ 53.1%Language:CMake 25.2%Language:Dart 17.5%Language:C 2.3%Language:Swift 1.3%Language:Kotlin 0.5%Language:Objective-C 0.1%