
This plugin provides the following Graylog modules:
- Input plugin for AWS Flow Logs network interface connection logs
- Input plugin for AWS CloudTrail logs
Required Graylog version: v2.1.0 and later (Please use the v0.6 release of this plugin if you are running Graylog v2.0.x)
Download the plugin
and place the .jar file in your Graylog plugin directory. The plugin directory
is the plugins/ folder relative from your graylog-server directory by default
and can be configured in your graylog.conf file.
Restart graylog-server and you are done.
After installing the plugin you will have a new cluster configuration section at “System -> Configurations” in your Graylog Web Interface. Make sure to complete the configuration before using any of the modules this plugin provides. You’ll see a lot of warnings in your graylog-server log file if you fail to do so.
Note that the AWS access and secret key are currently not stored encrypted. This feature is following shortly and before the final release of v1.0 of this plugin. (in a few days)
The configuration of this plugin has a parameter that controls if AWS entity translations are supposed to be attempted or not. This basically means that the plugin will try to find certain fields like a source IP address and enrich the log message with more information about the AWS entity (like a EC2 box, an ELB instance, a RDS database, …) automatically.
This would look something like this:
Here are required IAM permissions in case you decide to use this feature:
{
    "Version": "2012-10-17",
    "Statement": [
        {
            "Sid": "Stmt1469415911000",
            "Effect": "Allow",
            "Action": [
                "elasticloadbalancing:DescribeLoadBalancerAttributes",
                "elasticloadbalancing:DescribeLoadBalancers"
            ],
            "Resource": [
                "*"
            ]
        },
        {
            "Sid": "Stmt1469415936000",
            "Effect": "Allow",
            "Action": [
                "ec2:DescribeInstances",
                "ec2:DescribeNetworkInterfaceAttribute",
                "ec2:DescribeNetworkInterfaces"
            ],
            "Resource": [
                "*"
            ]
        }
    ]
}
The Flow Logs integration and analysis examples are described in this graylog.org blog post.
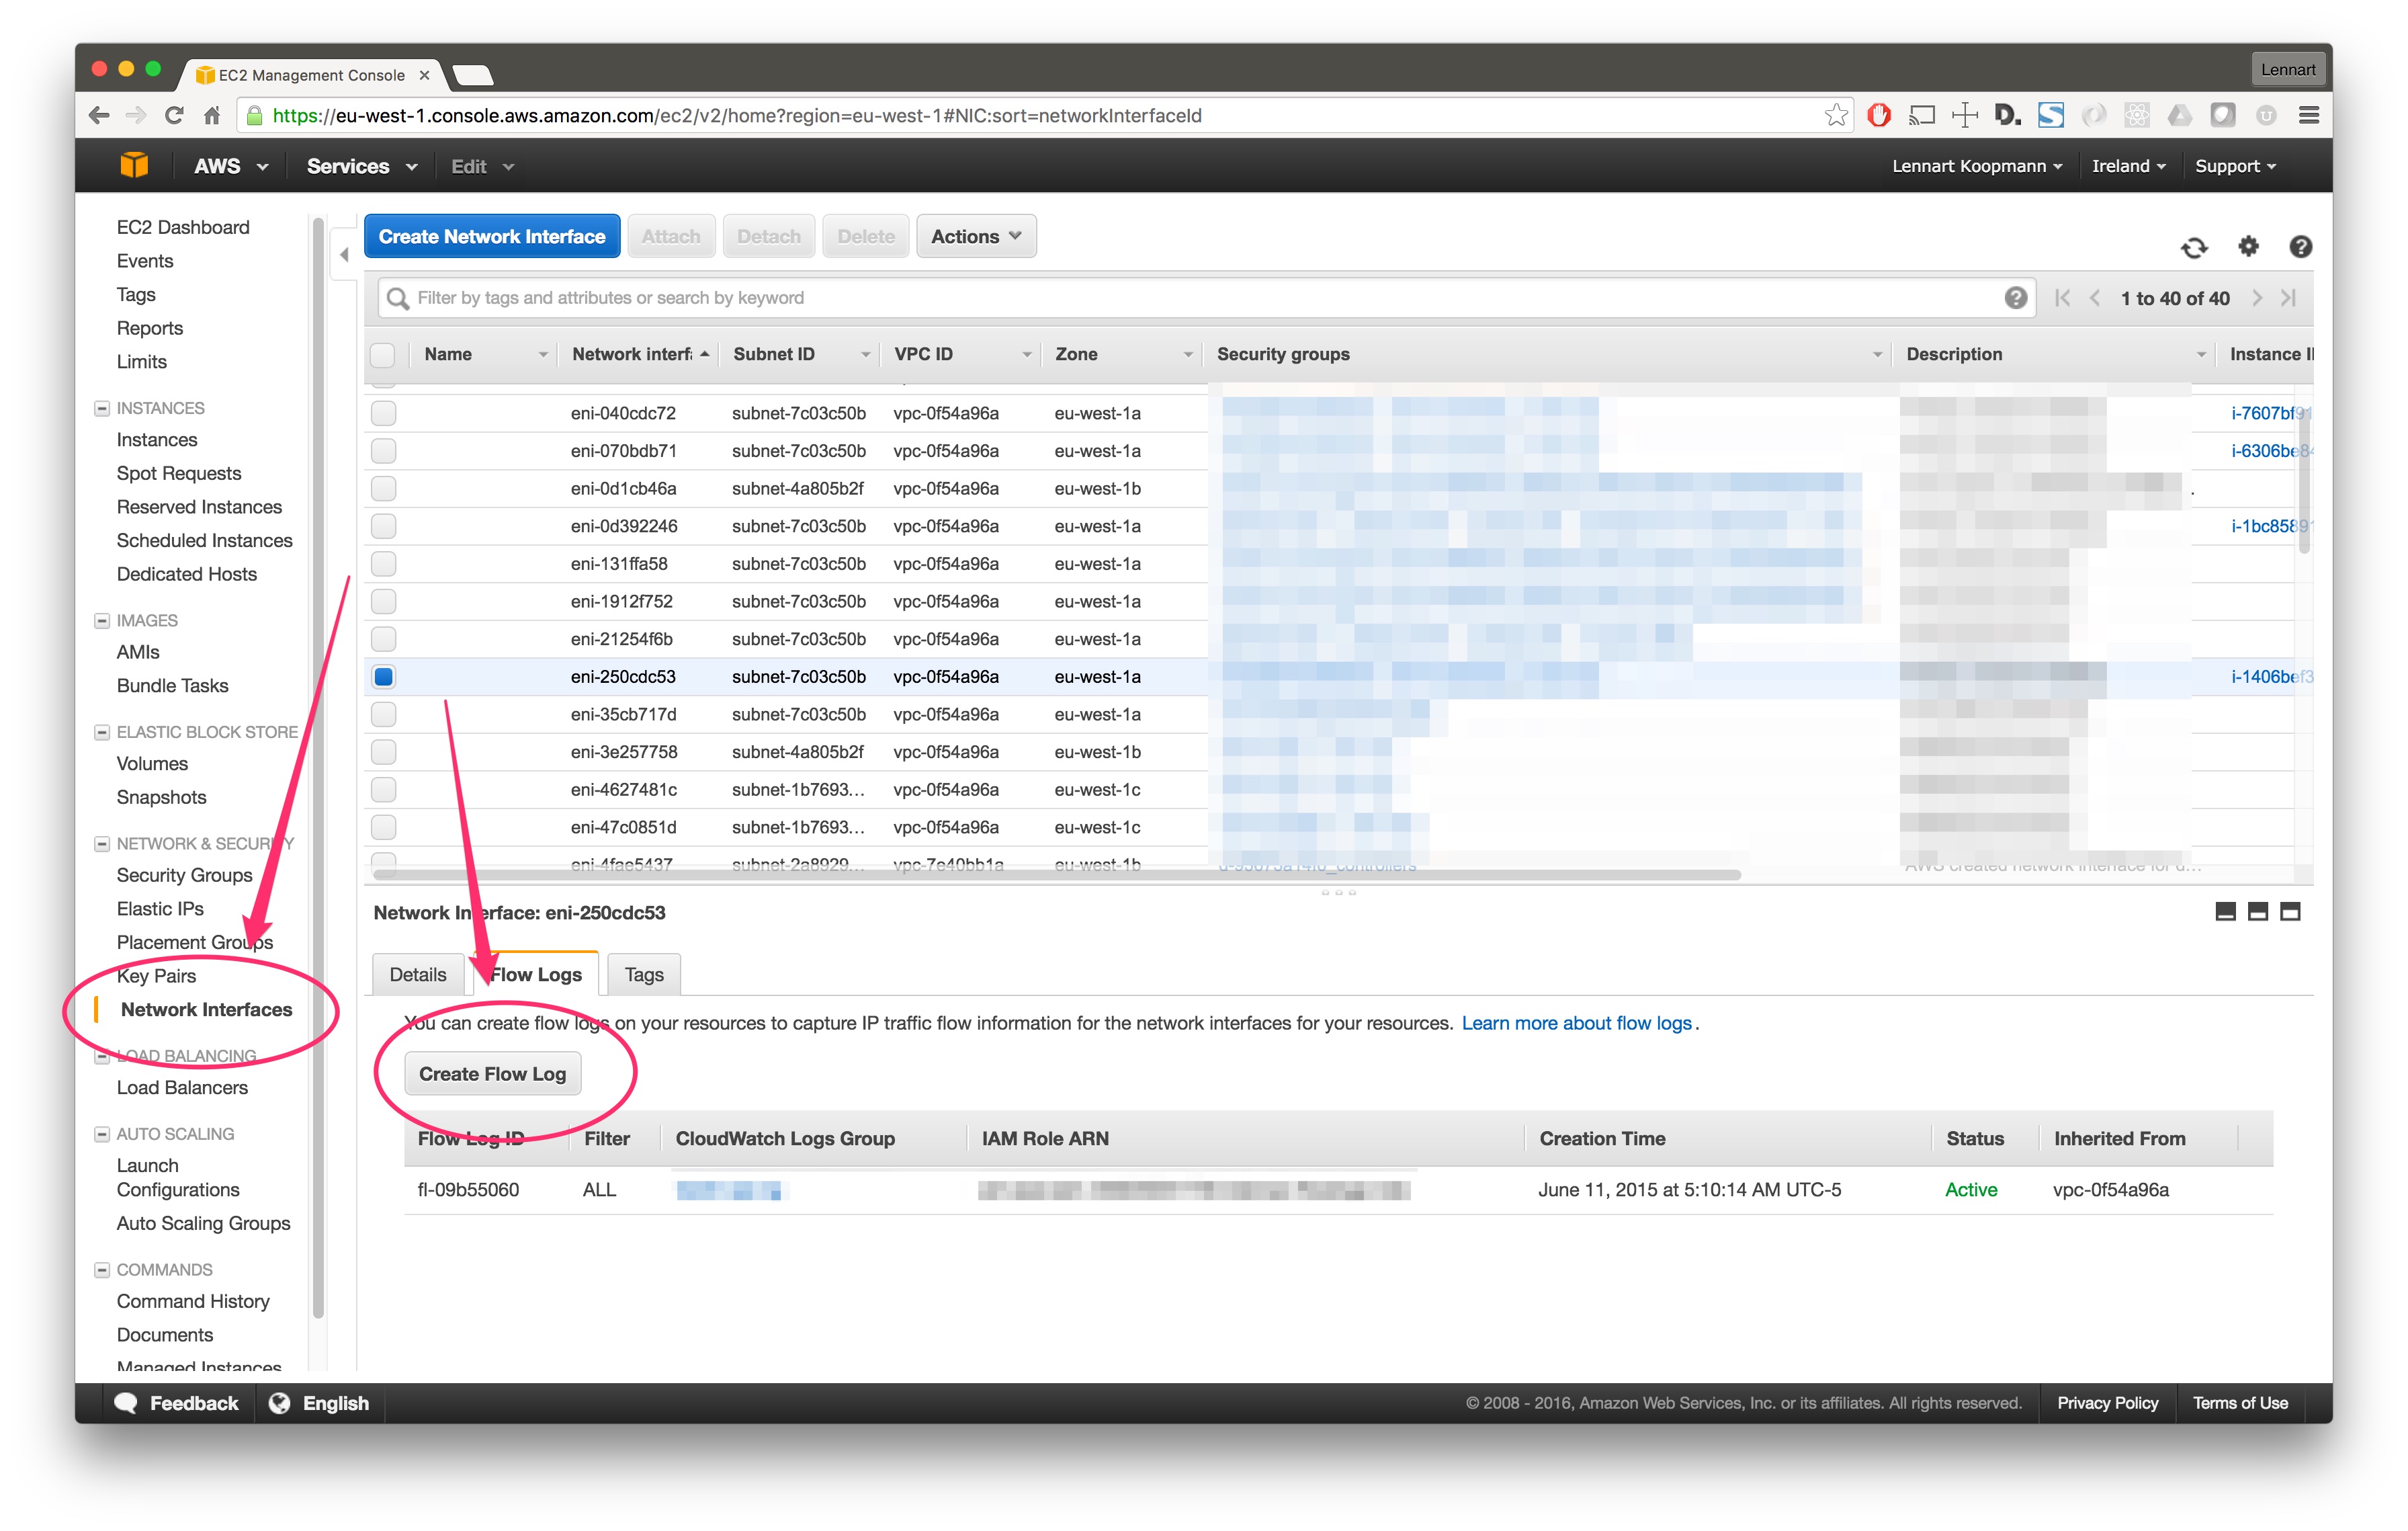
There are two ways to enable Flow Logs for an AWS network interface:
For a specific network interface in your EC2 console, under the “Network Interfaces” main navigation link:
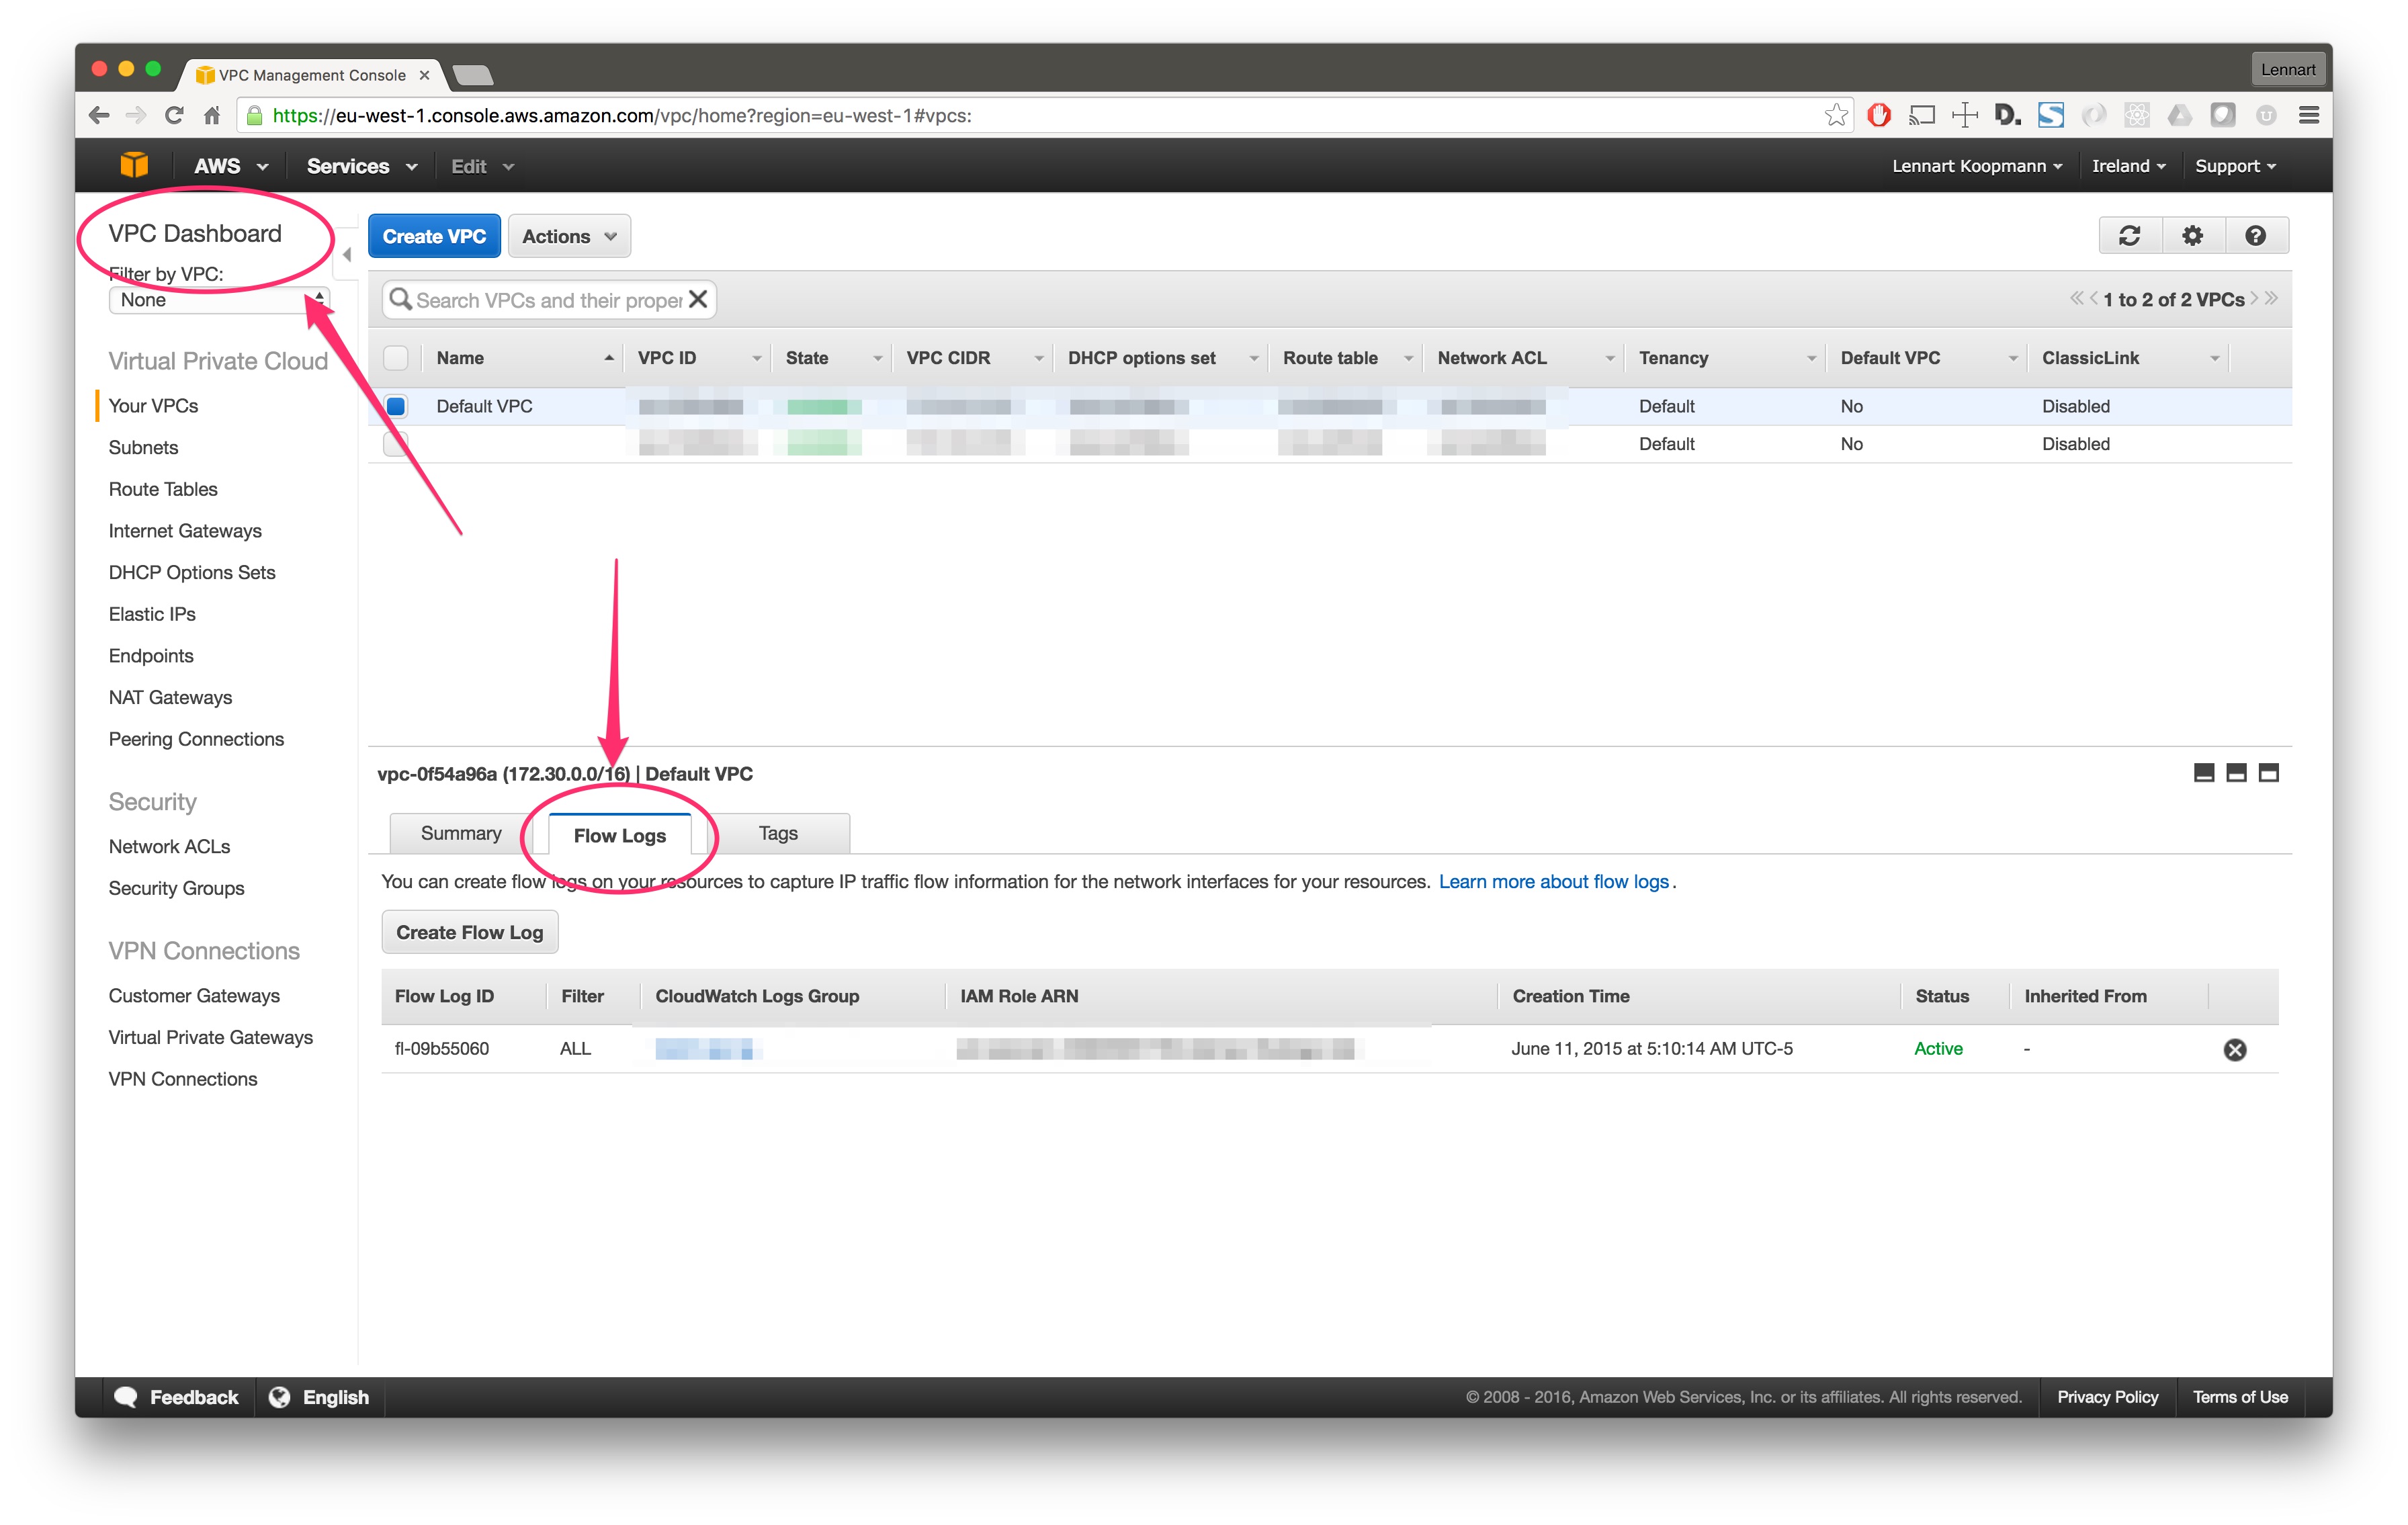
… or for all network interfaces in your VPC using the VPC console:
After a few minutes (usually 15 minutes but it can take up to an hour), AWS will start writing Flow Logs and you can view them in your CloudWatch console:
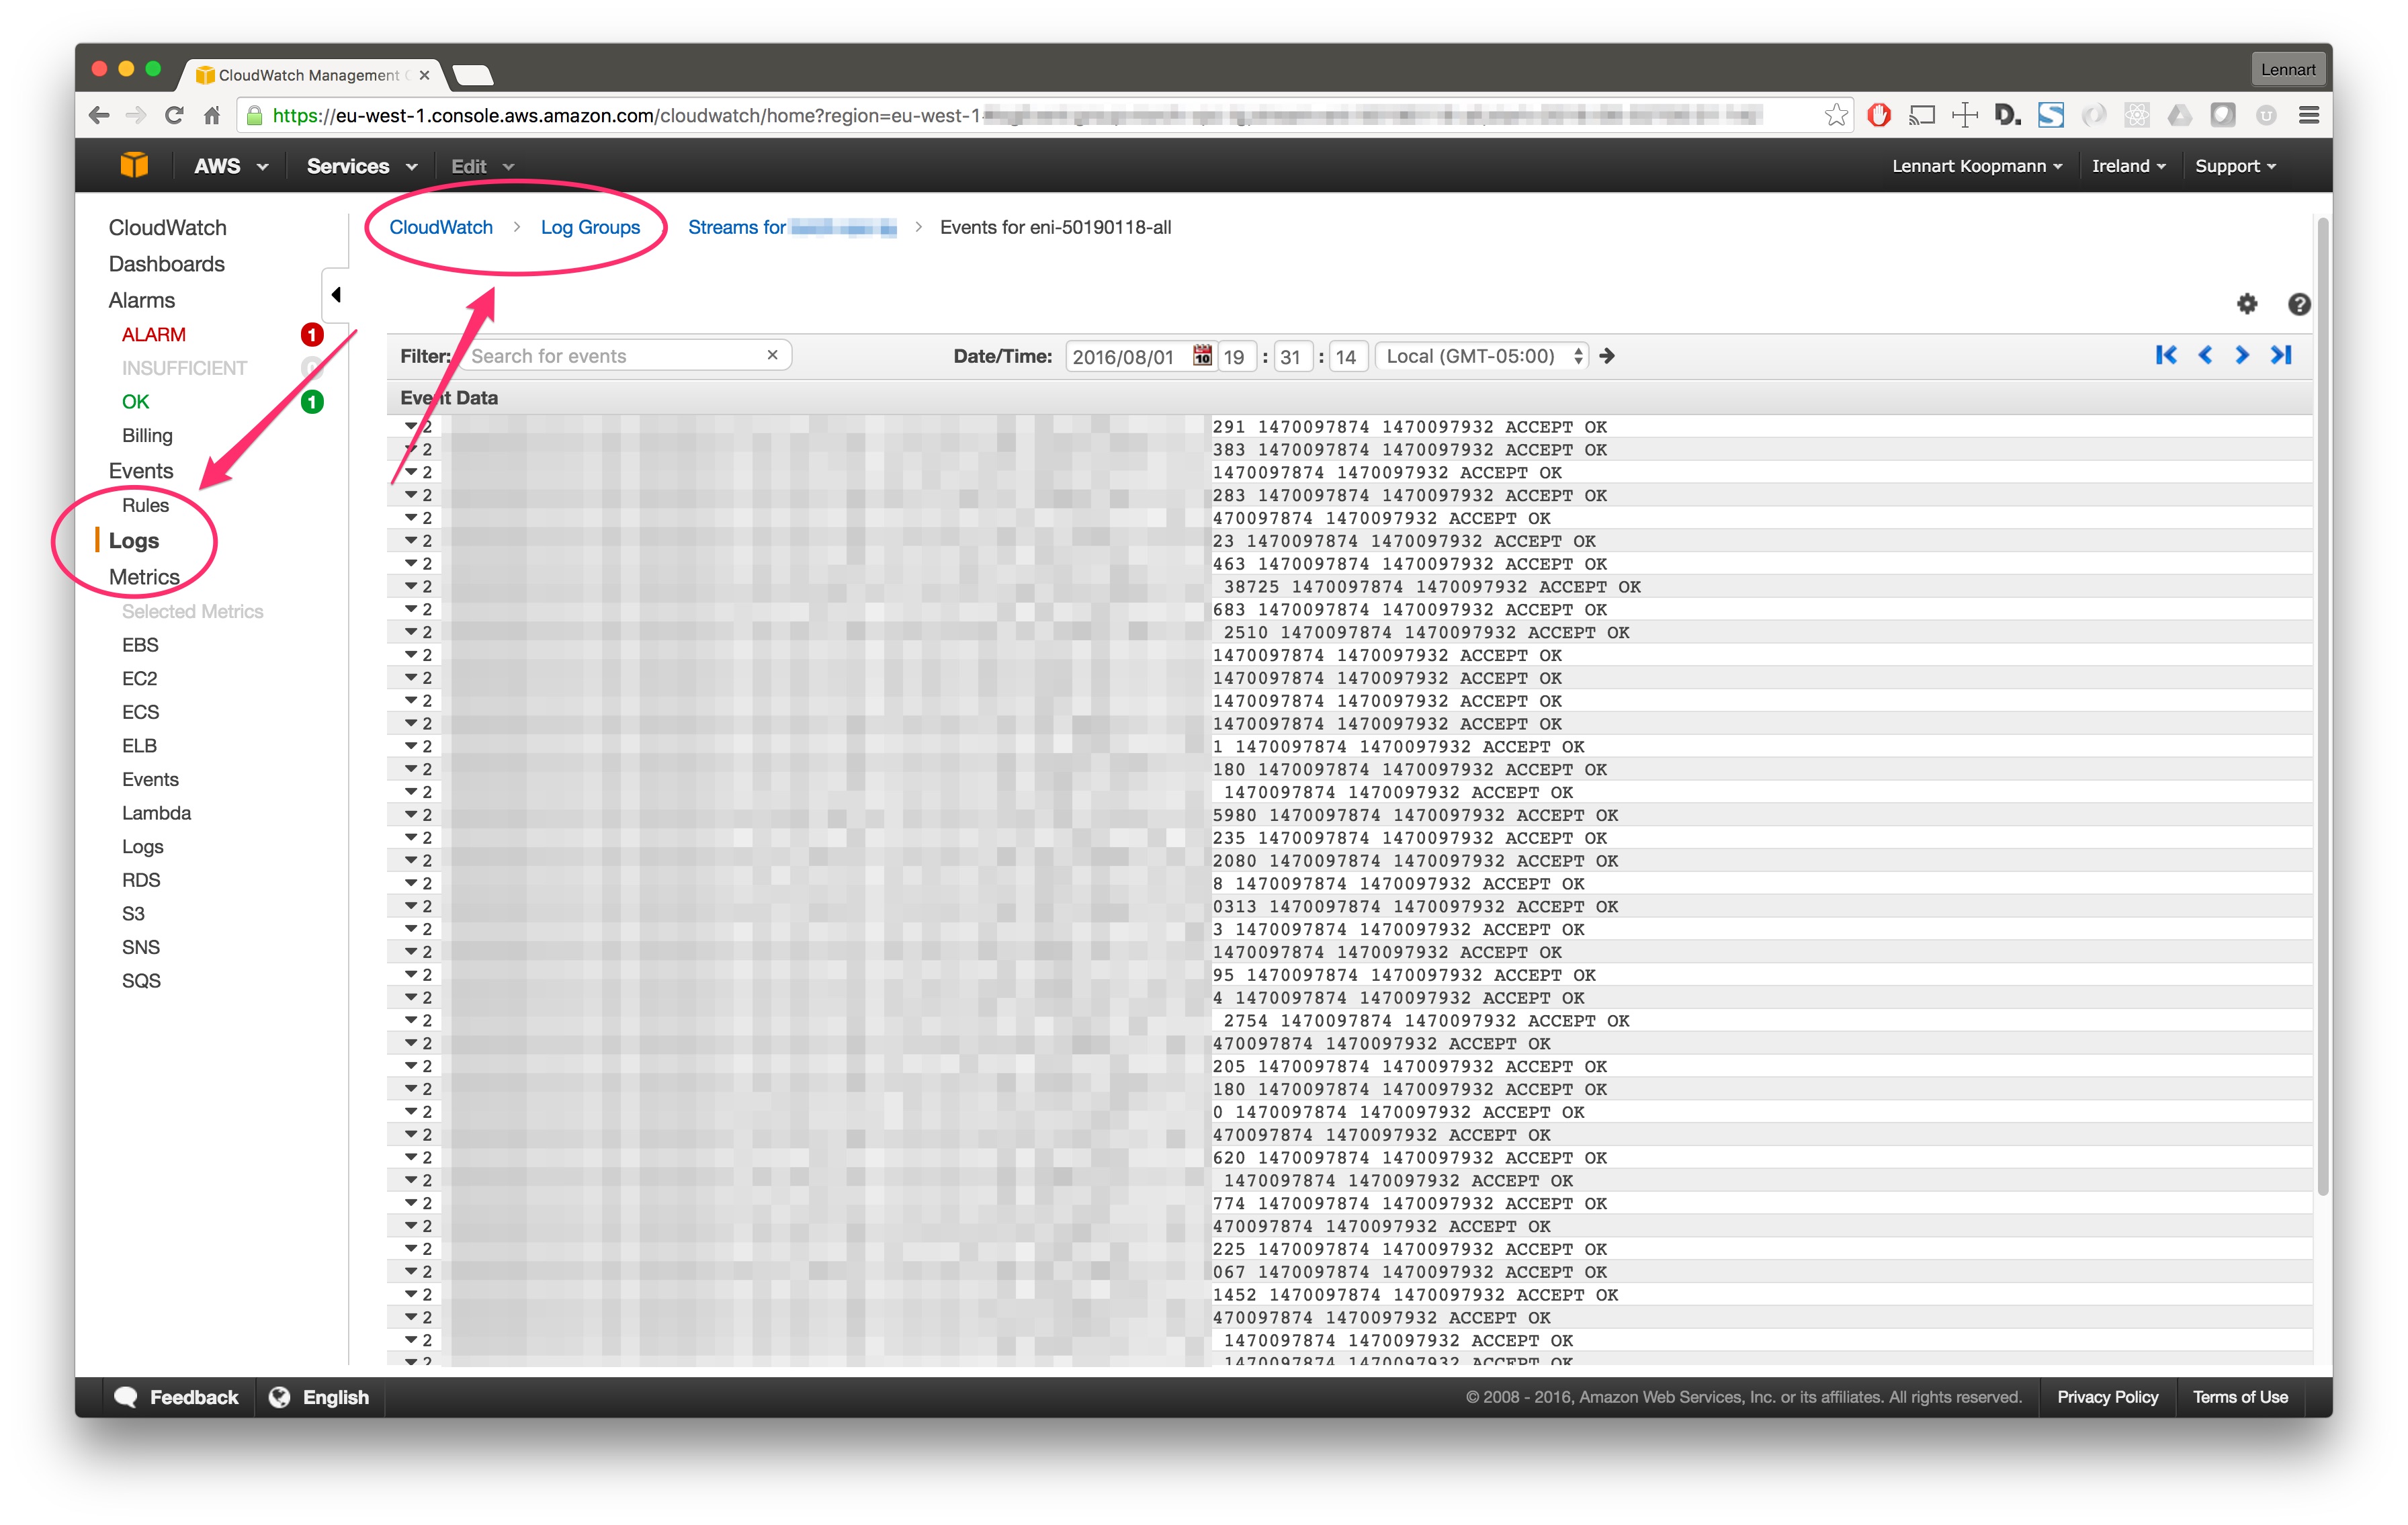
Now let’s go on and configure Graylog to read those logs.
First of all you need to create a IAM user that has the correct permissions to read from the CloudWatch log APIs. Make sure to copy the access and secret key because we will need them later to configure the Graylog input.
Here are our recommended IAM permissions:
{
    "Version": "2012-10-17",
    "Statement": [
        {
            "Sid": "Stmt1469413738000",
            "Effect": "Allow",
            "Action": [
                "logs:DescribeLogStreams",
                "logs:GetLogEvents"
            ],
            "Resource": "*"
        }
    ]
}
Now go into the Graylog Web Interface and start a new AWS FlowLogs input. It will ask you for some simple parameters like the log group that your Flow Logs are being written to (you chose that when creating the Flow Log on the network interface or VPC).
Important: AWS delivers the Flow Logs with a delay of about 15 minutes. This is why “Search in last 5 minutes” Graylog searches will not return any results. Always search in at least the last 15 or 30 minutes.
Start by enabling CloudTrail for an AWS region:
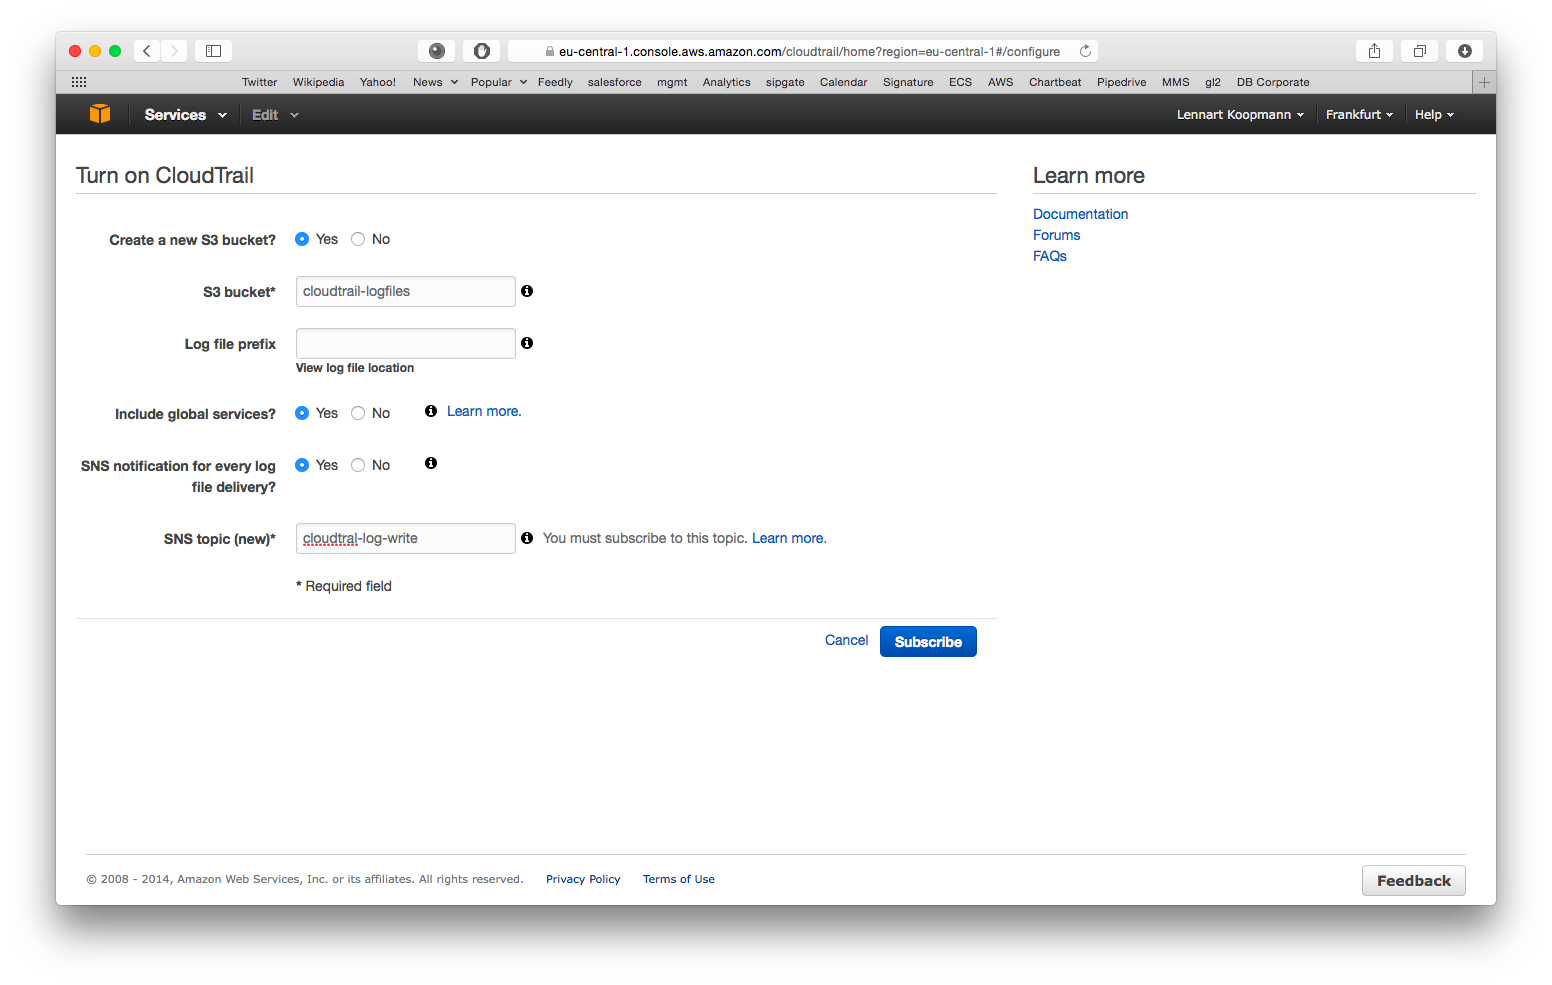
- Create a new S3 bucket: Yes
- S3 bucket: Choose anything here, you do not need it for configuration of Graylog later
- Log file prefix: Optional, not required for Graylog configuration
- Include global services: Yes (you might want to change this when using CloudTrail in multiple AWS regions)
- SNS notification for every log file delivery: Yes
- SNS topic: Choose something like cloudtrail-log-write here. Remember the name.
Navigate to the AWS SQS service (in the same region as the just enabled CloudTrail) and hit Create New Queue.
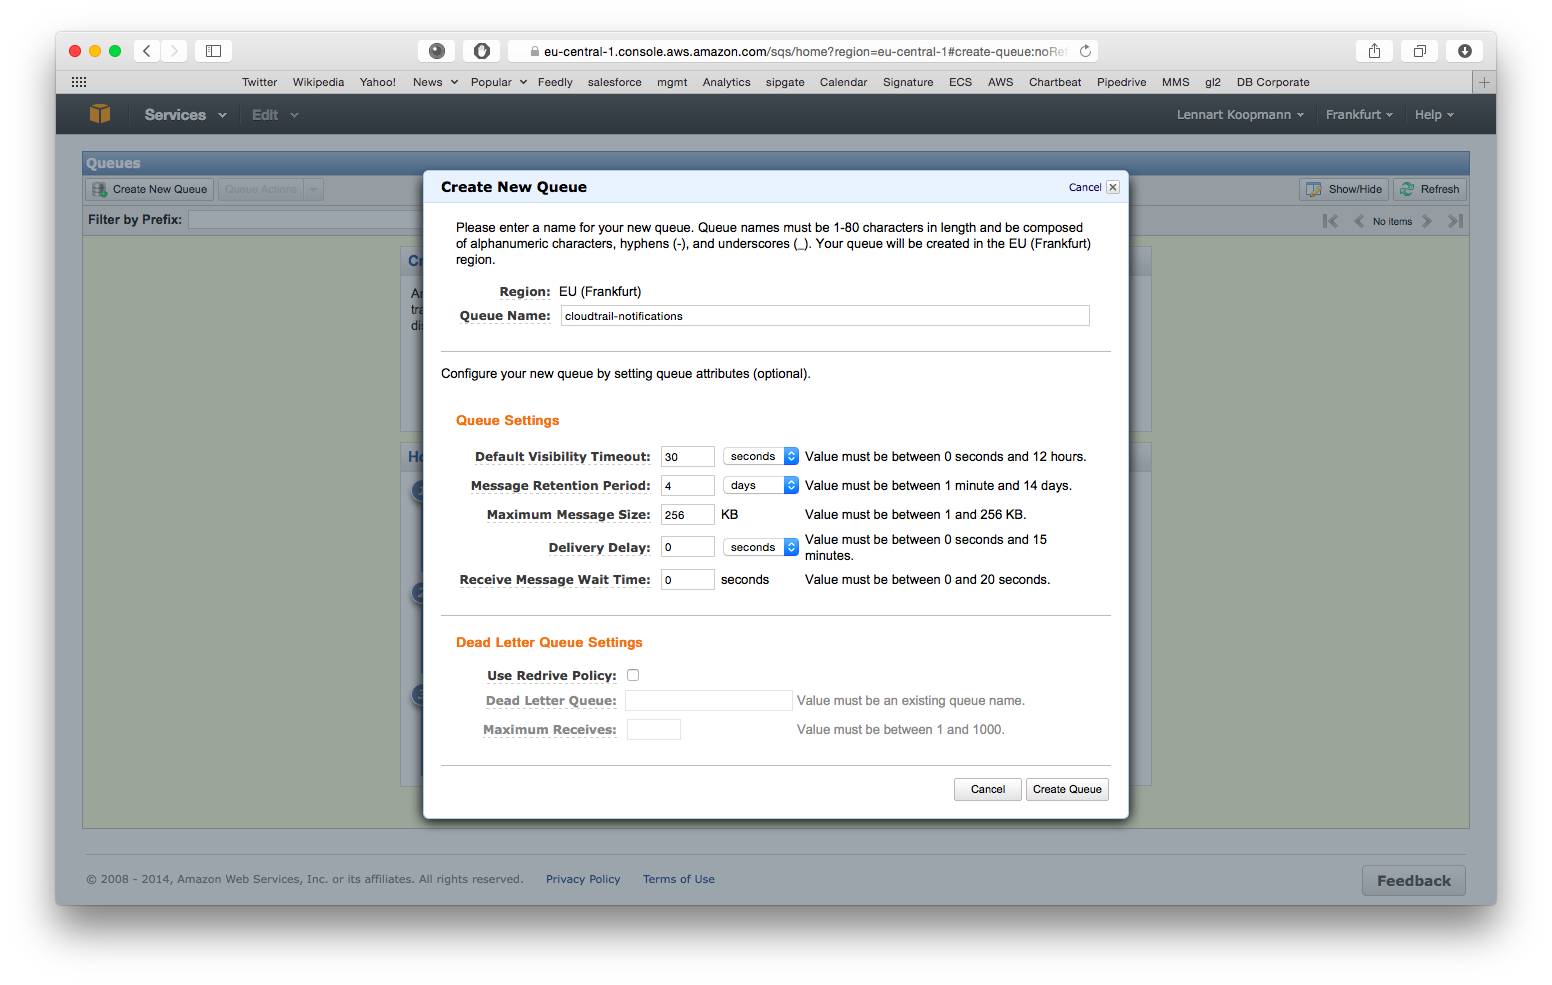
You can leave all settings on their default values for now but write down the Queue Name because you will need it for the Graylog configuration later. Our recommended default value is cloudtrail-notifications.
CloudTrail will write notifications about log files it wrote to S3 to this queue and Graylog needs this information. Let’s subscribe the SQS queue to the CloudTrail SNS topic you created in the first step now:
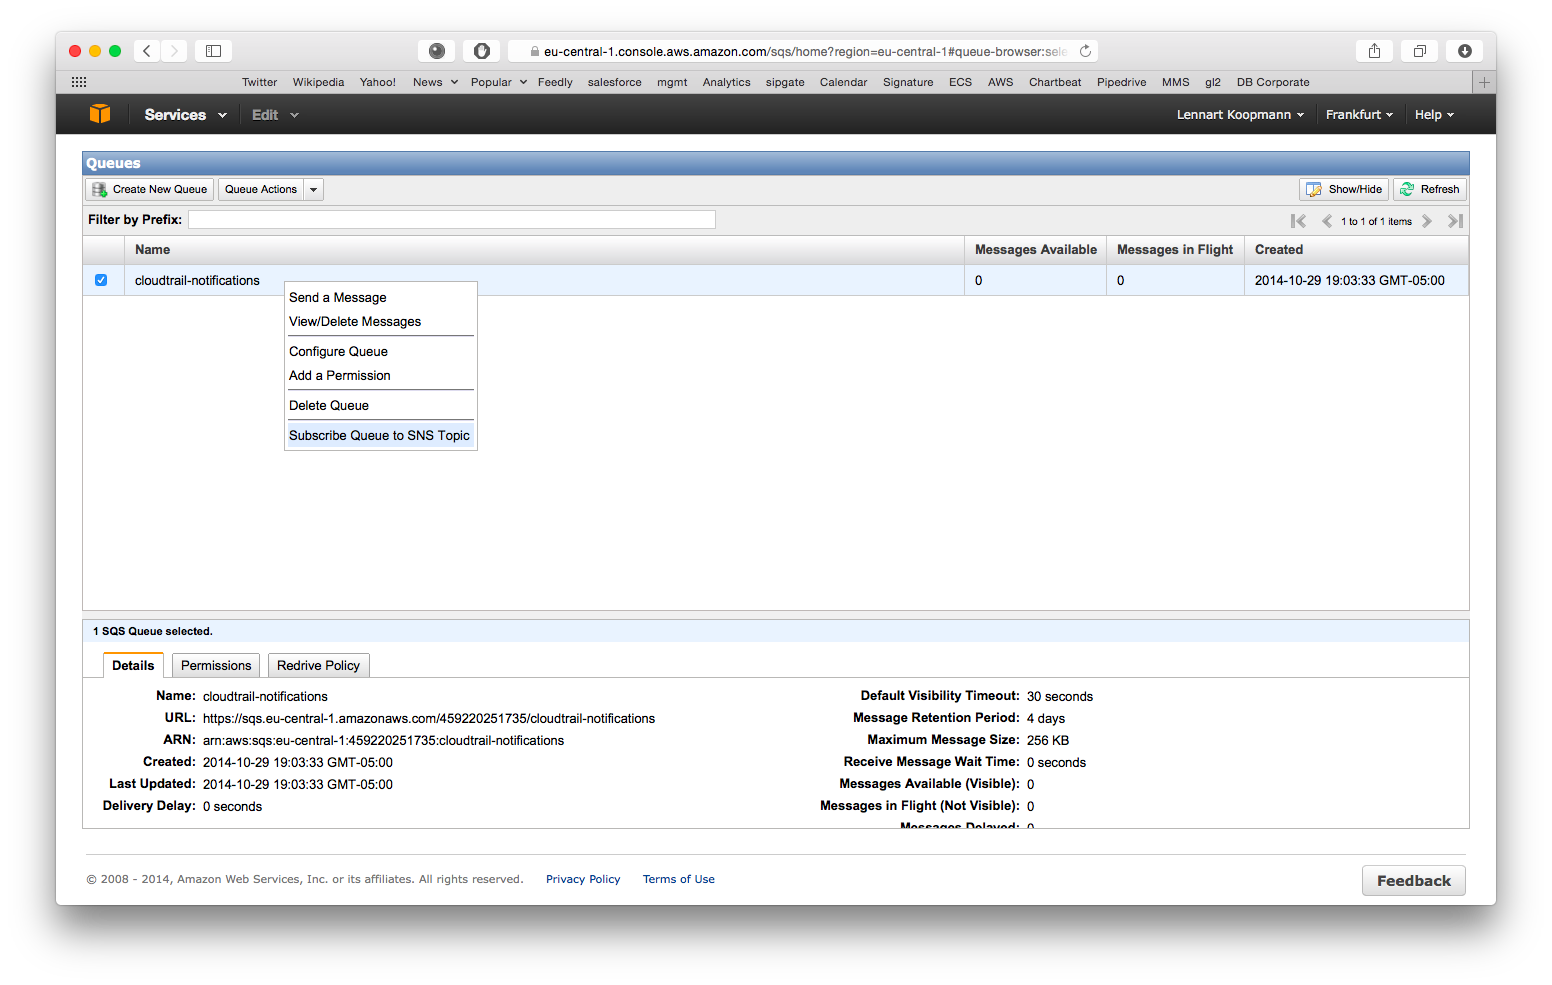
Right click on the new queue you just created and select Subscribe Queue to SNS Topic. Select the SNS topic that you configured in the first step when setting up CloudTrail. Hit subscribe and you are all done with the AWS configuration.
Copy the .jar file that you received to your Graylog plugin directory which is configured in your graylog.conf configuration file using the plugin_dir variable.
Restart graylog-server and you should see the new input type AWS CloudTrail Input at System -> Inputs -> Launch new input. The required input configuration should be self-explanatory.
Important: The IAM user you configured in “System -> Configurations” has to have permissions to read CloudTrail logs from S3 and write notifications from SQS:
{
  "Version": "2012-10-17",
  "Statement": [
    {
      "Sid": "Stmt1411854479000",
      "Effect": "Allow",
      "Action": [
        "s3:GetObject"
      ],
      "Resource": [
        "arn:aws:s3:::cloudtrail-logfiles/*"
      ]
    }
  ]
}
{
"Version": "2012-10-17",
"Statement": [
{
"Sid": "Stmt1411834838000",
"Effect": "Allow",
"Action": [
"sqs:DeleteMessage",
"sqs:ReceiveMessage"
],
"Resource": [
"arn:aws:sqs:eu-west-1:450000000000:cloudtrail-write"
]
}
]
}(Make sure to replace resource values with the actual ARNs of your environment)
You should see CloudTrail messages coming in after launching the input. (Note that it can take a few minutes based on how frequent systems are accessing your AWS resource) You can even stop Graylog and it will catch up with all CloudTrail messages that were written since it was stopped when it is started a!gain.
Now do a search in Graylog. Select “Search in all messages” and search for: source:"aws-cloudtrail"
This project is using Maven 3 and requires Java 8 or higher.
You can build a plugin (JAR) with mvn package.
DEB and RPM packages can be build with mvn jdeb:jdeb and mvn rpm:rpm respectively.
We are using the maven release plugin:
$ mvn release:prepare
[...]
$ mvn release:perform
This sets the version numbers, creates a tag and pushes to GitHub. Travis CI will build the release artifacts and upload to GitHub automatically.