Going forward, the Kube sensor will be using the ESPEasy (https://github.com/letscontrolit/ESPEasy) project as firmware. The work done by the ESPEasy team is great and allows me to leverage all of their supported sensors, focusing on hardware development and not wasting redundant effort on software.
In order to support the OLED screen in ESPEasy (and avoid having non-standard configuration), it is important to move the D9/D10 pins used in the I2C configuration to D3/D4 (SDA/SCL).
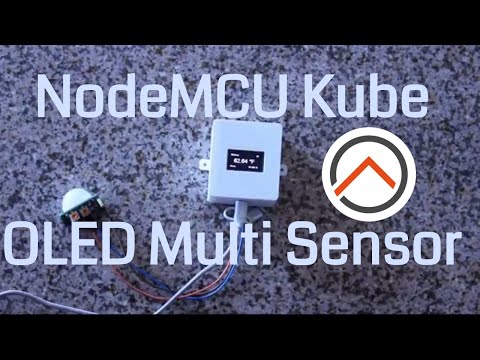
Code for Thingiverse item https://www.thingiverse.com/thing:2539897 (The Kube - a NodeMCU/DHT22 based MQTT temp/humidity sensor with local OLED display)
Note: The parts list I posted on the Thingiverse site (and below) contains affiliate links to Amazon. These are the parts I've used/tested in building my sensors, and if you wish to support my designs, please go ahead and use them to order parts. Thank you and enjoy!
*3D printed enclosure (https://www.thingiverse.com/thing:2539897)
*OLED screen (http://amzn.to/2xR4iQP) - I2C recommended
*NodeMCU breakout board (https://www.tindie.com/products/11677/)
*NodeMCU ESP8266 dev board v0.9 (http://amzn.to/2hd6RJk) or 1.0 (http://amzn.to/2ymAkak).
*DHT-22 sensor (http://amzn.to/2ymmODK)
*headers (http://amzn.to/2fNe81C)
*solid hook-up wire, 22awg (https://amzn.to/2voliAb)
Initial Build
- Print enclosure and cover
- Solder left/right inner headers onto the OSHPark carrier board (15 pins each)
- Solder DHT22 sensor onto board, with openings facing out
- Stick NodeMCU board onto carrier board, USB connector facing opposite from DHT22
- De-pin OLED screen (cut the black plastic holding pins together, remove pins one by one) <- alternatively, you can use breadboard wires (http://amzn.to/2fDGqeJ) with connectors on each end if you don't want to de-pin, but you'll have to bend the OLED screen pins to the side.
- Cut seven (7) short (~2 inch) lengths of hook-up wire and strip on each end.
- Connect/solder OLED screen to carrier board as follows:
For SPI OLED:
| Board | Wire Color | OLED |
|---|---|---|
| 3v3 | Red | VCC |
| Gnd | Black | Gnd |
| D10 | Orange | Res |
| D9 | Gray | DC |
| D8 | White | CS |
| D7 | Yellow | D1 |
| D5 | Brown | D0 |
For I2C OLED:
| Board | Wire Color | OLED |
|---|---|---|
| 3v3 | Red | VCC |
| Gnd | Black | Gnd |
| D4 | Blue | SCL |
| D3 | Green | SDA |
Final Assembly:
-
Stick OLED screen onto mounting posts (ensuring the screen is within the enclosure opening) and use a soldering iron to melt the posts over it.
-
Put NodeMCU carrier board in, ensuring it fits snugly (DHT sensor is tightly within its opening, USB connector is visible)
-
Put enclosure cover on, and secure with small screws (or glue in place)

Note Since the video was posted, I've switched to using pins D3/D4 as SCL/SDA for the I2C OLED screen, instead of D9/D10. Please connect the OLED as per the I2C table above!
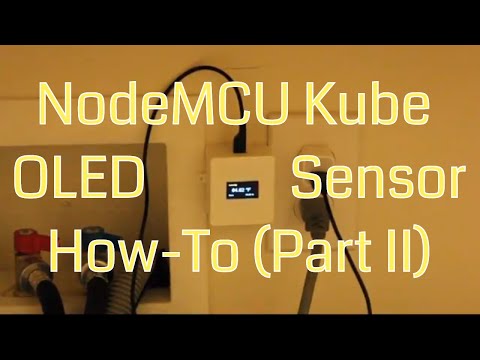
Just follow the video below to program the sensor in Arduino IDE using the code provided in this repository.
Note Since this video was posted, I updated the code to use the WiFiManager library and allow the ESP8266 to create its own access point (AP). This means you no longer have to specify the Wifi SSID or password in the code. Simply load the code onto the ESP8266, power it on, and look for it in your phone's WiFI settings. Once you connect to it, it will handle connecting to your home's Wifi via a web-based process. This takes one step away from the programming procedure, but please still watch the video below to understand how the different options affect the sensor's operation.
Note 2 Make sure you have the following Arduino Board files and Libraries installed in order to avoid compilation/runtime errors:
Board Files
ESP8266 by ESP8266 Community (v 2.4.1 or higher)
Libraries
Adafruit Unified Sensor by Adafruit (v 1.0.2 or higher)
ArduinoOTA by Ivan Grokhotkov and Miguel Angel Ajo (v 1.0.0 or higher)
DHT Sensor Library by Adafruit (v 1.3.0 or higher)
ESP8266 and ESP32 Oled Driver for SSD1306 Display by Daniel Eichhorn, Fabrice Weinberg (v 4.0.0 or higher)
ESP8266mDNS
ESP8266WiFi by Ivan Grokhotkov (v 1.0.0 or higher)
PubSubClient by Nick O'Leary (v 2.6.0 or higher)
WiFiManager by tzapu (v 0.12.0 or higher)
Note 3 As of 9/3/2018, work on this software project is halted, in favor of using ESPEasy as the firmware. I will leave the project file as-is, in case you don't want to move to ESPEasy, but I recommend using ESPEasy since it's actively developed and supports many more sensors already.
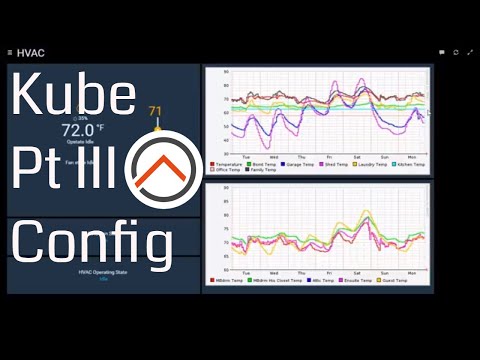
Now that we have the sensor built and running, we have to connect it to openHAB - watch the following video on how to do that using the provided MQTT topics, and how to calibrate the sensor by charting its readings against another sensor, thermostat, temperature gauge, etc..
That's it! Enjoy the sensor and please contribute to its further design by opening new issues or comments in this repository!