Control an addressable LED strip with an ESP8266 via a web browser or infrared remote control.
or

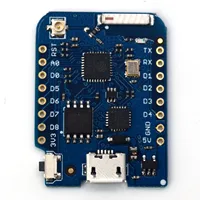
Adafruit HUZZAH ESP8266 Breakout

Other hardware:
- 3.3V to 5V Logic Level Shifter (required if LEDs "glitch")
Recommended by Adafruit NeoPixel "Best Practices" to help protect LEDs from current onrush:
Optional shield to make everything more tidy:
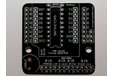
Wemos D1 Mini ESP8266 LED & Level Shifter Shield
- Turn the NeoPixel Ring on and off
- Adjust the brightness
- Change the display pattern
- Adjust the color

Patterns are requested by the app from the ESP8266, so as new patterns are added, they're automatically listed in the app.
The web app is stored in a file system in on-board flash memory. The file system used is LittleFS (Note: prior versions used SPIFFS).
The web app is a single page app that uses jQuery and Bootstrap. It has buttons for On/Off, a slider for brightness, a pattern selector, and a color picker (using jQuery MiniColors). Event handlers for the controls are wired up, so you don't have to click a 'Send' button after making changes. The brightness slider and the color picker use a delayed event handler, to prevent from flooding the ESP8266 web server with too many requests too quickly.
The app is installed via the Arduino IDE which can be downloaded here. The ESP8266 boards will need to be added to the Arduino IDE which is achieved as follows. Click File > Preferences and copy and paste the URL "http://arduino.esp8266.com/stable/package_esp8266com_index.json" into the Additional Boards Manager URLs field. Click OK. Click Tools > Boards: ... > Boards Manager. Find and click on ESP8266 (using the Search function may expedite this). Click on Install. After installation, click on Close and then select your ESP8266 board from the Tools > Board: ... menu.
The app depends on the following libraries. They must either be downloaded from GitHub and placed in the Arduino 'libraries' folder, or installed as described here by using the Arduino library manager.
- FastLED
- Arduino WebSockets
- WiFiManager
- NTPClient
- Arduino JSON
- lolrol LittleFS -- (integrated into ESP32 core v2, which is not used here yet)
Download the app code from GitHub using the green Clone or Download button from the GitHub project main page and click Download ZIP. Decompress the ZIP file in your Arduino sketch folder.
Here are the board settings I use:

The web app needs to be uploaded to the ESP8266's file system. You can do this within the Arduino IDE after installing the Arduino ESP8266 LittleFS.
With the upload tool installed, upload the web app using ESP8266 LittleFS Data Upload command in the Arduino Tools menu.
The web app files can be gzip compressed before uploading to the ESP8266's file system by running the following command:
gzip -r data/
The ESP8266WebServer will automatically serve any .gz file. The file index.htm.gz will get served as index.htm, with the content-encoding header set to gzip, so the browser knows to decompress it. The ESP8266WebServer doesn't seem to like the Glyphicon fonts gzipped, though, so I decompress them with this command:
gunzip -r data/fonts/
The firmware implements basic RESTful web services using the ESP8266WebServer library. Current values are requested with HTTP GETs, and values are set with POSTs using query string parameters. It can run in connected or standalone access point modes.
Control via infrared remote control is also supported, via the ESP8266 port of the IRremote library.