"one-click" CLI to install OpenFaaS Cloud on Kubernetes

You can use this tool to configure a Kubernetes cluster with OpenFaaS Cloud. You just need to complete all the pre-requisites and fill out your init.yaml file then run the tool. It automates several pages of manual steps using Golang templates and bash scripts so that you can get your own OpenFaaS Cloud in around 1.5 minutes.
Experience level: intermediate Kubernetes & cloud.
The ofc-bootstrap will install the following components:
- OpenFaaS installed with helm
- Nginx as your IngressController - with rate-limits configured
- SealedSecrets from Bitnami - store secrets for functions in git
- cert-manager - provision HTTPS certificates with LetsEncrypt
- buildkit from Docker - to building immutable Docker images for each function
- Authentication/authorization - through OAuth2 delegating to GitHub/GitLab
- Deep integration into GitHub/GitLab - for updates and commit statuses
- A personalized dashboard for each user
The ofc-bootstrap tool is used to install OpenFaaS Cloud in a single click. You will need to configure it with all the necessary secrets and configuration beforehand using a YAML file.

ofc-bootstrap packages a number of primitives such as an IngressController, a way to obtain certificates from LetsEncrypt, the OpenFaaS Cloud components, OpenFaaS itself and Minio for build log storage. Each component is interchangeable.
View a video demo by Alex Ellis running ofc-bootstrap in around 100 seconds on DigitalOcean.
See the ROADMAP.md for features, development status and backlogs.
You will need admin access to a Kubernetes cluster, some CLI tooling and a GitHub.com account or admin access to a self-hosted GitLab instance.
This tool automates the installation of OpenFaaS Cloud on Kubernetes. Before starting you will need to install some tools and then create either a local or remote cluster.
For your cluster the following specifications are recommended:
- 2-3 nodes with 1-2 vCPU and 2-4GB RAM each
These are guidelines and not a hard requirement, you may well be able to run with fewer resources, such as with a single 2vCPU node with 2GB RAM.
OpenFaaS Cloud installs, manages, and bundles software which spans source-control, TLS, DNS, and Docker image registries. You must have the following prepared before you start your installation.
- You'll need to register a domain-name and set it up for management in Google Cloud DNS, DigitalOcean or AWS Route 53.
- Set up a registry - the simplest option is to use your Docker Hub account. You can also use your own private registry or a cloud-hosted registry. You will need the credentials. If you need to, set up your own private registry.
dockerinstalled locally so that you can provide theconfig.jsonfile with credentials.- Admin-level access to a GitHub.com account or a self-hosted GitLab installation.
- A valid email address for use with LetsEncrypt, beware of rate limits.
- Admin access to a Kubernetes cluster.
- The ability to create one or more git repositories - one will be for your
CUSTOMERSAccess-Control List ACL and the other will be your test repository to check that everything worked.
- Kubernetes - development options
- Linux or Mac. Windows if
bashis available - dep
- helm
- faas-cli
curl -sL https://cli.openfaas.com | sudo sh - OpenSSL - the
opensslbinary must be available inPATH
If you are using a cluster with GKE then you must run the following command:
kubectl create clusterrolebinding "cluster-admin-$(whoami)" \
    --clusterrole=cluster-admin \
--user="$(gcloud config get-value core/account)"You may already have a Kubernetes cluster, if not, then follow the instructions below.
Pick either A or B.
You can create a managed or self-hosted Kubernetes cluster using a Kubernetes engine from a cloud provider, or by running either kubeadm or k3s.
Cloud-services:
- DigitalOcean Kubernetes (recommended)
- AKS
- EKS
- GKE
Local / on-premises:
Once set up make sure you have set your KUBECONFIG and / or kubectl tool to point at a the new cluster.
Check this with:
kubectl config get-contextsDo not follow the instructions for B).
For testing you can create a local cluster using kind, minikube or Docker Desktop. This is how you can install kind to setup a local cluster in a Docker container.
First install Go 1.10 or newer
- Set your
GOPATHif you don't already have one
export GOPATH=$HOME/go- Download and build
kind
Now use go get to install kind and point your KUBECONFIG variable at the new cluster.
go get sigs.k8s.io/kind
kind create cluster --name 1

export KUBECONFIG=$(kind get kubeconfig-path --name 1)Now clone the GitHub repository, download the binary release and start customising your own init.yaml file.
- Clone the
ofc-bootstraprepository
mkdir -p $GOPATH/src/github.com/openfaas-incubator
cd $GOPATH/src/github.com/openfaas-incubator/
git clone https://github.com/openfaas-incubator/ofc-bootstrap- Download the latest
ofc-bootstrapbinary release from GitHub
Either run the following script, or follow the manual steps below.
# Download and move to /usr/local/bin
curl -sLSf https://raw.githubusercontent.com/openfaas-incubator/ofc-bootstrap/master/get.sh | \
 sudo sh

# Or, download and move manually
curl -sLSf https://raw.githubusercontent.com/openfaas-incubator/ofc-bootstrap/master/get.sh | \
 sh
Manual steps:
Download ofc-boostrap from the GitHub releases page and move it to /usr/local/bin/.
You may also need to run chmod +x /usr/local/bin/ofc-bootstrap.
For Linux use the binary with no suffix, for MacOS, use the binary with the -darwin suffix.
Create your own init.yaml file from the example:
cp example.init.yaml init.yamlIn the following steps you will make a series of edits to the init.yaml file to customize it for your OpenFaaS Cloud installation.
Each setting is described with a comment to help you decide what value to set.
Edit root_domain and add your own domain i.e. example.com or ofc.example.com
If you picked a root domain of example.com, then your URLs would correspond to the following:
system.example.comauth.system.example.com*.example.com
After the installation has completed in a later step, you will need to create DNS A records with your DNS provider. You don't need to create these records now.
Log into your own private Docker registry, or the Docker Hub:
- Open the Docker for Mac/Windows settings and uncheck "store my password securely" / "in a keychain"
- Run
docker loginto populate~/.docker/config.json- this will be used to configure your Docker registry or Docker Hub account for functions.
Find the section of the YAML registry: docker.io/ofctest/
You need to replace the value for your registry, note the final / which is required.
-
Valid:
registry: docker.io/my-org/ -
Invalid:
registry: docker.io/my-org -
Valid:
registry: my-corp.jfrog.io/ofc-prod/ -
Invalid:
registry: my-corp.jfrog.io/ofc-prod -
Invalid:
registry: my-corp.jfrog.io/
Choose SCM between GitHub.com or GitLab self-hosted.
For GitHub set:
scm: githubFor GitLab set:
scm: gitlabSetup the GitHub / GitLab App and OAuth App
Your SCM will need to send webhooks to OpenFaaS Cloud's github-event or gitlab-event function for CI/CD. This is protected by a confidential secret called a Webhook secret. You can leave the field blank to have one generated for you, or you can set your own in init.yaml.
-
For GitHub create a GitHub App and download the private key file
- Read the docs for how to configure your GitHub App
- Leave the
value:forgithub-webhook-secretblank for an auto-generated password, or set your own password in the GitHub App UI and in this section of the YAML. - Update
init.yamlwhere you see the### User-inputsection - Set
app_id:under the section namedgithubwith GitHub App's ID - If not using a generated value, set the
github-webhook-secretliteral value with your Webhook secret for the GitHub App's - Click Generate a private key, this will be downloaded to your local computer (if you ever need a new one, generate a new one and delete the old key)
- Update the
private-keyvalue_fromto the path of the GitHub App's private key
-
For GitLab create a System Hook
- Leave the
value:forgitlab-webhook-secretblank, or set your own password - Update the
### User-inputsection including your System Hook's API Token and Webhook secret
- Leave the
-
Create your GitHub / GitLab OAuth App which is used for logging in to the dashboard
-
For GitLab update
init.yamlwith yourgitlab_instance
Access control to your OFC is controlled by a text file containing a list of valid usernames or organisations. This list only needs to contain organisation names, or the names of the users who are hosting repositories that OFC will manage.
Create a new GitHub repository with a CUSTOMERS Access Control List (ACL) file.
Note: This repository should not contain any code or functions.
- Create a new public GitHub repo
- Add a file named
CUSTOMERSand place each username or GitHub org you will use on a separate line - Find the GitHub "raw" URL (CDN)
- Copy and paste the raw URL into th
init.yamlfile incustomers_url:
If you are using a public cloud offering and you know that they can offer a LoadBalancer, then the ingress: field will be set to loadbalancer which is the default.
If you are deploying to a cloud or Kubernetes cluster where the type LoadBalancer is unavailable then you will need to change ingress: loadbalancer to ingress: host in init.yaml. Nginx will be configured as a DaemonSet exposed on port 80 and 443 on each node in your cluster. It is recommended that you create a DNS mapping between a chosen name and the IP of each node.
Note: it is a common error for new users to try to access the dashboard using the IP address of the load-balancer. You must use the DNS name for the dashboard: i.e.
system.example.com/dashboard/username
If you'd like to restrict who can log in to just those who use a GitHub account then create a GitHub OAuth App or the equivalent in GitLab.
- Set
enable_oauth:totrue
This feature is optional, but highly recommended
Enable auth and fill out the OAuth App client_id. Configure of-client-secret with the OAuth App Client Secret.
For GitLab set your oauth_provider_base_url.
- Set
client_id:in theoauth:section with the value of your OAuthclient_id - Set
of-client-secretin the secrets section at the top of the file using the value from your OAuthclient_secret
By default OpenFaaS Cloud will deploy Minio to keep track of your build logs. This can be customised to point at any compatible object storage service such as AWS S3 or DigitalOcean Spaces.
Set s3_url, s3_region s3_tls and s3_bucket with appropriate values.
OpenFaaS Cloud can use cert-manager to automatically provision TLS certificates for your OpenFaaS Cloud cluster using the DNS01 challenge.
This feature is optional, but highly recommended
Pick between the following providers for the DNS01 challenge:
- DigitalOcean DNS (free at time of writing)
- Google Cloud DNS
- AWS Route53
See also: cert-manager docs for ACME/DNS01
Note: Comment out the relevant sections and configure as necessary
You will set up the corresponding DNS A records in your DNS management dashboard after ofc-bootstrap has completed in the final step of the guide.
In order to enable TLS, edit the following configuration:
- Set
tls: true - Choose between
issuer_type: "prod"orissuer_type: "staging" - Choose between DNS Service
route53,clouddnsordigitaloceanand then updateinit.yaml - If you are using an API credential for DigitalOcean, AWS or GCP, then download that file from your cloud provider and set the appropriate path.
- Go to
# DNS Service Account secretininit.yamland choose and uncomment the section you need.
You can start out by using the Staging issuer, then switch to the production issuer.
- Set
issuer_type: "prod"(recommended) orissuer_type: "staging"(for testing)
Note if you want to switch from the staging TLS certificates to production certificates, see the appendix.
If you are planning on building functions using the dockerfile template you need to set enable_dockerfile_lang: true.
When this value is set to false, your users can only use your recommended set of templates.
If you want your functions to scale to zero then you need to set scale_to_zero: true.
This value should normally be left as per the number in the master branch, however you can edit openfaas_cloud_version if required.
Network policies restriction for the openfaas and openfaas-fn namespaces are applied by default.
When deployed, network policies restrict communication so that functions cannot talk to the core OpenFaaS components in the openfaas namespace. They also prevent functions from invoking each other directly. It is recommended to enable this feature.
The default behaviour is to enable policies. If you would like to remove the restrictions, then set network_policies: false.
If you are now ready, you can run the ofc-bootstrap tool:
cd $GOPATH/src/github.com/openfaas-incubator/ofc-bootstrap

ofc-bootstrap -yaml=init.yaml
Pay attention to the output from the tool and watch out for any errors that may come up. You will need to store the logs and share them with the maintainers if you run into any issues.
If you get anything wrong, there are some instructions in the appendix on how to make edits. It is usually easier to edit init.yaml and re-run the tool.
If you want to completely remove all the components that ofc-bootstrap installed to start-over then you can use: ./scripts/reset.sh. Caution: read the contents of the script carefully before running it.
Note: Be careful if you run
reset.shand make 100% sure that you are pointing at the correct cluster by checkingkubectl config get-context.
If you are running against a remote Kubernetes cluster you can now update your DNS entries so that they point at the IP address of your LoadBalancer found via kubectl get svc.
When ofc-bootstrap has completed and you know the IP of your LoadBalancer:
system.example.comauth.system.example.com*.example.com
Now over on GitHub / GitLab enter the URL for webhooks:
GitHub.com:
http://system.example.com/github-event
GitLab self-hosted:
http://system.example.com/gitlab-event
For more details see the GitLab instructions in OpenFaaS Cloud.
Then you need to enter the Webhook secret that was generated during the bootstrap process. Run the following commands to extract and decode it:
export SECRET=$(kubectl get secret -n openfaas-fn github-webhook-secret -o jsonpath="{.data.github-webhook-secret}" | base64 --decode; echo)

echo "Your webhook secret is: $SECRET"
Open the Github App UI and paste in the value into the "Webhook Secret" field.
Now check the following and run a smoke test:
- DNS is configured to the correct IP
- Check TLS certificates are issued as expected
- Check that you can trigger a build
- Check that your build is pushing images to your registry or the Docker Hub
- Check that your endpoint can be accessed
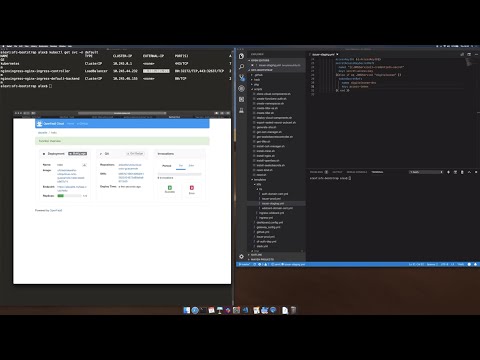
Now view your dashboard over at:
http://system.example.com/dashboard/<username>
Just replace <username> with your GitHub account.
Now you can install your GitHub app on a repo, run faas-cli new and then rename the YAML file to stack.yml and do a git push. Your OpenFaaS Cloud cluster will build and deploy the functions found in that GitHub repo.
If you're unsure how to do this, then you could use the QuickStart for the Community Cluster, just remember to change the URLs to your own cluster.
If you think that everything is set up correctly but want to troubleshoot then head over to the GitHub App webpage and click "Advanced" - here you can find each request/response from the GitHub push events. You can resend them or view any errors.
Follow the detailed Troubleshooting Guide in the OpenFaaS docs. If you are still stuck after that please chat with us in #openfas-cloud on Slack.
OpenFaaS Cloud abstracts away the core OpenFaaS UI and API. Your new API is driven by pushing changes into a Git repository, rather than running commands, or browsing a UI.
You may still want access to your OpenFaaS cluster, in which case run the following:
# Fetch your generated admin password:

export PASSWORD=$(kubectl get secret -n openfaas basic-auth -o jsonpath="{.data.basic-auth-password}" | base64 --decode; echo)

# Open a tunnel to the gateway using `kubectl`:
kubectl port-forward -n openfaas deploy/gateway 31112:8080 &

# Point the CLI to the tunnel:
export OPENFAAS_URL=http://127.0.0.1:31112

# Log in:
echo -n $PASSWORD | faas-cli login --username admin --password-stdin
At this point you can also view your UI dashboard at: http://127.0.0.1:31112
If you run the step above Access your OpenFaaS UI or API, then you can edit settings for OpenFaaS Cloud and redeploy your functions. This is an advanced step.
cd tmp/openfaas-cloud/

# Edit stack.yml
# Edit github.yml or gitlab.yml
# Edit gateway_config.yml
# Edit buildshiprun_limits.yml

# Update all functions
faas-cli deploy -f stack.yml

# Update a single function, such as "buildshiprun"
faas-cli deploy -f stack.yml --filter=buildshiprun
For each user or org you want to enroll into your OpenFaaS Cloud edit the CUSTOMERS ACL file and add their username on a new line.
openfaas
alexellis
When you want to switch to the Production issuer from staging do the following:
Flush out the staging certificates and orders
kubectl delete certificates --all  -n openfaas
kubectl delete secret -n openfaas -l="certmanager.k8s.io/certificate-name"
kubectl delete order -n openfaas --all
Now update the staging references to "prod":
sed -i '' s/letsencrypt-staging/letsencrypt-prod/g ./tmp/generated-ingress-ingress-wildcard.yaml
sed -i '' s/letsencrypt-staging/letsencrypt-prod/g ./tmp/generated-ingress-ingress.yaml
sed -i '' s/letsencrypt-staging/letsencrypt-prod/g ./tmp/generated-tls-auth-domain-cert.yml
sed -i '' s/letsencrypt-staging/letsencrypt-prod/g ./tmp/generated-tls-wildcard-domain-cert.yml
Now create the new ingress and certificates:
kubectl apply -f ./tmp/generated-ingress-ingress-wildcard.yaml
kubectl apply -f ./tmp/generated-ingress-ingress.yaml
kubectl apply -f ./tmp/generated-tls-auth-domain-cert.yml
kubectl apply -f ./tmp/generated-tls-wildcard-domain-cert.ymlGot questions, comments or suggestions?
Join the team and community over on Slack