Creating vertical data bars in email templates by using HTML/CSS is possible and straight forward to accomplish.
Start by defining the area that will contain the vertical bars:
<table width="300" height="350" align="center">
  <tr>
  </tr>
</table>
The first <td> cell is the beginning of the vertical data bar. Place another <table> element inside the first <td> cell. Then give the second <td> cell a defined width, height, and background-color:
<table width="300" height="350" align="center">
  <tr>
    <!-- Vertical data bar -->
    <td valign="bottom" align="center">
      <table>
        <tr>
          <td width="30" height="150" style="background-color: #10ed81;"></td>
        </tr>
      </table>
    </td>
  </tr>
</table>
Repeat that section to create additional vertical data bars:
<table width="300" height="350" align="center">
  <tr>
    <!-- Vertical data bar #1 -->
    <td valign="bottom" align="center">
      <table>
        <tr>
          <td width="30" height="150" style="background-color: #10ed81;"></td>
        </tr>
      </table>
    </td>
    <!-- Vertical data bar #2 -->
    <td valign="bottom" align="center">
      <table>
        <tr>
          <td width="30" height="180" style="background-color: #10ed81;"></td>
        </tr>
      </table>
    </td>
  </tr>
</table>Two ways you can add helpful labels to these data bars:
Add a label underneath the data bar by creating a second <tr> element and a <td> cell that corresponds to the specific data bar:
<table width="300" height="350" align="center">
  <tr>
    <!-- Vertical data bar #1 -->
    <td valign="bottom" align="center">
      <table>
        <tr>
          <td width="30" height="150" style="background-color: #10ed81;"></td>
        </tr>
      </table>
    </td>
  </tr>
  <!-- Corresponding label -->
  <tr>
    <td align="center" height="10" style="font-size: 12px; font-family: 'Courier New'; padding: 0 0 10px 0;">2013</td>
  </tr>
</table>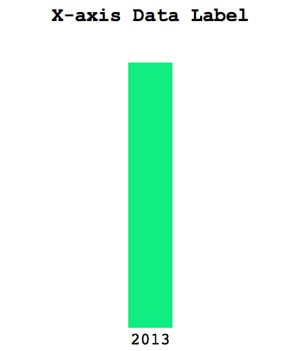
If you want to keep the label in the same <table> parent element, you can move the <td> cell below the vertical databar. Add the max-width property and set it to the value of the vertical databar's width. This prevents the databar from expanding due to the text label's length.
<table width="300" height="350" align="center">
  <tr>
    <!-- Vertical data bar #1 -->
    <td valign="bottom" align="center">
      <table>
        <tr>
          <td width="30" height="150" style="background-color: #10ed81;"></td>
        </tr>
        <!-- Corresponding label -->
        <tr>
          <td align="center" height="10" style="font-size: 12px; font-family: 'Courier New'; max-width: 30px; padding: 0 0 10px 0;">2013</td>
        </tr>
      </table>
    </td>
  </tr>
</table>
You can also place a label right above the vertical bar by adding another <tr> and <td> element:
<table width="300" height="350" align="center">
  <tr>
    <!-- Vertical data bar -->
    <td valign="bottom" align="center">
      <table>
        <!-- Top label -->
        <tr>
          <td style="font-family: 'Courier New'; font-size: 12px; max-width: 30px; white-space: nowrap;">$1,234</td>
        </tr>
        <tr>
          <td width="30" height="150" style="background-color: #10ed81;"></td>
        </tr>
      </table>
    </td>
  </tr>
</table>
The max-width CSS property limits the label width to 30px. This prevents it from expanding the width of the vertical data bar. The white-space: nowrap CSS property stops labels from breaking into two lines.
A simple way to add interactivity to these data bars is by changing the label font color to blend into the background and adding a hover state:
<style type="text/css">
  .bar-labels:hover td {
    color: #000000 !important;
  }
</style><table width="300" height="350" align="center" class="bar-labels">
<tr>
<!-- Vertical data bar #1 -->
<td valign="bottom" align="center">
<table>
<tr>
<td style="color: #ffffff; font-family: 'Courier New'; font-size: 12px; max-width: 30px; white-space: nowrap;">$1,234</td>
</tr>
<tr>
<td width="30" height="150" style="background-color: #10ed81;"></td>
</tr>
</table>
</td>
</tr>
</table>If your data set can be display through vertical data bars, building this out can be more efficient and effective than using images.
