Python 3 is required to run the FRDR Vault client from the command line. Ensure that the output of python3 --version shows 3.6 or higher.
You may want to run inside a virutal environment (see below) before running this command.
pip install -r requirements.txtRun inside a virtual environment:
python3 -m venv env
source env/bin/activate
at this point you should see (env) to the right of your command prompt, showing you that you are running inside a virtual environment. You can now check the version of Python inside this environment:
python --versionAnd if it's indeed version 3, then install the requirements inside the virtual environment:
pip install -r requirements.txtTo exit the virtual environment:
deactivateThe Electron GUI in /gui should work for development after runing cd gui and npm install and npm start.
The Python code needs to be built on its target platform using pyinstaller:
pyinstaller -w crypto_gui.py --distpath gui
(On Mac, this also builds a .app version of the Python code, which you'll actually want to delete -- just keep the folder of CLI tools.)
After building the crawler, the GUI can be built from the gui subdirectory with:
electron-packager . --icon=resources/icon.ico (Windows)
electron-packager . --icon=resources/icon.icns (Mac)
On Mac, you can sign for distribution with electron-osx-sign and electron-notarize-cli, and you need to include the embedded Python binaries:
IFS=$'\n' && electron-osx-sign frdr-crypto-darwin-x64/frdr-crypto.app/ $(find frdr-crypto-darwin-x64/frdr-crypto.app/Contents/ -type f -perm -u+x) --identity [hash] --entitlements=entitlements.plist --entitlements-inherit=entitlements.plist --hardenedRuntime
electron-notarize --bundle-id ca.frdr-dfdr.secure --username my.apple.id@example.com --password @keystore:AC_PASSWORD frdr-crypto-darwin-x64/frdr-crypto.app/
Finally, to package for install:
electron-installer-windows --src frdr-crypto-win32-x64/ --dest install/ --config config.json (Windows)
hdiutil create tmp.dmg -ov -volname "FRDRSecure" -fs HFS+ -srcfolder frdr-crypto-darwin-x64/ && hdiutil convert tmp.dmg -format UDZO -o FRDRSecure.dmg && rm tmp.dmg (Mac)
To encrypt a file or a directory,
$ python crypto.py -e -i <path to the file or dir you want to encrypt> -o <output path to the encrypted file or dir>The output path is optional.
For example,
$ python crypto.py -e -i ./test_dataset -o ./test_dataset_enc_localTo decrypt a file or a directory,
$ python crypto.py -d -i <path to the encrypted file or dir> -k <path to the key>The output path is optional.
For example,
$ python crypto.py -d -i ./test_dataset_enc_local -k e9d63a50-bbdb-42ec-b5dd-3a6ad88b58da_key.pemTo encrypt a file or a directory,
# log into vault with username and password
$ python crypto.py -e -i <path to the file or dir you want to encrypt>  -o <output path to the encrypted file or dir> --vault <vault server address> --username <vault username> --password <vault password>
# or log into vault with oauth
$ python crypto.py -e -i <path to the file or dir you want to encrypt>  -o <output path to the encrypted file or dir> --vault <vault server address> --oauth
The output path is optional. For example,
# log into vault with username and password
$ python crypto.py -e -i ./test_dataset  -o ./test_dataset_enc_vault/ --vault http://127.0.0.1:8200/ --username bob --password training
# or log into vault with oauth
$ python crypto.py -e -i ./test_dataset  -o ./test_dataset_enc_vault/ --vault http://127.0.0.1:8200/ --oauth
To decrypt a file or a directory,
$ python crypto.py -d -i <path to the file or dir you want to encrypt> -o <output path to the encrypted file or dir> --vault <vault server address> --username <vault username> --password <vault password> --url <api path to fetch the secret>The output path is optional.
For example,
$ python crypto.py -d -i ./test_dataset_enc_vault/ --vault http://127.0.0.1:8200/ --username bob --password training --url http://127.0.0.1:8200/v1/secret/data/4186db38-9ebe-0512-8c32-4552220324aa/test_datasetUsage:
crypto.py -e -i <input_path> [-o <output_path>] [--vault <vault_addr>] [--username <vault_username>] [--password <vault_password>] [--oauth] [--loglevel=<loglevel>]
crypto.py -d -i <input_path> [-o <output_path>] (--key <key_path> | --vault <vault_addr> (--username <vault_username> --password <vault_password> | --oauth) --url <API_path>) [--loglevel=<loglevel>]
crypto.py --logout_vault
Options:
-e --encrypt           encrypt
-d --decrypt           decrypt
--oauth
-i <input_path>, --input <input_path>
-o <output_path>, --output <output_path>
-k <key_path>, --key <key_path>
--vault <vault_addr> using hashicorp vault for key generation and storage
-u <vault_username>, --username <vault_username>
-p <vault_password>, --password <vault_password>
--token <vault_token>
--logout_vault  Remove old vault tokens
--url <API_path>  API Path to fetch secret on vault
-l --loglevel The logging level(debug, error, warning or info) [default: info]$ python access_manager_test.py --mode <access manager mode> --vault <vault server address> (--username <vault_username> --password <vault_password> | --oauth) [--name <dataset uuid>] [--requester <requester entity id on vault>]For example, to grant access
# log into vault with username and password
$ python access_manager_test.py --mode grant-access --vault http://127.0.0.1:8200/ --username "bob" --password "training" --requester 9d32d549-69ac-8685-8abb-bc10b9bc31c4 --name 104a3f2b-de39-4132-9bd6-f2a32499d647
# or log into vault with oauth
$ python access_manager_test.py --mode grant-access --vault http://127.0.0.1:8200/ --oauth --requester 9d32d549-69ac-8685-8abb-bc10b9bc31c4 --name 104a3f2b-de39-4132-9bd6-f2a32499d647
To review existing shares
python access_manager_test.py --mode review-shares --vault http://127.0.0.1:8200/ --username "bob" --password "training"Usage:
access_manager_test.py --mode <mode> --vault <vault_addr> (--username <vault_username> --password <vault_password> | --oauth) [--requester <requester_vault_entity_id>] [--name <dataset_name>] [--expire <expiry_date>]
Options:
-m <mode>, --mode <mode> grant-access, revoke-access, review-shares or generate-access-request
--vault <vault_addr> using hashicorp vault for key generation and storage
-u <vault_username>, --username <vault_username>
-p <vault_password>, --password <vault_password>
--oauth
-r <requester_vault_entity_id>, --requester <requester_vault_entity_id>
-n <dataset_name>, --name <dataset_name>
--expire <expiry date> the permission expiry date in format YYYY-mm-ddResearchers need to log into Vault to generate a unique entity ID on vault before they request access on FRDR, which is performed on this client applcaiton.
$ python access_manager_test.py --mode generate-access-request --vault <vault server address> (--username <vault_username> --password <vault_password> | --oauth) For example,
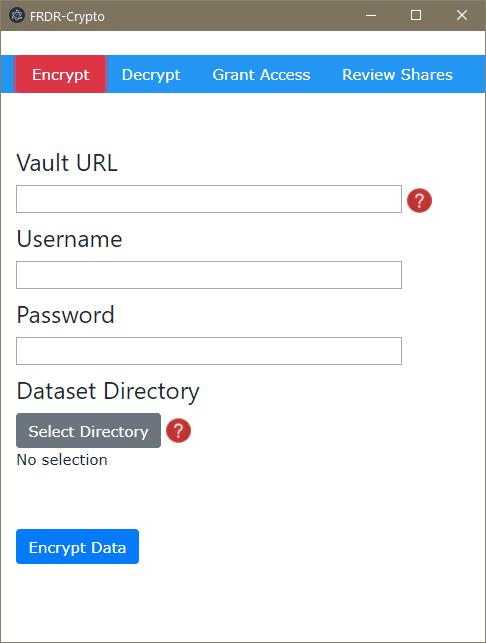
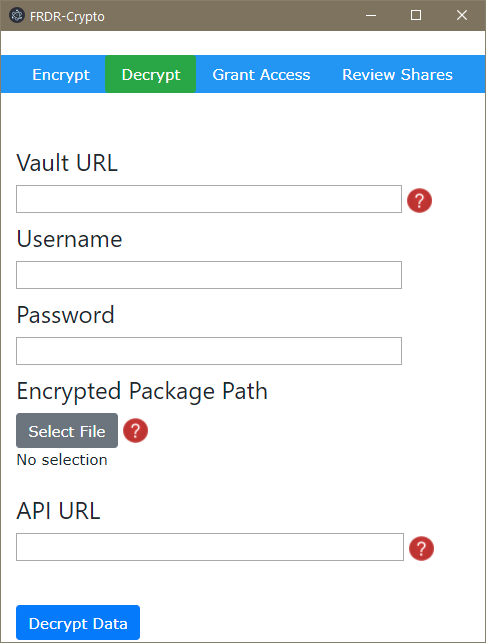
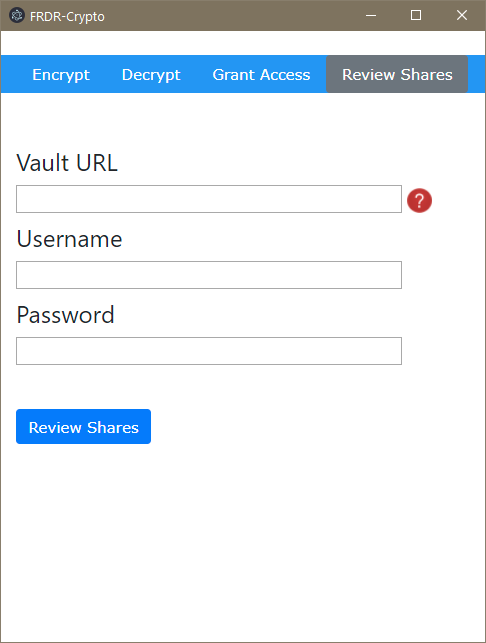
python access_manager_test.py --mode generate-access-request --vault http://127.0.0.1:8200/ --username "bob" --password "training"The GUI is divided into four features -- encrypting a package, decrypting a package, granting access to another user, and reviewing/revoking existing shares. In order to do any of these, you'll need to provide the URL of the Vault instance, as well as a username and password.
The Encrypt menu option allows you to encrypt any directory on your computer by automatically generating encryption keys, sending them to Vault with your credentials, using those keys to secure the package, and wrapping it in a metadata container called bagit. When clicking Encrypt Data you'll be prompted to pick a destination for the package, which you can then upload to a repository such as FRDR.
The Decrypt menu option allows you to decrypt an encrypted package for access. Assuming you've already downloaded the package, clicking Decrypt Datawill retrieve its decryption keys from a Vault API endpoint URL (which will be normally be provided to you upon acceptance of an access request) and decrypt the package. You should only decrypt packages on trusted computers, as their contents may be very sensitive.
The Grant Access menu option allows you to grant access to a package's encryption keys on Vault to another user who has requested access. You will need the requester's ID and the package/dataset ID, both of which will normally be included in a private message to you along with an access request.
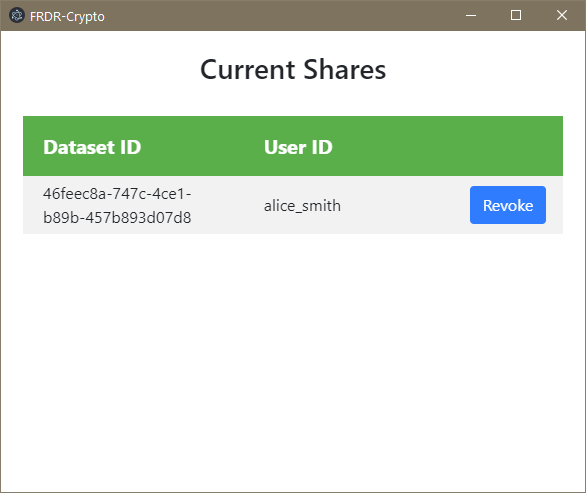
The Review Shares menu option allows you to review all of the other users to whom you have granted access to individual packages, and if desired, revoke their access to those packages from a separate menu that appears on authentication.
python expire_permission.py --vault <vault_addr> --tokenfile <vault root token file path> 


