This repository provides you cdk scripts and sample code on how to implement end to end data pipeline for transactional data lake by ingesting stream change data capture (CDC) from MySQL DB to Amazon S3 in Apache Iceberg format through Amazon MSK Serverless using Amazon MSK Connect and Glue Streaming.
Stream CDC into an Amazon S3 data lake in Apache Iceberg format with AWS Glue Streaming and MSK Connect (Debezium)
Below diagram shows what we are implementing.

The cdk.json file tells the CDK Toolkit how to execute your app.
This project is set up like a standard Python project. The initialization
process also creates a virtualenv within this project, stored under the .venv
directory. To create the virtualenv it assumes that there is a python3
(or python for Windows) executable in your path with access to the venv
package. If for any reason the automatic creation of the virtualenv fails,
you can create the virtualenv manually.
To manually create a virtualenv on MacOS and Linux:
$ python3 -m venv .venv
After the init process completes and the virtualenv is created, you can use the following step to activate your virtualenv.
$ source .venv/bin/activate
If you are a Windows platform, you would activate the virtualenv like this:
% .venv\Scripts\activate.bat
Once the virtualenv is activated, you can install the required dependencies.
(.venv) $ pip install -r requirements.txt
To add additional dependencies, for example other CDK libraries, just add
them to your setup.py file and rerun the pip install -r requirements.txt
command.
Before synthesizing the CloudFormation,
-
Create a custom plugin
(a) Download the MySQL connector plugin for the latest stable release from the Debezium site.
(b) Download and extract the AWS Secrets Manager Config Provider.
(c) Compress the directory that you created in the previous step into a ZIP file and then upload the ZIP file to an S3 bucket.$ mkdir -p debezium-connector-mysql $ tar -xzf debezium-connector-mysql-2.4.0.Final-plugin.tar.gz -C debezium-connector-mysql $ unzip jcustenborder-kafka-config-provider-aws-0.1.2.zip -d debezium-connector-mysql $ cd debezium-connector-mysql/jcustenborder-kafka-config-provider-aws-0.1.2/lib $ wget https://repo1.maven.org/maven2/com/google/guava/guava/31.1-jre/guava-31.1-jre.jar $ cd ../../ $ zip -9 -r ../debezium-connector-mysql-v2.4.0.zip * $ cd .. $ aws s3 cp debezium-connector-mysql-v2.4.0.zip s3://my-bucket/path/(d) Copy the following JSON and paste it in a file. For example,
debezium-source-custom-plugin.json.{ "name": "debezium-connector-mysql-v2-4-0", "contentType": "ZIP", "location": { "s3Location": { "bucketArn": "arn:aws:s3:::<my-bucket>", "fileKey": "<path>/debezium-connector-mysql-v2.4.0.zip" } } }(e) Run the following AWS CLI command from the folder where you saved the JSON file to create a plugin.
aws kafkaconnect create-custom-plugin --cli-input-json file://debezium-source-custom-plugin.json
-
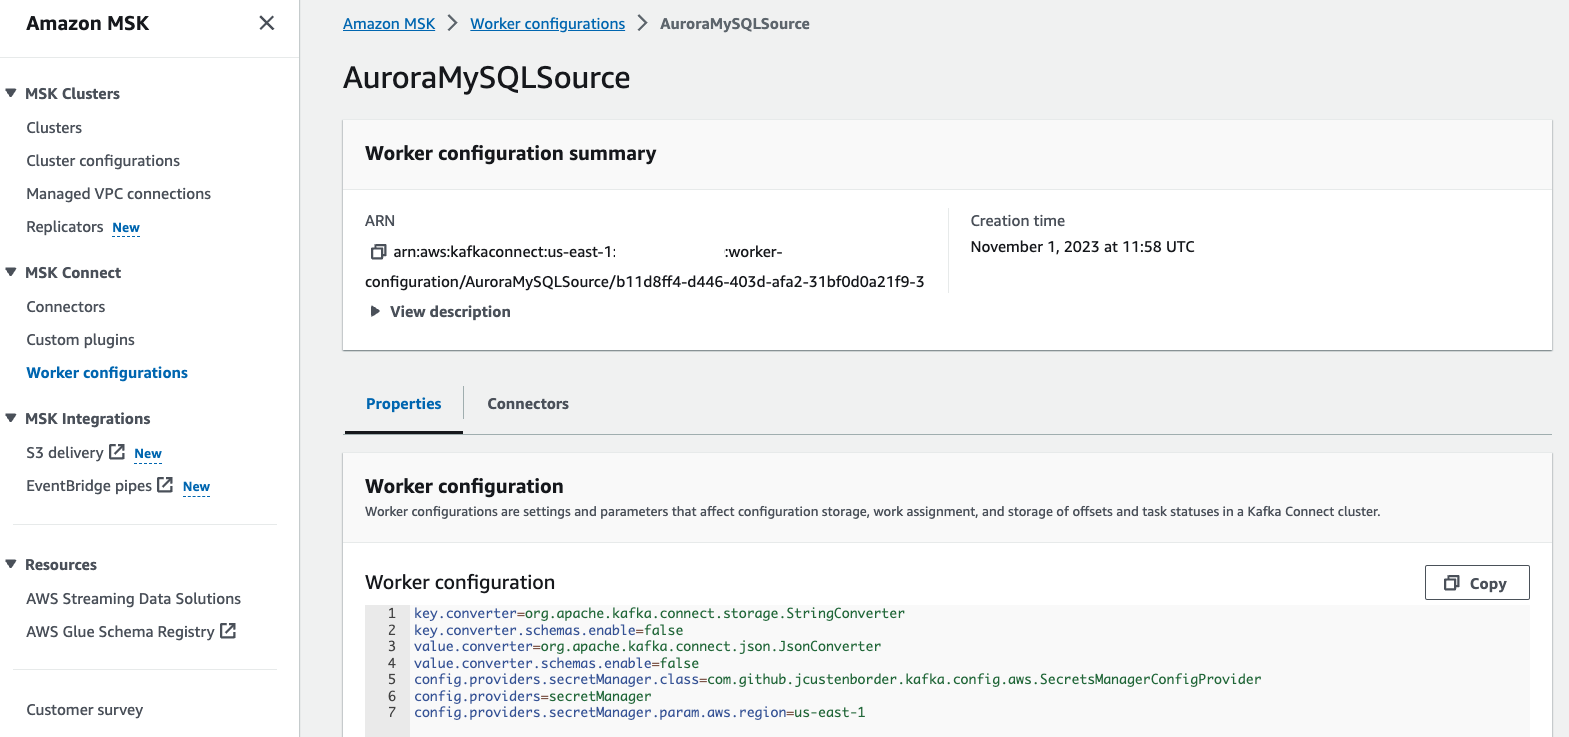
Create a custom worker configuration with information about your configuration provider.
(a) Copy the following worker configuration properties into a file.
To learn more about the configuration properties for the AWS Secrets Manager Config Provider, see SecretsManagerConfigProvider in the plugin's documentation.key.converter=org.apache.kafka.connect.storage.StringConverter key.converter.schemas.enable=false value.converter=org.apache.kafka.connect.json.JsonConverter value.converter.schemas.enable=false config.providers.secretManager.class=com.github.jcustenborder.kafka.config.aws.SecretsManagerConfigProvider config.providers=secretManager config.providers.secretManager.param.aws.region=us-east-1
(b) Run the following AWS CLI command to create your custom worker configuration.
Replace the following values:my-worker-config-name- a descriptive name for your custom worker configuration (e.g.,AuroraMySQLSource)encoded-properties-file-content-string- a base64-encoded version of the plaintext properties that you copied in the previous step
   aws kafkaconnect create-worker-configuration \
       --name <my-worker-config-name> \
       --properties-file-content <encoded-properties-file-content-string>
You should see output similar to the following example on the AWS Web console.

ℹ️ To learn more about how to create a Debezium source connector, see Debezium source connector with configuration provider
-
Set up Apache Iceberg connector for AWS Glue to use Apache Iceberg with AWS Glue jobs. (For more information, see References (2)). Then
glue_connections_nameofcdk.context.jsonconfiguration file should be set by Apache Iceberg connector name like this:{ "glue_connections_name": "iceberg-connection" } -
Create a S3 bucket for a glue job script and upload the glue job script file into the s3 bucket. Then
glue_assets_s3_bucket_nameandglue_job_script_file_nameofcdk.context.jsonconfiguration file should be set by the S3 bucket name and the glue job script file name like this:{ "glue_assets_s3_bucket_name": "aws-glue-assets-123456789012-us-east-1", "glue_job_script_file_name": "spark_sql_merge_into_iceberg.py" } -
Set up the cdk context configuration file,
cdk.context.json.
Then you set other remaining configurations of the cdk context configuration file cdk.context.json accordingly.
For example:
{
  "vpc_name": "default",
  "db_cluster_name": "retail",
  "msk_cluster_name": "retail-trans",
  "msk_connector_worker_configuration_name": "AuroraMySQLSource",
  "msk_connector_custom_plugin_name": "debezium-connector-mysql-v2-4-0",
  "msk_connector_name": "retail-changes",
  "msk_connector_configuration": {
    "tasks.max": "1",
    "database.include.list": "testdb",
    "topic.prefix": "retail-server",
    "topic.creation.default.partitions": "3",
    "topic.creation.default.replication.factor": "2",
    "include.schema.changes": "true",
    "schema.history.internal.kafka.topic": "schema-changes.testdb"
  },
  "glue_assets_s3_bucket_name": "aws-glue-assets-123456789012-us-east-1",
  "glue_job_script_file_name": "spark_sql_merge_into_iceberg.py",
  "glue_job_name": "cdc_based_upsert_to_iceberg_table",
  "glue_job_input_arguments": {
    "--catalog": "job_catalog",
    "--database_name": "cdc_iceberg_demo_db",
    "--table_name": "retail_trans_iceberg",
    "--primary_key": "trans_id",
    "--kafka_topic_name": "retail-server.testdb.retail_trans",
    "--starting_offsets_of_kafka_topic": "earliest",
    "--iceberg_s3_path": "s3://glue-iceberg-demo-us-east-1/cdc_iceberg_demo_db",
    "--lock_table_name": "iceberg_lock",
    "--aws_region": "us-east-1",
    "--window_size": "100 seconds",
    "--extra-jars": "s3://aws-glue-assets-123456789012-us-east-1/extra-jars/aws-sdk-java-2.17.224.jar",
    "--user-jars-first": "true"
  },
  "glue_connections_name": "iceberg-connection"
}
ℹ️ --primary_key of glue_job_input_arguments should be set by Iceberg table's primary column name. So, it is better to set the primary key of RDS table.
ℹ️ --extra-jars and --user-jars-first of glue_job_input_arguments is used in the 4th step of Set up Glue Streaming Job.
Now you can now synthesize the CloudFormation template for this code.
(.venv) $ export CDK_DEFAULT_ACCOUNT=$(aws sts get-caller-identity --query Account --output text)
(.venv) $ export CDK_DEFAULT_REGION=$(curl -s 169.254.169.254/latest/dynamic/instance-identity/document | jq -r .region)
(.venv) $ cdk synth --all
Now let's try to deploy.
(.venv) $ cdk list
TrxDataLakeVpc
AuroraMysqlAsDataSource
MSKServerlessAsGlueStreamingJobDataSource
TrxDataLakeBastionHost
GlueStreamingCDCtoIcebergS3Path
GlueMSKServerlessConnection
GlueStreamingMSKServerlessToIcebergJobRole
GlueIcebergDatabase
GrantLFPermissionsOnGlueJobRole
GlueStreamingJobMSKServerlessToIceberg
KafkaConnectorStack
Create an Aurora MySQL Cluster
(.venv) $ cdk deploy TransactionalDataLakeVpc AuroraMysqlAsDMSDataSource
Create a MSK Serverless Cluster
(.venv) $ cdk deploy MSKServerlessAsGlueStreamingJobDataSource
In order to set up the Aurora MySQL, you need to connect the Aurora MySQL cluster on either your local PC or a EC2 instance.
-
(Optional) Create an EC2 Instance
(.venv) $ cdk deploy TrxDataLakeBastionHost
-
Connect to the Aurora cluster writer node.
 $ sudo pip install ec2instanceconnectcli
 $ export BASTION_HOST_ID=$(aws cloudformation describe-stacks --stack-name TrxDataLakeBastionHost | jq -r '.Stacks[0].Outputs | .[] | select(.OutputKey | endswith("EC2InstanceId")) | .OutputValue')
 $ mssh --region "your-region-name (e.g., us-east-1)" ec2-user@${BASTION_HOST_ID}
 [ec2-user@ip-172-31-7-186 ~]$ mysql -hdb-cluster-name.cluster-xxxxxxxxxxxx.region-name.rds.amazonaws.com -uadmin -p
 Enter password:
 Welcome to the MariaDB monitor.  Commands end with ; or \g.
 Your MySQL connection id is 20
 Server version: 8.0.23 Source distribution

 Copyright (c) 2000, 2018, Oracle, MariaDB Corporation Ab and others.

 Type 'help;' or '\h' for help. Type '\c' to clear the current input statement.

 MySQL [(none)]>
ℹ️
TrxDataLakeBastionHostis a CDK Stack to create the bastion host.ℹ️ You can also connect to an EC2 instance using the EC2 Instance Connect CLI. For more information, see Connect using the EC2 Instance Connect CLI. For example,
$ sudo pip install ec2instanceconnectcli
$ mssh ec2-user@i-001234a4bf70dec41EXAMPLE # ec2-instance-id
-
At SQL prompt run the below command to confirm that binary logging is enabled:
 MySQL [(none)]> SHOW GLOBAL VARIABLES LIKE "log_bin";
 +---------------+-------+
 | Variable_name | Value |
 +---------------+-------+
 | log_bin       | ON    |
 +---------------+-------+
 1 row in set (0.00 sec)
-
Also run this to AWS DMS has bin log access that is required for replication
 MySQL [(none)]> CALL mysql.rds_set_configuration('binlog retention hours', 24);
 Query OK, 0 rows affected (0.01 sec)
- Run the below command to create the sample database named
testdb.MySQL [(none)]> SHOW DATABASES; +--------------------+ | Database | +--------------------+ | information_schema | | mysql | | performance_schema | | sys | +--------------------+ 4 rows in set (0.00 sec) MySQL [(none)]> CREATE DATABASE IF NOT EXISTS testdb; Query OK, 1 row affected (0.01 sec) MySQL [(none)]> USE testdb; Database changed MySQL [testdb]> SHOW tables; Empty set (0.00 sec)
- Also run this to create the sample table named
retail_transMySQL [testdb]> CREATE TABLE IF NOT EXISTS testdb.retail_trans ( trans_id BIGINT(20) AUTO_INCREMENT, customer_id VARCHAR(12) NOT NULL, event VARCHAR(10) DEFAULT NULL, sku VARCHAR(10) NOT NULL, amount INT DEFAULT 0, device VARCHAR(10) DEFAULT NULL, trans_datetime DATETIME DEFAULT CURRENT_TIMESTAMP, PRIMARY KEY(trans_id), KEY(trans_datetime) ) ENGINE=InnoDB AUTO_INCREMENT=0; Query OK, 0 rows affected, 1 warning (0.04 sec) MySQL [testdb]> SHOW tables; +------------------+ | Tables_in_testdb | +------------------+ | retail_trans | +------------------+ 1 row in set (0.00 sec) MySQL [testdb]> DESC retail_trans; +----------------+-------------+------+-----+-------------------+-------------------+ | Field | Type | Null | Key | Default | Extra | +----------------+-------------+------+-----+-------------------+-------------------+ | trans_id | bigint | NO | PRI | NULL | auto_increment | | customer_id | varchar(12) | NO | | NULL | | | event | varchar(10) | YES | | NULL | | | sku | varchar(10) | NO | | NULL | | | amount | int | YES | | 0 | | | device | varchar(10) | YES | | NULL | | | trans_datetime | datetime | YES | MUL | CURRENT_TIMESTAMP | DEFAULT_GENERATED | +----------------+-------------+------+-----+-------------------+-------------------+ 7 rows in set (0.00 sec) MySQL [testdb]>
After setting up the Aurora MySQL, you should come back to the terminal where you are deploying stacks.
-
Make sure Apache Iceberg connector for AWS Glue ready to use Apache Iceberg with AWS Glue jobs.
-
Create a S3 bucket for Apache Iceberg table
(.venv) $ cdk deploy GlueStreamingCDCtoIcebergS3Path
-
Upload AWS SDK for Java 2.x jar file into S3
(.venv) $ wget https://repo1.maven.org/maven2/software/amazon/awssdk/aws-sdk-java/2.17.224/aws-sdk-java-2.17.224.jar
(.venv) $ aws s3 cp aws-sdk-java-2.17.224.jar s3://aws-glue-assets-123456789012-us-east-1/extra-jars/aws-sdk-java-2.17.224.jar
A Glue Streaming Job might fail because of the following error:
py4j.protocol.Py4JJavaError: An error occurred while calling o135.start.
: java.lang.NoSuchMethodError: software.amazon.awssdk.utils.SystemSetting.getStringValueFromEnvironmentVariable(Ljava/lang/String;)Ljava/util/Optional
We can work around the problem by starting the Glue Job with the additional parameters:
--extra-jars s3://path/to/aws-sdk-for-java-v2.jar
--user-jars-first true
In order to do this, we might need to upload AWS SDK for Java 2.x jar file into S3.
-
Create Glue Streaming Job
-
(step 1) Select one of Glue Job Scripts and upload into S3
(.venv) $ ls src/main/python/
 spark_sql_merge_into_iceberg.py
(.venv) $ aws s3 mb s3://aws-glue-assets-123456789012-us-east-1 --region us-east-1
(.venv) $ aws s3 cp src/main/python/spark_sql_merge_into_iceberg.py s3://aws-glue-assets-123456789012-us-east-1/scripts/
-
(step 2) Provision the Glue Streaming Job
(.venv) $ cdk deploy GlueMSKServerlessConnection \
                     GlueStreamingMSKServerlessToIcebergJobRole \
                     GlueIcebergDatabase \
                     GrantLFPermissionsOnGlueJobRole \
                     GlueStreamingJobMSKServerlessToIceberg
-
-
Make sure the glue job to access the Kinesis Data Streams table in the Glue Catalog database, otherwise grant the glue job to permissions
Wec can get permissions by running the following command:
(.venv) $ aws lakeformation list-permissions | jq -r '.PrincipalResourcePermissions[] | select(.Principal.DataLakePrincipalIdentifier | endswith(":role/GlueJobRole-MSKServerless2Iceberg"))'If not found, we need manually to grant the glue job to required permissions by running the following command:
(.venv) $ aws lakeformation grant-permissions \
            --principal DataLakePrincipalIdentifier=arn:aws:iam::{account-id}:role/GlueJobRole-MSKServerless2Iceberg \
            --permissions SELECT DESCRIBE ALTER INSERT DELETE \
            --resource '{ "Table": {"DatabaseName": "cdc_iceberg_demo_db", "TableWildcard": {}} }'
Go to Athena on the AWS Management console.
-
(step 1) Create a database
In order to create a new database called
cdc_iceberg_demo_db, enter the following statement in the Athena query editor and click the Run button to execute the query.CREATE DATABASE IF NOT EXISTS cdc_iceberg_demo_db;
-
(step 2) Create a table
Copy the following query into the Athena query editor, replace the
xxxxxxxin the last line underLOCATIONwith the string of your S3 bucket, and execute the query to create a new table.CREATE TABLE cdc_iceberg_demo_db.retail_trans_iceberg ( trans_id bigint, customer_id string, event string, sku string, amount bigint, device string, trans_datetime timestamp ) PARTITIONED BY (`event`) LOCATION 's3://glue-iceberg-demo-xxxxxxx/cdc_iceberg_demo_db/retail_trans_iceberg' TBLPROPERTIES ( 'table_type'='iceberg' );If the query is successful, a table named
retail_trans_icebergis created and displayed on the left panel under the Tables section.If you get an error, check if (a) you have updated the
LOCATIONto the correct S3 bucket name, (b) you have mydatabase selected under the Database dropdown, and (c) you haveAwsDataCatalogselected as the Data source.ℹ️ If you fail to create the table, give Athena users access permissions on
cdc_iceberg_demo_dbthrough AWS Lake Formation, or you can grant anyone using Athena to accesscdc_iceberg_demo_dbby running the following command:(.venv) $ aws lakeformation grant-permissions \ --principal DataLakePrincipalIdentifier=arn:aws:iam::{account-id}:user/example-user-id \ --permissions CREATE_TABLE DESCRIBE ALTER DROP \ --resource '{ "Database": { "Name": "cdc_iceberg_demo_db" } }' (.venv) $ aws lakeformation grant-permissions \ --principal DataLakePrincipalIdentifier=arn:aws:iam::{account-id}:user/example-user-id \ --permissions SELECT DESCRIBE ALTER INSERT DELETE DROP \ --resource '{ "Table": {"DatabaseName": "cdc_iceberg_demo_db", "TableWildcard": {}} }'
Create and run MSK Connect
(.venv) $ cdk deploy KafkaConnectorStack
-
Run glue job to load data from Kinesis Data Streams into S3
(.venv) $ aws glue start-job-run --job-name cdc_based_upsert_to_iceberg_table
-
Generate test data.
 $ export BASTION_HOST_ID=$(aws cloudformation describe-stacks --stack-name AuroraMysqlBastionHost | jq -r '.Stacks[0].Outputs | .[] | select(.OutputKey | endswith("EC2InstanceId")) | .OutputValue')
 $ mssh --region "your-region-name (e.g., us-east-1)" ec2-user@${BASTION_HOST_ID}
 [ec2-user@ip-172-31-7-186 ~]$ pip3 install -r utils/requirements-dev.txt
 [ec2-user@ip-172-31-7-186 ~]$ python3 utils/gen_fake_mysql_data.py \
                                 --database your-database-name \
                                 --table your-table-name \
                                 --user user-name \
                                 --password password \
                                 --host db-cluster-name.cluster-xxxxxxxxxxxx.region-name.rds.amazonaws.com \
                                 --max-count 10
After filling data into the MySQL table, connect to the Aurora cluster writer node and run some DML(insert, update, delete) queries.
For example, update some records.
 $ mysql -hdb-cluster-name.cluster-xxxxxxxxxxxx.region-name.rds.amazonaws.com -uadmin -p
 Enter password:
 Welcome to the MariaDB monitor.  Commands end with ; or \g.
 Your MySQL connection id is 20
 Server version: 8.0.23 Source distribution

 Copyright (c) 2000, 2018, Oracle, MariaDB Corporation Ab and others.

 Type 'help;' or '\h' for help. Type '\c' to clear the current input statement.

 MySQL [(none)]> USE testdb;
 Database changed

 MySQL [testdb]> SELECT * FROM retail_trans LIMIT 10;
 +----------+--------------+----------+------------+--------+--------+---------------------+
 | trans_id | customer_id  | event    | sku        | amount | device | trans_datetime      |
 +----------+--------------+----------+------------+--------+--------+---------------------+
 |        1 | 460104780596 | cart     | IQ6879MMTB |      8 | mobile | 2023-01-16 06:08:06 |
 |        2 | 758933025159 | like     | RL1573WWLT |      1 | tablet | 2023-01-16 06:17:21 |
 |        3 | 754384589074 | like     | PX4135DYNT |      1 | mobile | 2023-01-16 06:08:52 |
 |        4 | 602811489876 | purchase | PI7913TREO |     66 | pc     | 2023-01-16 06:01:07 |
 |        5 | 222732129586 | like     | AS6987HGLN |      1 | mobile | 2023-01-16 06:09:06 |
 |        6 | 387378799012 | list     | AI6161BEFX |      1 | pc     | 2023-01-16 06:10:27 |
 |        7 | 843982894991 | cart     | DA7930CJBR |     81 | pc     | 2023-01-16 06:11:41 |
 |        8 | 818177069814 | like     | JS6166YPTE |      1 | pc     | 2023-01-16 06:17:08 |
 |        9 | 248083404876 | visit    | AS8552DVOO |      1 | pc     | 2023-01-16 06:24:39 |
 |       10 | 731184658511 | visit    | XZ9997LSJN |      1 | tablet | 2023-01-16 06:12:18 |
 +----------+--------------+----------+------------+--------+--------+---------------------+
 10 rows in set (0.00 sec)

 MySQL [testdb]> UPDATE retail_trans SET amount = 3 WHERE trans_id=6;
 Query OK, 1 rows affected (0.00 sec)
 Rows matched: 1  Changed: 1  Warnings: 0

 MySQL [testdb]> UPDATE retail_trans SET amount = 39 WHERE trans_id=19;
 Query OK, 1 rows affected (0.00 sec)
 Rows matched: 1  Changed: 1  Warnings: 0

 MySQL [testdb]> UPDATE retail_trans SET amount = 60 WHERE trans_id=21;
 Query OK, 1 rows affected (0.00 sec)
 Rows matched: 1  Changed: 1  Warnings: 0

 MySQL [testdb]> UPDATE retail_trans SET amount = 4 WHERE trans_id=23;
 Query OK, 1 rows affected (0.00 sec)
 Rows matched: 1  Changed: 1  Warnings: 0

 MySQL [testdb]> UPDATE retail_trans SET amount = 42 WHERE trans_id=24;
 Query OK, 1 rows affected (0.00 sec)
 Rows matched: 1  Changed: 1  Warnings: 0
Delete some records.
 MySQL [testdb]> DELETE FROM retail_trans WHERE trans_id=6;
 Query OK, 1 rows affected (0.00 sec)

 MySQL [testdb]> DELETE FROM retail_trans WHERE trans_id=33;
 Query OK, 1 rows affected (0.00 sec)

 MySQL [testdb]> DELETE FROM retail_trans WHERE trans_id=23;
 Query OK, 1 rows affected (0.00 sec)
Insert some new records.
MySQL [testdb]> INSERT INTO retail_trans (customer_id, event, sku, amount, device) VALUES -> ("818177069814", "like", "JS6166YPTE", 1, "mobile"), -> ("387378799012", "list", "AI6161BEFX", 1, "pc"), -> ("839828949919", "purchase", "AC2306JBRJ", 5, "tablet"), -> ("248083404876", "visit", "AS8552DVOO", 1, "pc"), -> ("731184658511", "like", "XZ9997LSJN", 1, "tablet"); Query OK, 5 rows affected (0.00 sec) Records: 5 Duplicates: 0 Warnings: 0 -
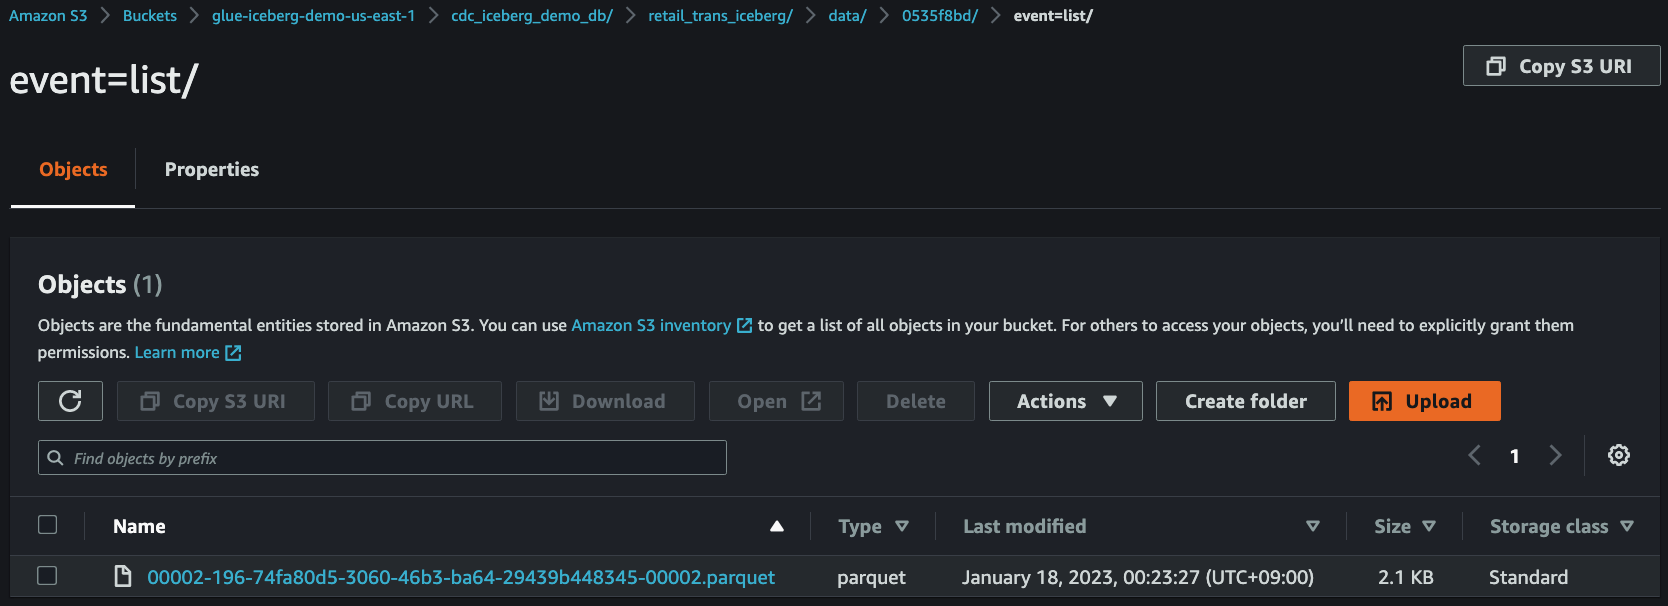
Check streaming data in S3
After
5~7minutes, you can see that the streaming data have been delivered from MSK Serverless to S3.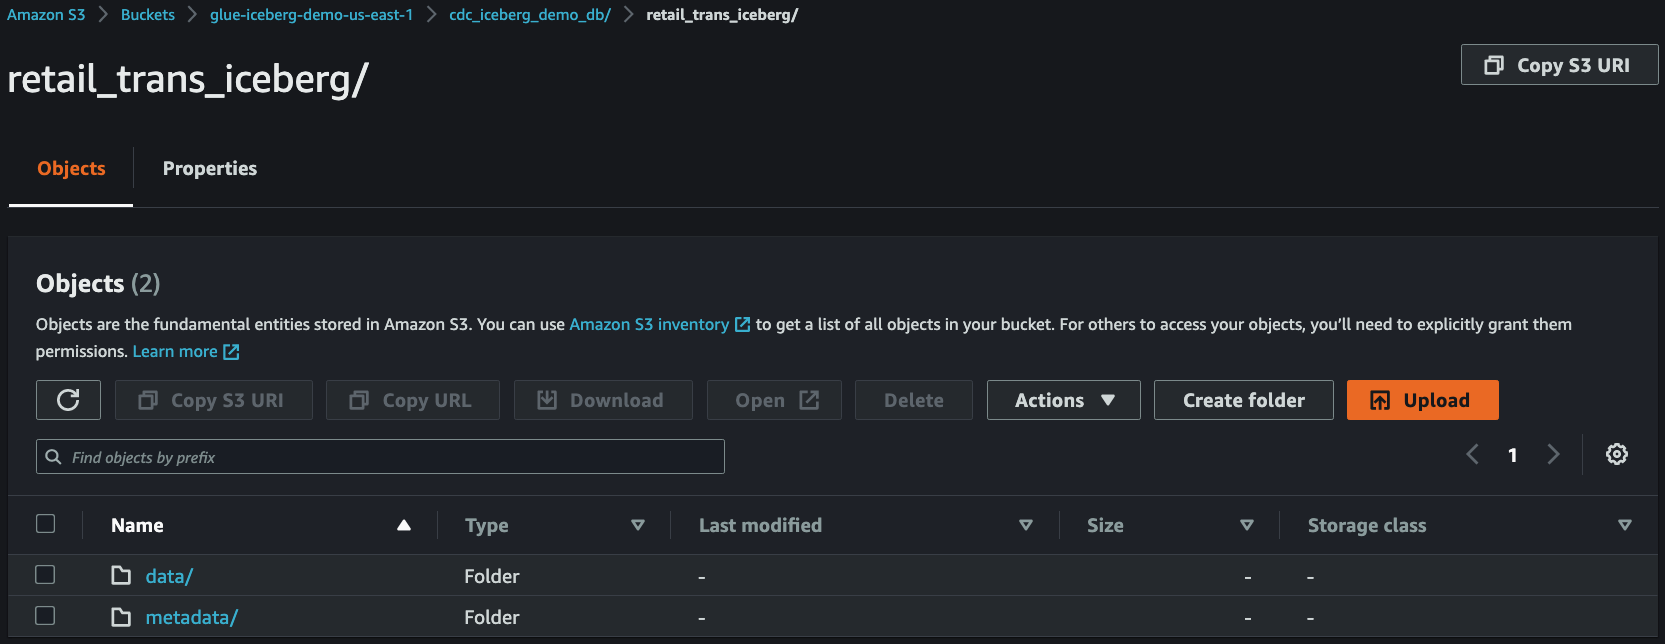
-
Run test query using Amazon Athena
Enter the following SQL statement and execute the query.
SELECT COUNT(*)
FROM cdc_iceberg_demo_db.retail_trans_iceberg;


-
Stop the glue job by replacing the job name in below command.
(.venv) $ JOB_RUN_IDS=$(aws glue get-job-runs \ --job-name cdc_based_upsert_to_iceberg_table | jq -r '.JobRuns[] | select(.JobRunState=="RUNNING") | .Id' \ | xargs) (.venv) $ aws glue batch-stop-job-run \ --job-name cdc_based_upsert_to_iceberg_table \ --job-run-ids $JOB_RUN_IDS -
Delete the CloudFormation stack by running the below command.
(.venv) $ cdk destroy --all
cdk lslist all stacks in the appcdk synthemits the synthesized CloudFormation templatecdk deploydeploy this stack to your default AWS account/regioncdk diffcompare deployed stack with current statecdk docsopen CDK documentation
Enjoy!
- (1) Transactional Data Lake using Apache Iceberg with AWS Glue Streaming and DMS

- (2) AWS Glue versions: The AWS Glue version determines the versions of Apache Spark and Python that AWS Glue supports.
- (3) Use the AWS Glue connector to read and write Apache Iceberg tables with ACID transactions and perform time travel (2022-06-21)
- (4) AWS Glue Streaming Ingestion from Kafka to Apache Iceberg table in S3
- (5) Amazon Athena Using Iceberg tables
- (6) Implement a CDC-based UPSERT in a data lake using Apache Iceberg and AWS Glue (2022-06-15)
- (7) Apache Iceberg - Spark Writes with SQL (v0.14.0)
- (8) Crafting serverless streaming ETL jobs with AWS Glue (2020-10-14)
- (9) AWS Glue Notebook Samples - sample iPython notebook files which show you how to use open data dake formats; Apache Hudi, Delta Lake, and Apache Iceberg on AWS Glue Interactive Sessions and AWS Glue Studio Notebook.
- (10) Choosing an open table format for your transactional data lake on AWS (2023-06-09)
- (11) Debezium Connectors - MySQL Change event values
-
Granting database or table permissions error using AWS CDK
-
Error message:
AWS::LakeFormation::PrincipalPermissions | CfnPrincipalPermissions Resource handler returned message: "Resource does not exist or requester is not authorized to access requested permissions. (Service: LakeFormation, Status Code: 400, Request ID: f4d5e58b-29b6-4889-9666-7e38420c9035)" (RequestToken: 4a4bb1d6-b051-032f-dd12-5951d7b4d2a9, HandlerErrorCode: AccessDenied)
-
Solution:
The role assumed by cdk is not a data lake administrator. (e.g.,
cdk-hnb659fds-deploy-role-12345678912-us-east-1)
So, deploying PrincipalPermissions meets the error such as:Resource does not exist or requester is not authorized to access requested permissions.In order to solve the error, it is necessary to promote the cdk execution role to the data lake administrator.
For example, https://github.com/aws-samples/data-lake-as-code/blob/mainline/lib/stacks/datalake-stack.ts#L68 -
Reference:
https://github.com/aws-samples/data-lake-as-code - Data Lake as Code
-
-
Amazon MSK Serverless does not allow
auto.create.topics.enableto be set totrue.$ aws kafka update-cluster-configuration --cluster-arn arn:aws:kafka:us-east-1:123456789012:cluster/msk/39bb8562-e1b9-42a5-ba82-703ac0dee7ea-s1 --configuration-info file://msk-cluster-config.json --current-version K2EUQ1WTGCTBG2 An error occurred (BadRequestException) when calling the UpdateClusterConfiguration operation: This operation cannot be performed on serverless clusters.- Solution: To automatically create Kafka topics, use a Debezium configuration with
topic.creation.enableset totrue.
- Solution: To automatically create Kafka topics, use a Debezium configuration with
-
Debezium connector failure with the following error message:
2023-11-02T06:21:09.000Z [Worker-03ae84b36842a92e0] java.lang.NoClassDefFoundError: com/google/common/base/Strings 2023-11-02T06:21:09.000Z [Worker-03ae84b36842a92e0] at com.github.jcustenborder.kafka.connect.utils.config.ConfigKeyBuilder.build(ConfigKeyBuilder.java:61) 2023-11-02T06:21:09.000Z [Worker-03ae84b36842a92e0] at com.github.jcustenborder.kafka.config.aws.SecretsManagerConfigProviderConfig.config(SecretsManagerConfigProviderConfig.java:75) 2023-11-02T06:21:09.000Z [Worker-03ae84b36842a92e0] at com.github.jcustenborder.kafka.config.aws.SecretsManagerConfigProviderConfig.<init>(SecretsManagerConfigProviderConfig.java:53) 2023-11-02T06:21:09.000Z [Worker-03ae84b36842a92e0] at com.github.jcustenborder.kafka.config.aws.SecretsManagerConfigProvider.configure(SecretsManagerConfigProvider.java:136) 2023-11-02T06:21:09.000Z [Worker-03ae84b36842a92e0] at org.apache.kafka.common.config.AbstractConfig.instantiateConfigProviders(AbstractConfig.java:548) 2023-11-02T06:21:09.000Z [Worker-03ae84b36842a92e0] at org.apache.kafka.common.config.AbstractConfig.resolveConfigVariables(AbstractConfig.java:491) 2023-11-02T06:21:09.000Z [Worker-03ae84b36842a92e0] at org.apache.kafka.common.config.AbstractConfig.<init>(AbstractConfig.java:107) 2023-11-02T06:21:09.000Z [Worker-03ae84b36842a92e0] at org.apache.kafka.common.config.AbstractConfig.<init>(AbstractConfig.java:129) 2023-11-02T06:21:09.000Z [Worker-03ae84b36842a92e0] at org.apache.kafka.connect.runtime.WorkerConfig.<init>(WorkerConfig.java:452) 2023-11-02T06:21:09.000Z [Worker-03ae84b36842a92e0] at org.apache.kafka.connect.runtime.distributed.DistributedConfig.<init>(DistributedConfig.java:405) 2023-11-02T06:21:09.000Z [Worker-03ae84b36842a92e0] at org.apache.kafka.connect.cli.ConnectDistributed.startConnect(ConnectDistributed.java:95) 2023-11-02T06:21:09.000Z [Worker-03ae84b36842a92e0] at org.apache.kafka.connect.cli.ConnectDistributed.main(ConnectDistributed.java:80) 2023-11-02T06:21:09.000Z [Worker-03ae84b36842a92e0] Caused by: java.lang.ClassNotFoundException: com.google.common.base.Strings 2023-11-02T06:21:09.000Z [Worker-03ae84b36842a92e0] at java.base/java.net.URLClassLoader.findClass(URLClassLoader.java:476) 2023-11-02T06:21:09.000Z [Worker-03ae84b36842a92e0] at java.base/java.lang.ClassLoader.loadClass(ClassLoader.java:594) 2023-11-02T06:21:09.000Z [Worker-03ae84b36842a92e0] at org.apache.kafka.connect.runtime.isolation.PluginClassLoader.loadClass(PluginClassLoader.java:104) 2023-11-02T06:21:09.000Z [Worker-03ae84b36842a92e0] at java.base/java.lang.ClassLoader.loadClass(ClassLoader.java:527) 2023-11-02T06:21:09.000Z [Worker-03ae84b36842a92e0] ... 12 more 2023-11-02T06:21:09.000Z [Worker-03ae84b36842a92e0] MSK Connect encountered errors and failed.-
Solution: Confluent hub installation is missing guava #2
To resolve the MSK Connect issue I downloaded the guava jar (guava-31.1-jre.jar) directly from here
When you create the custom plugin for MSK Connect, after extracting jcusten-border-kafka-config-provider-aws drop the guava jar in the lib folder, before creating the archive that you upload to S3.
-
-
Set up
client.properties$ cat client.properties security.protocol=SASL_SSL sasl.mechanism=AWS_MSK_IAM sasl.jaas.config=software.amazon.msk.auth.iam.IAMLoginModule required; sasl.client.callback.handler.class=software.amazon.msk.auth.iam.IAMClientCallbackHandler
ℹ️
client.propertiesis a property file containing configs to be passed to Admin Client. This is used only with--bootstrap-serveroption for describing and altering broker configs.
For more information, see Getting started using MSK Serverless clusters - Step 3: Create a client machine -
Get Bootstrap server information
$ aws kafka get-bootstrap-brokers --cluster-arn msk_cluster_arn $ export BS={BootstrapBrokerStringSaslIam} -
List Kafka toipics
$ kafka-topics.sh --bootstrap-server $BS \ --command-config client.properties \ --list -
Create a Kafka toipic
$ kafka-topics.sh --bootstrap-server $BS \ --command-config client.properties \ --create \ --topic topic_name \ --partitions 3 \ --replication-factor 2 -
Consume records from a Kafka toipic
$ kafka-console-consumer.sh --bootstrap-server $BS \ --consumer.config client.properties \ --topic topic_name \ --from-beginning -
Produce records into a Kafka toipic
$ kafka-console-producer.sh --bootstrap-server $BS \
                            --producer.config client.properties \
                            --topic topic_name
-
Sample Data
{ "before": null, "after": { "trans_id": 28, "customer_id": "818177069814", "event": "like", "sku": "JS6166YPTE", "amount": 1, "device": "pc", "trans_datetime": 1699441714000 }, "source": { "version": "2.4.0.Final", "connector": "mysql", "name": "retail-server", "ts_ms": 1699441786000, "snapshot": "false", "db": "testdb", "sequence": null, "table": "retail_trans", "server_id": 1629810274, "gtid": null, "file": "mysql-bin-changelog.000003", "pos": 10867, "row": 0, "thread": 8948, "query": null }, "op": "c", "ts_ms": 1699441786893, "transaction": null } -
Spark DataFrame Schema
root
 |-- after: struct (nullable = true)
 |    |-- amount: long (nullable = true)
 |    |-- customer_id: string (nullable = true)
 |    |-- device: string (nullable = true)
 |    |-- event: string (nullable = true)
 |    |-- sku: string (nullable = true)
 |    |-- trans_datetime: long (nullable = true)
 |    |-- trans_id: long (nullable = true)
 |-- before: string (nullable = true)
 |-- op: string (nullable = true)
 |-- source: struct (nullable = true)
 |    |-- connector: string (nullable = true)
 |    |-- db: string (nullable = true)
 |    |-- file: string (nullable = true)
 |    |-- gtid: string (nullable = true)
 |    |-- name: string (nullable = true)
 |    |-- pos: long (nullable = true)
 |    |-- query: string (nullable = true)
 |    |-- row: long (nullable = true)
 |    |-- sequence: string (nullable = true)
 |    |-- server_id: long (nullable = true)
 |    |-- snapshot: string (nullable = true)
 |    |-- table: string (nullable = true)
 |    |-- thread: long (nullable = true)
 |    |-- ts_ms: long (nullable = true)
 |    |-- version: string (nullable = true)
 |-- transaction: string (nullable = true)
 |-- ts_ms: long (nullable = true)
See CONTRIBUTING for more information.
This library is licensed under the MIT-0 License. See the LICENSE file.