This repository provides you cdk scripts and sample codes on how to implement a simple SaaS metering system.
Below diagram shows what we are implementing.

The cdk.json file tells the CDK Toolkit how to execute your app.
This project is set up like a standard Python project. The initialization
process also creates a virtualenv within this project, stored under the .venv
directory. To create the virtualenv it assumes that there is a python3
(or python for Windows) executable in your path with access to the venv
package. If for any reason the automatic creation of the virtualenv fails,
you can create the virtualenv manually.
To manually create a virtualenv on MacOS and Linux:
$ python3 -m venv .venv
After the init process completes and the virtualenv is created, you can use the following step to activate your virtualenv.
$ source .venv/bin/activate
If you are a Windows platform, you would activate the virtualenv like this:
% .venv\Scripts\activate.bat
Once the virtualenv is activated, you can install the required dependencies.
(.venv) $ pip install -r requirements.txt
At this point you can now synthesize the CloudFormation template for this code.
Before synthesizing the CloudFormation, you should set approperly the cdk context configuration file, cdk.context.json.
In this project, we use the following cdk context:
{
  "vpc_name": "default",
  "firehose": {
    "stream_name": "random-gen",
    "buffer_size_in_mbs": 128,
    "buffer_interval_in_seconds": 300,
    "s3_bucket": "apigw-access-log-to-firehose-{region}-{account-id}",
    "s3_output_folder": "json-data",
    "prefix": "json-data/year=!{timestamp:yyyy}/month=!{timestamp:MM}/day=!{timestamp:dd}/hour=!{timestamp:HH}/",
    "error_output_prefix": "error/year=!{timestamp:yyyy}/month=!{timestamp:MM}/day=!{timestamp:dd}/hour=!{timestamp:HH}/!{firehose:error-output-type}"
  },
  "athena_work_group_name": "SaaSMeteringDemo",
  "merge_small_files_lambda_env": {
    "OLD_DATABASE": "mydatabase",
    "OLD_TABLE_NAME": "restapi_access_log_json",
    "NEW_DATABASE": "mydatabase",
    "NEW_TABLE_NAME": "restapi_access_log_parquet",
    "NEW_TABLE_S3_FOLDER_NAME": "parquet-data",
    "COLUMN_NAMES": "requestId,ip,user,requestTime,httpMethod,resourcePath,status,protocol,responseLength"
  }
}
s3_bucket to store access logs for yourself. Otherwise, {region} and {account-id} of s3_bucket option will be replaced based on your AWS account profile.
(.venv) $ export CDK_DEFAULT_ACCOUNT=$(aws sts get-caller-identity --query Account --output text)
(.venv) $ export CDK_DEFAULT_REGION=$(curl -s 169.254.169.254/latest/dynamic/instance-identity/document | jq -r .region)
(.venv) $ cdk synth --all
Use cdk deploy command to create the stack shown above.
(.venv) $ cdk deploy --require-approval never --all
After all CDK stacks are successfully deployed, make sure that the AWS Lambda function merging many small files to a few of large parquet files is granted appropriate LakeFormation permissions.
Go checking Amazon Lake Formation Web console

Otherwise, you need to grant appropriate LakeFormation permissions to the AWS Lambda function merging many small files to a few of large parquet files by running the following commands:
(.venv) $ MERGE_SMALL_FILES_JOB_ROLE_ARN=$(aws cloudformation describe-stacks \
            --stack-name RestApiAccessLogMergeSmallFiles | \
            jq -r '.Stacks[0].Outputs[] | \
            select(.OutputKey | endswith("LambdaExecRoleArn")) | \
            .OutputValue')
(.venv) $ aws lakeformation grant-permissions \
              --principal DataLakePrincipalIdentifier=${MERGE_SMALL_FILES_JOB_ROLE_ARN} \
              --permissions CREATE_TABLE DESCRIBE ALTER DROP \
              --resource '{ "Database": { "Name": "mydatabase" } }'
(.venv) $ aws lakeformation grant-permissions \
              --principal DataLakePrincipalIdentifier=${MERGE_SMALL_FILES_JOB_ROLE_ARN} \
              --permissions SELECT DESCRIBE ALTER INSERT DELETE DROP \
              --resource '{ "Table": {"DatabaseName": "mydatabase", "TableWildcard": {}} }'
ℹ️
mydatabaseis the database for access logs specified asOLD_DATABASEandNEW_DATABASEin thecdk.context.jsonfile.
ℹ️
RestApiAccessLogMergeSmallFilesis the CDK Stack name to create the lambda function merging small files to large one by running Amazon Athena Create Table As Select(CTAS) query.
To add additional dependencies, for example other CDK libraries, just add
them to your setup.py file and rerun the pip install -r requirements.txt
command.
-
Register a Cognito User, using the aws cli
USER_POOL_CLIENT_ID=$(aws cloudformation describe-stacks --stack-name RandomGenApiGw | jq -r '.Stacks[0].Outputs[] | select(.OutputKey == "UserPoolClientId") | .OutputValue')

aws cognito-idp sign-up \
  --client-id ${USER_POOL_CLIENT_ID} \
  --username "user-email-id@domain.com" \
  --password "user-password"
Note: You can find
UserPoolClientIdwith the following command:aws cloudformation describe-stacks --stack-name RandomGenApiGw | jq -r '.Stacks[0].Outputs[] | select(.OutputKey == "UserPoolClientId") | .OutputValue'
ℹ️
RandomGenApiGwis the CDK stack name to create a user pool. -
Confirm the user, so they can log in:
USER_POOL_ID=$(aws cloudformation describe-stacks --stack-name RandomGenApiGw | jq -r '.Stacks[0].Outputs | map(select(.OutputKey == "UserPoolId")) | .[0].OutputValue')

aws cognito-idp admin-confirm-sign-up \
  --user-pool-id ${USER_POOL_ID} \
  --username "user-email-id@domain.com"
At this point if you look at your cognito user pool, you would see that the user is confirmed and ready to log in:
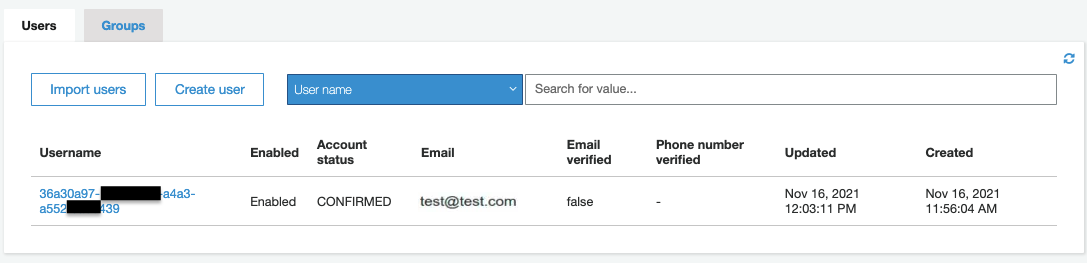
Note: You can find
UserPoolIdwith the following command:aws cloudformation describe-stacks --stack-name RandomGenApiGw | jq -r '.Stacks[0].Outputs | map(select(.OutputKey == "UserPoolId")) | .[0].OutputValue'
-
Log the user in to get an identity JWT token
USER_POOL_CLIENT_ID=$(aws cloudformation describe-stacks --stack-name RandomGenApiGw | jq -r '.Stacks[0].Outputs[] | select(.OutputKey == "UserPoolClientId") | .OutputValue') aws cognito-idp initiate-auth \ --auth-flow USER_PASSWORD_AUTH \ --auth-parameters USERNAME="user-email-id@domain.com",PASSWORD="user-password" \ --client-id ${USER_POOL_CLIENT_ID} -
Invoke REST API method
$ MY_ID_TOKEN=$(aws cognito-idp initiate-auth --auth-flow USER_PASSWORD_AUTH --auth-parameters USERNAME="user-email-id@domain.com",PASSWORD="user-password" --client-id your-user-pool-client-id | jq -r '.AuthenticationResult.IdToken')
$ curl -X GET 'https://{your-api-gateway-id}.execute-api.{region}.amazonaws.com/prod/random/strings?len=7' --header "Authorization: ${MY_ID_TOKEN}"
The response is:
["weBJDKv"]
-
Generate test requests and run them.
$ source .venv/bin/activate (.venv) $ pip install "requests==2.31.0" "boto3==1.34.61" (.venv) $ python tests/run_test.py --execution-id {your-api-gateway-execution-id} \ --region-name {region} \ --auth-token ${MY_ID_TOKEN} \ --max-count 10 -
Check the access logs in S3
After
5~10minutes, you can see that the access logs have been delivered by Kinesis Data Firehose to S3 and stored in a folder structure by year, month, day, and hour.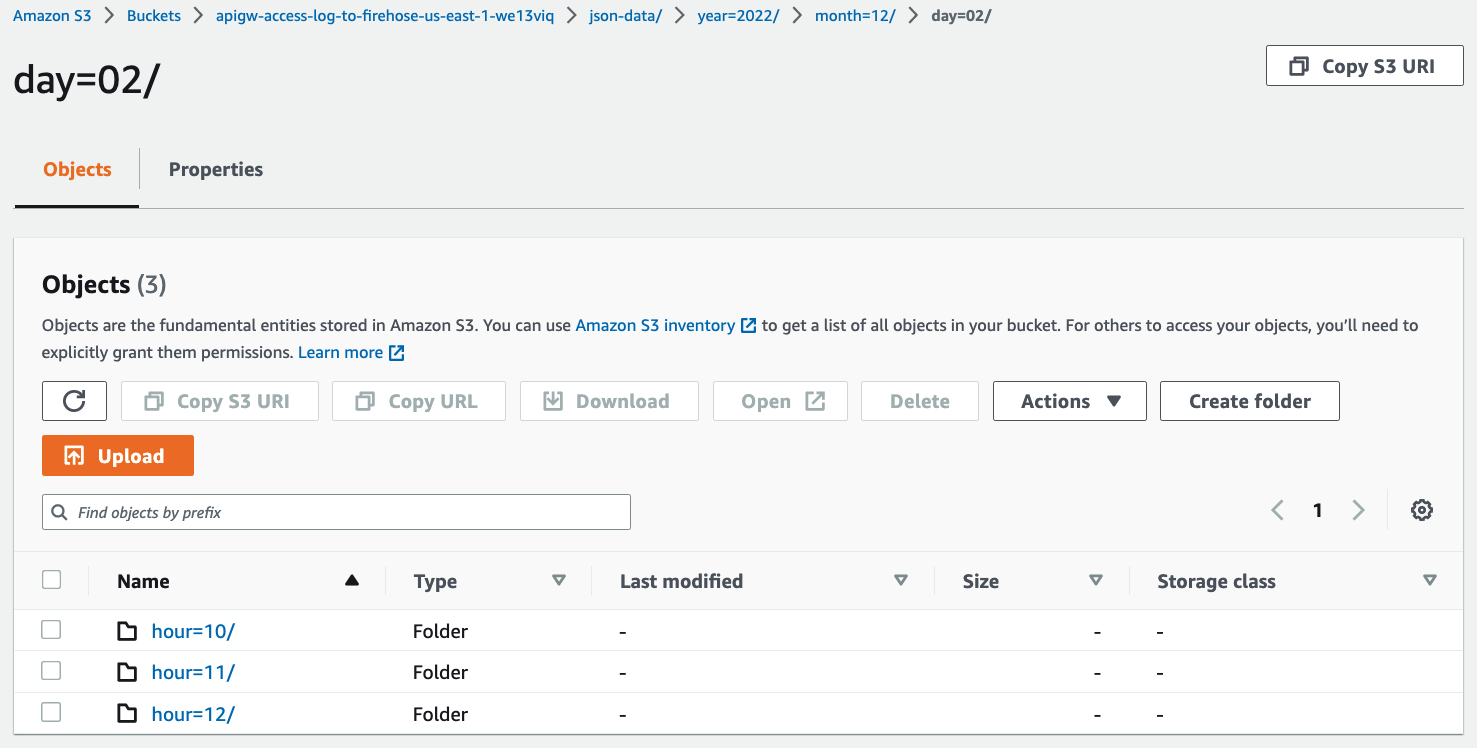
-
Creating and loading a table with partitioned data in Amazon Athena
Go to Athena on the AWS Management console.
-
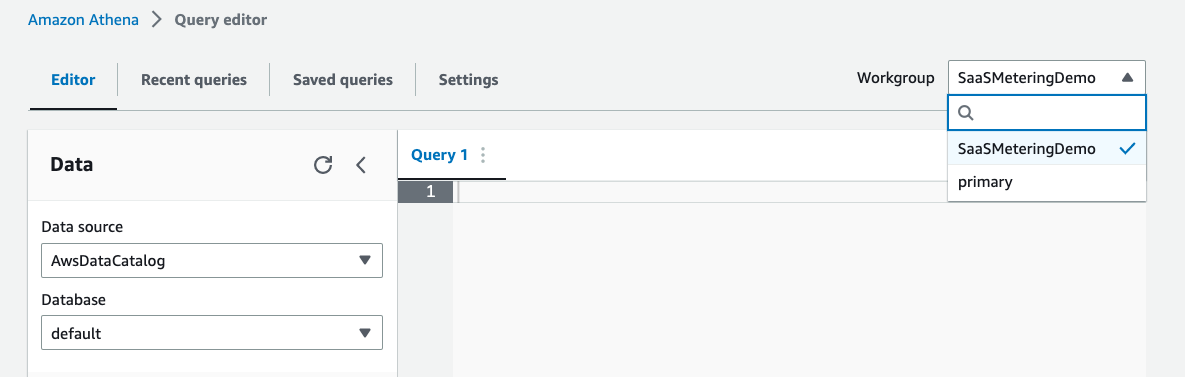
(step 1) Specify the workgroup to use
To run queries, switch to the appropriate workgroup like this:
-
(step 2) Create a database
In order to create a new database called
mydatabase, enter the following statement in the Athena query editor and click the Run button to execute the query.CREATE DATABASE IF NOT EXISTS mydatabase
-
(step 3) Create a table
Copy the following query into the Athena query editor, replace the
xxxxxxxin the last line underLOCATIONwith the string of your S3 bucket, and execute the query to create a new table.CREATE EXTERNAL TABLE mydatabase.restapi_access_log_json ( `requestId` string, `ip` string, `user` string, `requestTime` timestamp, `httpMethod` string, `resourcePath` string, `status` string, `protocol` string, `responseLength` integer) PARTITIONED BY ( `year` int, `month` int, `day` int, `hour` int) ROW FORMAT SERDE 'org.openx.data.jsonserde.JsonSerDe' STORED AS INPUTFORMAT 'org.apache.hadoop.mapred.TextInputFormat' OUTPUTFORMAT 'org.apache.hadoop.hive.ql.io.IgnoreKeyTextOutputFormat' LOCATION 's3://apigw-access-log-to-firehose-xxxxx/json-data'
If the query is successful, a table named
restapi_access_log_jsonis created and displayed on the left panel under the Tables section.If you get an error, check if (a) you have updated the
LOCATIONto the correct S3 bucket name, (b) you have mydatabase selected under the Database dropdown, and (c) you haveAwsDataCatalogselected as the Data source.ℹ️ If you fail to create the table, give Athena users access permissions on
mydatabasethrough AWS Lake Formation, or you can grant anyone using Athena to accessmydatabaseby running the following command:(.venv) $ aws lakeformation grant-permissions \ --principal DataLakePrincipalIdentifier=arn:aws:iam::{account-id}:user/example-user-id \ --permissions CREATE_TABLE DESCRIBE ALTER DROP \ --resource '{ "Database": { "Name": "mydatabase" } }' (.venv) $ aws lakeformation grant-permissions \ --principal DataLakePrincipalIdentifier=arn:aws:iam::{account-id}:user/example-user-id \ --permissions SELECT DESCRIBE ALTER INSERT DELETE DROP \ --resource '{ "Table": {"DatabaseName": "mydatabase", "TableWildcard": {}} }' -
(step 4) Load the partition data
Run the following query to load the partition data.
MSCK REPAIR TABLE mydatabase.restapi_access_log_json;
After you run this command, the data is ready for querying.
Instead of
MSCK REPAIR TABLEcommand, you can use theALTER TABLE ADD PARTITIONcommand to add each partition manually.For example, to load the data in
s3://apigw-access-log-to-firehose-xxxxx/json-data/year=2023/month=01/day=10/hour=06/
you can run the following query.ALTER TABLE mydatabase.restapi_access_log_json ADD IF NOT EXISTS PARTITION (year=2023, month=1, day=10, hour=6) LOCATION 's3://apigw-access-log-to-firehose-xxxxx/json-data/year=2023/month=01/day=10/hour=06/';
-
(Optional) (step 5) Check partitions
Run the following query to list all the partitions in an Athena table in unsorted order.
SHOW PARTITIONS mydatabase.restapi_access_log_json;
-
-
Run test query
Enter the following SQL statement and execute the query.
SELECT COUNT(*)
FROM mydatabase.restapi_access_log_json;
-
Merge small files into large one
When real-time incoming data is stored in S3 using Kinesis Data Firehose, files with small data size are created.
To improve the query performance of Amazon Athena, it is recommended to combine small files into one large file.
Also, it is better to use columnar dataformat (e.g.,Parquet,ORC,AVRO, etc) instead ofJSONin Amazon Athena.
To run these tasks periodically, the AWS Lambda function that executes Athena's Create Table As Select (CTAS) query has been deployed.
Now we create an Athena table to query for large files that are created by periodical merge files task.CREATE EXTERNAL TABLE mydatabase.restapi_access_log_parquet ( `requestId` string, `ip` string, `user` string, `requestTime` timestamp, `httpMethod` string, `resourcePath` string, `status` string, `protocol` string, `responseLength` integer) PARTITIONED BY ( `year` int, `month` int, `day` int, `hour` int) ROW FORMAT SERDE 'org.apache.hadoop.hive.ql.io.parquet.serde.ParquetHiveSerDe' STORED AS INPUTFORMAT 'org.apache.hadoop.hive.ql.io.parquet.MapredParquetInputFormat' OUTPUTFORMAT 'org.apache.hadoop.hive.ql.io.parquet.MapredParquetOutputFormat' LOCATION 's3://apigw-access-log-to-firehose-xxxxx/parquet-data'
After creating the table and once merge files task is completed, the data is ready for querying.


Delete the CloudFormation stack by running the below command.
(.venv) $ cdk destroy --force --all
cdk lslist all stacks in the appcdk synthemits the synthesized CloudFormation templatecdk deploydeploy this stack to your default AWS account/regioncdk diffcompare deployed stack with current statecdk docsopen CDK documentation
Enjoy!
- Amazon API Gateway - Logging API calls to Kinesis Data Firehose
- Setting up CloudWatch logging for a REST API in API Gateway
- Amazon API Gateway - $context Variables for data models, authorizers, mapping templates, and CloudWatch access logging
- Amazon AIP Gateway - Integrate a REST API with an Amazon Cognito user pool
- Building fine-grained authorization using Amazon Cognito, API Gateway, and IAM (2021-05-21)
- How to resolve "Invalid permissions on Lambda function" errors from API Gateway REST APIs
- AWS Lake Formation - Create a data lake administrator
- AWS Lake Formation Permissions Reference
- Tutorial: Schedule AWS Lambda Functions Using CloudWatch Events
- Amazon Athena Workshop
- Curl Cookbook
See CONTRIBUTING for more information.
This library is licensed under the MIT-0 License. See the LICENSE file.