Datadog Webhook to Trigger Telegram Notifications

Background
This project is forked from https://github.com/traveloka/datadog-webhook-telegram.
The following changes have been made from the original:
- Split warnings and errors into two different Telegram channels
(
TELEGRAM_WARNING_CHAT_IDandTELEGRAM_CRITICAL_CHAT_ID). - Use
sendPhotoendpoint for warnings and errors, andsendMessageendpoint when the alert recovers, so that the graphs look better, and so that the message is cleaner without the link to the graph in it. - Reformatted the message content to only include
event_titleandalert_status, to make the messages cleaner, but added support for some additional fields in the webhook if anyone else wants to use them. - Added missing auth credentials to the documentation.
- Added a Python script to generate the Basic Authorization JSON header that Datadog needs to use to authenticate the requests it makes to the Webhook.
- Upgraded docs from Python 3.7 to Python 3.9, since all Python3 versions prior to 3.9.1 are vulnerable to CVE-2021-3177.
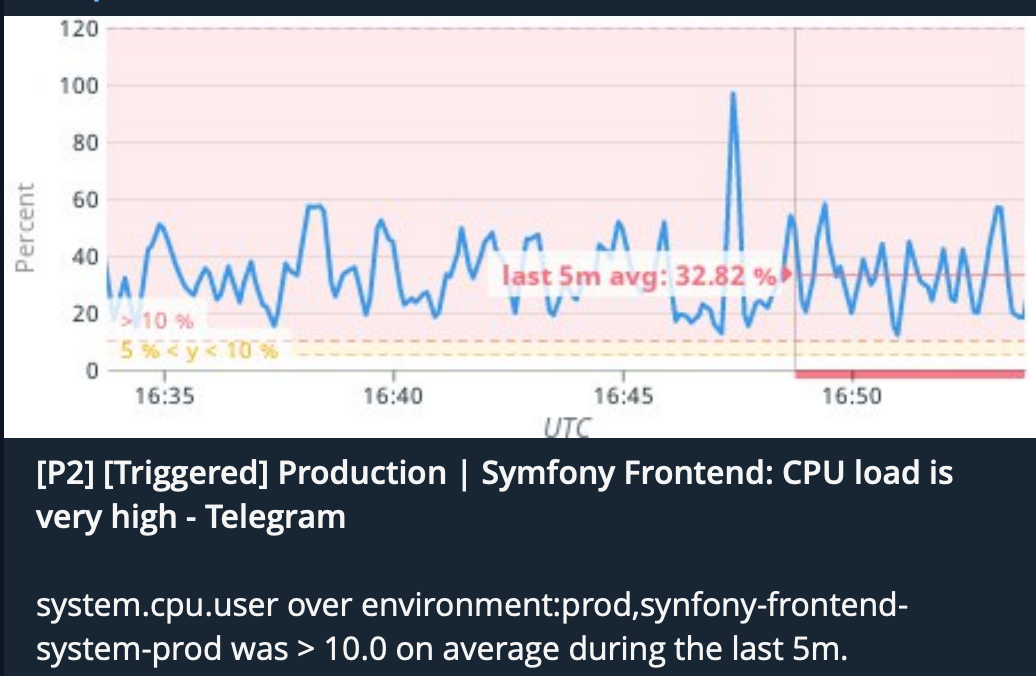
Example Telegram Notification:
Prerequisites
- Install ngrok.
brew install ngrok- Ensure your System Python3 version is 3.9, but greater than 3.9.1.
python3 -V- If your System Python is not 3.9:
brew install python@3.9
brew link python@3.9- If your Sytem Python is 3.9 but not greater than 3.9.1:
brew update
brew upgrade python@3.9- Create a new Telegram Bot and take note of the Bot Token.
- Create two new Telegram channels, one for warnings and one for errors and add the bot into them as an Admin user.
- Export the environment variables that are required by the webhook:
export TELEGRAM_BOT_TOKEN='<BOT_TOKEN>'
export TELEGRAM_WARNING_CHAT_ID='<WARNING_CHAT_ID>'
export TELEGRAM_CRITICAL_CHAT_ID='<CRITICAL_CHAT_ID>'
export HTTP_AUTH_USERNAME='<USERNAME_TO_AUTH_DATADOG_WEBHOOK>'
export HTTP_AUTH_PASSWORD='<PASSWORD_TO_AUTH_DATADOG_WEBHOOK>'
Datadog Webhook Configuration
- Login to Datadog.
- Navigate to Integrations -> Integrations -> Search for Webhooks -> Configure.
- Navigate to the bottom and insert the Name and URL of the receiver.
eg:
Name : Telegram_Notifications
URL : https://0f379388.ngrok.io
- Tick the
Use Custom Payloadcheckbox and enter the following JSON content intoPayloadinput box:
{
    "alert_priority": "$ALERT_PRIORITY",
    "alert_query": "$ALERT_QUERY",
    "alert_status": "$ALERT_STATUS",
    "alert_title": "$ALERT_TITLE",
    "alert_transition": "$ALERT_TRANSITION",
    "alert_type": "$ALERT_TYPE",
    "event_title": "$EVENT_TITLE",
    "event_type": "$EVENT_TYPE",
    "link": "$LINK",
    "priority": "$PRIORITY",
    "snapshot": "$SNAPSHOT",
    "text_only_msg": "$TEXT_ONLY_MSG",
    "tags": "$TAGS",
    "user": "$USER"
}- Tick the
Custom Headerscheckbox. - Ensure that the
Encode as formcheckbox is NOT ticked. - Ensure that your
HTTP_AUTH_USERNAMEandHTTP_AUTH_PASSWORDenvironment variables are configured (see Prerequisites above). - Run the
generate_basic_auth.pyscript in your terminal to generate your Basic Authorization header for the Datadog webhook to prevent random unauthenticated requests from being processed by your webhook.
python3 generate_basic_auth.py- This should return an HTTP Basic Authorization header in JSON format that will be used to authenticate requests to your Webhook receiver, for example:
{
    "Authorization": "Basic d0gcatM0us3Ra8b1T"
}- Paste the JSON returned by the script into the input box below the
Custom Headerscheckbox. - Click the
SaveButton.
Testing your Webhook
- Run the webhook receiver from your terminal.
python3 telegram_webhooks.py- Open a new terminal window and use ngrok to create a URL that is publically accessible through the internet by creating a tunnel to the webhook receiver that is running on your local machine.
ngrok http 8090- Note that the ngrok URL will change if you stop ngrok and run it again, so keep it running in a separate terminal window, otherwise you will not be able to test your webhook successfully.
- Update your Datadog webhook configuration to the URL that is displayed while ngrok is running (be sure to use the https one).
- Login to Datadog and configure a Monitor to send alerts to your Webhook
by adding the Webhook name in the
Notify your teamsection, eg.@webhook-Telegram_Notifications. You will probably want to either clone an existing Monitor and lower the thresholds dramatically so that alerts can be triggered for testing purposes, or alternatively create a new Monitor also setting the thresholds to values that will trigger notifications that will allow you to test your Webhook. - Check your Telegram channels that you crated for your Datadog notifications that have the bot running within them.
Deploy to AWS Lambda
- Create a Python 3.9 Virtual Environment:
python3 -m venv venv/py3.9
source venv/py3.9/bin/activate- Upgrade pip.
python3 -m pip install --upgrade pip- Install the Python dependencies that are required by the Webhook receiver:
pip3 install -r requirements.txt- Create a file called
zappa_settings.jsonand insert the JSON content below to configure your AWS Lambda deployment:
{
    "production": {
        "app_function": "telegram_webhooks.app",
        "aws_region": "us-east-1",
        "profile_name": "default",
        "project_name": "datadog-webhook",
        "runtime": "python3.9",
        "s3_bucket": "datadog-telegram-webhooks",
        "environment_variables": {
            "TELEGRAM_BOT_TOKEN":"<BOT_TOKEN>",
            "TELEGRAM_WARNING_CHAT_ID":"<WARNING_CHAT_ID>",
            "TELEGRAM_CRITICAL_CHAT_ID":"<CRITICAL_CHAT_ID>",
            "HTTP_AUTH_USERNAME":"<HTTP_AUTH_USERNAME>",
            "HTTP_AUTH_PASSWORD":"<HTTP_AUTH_PASSWORD>"
        }
    }
}- Use Zappa to deploy your Webhook to AWS Lambda (this is installed as part of the dependencies above):
zappa deploy- Take note of the URL that is returned by the
zappa deploycommand, eg.https://1d602d00.execute-api.us-east-1.amazonaws.com/production(obviously use your own and don't copy and paste this one, or your Webhook will not work).
NOTE: If you get the following error when running the zappa deploy command:
botocore.exceptions.ClientError:
An error occurred (IllegalLocationConstraintException) when calling
the CreateBucket operation: The unspecified location constraint
is incompatible for the region specific endpoint this request was sent to.
This error usually means that your S3 bucket name is not unique, and that you should change it to something different, since the S3 bucket names are not namespaced and are global for everyone.
- Check the status of the API Gateway URL that was created by zappa:
zappa status- Test your webhook by making a curl request to the URL that was returned
by
zappa deploy:
curl https://1d602d00.execute-api.us-east-1.amazonaws.com/production
You should expect the following response:
{"status":"ok"}- Update your Webhook URL in Datadog to the one returned by the
zappa deploycommand. - You can view your logs by running:
zappa tail