In this tutorial, we will guide you through the process of connecting an Arduino Nano MKR 1310 device to the Helium network and sending data to w3bstream.
Before you begin, make sure you have the following:
- Arduino Nano MKR WAN 1310 board
- The Arduino IDE installed
- A Helium Console account
- A w3bstream Studio account
- Familiarity with using the Arduino IDE to upload and edit a sketch
- Connect your Arduino Nano MKR 1310 board to your computer using a USB cable.
- Open the Arduino IDE.
- Install the Arduino SAMD core by going to Tools > Board > Boards Manager and searching for "Arduino SAMD Boards". Install the latest version.
- Install the MKRWAN library by going to Sketch > Include Library > Manage Libraries and searching for "MKRWAN". Install the latest version of the MKRWAN library. NOTE: do not install the MKRWAN_v2 library.
- Select Tools > Board > Arduino MKR WAN 1310.
- Select the appropriate port under Tools > Port.
If you need more detailed information, see the MKR WAN 1310 getting started guide.
You are now ready to proceed with the next steps.
Before you start, update the modem firmware by uploading and running the example MKRWANFWUpdate_standalone from the MKRWAN library:
- Open the Arduino IDE and select File > Examples > MKRWAN > MKRWANFWUpdate_standalone.
- Open the Serial Monitor by clicking the magnifying glass icon in the top right corner of the Arduino IDE. Set the baud rate to 115200.
- Click the Upload button to upload the sketch to your board.
- Wait until the sketch finished programmming the new firmware.
- Upload the sketch provided in this tutorial to your Arduino Nano MKR 1310.
- Open the Arduino Serial Monitor. Set the baud rate to 115200.
- The device EUI will be printed in the Serial Monitor like below:
18:42:34.144 -> Your module version is: ARD-078 1.2.3
18:42:34.144 -> Your device EUI is: a8610a3233437400- Copy this EUI, you'll need to add it to the Helium console on the next step.
Follow the guide at Helium Console Device Addition to add your device to the Helium Console. Use the Device EUI obtained in the previous step during the device creation process.

In the Arduino sketch, replace the following text with the values you see in the Helium Console for the device you just created:
- YOUR_APP_EUI : replace with the value of App EUI you see in Helium console for your device.
- YOUR_APP_KEY: replace with the value of App Key you see in Helium console for your device.
Follow the guide at w3bstream Project Creation to create a w3bstream project.
Create a new project using the hello_world template.

Follow the guide at Registering a Device in w3bstream to register your device in the w3bstream project.
In the Arduino sketch, replace YOUR_DEVICE_NAME with the name of the device you just created.

Follow the next steps to generate your API key:
- In w3bstream Studio, click on your wallet address in the top right corner.
- Click on Settings
- Add a new API key with Event privileges set to Read/Write.
- Copy the newly generated API key, you'll need to add it to yout Helium integration later.

If desired, replace the value of the message variable in the Arduino sketch with your own message.
Create a Custom function in Helium console. Refer to https://docs.helium.com/console/functions for details.
Copy the following code into the Custom script textbox:
function Decoder(bytes, port, uplink_info) {
    const { dev, msg } = JSON.parse(String.fromCharCode(...bytes));
    return { dev, msg };
}
Create a new HTTP integration in the Helium console. Refer to https://docs.helium.com/console/integrations/http for details.
Configure the integration as follows:
- Set the HTTP method to POST
- Set the endpoint URL to the HTTP route of your w3bstream project
- Add the following HTTP header:
- Key: Authorization
- Value: Bearer followed by your w3bstream API key
- Add the following URL parameter:
- Key: eventType
- Value: DA-TA_PU-SH

- Enter the following in Template body
[{
  "device_id": "{{decoded.payload.dev}}",
  "event_type": "DEFAULT",
  "payload": "{{decoded.payload.msg}}"
}]
Create a new flow in the Helium console. Refer to https://docs.helium.com/console/flows/actions for details.
Configure the flow as follows:
- Add your device to the flow
- Add the decoder funtion to the flow, and link it to your device
- Add the http integration to your flow, and link it to the decoder function
- You should have a flow like devide->decoder->integration

Ensure you have enough Data Credits in your Helium account to use the network. Refer to Data Credits Documentation for details.
- Upload the modified Arduino sketch to your Arduino Nano MKR 1310.
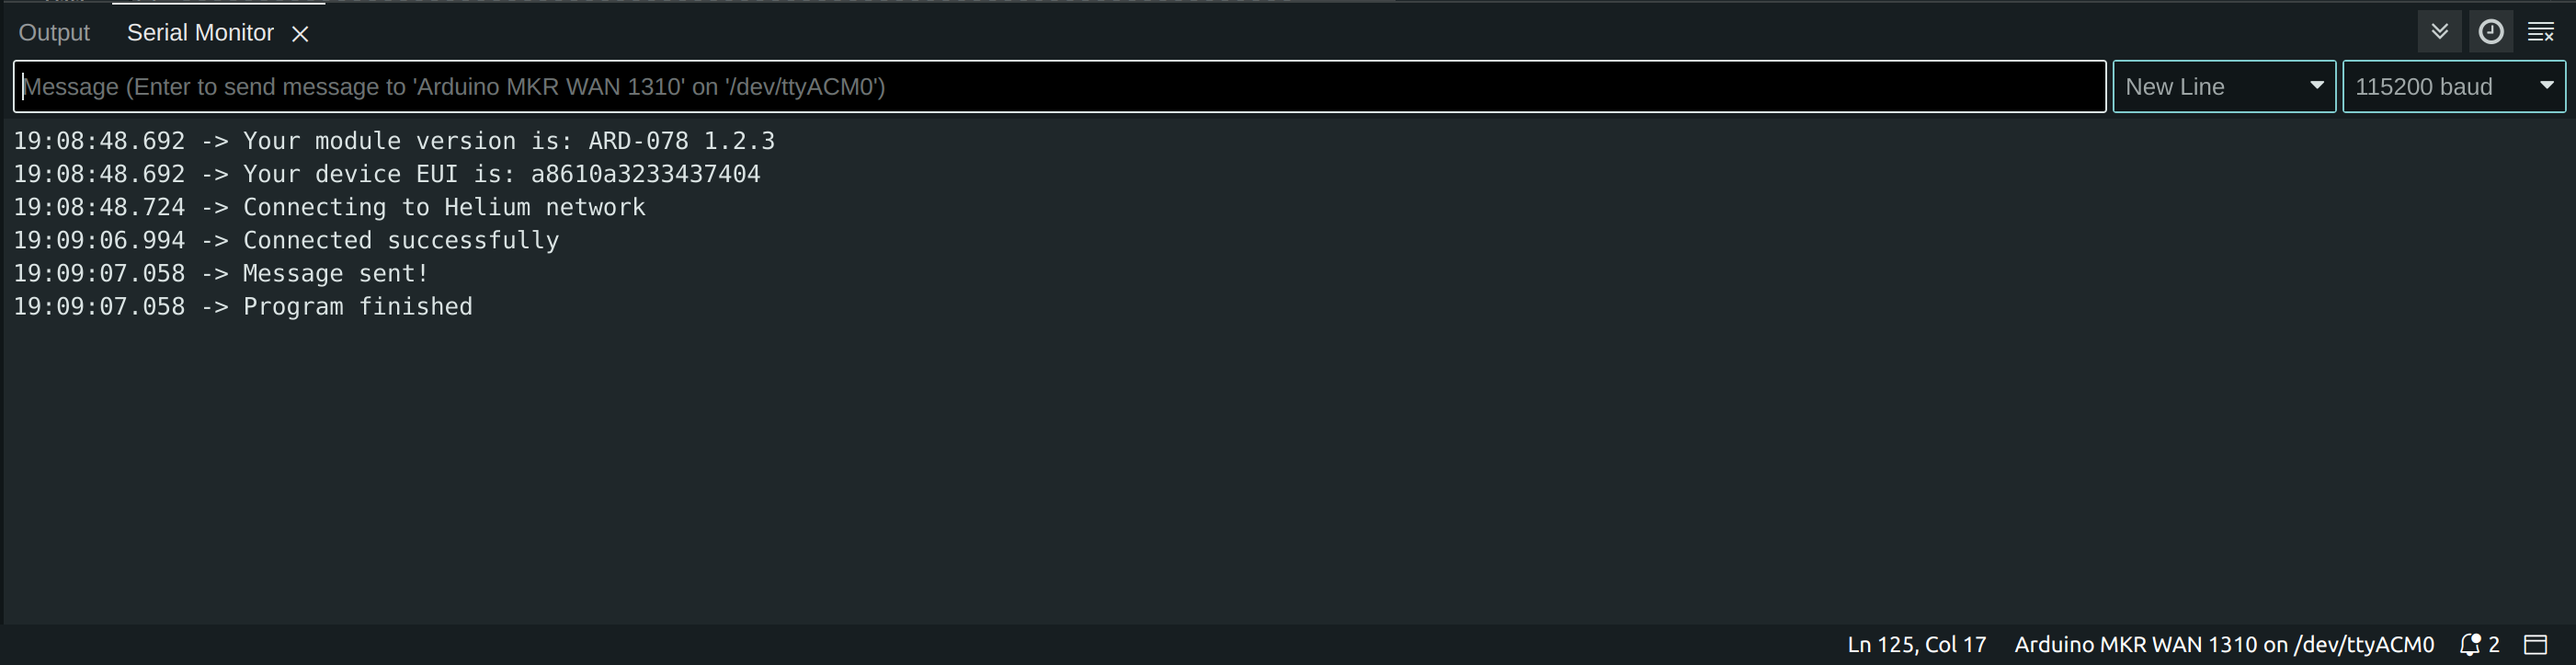
- Monitor the Serial Monitor for possible errors. If there are no errors, you should see something like this:
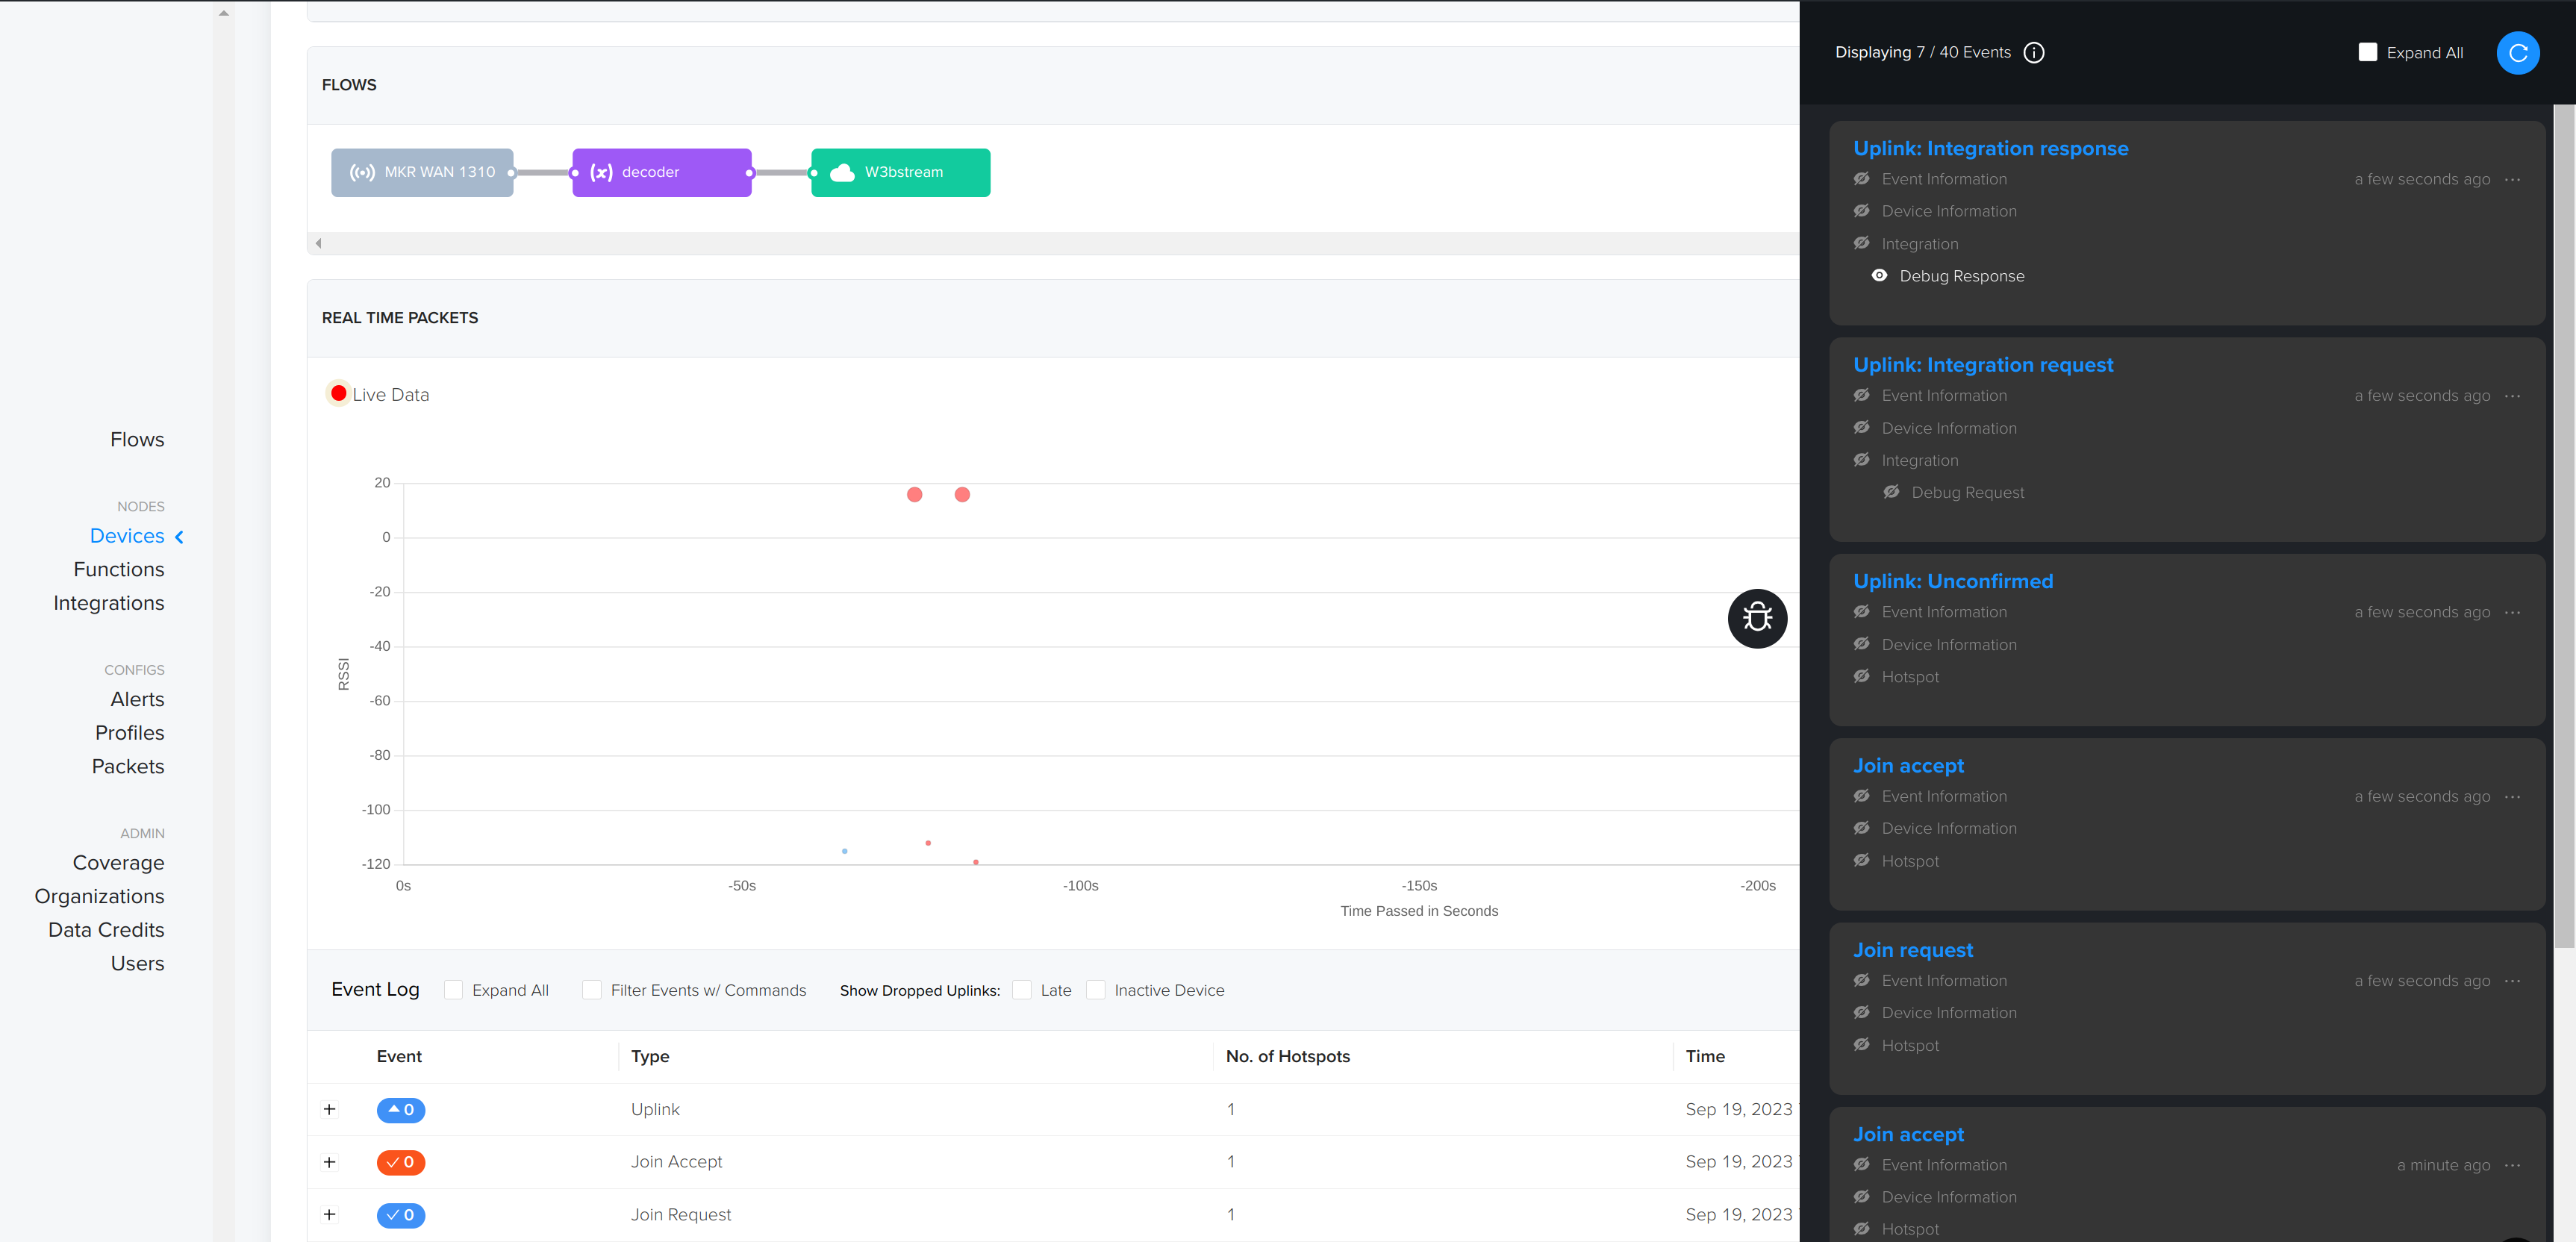
- Monitor the Helium debug console to see the device activity and optional debug information.
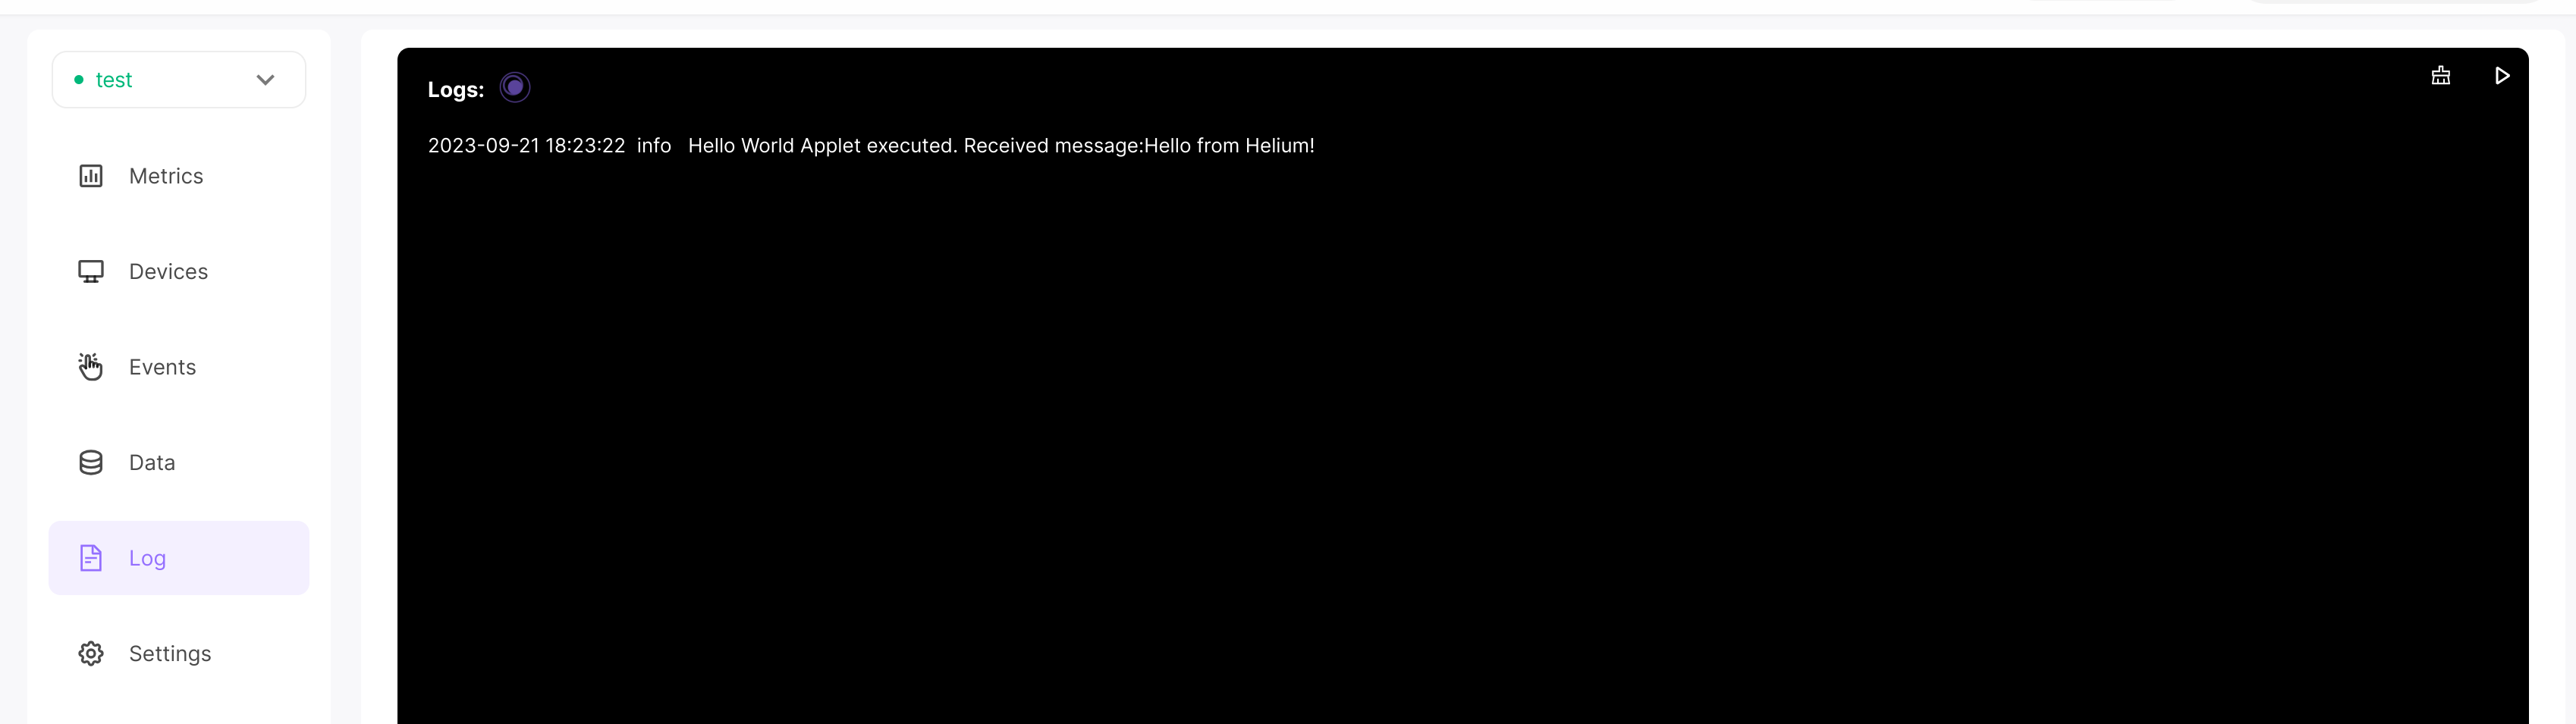
- Check the w3bstream project logs in w3bstream studio; you should see the message printed there.


Congratulations! You have successfully integrated your Arduino Nano MKR 1310 with Helium and w3bstream. Your device can now send data to w3bstream via the Helium network.