This tutorial contains step-by-step instructions on creating your first Docker image and container for a basic web server app written in Python.
After creating a Docker container with your application, you can deploy it to your Kubernetes cluster.
This tutorial is for Linux users.
A Docker image provides an isolated filesystem to run the container. The image must contain everything needed to run your application — the operating system, all dependencies, configurations, scripts, binaries, etc. The image also contains configuration data for the container, such as environment variables, a default command to run, and other metadata.
A Docker container is a sandboxed process running on a host machine. A container:
- Is a runnable instance of an image.
- Can be run on local machines, virtual machines, or deployed to the cloud.
- Is portable and can be run on any OS.
- Is isolated from other containers and runs its own software, binaries, configurations, etc.
- You have installed the latest version of Docker Desktop or Docker Engine.
- You have a text editor to edit files.
-
Create the directories to store your application source code and Docker metadata:
# Your project root
mkdir quickstart_docker
# Application source code
mkdir quickstart_docker/application
# Docker configuration files
mkdir quickstart_docker/docker
# Dockerfile location
mkdir quickstart_docker/docker/application
[!NOTE]
This is a suggested directory structure to organize the Docker and application files. You can use a directory structure better suited for your project. -
Go to the
quickstart_dockerdirectory. Replace/path/to/quickstart_dockerwith the path to yourquickstart_dockerdirectory:cd /path/to/quickstart_docker -
Create the application file:
touch application/application.py
-
Using a text or code editor, add the sample HTTP server Python code in the
application.pyfile:import http.server import socketserver import os # Listen to port 8800 PORT = 8800 # Serve files from the current directory # directly mapping the directory structure to HTTP requests Handler = http.server.SimpleHTTPRequestHandler # Create and listen at the HTTP socket, # dispatching the requests to the handler. httpd = socketserver.TCPServer(("", PORT), Handler) # Echo current status to the console and server logs. # It will be shown as the first line in the 'docker logs' command output. os.system(f"echo 'serving at port {PORT}'") # Handle requests until the server is terminated. httpd.serve_forever()
-
Create the
Dockerfile:touch docker/application/Dockerfile
-
Add the following Docker image configuration in the
Dockerfile:# Use the base Python image from the Docker Hub FROM python:3.9 # Set the working directory of the Docker container to '/app'. # Any RUN, CMD, ADD, COPY, and ENTRYPOINT # commands will be executed in the specified directory. WORKDIR /app # Copy the 'application' directory contents into the container at '/app' COPY ./application /app # Make port 8800 available to the world outside the container EXPOSE 8800 # Execute 'python3 /app/application.py' when the container launches CMD ["python3", "/app/application.py"]
-
View the contents of the
quickstart_dockerdirectory, using thetreecommand. You should see the following structure:└── quickstart_docker ├── application │ └── application.py └── docker └── application └── Dockerfile
-
Build your application image using the
docker buildcommand:docker build . -f docker/Dockerfile -t exampleappThe
docker buildcommand above uses the following options:.— use the current directory as the build context.-f— specify theDockerfilepath:docker/Dockerfile.-t— tag the image, giving it a human-readable name:exampleapp. You can refer to the image name when running the container.
-
View the image list:
docker images
-
You should see the following:
REPOSITORY   TAG       IMAGE ID       CREATED       SIZE
exampleapp   latest    22a44e06fe8d   1 minute ago  997MB
-
Create and run a container from your image:
docker run --name server -p 128.0.0.1:8800:8800 -d exampleapp
The
docker runcommand above uses the following options:-p— publish the container's port8800to127.0.0.1:8800(localhost:8800) on the host. Without this port mapping, you won't be able to access the application from the host.-d— run the container in the background.--name— assign the nameserverto the container.exampleapp— the name of the image to containerize.
-
You should see the container ID, similar to the following:
f7a6449f80ee87003e40ef7746fd102695c4910ee94906e0711f97ca1765068f -
Open your web browser to http://localhost:8800. You should see the contents of the
/appdirectory, served by the application in the container: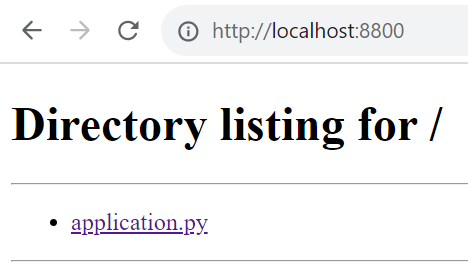
-
Stop the container:
docker container stop server

In the next tutorial, we will show how to share your image to the Docker registry. The default registry is Docker Hub.
You can also read the official Docker guide on sharing the image.