K.I.S.S.S. Keep It Simple Slide Scanner is an other DIY slide scanner project. Here you'll find informations about how I went into this scanning project. It is provided "as is". For sure you'll need to adapt it to match your own installation.
It uses a simple projector lens trick by adding a white midsole between lenses which will illuminate the slides. It then allows a DSLR to capture a slide by photographing it directly from the projector instead of the projected picture.

It uses a Raspberry Pi which control the slide projector via a simple relay module and a DSLR camera to capture the slides. Then it does some post processing operations and send it straight to the cloud ! oh yeah
My dad was doing a lot (LOT) of photographies, exclusively on slides. From the early 1960's up to the 1990's. During this time he did more than 10'000 photos. Not a bad score at a time where you had to go to corner shop to develop them! Since 30 years, for many reasons, those slides and their memories are sleeping in a attic...

Now you understand why I needed some automations to accomplish this task :-)
My goal was to capture those 10'000 slides. First to keep all those memories in a safe place and also to have an easy and confortable way to watch them. Resulting scan quality is beyond my expectations. Far more than acceptable for display, maybe not enough for print. It depends of many factors. With this DIY scanner It takes about 3 minutes to scan a 50 slides's rack. With some optimizations (like working exclusively in RAM) it could even take a single minute.
- Slide projector with wired remote
- Wired remote from those times are easily "hackable". They're just made of electrical contacts. I kept the original 6 DIN connector which go to the projector and plugged the other side to a relay instead of the remote.


- DSLR photo camera with USB remote capabilities (see Gphoto2 below)
- I use a Canon 700d with a 70-300mm TAMARON lens in macro mode. I put every settings in manual mode except ISO.


- Raspberry Pi
- I use a Raspberry 4 but all of them should work. Keep in mind that if you do some post processing operations, the more cpu/ram it has, faster it'll run !


- Relay module
- A simple relay module which is used to control the slide projector from the Raspberry Pi's GPIO.


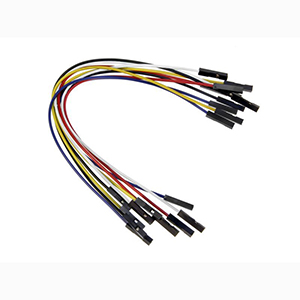
- Few Dupont wires
- Classics female to female Dupont wires to plug the Raspberry Pi GPIOs to the relay module.

- A tripod
- Optional but very useful depending on your setup.


-
Raspbian (now called Raspberry Pi OS)
- Raspbian is a Debian-based operating system for Raspberry Pi. [https://www.raspberrypi.org/downloads/raspberry-pi-os/]
-
Python
- Python was the best choice for many reasons... Ease of use, tons of libraries to manage the Rasp , the post processing stuffs and the cloud interaction.
-
Gphoto 2
- gPhoto2 is a free, redistributable, ready to use set of digital camera software applications for Unix-like systems, written by a whole team of dedicated volunteers around the world. It supports more than 2500 cameras
- Check if your DSLR is supported here : http://www.gphoto.org/proj/libgphoto2/support.php
- I suggest this automated installer to have the lastest bits of this wonderful software : https://github.com/gonzalo/gphoto2-updater/ . This script allows to install last development and last stable releases of gphoto2 and libgphoto2 based on git repositories
-
OpenCV library
- OpenCV (Open Source Computer Vision Library) is an open source computer vision and machine learning software library. I use it in the post processing stage for multiple purposes : intelligent cropping (thx mec!) , mirroring , rotating, "final polish" , etc...
-
Nextcloud
- Nextcloud offers the industry-leading, on-premises content collaboration platform. Since I use this software since many years to store all my files and especially pictures, it was a natural choice to use it at final stage to push all my scans into it. I love the way I can browse my content, from my computer , my phone , my TV using Kodi through the webdav access , or whatever ... it has it all !
- To push pictures to a Nextcloud instance I use Tavinus Cloud Manager (https://github.com/tavinus/cloudmanager) . This is Nextcloud / Owncloud CLI Webdav Client which uses
curlto access the Nextcloud webdav service.

K.I.S.S.S. is just made of 2 main scripts. The "capture script" called KISSS.py and the post processing script called post-processing.py.
1. Setup your hardware
Install all your hardware on a table and wire everything.
Put the projector ON with a sample slide.
VERY IMPORTANT STEP : calibrate your camera with the sample slide. Be sure to have the right (manual) focus and that the picture takes the whole frame in the camera target. If it doesn't (because of your lens setup) an intelligent cropping will be done on post-processing stage.
2. Setup the KISSS.py script
There are 2 variables to edit at the begining of the script :
baseFolder : Base folder where folders and pictures will be created
relayPin : Raspberry GPIO pin where you plugged the relay which manage projector remote
3. Capture
You're now ready for the capture. Just launch KISSS.py with a name as parameter. In my case I use the slide box number as name to have a correspondance between folder name and physical slide box number.
./KISSS.py 001
This command will launch a 50 slides scan in a row and put raw files into baseFolder/001 folder.
4. Post processing
After your capture is done , you'll have a folder full of pictures. Now it's time to post process them. In my case I needed to crop, mirror and rotate them.
All those step are configurable and optional.
At the very final stage, and if you want to, the post process script can push your pictures to a Nextcloud instance of your choice for better visualisation (and backups).
There are few variables to edit at the begining of the post-processing.py script :
baseFolder : Base folder where folders and pictures will be processed.
mirroring : 1 or 0 , enable or disable automatic mirroring of the picture.
rotating : 1 or 0 , enable or disable automatic rotation of the picture.
degrees : value between 0 and 360 . Degrees value to rotate the picture.
clouding : 1 or 0 , enable or disable automatic upload to a nextcloud instance (see below for nextcloud instance configuration).
remote_path : remote folder on your Nextcloud instance.
./post-processing.py 001
This command will post process all files found in baseFolder/001 folder and put resulting files into baseFolder/001/processed/ and to your Nextcloud instance (if configured).
There are two configuration files that need to be edited
Defines the target server domain, protocol and port
# Edit the shell variables below
CLOUDSERVERDOMAIN='cloud.domain.tld'
CLOUDSERVERPROTOCOL='https://'
CLOUDSERVERPORT=443
Defines the usernames/passwords to be used
The first user is used as default
---- Add accounts one per line, as in USERNAME:PASSWORD
myUsername:myPassword
Here are some samples of my scans. More to come ...