eksctl is a tool that makes it easy to create and add nodes to an EKS cluster.
brew tap weaveworks/tap
brew install weaveworks/tap/eksctl
NOTE: These instructions were tested with 0.1.40. The 0.1.X version changes introduce breaking changes and instructions may need to be updated for newer versions. To download 0.1.40, you can download the binary from here
This will create the EKS cluster (the master nodes). This may take 20+ minutes.
eksctl create cluster -f cluster_config.yaml --auto-kubeconfig
Command Output
$ eksctl create cluster -f cluster_config.yaml --auto-kubeconfig
[ℹ]  using region us-east-1
[✔]  using existing VPC (vpc-f6570b8d) and subnets (private:[] public:[subnet-58b35b04 subnet-b440b9d3 subnet-21ac2f2e])
[!]  custom VPC/subnets will be used; if resulting cluster doesn't function as expected, make sure to review the configuration of VPC/subnets
[ℹ]  using Kubernetes version 1.13
[ℹ]  creating EKS cluster "armand-demo-cluster" in "us-east-1" region
[ℹ]  will create a CloudFormation stack for cluster itself and 0 nodegroup stack(s)
[ℹ]  if you encounter any issues, check CloudFormation console or try 'eksctl utils describe-stacks --region=us-east-1 --name=armand-demo-cluster'
[ℹ]  1 task: { create cluster control plane "armand-demo-cluster" }
[ℹ]  building cluster stack "eksctl-armand-demo-cluster-cluster"
[ℹ]  deploying stack "eksctl-armand-demo-cluster-cluster"
[✔]  all EKS cluster resource for "armand-demo-cluster" had been created
[✔]  saved kubeconfig as "/Users/armanmcq/.kube/eksctl/clusters/armand-demo-cluster"
[ℹ]  kubectl command should work with "/Users/armanmcq/.kube/eksctl/clusters/armand-demo-cluster", try 'kubectl --kubeconfig=/Users/armanmcq/.kube/eksctl/clusters/armand-demo-cluster get nodes'
[✔]  EKS cluster "armand-demo-cluster" in "us-east-1" region is ready
More Details
- An EKS cluster (the master nodes) is very cheap ($0.20 per hour).
- You may want to leave the cluster always running and just remove the GPU worker nodes when you aren't using it.
--auto-kubeconfigis a personal preference. It writes the kubeconfig to a separate file instead of adding it to the main kubeconfig file. See more here:
3. Launch the the worker nodes with eksctl. This will launch the EC2 instances and connect them to the k8s cluster.
eksctl create nodegroup -f nodegroup_config.yaml
Command Output
$ eksctl create nodegroup -f nodegroup_config.yaml
[ℹ]  using region us-east-1
[ℹ]  will use version 1.13 for new nodegroup(s) based on control plane version
[ℹ]  nodegroup "nodegroup-p3dn" will use "ami-0017d945a10387606" [AmazonLinux2/1.13]
[ℹ]  using EC2 key pair "us-east-1-armanmcq-tf-neo"
[ℹ]  1 nodegroup (nodegroup-p3dn) was included
[ℹ]  will create a CloudFormation stack for each of 1 nodegroups in cluster "armand-demo-cluster"
[ℹ]  1 task: { create nodegroup "nodegroup-p3dn" }
[ℹ]  building nodegroup stack "eksctl-armand-demo-cluster-nodegroup-nodegroup-p3dn"
[ℹ]  --nodes-min=4 was set automatically for nodegroup nodegroup-p3dn
[ℹ]  --nodes-max=4 was set automatically for nodegroup nodegroup-p3dn
[ℹ]  deploying stack "eksctl-armand-demo-cluster-nodegroup-nodegroup-p3dn"
[ℹ]  adding role "arn:aws:iam::578276202366:role/eksctl-armand-demo-cluster-nodegr-NodeInstanceRole-LIO93J931ALY" to auth ConfigMap
[ℹ]  nodegroup "nodegroup-p3dn" has 0 node(s)
[ℹ]  waiting for at least 4 node(s) to become ready in "nodegroup-p3dn"
[ℹ]  nodegroup "nodegroup-p3dn" has 4 node(s)
[ℹ]  node "ip-172-31-1-72.ec2.internal" is ready
[ℹ]  node "ip-172-31-15-97.ec2.internal" is ready
[ℹ]  node "ip-172-31-3-4.ec2.internal" is ready
[ℹ]  node "ip-172-31-8-106.ec2.internal" is ready
[ℹ]  as you are using a GPU optimized instance type you will need to install NVIDIA Kubernetes device plugin.
[ℹ]      see the following page for instructions: https://github.com/NVIDIA/k8s-device-plugin
[✔]  created 1 nodegroup(s) in cluster "armand-demo-cluster"
[ℹ]  checking security group configuration for all nodegroups
[ℹ]  all nodegroups have up-to-date configuration
More Details
eksctlcalls this a nodegroup. You could have multiple nodegroup - one with GPU instances, another with CPU instances for example.- You can do this as part of the
eksctl create clusterstep by adding thenodegroup_config.yamlinfo tocluster_config.yaml.
The kubeconfig file holds information and credentials for your cluster(s). You need to tell kubectl to use the kubeconfig for the cluster we just created by setting the KUBECONFIG environment variable.
export KUBECONFIG=~/.kube/eksctl/clusters/armand-demo-cluster
More Details
- Process would be different if we were not using
--auto-kubeconfig. If you store info for multiple cluster on the main kubeconfig file (~/.kube/config), you will need to use thekubectl configcommand.
This tells enables GPU support in k8s.
kubectl create -f https://raw.githubusercontent.com/NVIDIA/k8s-device-plugin/1.0.0-beta/nvidia-device-plugin.yml
More Details
- This is a DaemonSet that runs on each node. It allows you to automatically:
- Expose the number of GPUs on each nodes of your cluster
- Keep track of the health of your GPUs
- Run GPU enabled containers in your Kubernetes cluster.
- https://github.com/NVIDIA/k8s-device-plugin
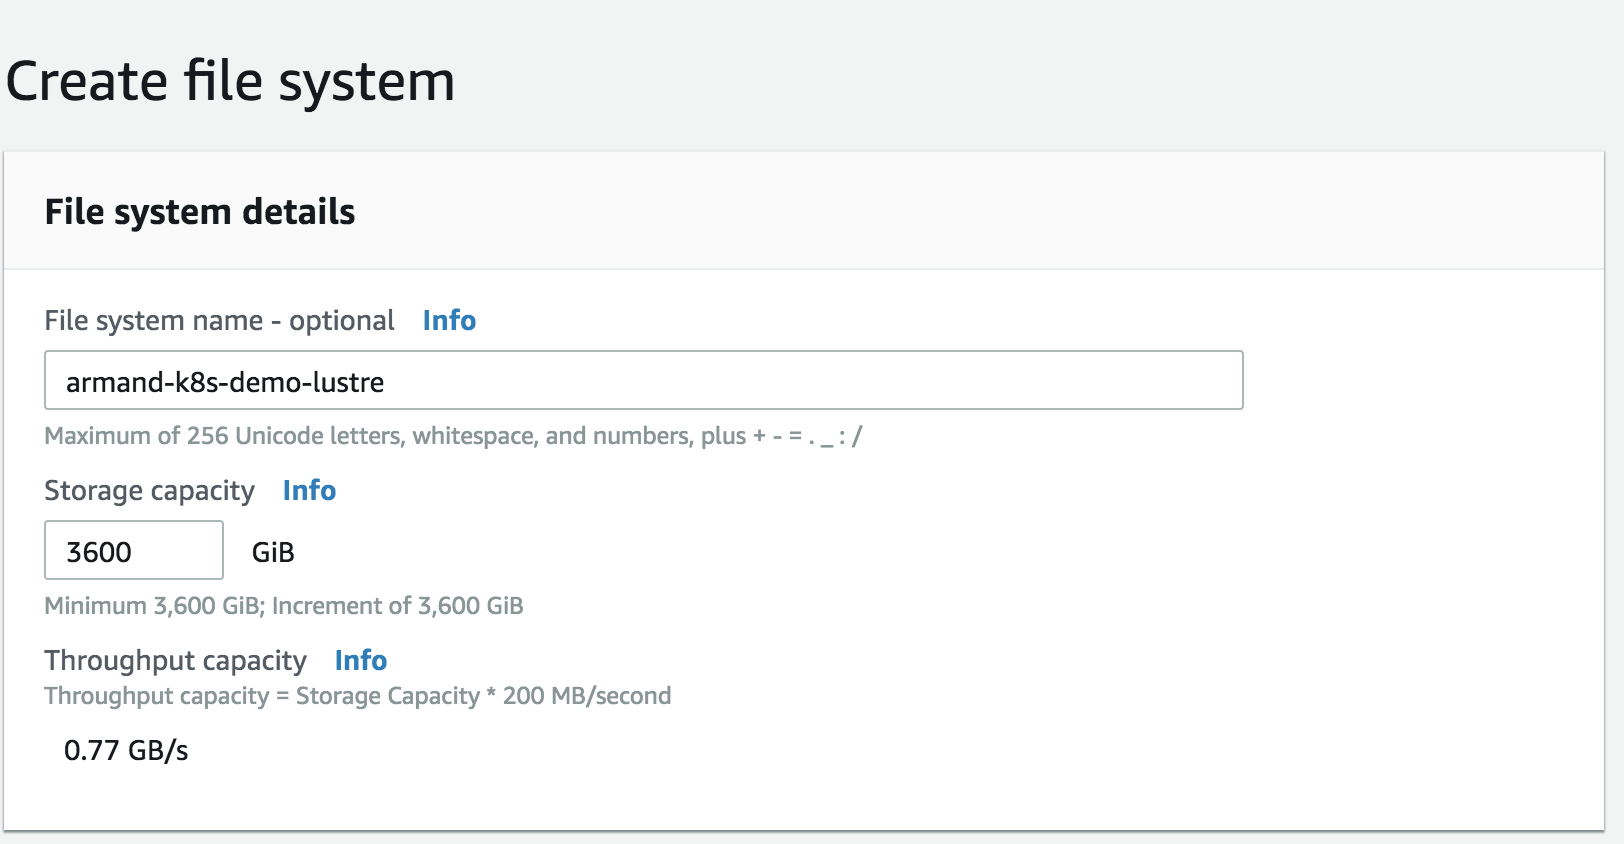
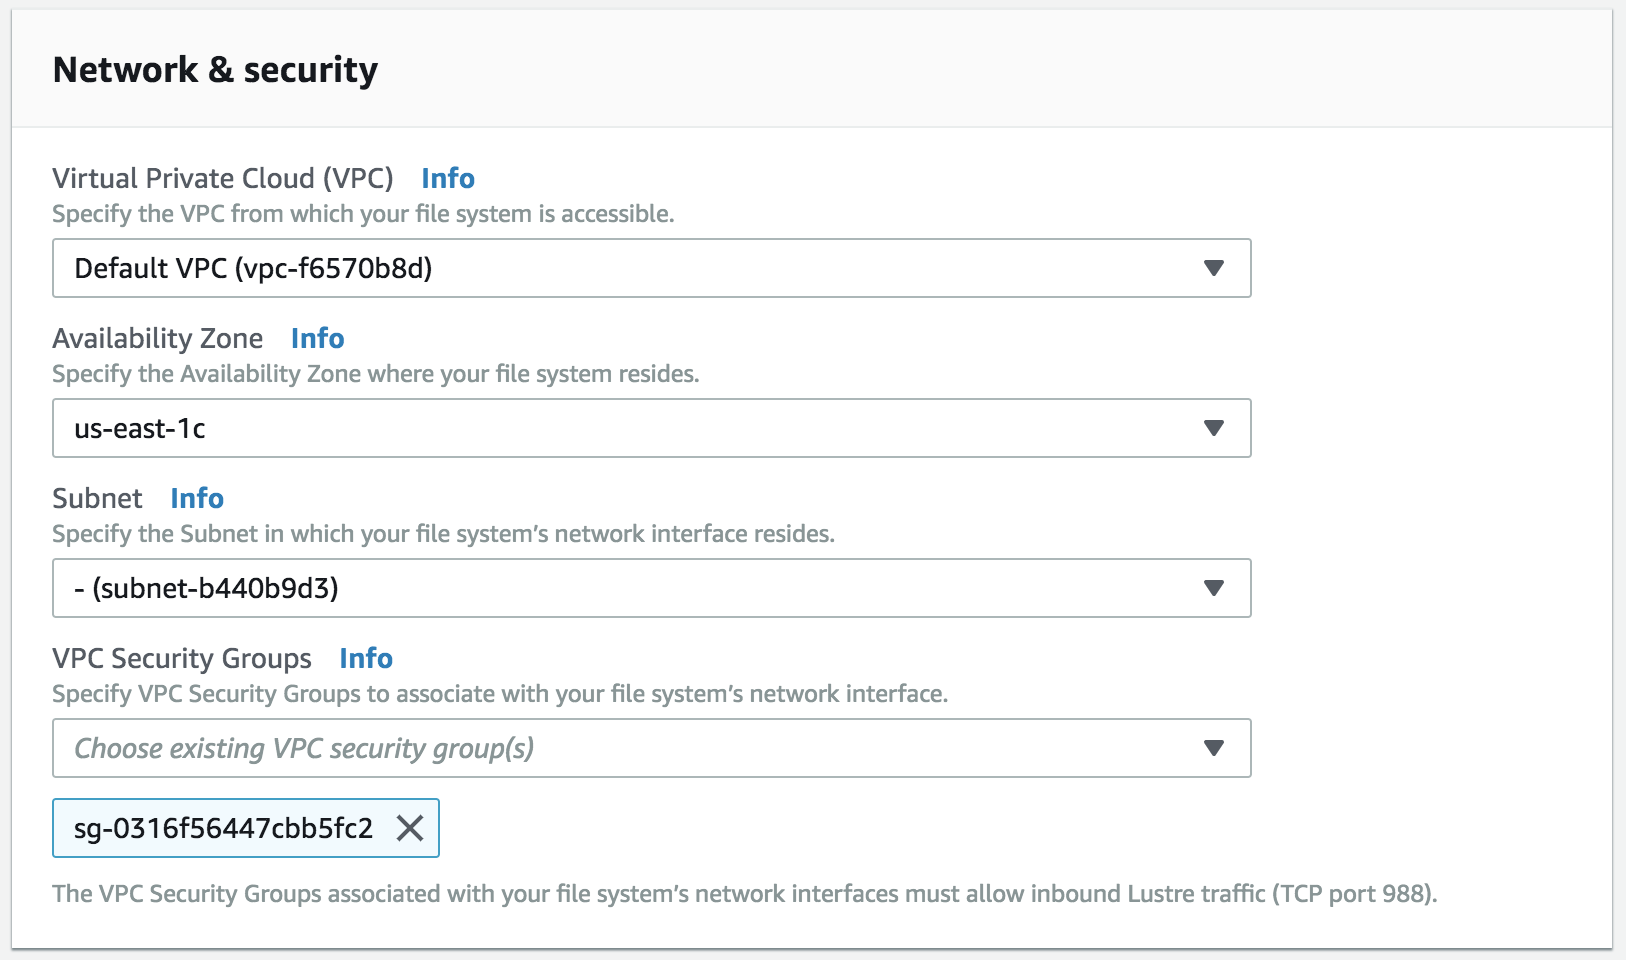
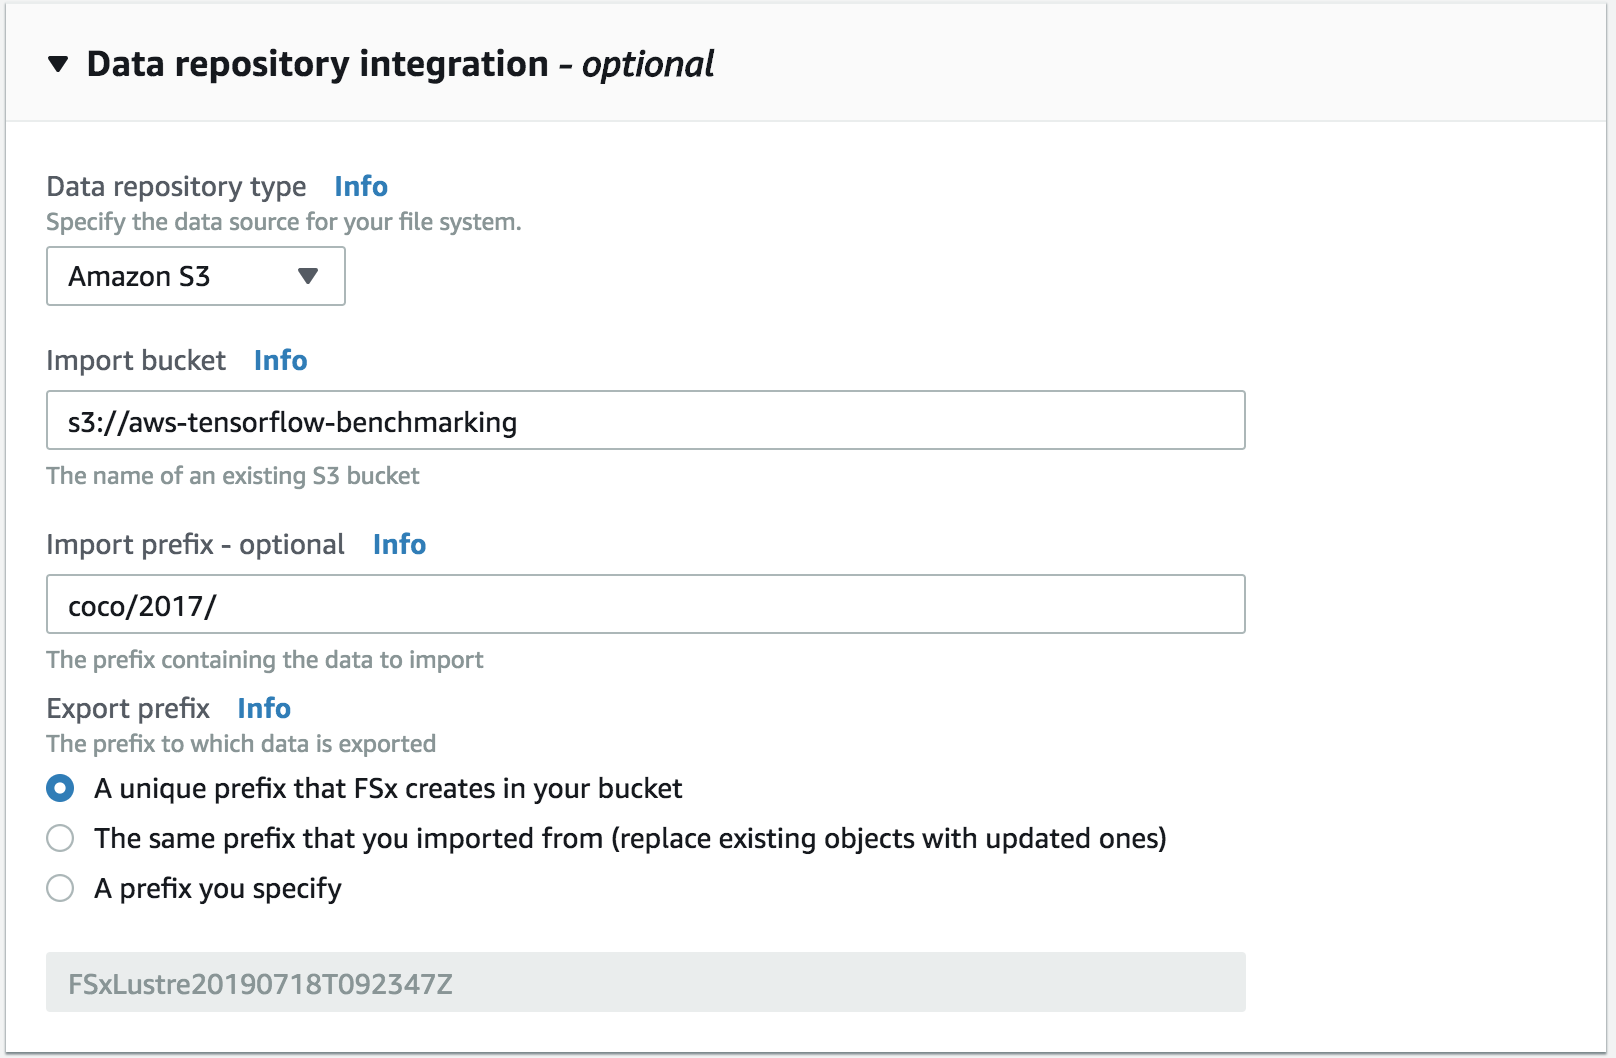
We will be storing data and logs on on FSx.
First we need to create a security group
kubectl apply -f https://raw.githubusercontent.com/kubernetes-sigs/aws-fsx-csi-driver/master/deploy/kubernetes/manifest.yaml
In pv-fsx.yaml, you need to replace the fsx id with the id of the cluster you created (the fields are spec.csi.volumeHandle and spec.csi.volumeAttributes.dnsname).
Also change the region if needed (spec.csi.volumeAttributes.dnsname )
kubectl apply -f pv-fsx.yaml
Confirm success with kubectl get pv
kubectl apply -f pvc-fsx.yaml
Launch the pod
kubectl apply -f attach-pvc.yaml
Use kubectl get pod to see the pod being created. -w flag will watch.
'SSH' into the pod
kubectl exec attach-pvc -it -- /bin/bash
- Install helm locally
brew install kubernetes-helm
- Set up tiller in the cluster
kubectl create -f helm/tiller-rbac-config.yamlhelm init --service-account tiller --history-max 200
helm install --name mpijob helm/mpijob/


