First of all I'd like to welcome you to this workshop. In this hands-on workshop we will get through almost the full lifecycle of creating Whatsapp-like app in React Native from prototyping phase to fully working app.
- How React Native works under the hood
- Best practices of getting started with new React Native app.
- Overview of developer tools and debugging tips and tricks
- Core components in React Native
- Images and SVG Icons in React Native
- Styling your mobile app using flexbox with yoga layouting engine
- Building navigation workflows with react-navigation
- Different ways of adding Animations in React Native whether it's microinteractions or more complex behaviors
- GraphQL overview and how we can get started with GraphQL in our React Native apps
- Adding realtime capabilities to our app
This is a huge list of things that we will go through during workshop so before it starts we need to be sure all required software is installed so we can get to the point from the very beginning.
Setup instructions before workshop
Workshop will be taught using Zoom software. It's crucial that you download Zoom from official website. https://zoom.us/download
We will use Zoom breakout rooms feature, which means that you will be splitted into groups during hands on part of the excercise and assigned into so-called "Breakout rooms". In breakout room you are assigned to its crucial that you collaborate and share screen to ask guidelines. That's the best part of the remote workshop and it makes it even more interactive and engaging than in-person one. I will go through every room to participate in discussions, help answering questions and so on.
I encourage you to keep video on at all times, so experience will be more human and social. I also encoruage you to use Mute feature if you are not talking to disable background noise.
You'll be able to write React Native code for either iOS, Android, or both. Let's make sure your machine is ready to get rolling.
It's important that you are able to run a "Hello World" app BEFORE this workshop, even if you're not familiar with the steps.
We'll go over all the tools you've installed, but for now let's get you setup. If these steps seem rudimentary, then good! That's why we want them out of the way before the workshop. If these tools are new to you, please spend some time familiarizing yourself as we will mention but not go into detail on their exact use.
This part isn't critical, but we'll be occasionally pushing our code to a repo in the demo. If you would like to follow along with those steps, be sure to have a GitHub account and install Git for your OS.
Installing Git: https://www.atlassian.com/git/tutorials/install-git
There is a quick-start and there is a native code start. We'll be using the native-cli option. I will showcase also Expo option, but it's important you to get native-cli working before the workshop
The directions can be found here: https://reactnative.dev/docs/environment-setup
Please click the native tab and follow the steps provided.
React Native CLI Quickstart
Each of the directions above, ask you to generate "AwesomeProject" and run it. If you've done that you're ready for our workshop!
In this remote workshop setting, we will be using Zoom breakout rooms feauture.
After cloning this repo, please run npm install to install all dependencies.
To run iOS app within simulator, use
npx react-native run-ios
For Android, use
npx react-native run-android
To follow along with the workshop properly, there is an assumption that you've done prerequisite installations at home and have Hello World app running with react-native cli.
I will answer questions for troubleshooting during the workshop, but to ensure consistent pace of the workshop, if you haven't done required installations beforehand, please refrain from asking installation questions.
Troubleshooting
If for some reason Android Build has failed, make sure you followed all steps at https://reactnative.dev/docs/environment-setup
Potential fixes:
- Check that you don't have two JDKs in the system
- Check that you have
ANDROID_HOMEdefined and in the Path
Potential fix for SDK not found (temp fix and a bad practice):
- Add
local.propertiesfile inandroiddirectory
Add sdk.dir=/Users/username/Library/Android/sdk under it making sure you substitute username with your username.
Slides for the whole workshop can be found here, but please make sure to follow along instead of jumping forward. If you've completed the step and wanna get bonus exercises, just ask.
Exercise 1 - Components structure
-
Install flipper for debugging
-
run
npm installin the repo after cloning it -
create
srcfolder -
create
src/components/Compose.jscomponent
For this exercise it should return View
- create
src/components/Message.jscomponent
It should get message prop and render it
- create
src/components/ChatItem.jscomponent
It should get title and description prop and render them.
- create
src/components/Avatar.jscomponent
For this exercise it should just return empty View
- create
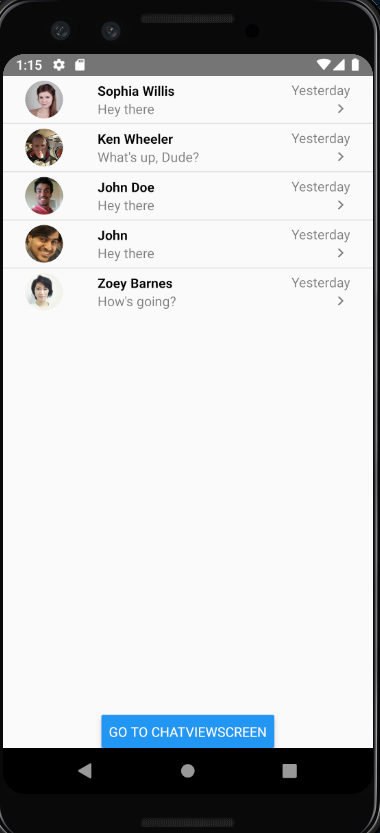
src/screens/Conversations.jscomponent
That will contain ChatItem component that in future we will turn into chat coversations list.
Data shape will look like this. In next excercises we will get it from api.
const chats = [{
    id: 1,
    title: 'Lorem Ipsum',
    description: 'Hey there',
    user: {
        avatar: 'http://www.codetic.net/demo/templates/Privado/img/avatar.png'
    }
}]- create
src/screens/ChatViewScreen.jscomponent
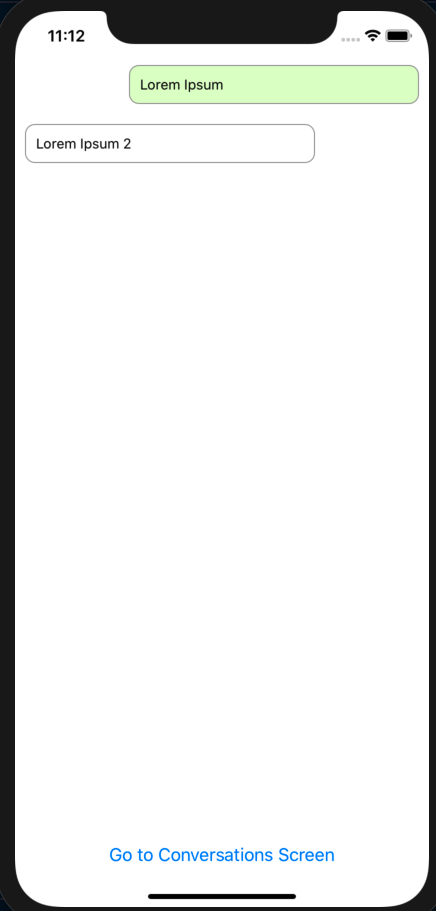
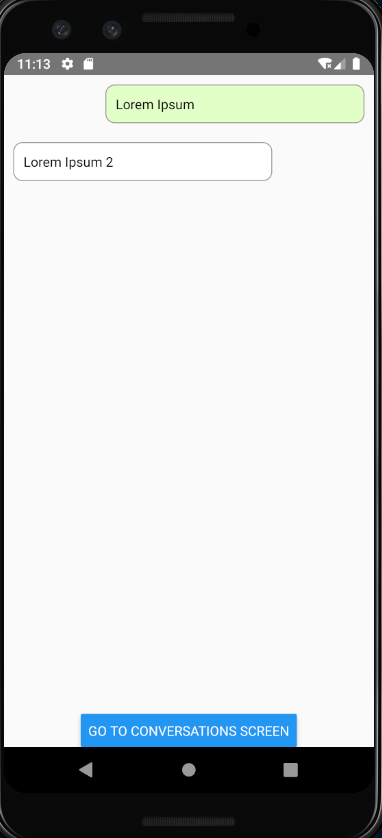
This component should have multiple Message components to render messages. Use the following mocked data:
const messages = [{
id: 1,
userId: 1,
message: 'Lorem Ipsum'
},{
id: 2,
userId: 2,
message: 'Lorem Ipsum 2'
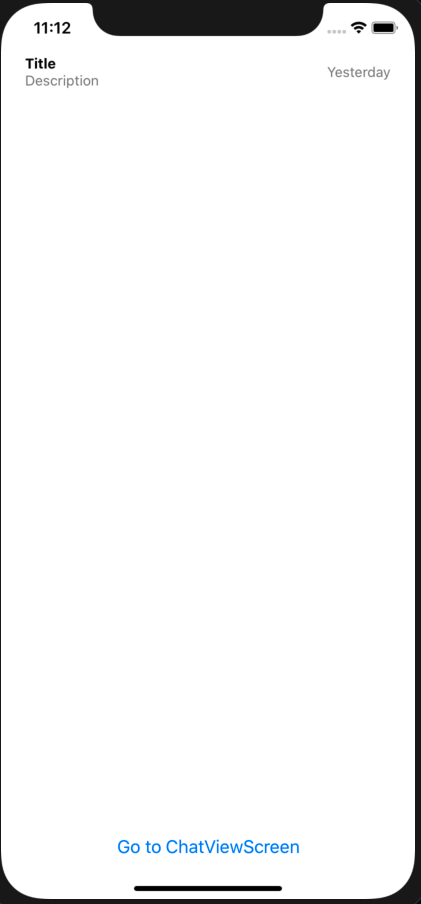
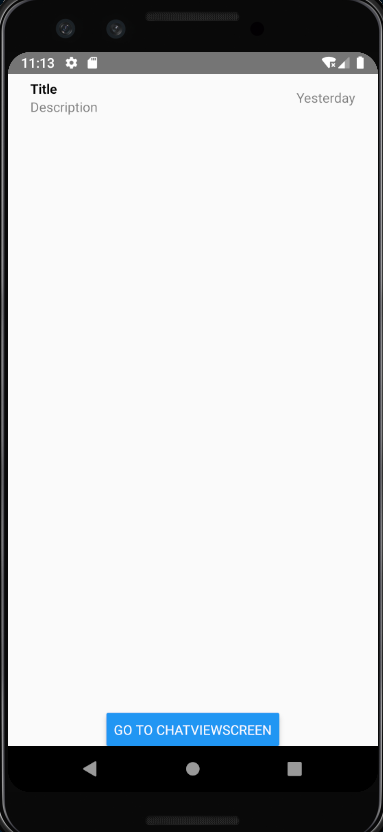
}]- Switch different screens in
App.jsby changing state (useuseStatehook for that) - Add a
ButtontoApp.jsand switch it's title conditionaly
After this exercise you will have component structure that we can use for future examples. If by the end of the exercise you have not completed everything, you can check out step1 branch for solution.
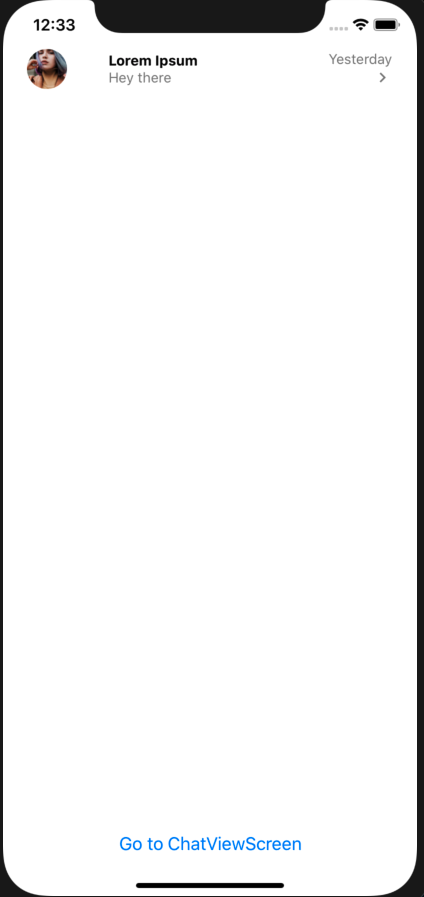
Excercise 2 - Layout and Flexbox
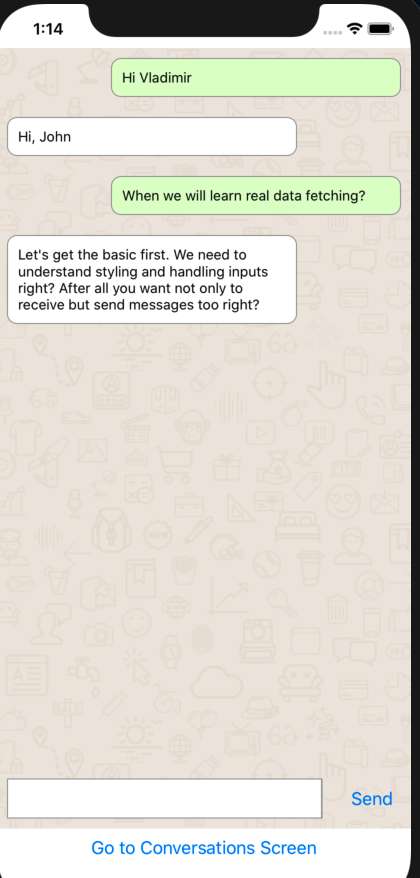
Style screens to look like this:
- Layout style props https://facebook.github.io/react-native/docs/layout-props.html
- Test style props https://facebook.github.io/react-native/docs/text.html
After this exercise we will have basic layout of all components. If by the end of the exercise you have not completed everything, you can check out step2 branch for solution.
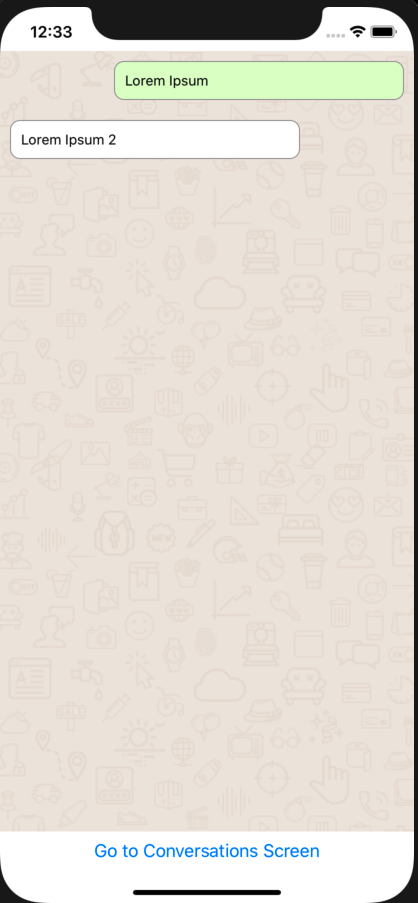
Exercise 3 - Images and Icons
Add more styling to the app to look like this: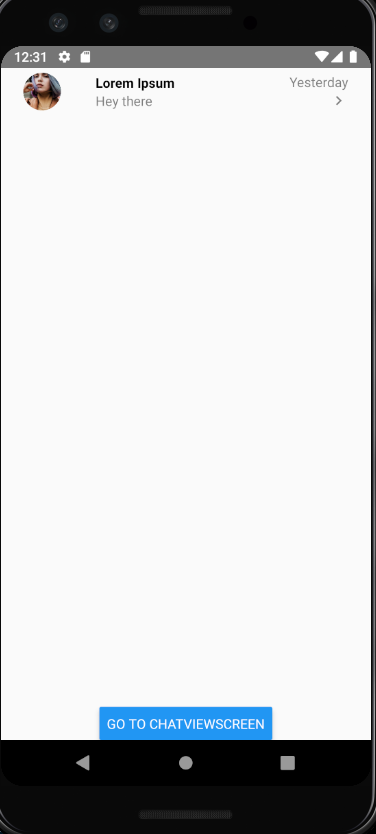

- Add
ImageBackgroundcomponent toChatViewscreen. Get image from the internet and load it locally by usingrequiresyntax. - Create
Avatarcomponent and add it toChatItemcomponent. - Use
FlatListfor rendering both list of conversations and messages - Add
chevron-righticon fromreact-native-vector-icons/MaterialIcons
Make sure to install
react-native-vector-icons
Vector Icons: https://github.com/oblador/react-native-vector-icons
after you install make sure on iOS to run npx pod-install ios
Installation instructions
Make sure to add to `Info.plist` the following:<key>UIAppFonts</key>
<array>
<string>AntDesign.ttf</string>
<string>Entypo.ttf</string>
<string>EvilIcons.ttf</string>
<string>Feather.ttf</string>
<string>FontAwesome.ttf</string>
<string>FontAwesome5_Brands.ttf</string>
<string>FontAwesome5_Regular.ttf</string>
<string>FontAwesome5_Solid.ttf</string>
<string>Foundation.ttf</string>
<string>Ionicons.ttf</string>
<string>MaterialCommunityIcons.ttf</string>
<string>MaterialIcons.ttf</string>
<string>Octicons.ttf</string>
<string>SimpleLineIcons.ttf</string>
<string>Zocial.ttf</string>
</array>
and for android to app/build.gradle the following:
apply from: "../../node_modules/react-native-vector-icons/fonts.gradle"
If there are no network images on Android it means your emulator has no access to internet. Run emulator with:
emulator Pixel_3_API_28 -dns-server 8.8.8.8
After this exercise screens should look like this:
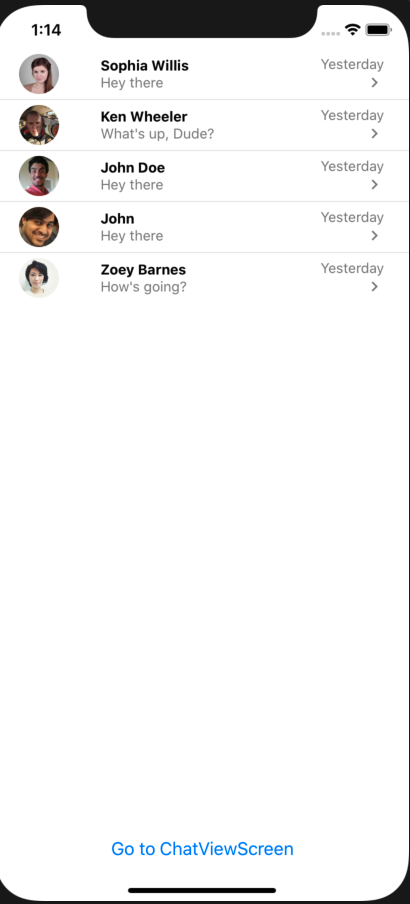

If you are not able to complete this section on time, checkout step3 branch, run npm install, run npx pod-install ios. Make sure to restart metro bundler and rebuild the app
Exercise 4 - API, Input and Keyboard
- create
services/api.jsfile where you will have mocked api calls.
export const mockMessages = [
  {
    userId: 1,
    message: 'Hi Vladimir',
  },
  {
    userId: 2,
    message: 'Hi, John',
  },
  {
    userId: 1,
    message: 'When we will learn real data fetching?',
  },
  {
    userId: 2,
    message:
      "Let's get the basic first. We need to understand styling and handling inputs right? After all you want not only to receive but send messages too right?",
  },
];

export const chats = [
  {
    id: '123',
    title: 'Sophia Willis',
    description: 'Hey there',
    user: {
      avatarUrl: 'https://randomuser.me/api/portraits/women/43.jpg',
    },
    date: '8:30am',
  },
  {
    id: '234',
    title: 'Ken Wheeler',
    description: "What's up, Dude?",
    user: {
      avatarUrl: 'https://avatars2.githubusercontent.com/u/286616?s=460&v=4',
    },
    date: 'Yesterday',
  },
  {
    id: '123',
    title: 'John Doe',
    description: 'Hey there',
    user: {
      avatarUrl: 'https://randomuser.me/api/portraits/men/38.jpg',
    },
    date: 'Yesterday',
  },
  {
    id: '123',
    title: 'John',
    description: 'Hey there',
    user: {
      avatarUrl: 'https://randomuser.me/api/portraits/men/39.jpg',
    },
    date: 'Yesterday',
  },
  {
    id: '123',
    title: 'Zoey Barnes',
    description: "How's going?",
    user: {
      avatarUrl: 'https://randomuser.me/api/portraits/women/48.jpg',
    },
    date: '15/04/2018',
  },
];

export const getChats = () =>
  new Promise(resolve => setTimeout(() => resolve(chats), 1000));

export const getMessagesById = id =>
  new Promise(resolve => setTimeout(() => resolve(mockMessages), 1000));

export const postMessage = message =>
  mockMessages.push({
    userId: 1,
    message,
});- Use these calls to load chats and messages
- Write Compose component to post new messages using
postMessagemethod fromservices/api. For input useTextInputcomponent - When Keyboard is opened, use
KeyboardAvoidingViewto make sure it's not covering theTextInput - Dismiss Keyboard and empty the field when posting a new message
In the end we should have basic functionality of posting and viewing messages. Now it's time to remove screen navigating components and create proper navigation layout. If you are not able to complete this step on time, make sure before next step to check out step4 branch, run npm install and npx pod-install ios if you are using iOS.
Make sure to restart metro bundler and rebuild the app
Exercise 5 - Navigation
Install React-navigation by following https://reactnavigation.org/docs/getting-started
In a nutshell it's the following steps:
npm install --save @react-navigation/native
npm install --save react-native-reanimated react-native-gesture-handler react-native-screens react-native-safe-area-context @react-native-community/masked-view
- Remove Navigation buttons from the bottom of the screen
- Create Navigation from
ConversationScreentoChatViewScreenpassing title of the conversation as a param. - Display conversation title in the header on
ChatViewScreenand load relevant messages for conversation based on id (it will matter for later stage exercises. Right now messages will be the same) - Add left button on the left on
ChatViewScreenwith chevron left andgoBacknavigation
After this exercise You will have basic navigation workflow and we can start with Animations. If you are not able to finish this exercise on time, you can checkout step5 branch, npm install npx pod-install ios
Exercise 6 - Animations
Take a look at the following video and implement
Animations using Animated API and react-native-animatable
After this exercise you suppose to have you screen with animations as shown in the video. If you are not able to complete this exercise on time, then you can check out step 6 branch in the repo, follow with npm install, npx pod-install ios and rebuild your project and restart. Make sure to stop the metro bundler beforehand.
Exercise 7 - GraphQL
Install Apollo GraphQL client by following this document: https://www.apollographql.com/docs/react/get-started/
Configure your client for real-time capabilities like so:
import { ApolloClient } from 'apollo-client';
import { InMemoryCache } from 'apollo-cache-inmemory';
import { HttpLink } from 'apollo-link-http';
import { split } from 'apollo-link';
import { WebSocketLink } from 'apollo-link-ws';
import { getMainDefinition } from 'apollo-utilities';

// Create an http link:
const httpLink = new HttpLink({
  uri: 'endpoint url'
});

// Create a WebSocket link:
const wsLink = new WebSocketLink({
  uri: `ws://endpoint url`,
  options: {
    reconnect: true
  }
});

// using the ability to split links, you can send data to each link
// depending on what kind of operation is being sent
const link = split(
  // split based on operation type
  ({ query }) => {
    const definition = getMainDefinition(query);
    return (
      definition.kind === 'OperationDefinition' &&
      definition.operation === 'subscription'
    );
  },
  wsLink,
  httpLink,
);

const cache = new InMemoryCache();
const client = new ApolloClient({
  // Provide required constructor fields
  cache: cache,
  link: link,
});-
Now instead of having API calls, use
useQueryhook to get conversations from the endpoint created during the workshop. -
Use
useMutationto post message to this endpoint. Finally useuseSubscriptionto get real-time data. -
Get rid of
api/services