This is the official implementation of the 3DV 2020 submission "Semantic Implicit Neural Scene Representations With Semi Supervised Training"
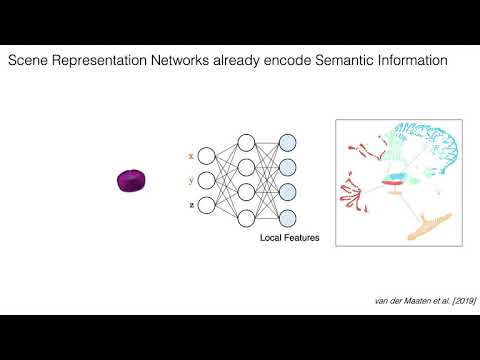
Existing implicit representations for appearance and geometry of 3D scenes—such as Scene Representations Networks (SRNs)—can be updated to also perform semantic segmentation with only a few training examples. The resulting semantic scene representations offer a continuous, multimodal representation of a 3D scene which may find use in downstream applications such as robotics.
In this repository we guide the user through the construction of such a representation, by first pretraining an SRN and then updating it via our semi-supervised, few-shot training strategy. The primary focus is on the second step since the SRNs repository offers a comprehensive overview of the first step. For additional information on the concepts and experiments please refer to our paper (linked in the yellow button above).
This repository depends on a git submodule, pytorch-prototyping. To clone both the main repo and the submodule, use
git clone --recurse-submodules https://github.com/apsk14/semantic_scene_representations.git
This code was tested with python 3.7.8 and pytorch 1.8.1. We recommend using anaconda for dependency management. For linux machines you can create an environment with name "semantic_srn" with all dependencies like so:
conda env create -f environment.yml
If not on linux please refer to packages.yaml for a list of the packages used.
The code is organized as follows:
- dataio.py loads training and testing data.
- data_util.py and util.py contain utility functions.
- train.py contains the code for pretraining as well as optimizing for test time observations
- update.py contains the code for updating a pretrained SRN to perform semantic segmentation
- test.py contains the testing code.
- models.py contains the various models used in all the experiments (SRNs, Linear, U-Net).
- hyperlayers.py contains implementations of different hypernetworks.
- custom_layers.py contains implementations of the raymarcher and the DeepVoxels U-Net renderer.
- geometry.py contains utility functions for 3D and projective geometry.
- util.py contains misc utility functions.
There are 4 directories which house the scripts used to run experiments. There is also a quick_run directory which can be used to see some quick results (see the quick results section for details).
The dataset used in the paper was custom rendered from Blender by registering pairs of objects (chairs and tables) from Partnet v0 and Shapenet v2. The dataset along with pretrained models are stored here. Information for the dataset can be found at semantic_scenes_dataset
Alternatively one can simply run setup_data.sh in the desired data location, and setup_models.sh to download the pretrained models. Be wary, the dataset and models are both fairly large (~46GB and ~12GB respectively).
Assuming proper download of the code and dataset, we will now guide the user through training and testing models. Be sure to put in the correct filepaths in the scripts and config files according to your own directory structure; i.e., make sure to have the correct paths to the data directory and trained models as required. Additionally, the scripts do not contain all possible arguments so please use the --help flag for any file (e.g., python train.py --help) to see all the options.
Obtaining a semantic scene representation requires 4 main steps: 2 training and 2 testing, each of which has its own directory for the corresponding scripts and is explained below. For a quick example useage, feel free to skip to the quick results section.
1) Training an SRN
Here a basic SRN is trained using images at various poses Please refer to the original SRNS repository for details for this step. This can be done with only RGB images as per the original SRNs paper (vanilla SRN) or additionally supervised with segmentation data (semantic SRN). For our main experiment we first train a vanilla SRN. The scripts for this step are found in training_scripts/. As an example consider training a vanilla SRN for Chairs:
python ../train.py  \
	--config_filepath "path to config_train_chair.yml" \ # path to config file to set the data and logging roots
	--log_dir vanilla_srn \ # name of directory which will contain model checkpoints and tensorboard events
	--img_sidelengths 64,128 \ # training image sidelengths (max is 128) one for each training segment
	--batch_size_per_img_sidelength 4,8 \ # batch sizes, one for each training segment
	--max_steps_per_img_sidelength 5000,150000 \ # iterations, one for each training segment
	--class_weight=0. # indicates that only rgb will be used to train (vanilla srn)
2) Updating an SRN for semantic segmentation
In this step the features of a pretrained SRN are linearly regressed to semantic labels using a small training set of segmentation maps. The goal here is to learn the optimal regression coefficents mapping vanilla SRN features to semantic labels. Note that this step is only necessary if a vanilla SRN was trained since the semantic SRN was already trained to produce semantic labels. The scripts for this step can be found in update_scripts/
An example call for this step is updating a vanilla SRN with 30 segmentation maps (10 chair instances each with 3 views):
python ../update.py \
    --config_filepath "path to config_train_chair.yml" \
    --model_type linear \ # specify the semantic predictor type ('linear' regressor or 1 layer 'MLP')
    --log_dir srnlinear \ # where to save out the learned linear coefficients
    --checkpoint_path "path to pretrained vanilla srn" \ # pretrained SRN from step 1 which is to be updated
    --img_sidelengths 128  --batch_size_per_img_sidelength 4  --max_steps_per_img_sidelength 5000 \
    --steps_til_ckpt 500 \ # how often to checkpoint
    --max_num_instances_train 10 \ # number of chair instances to use
    --specific_observation_idcs 0,1,2  # number of views per chair instance to use
3) Learning latent codes from test time observations
In this step, a number of views from a test time, unseen object are used to obtain the test time SRN that is most consistent with the observations. This can be done with as few as a single image/view of a test time object. The scripts for testing can be found in test_scripts. An example call for testing given a single RGB observation (single shot) is:
python ../train.py \
--config_filepath "path to config_test_chair.yml"  \
--log_dir srn_singleshot_test \ # name of dir in logging root to save out the test time SRNs
--checkpoint_path "path to pretrained srn" \
--overwrite_embeddings \ # indicates that we want to learn just the latent codes for the test time examples with the rest of the SRN fixed.
--img_sidelengths 128 --max_steps_per_img_sidelength 10000 --batch_size_per_img_sidelength 4 \
--specific_observation_idcs 65 \ # which view we should use as the single given observation.
--class_weight=0. \ # only use an rgb observation at test time
4) Rendering results from the updated SRN
Finally, with a semantically-aware SRN in-hand for each test object, this final step simply renders rgb and segmentation views and/or point clouds for each test time instance. The scripts for these results can be found in result_scripts/. An example of rendering results from a linearly updated vanilla SRN (SRN+Linear in the paper) given a single observation is:
python ../test.py \
    --config_filepath "path to config_test_chair.yml" \
    --checkpoint_path "path to test time SRNS" \ # path to the outputs of step 3.
    --log_dir srnlinear_results \
    --linear_path "path to linear coefficients for segmentation" \ # path to linear model from step 2
    --eval_mode 'linear' \ # indicates we are using a linearly updated vanilla SRN
    --input_idcs 65 \ # indicates which observation(s) were given at test time (step 3), in this case it was a single view.
    --point_cloud # indicates that we would like to render point clouds for every test instance in addition to novel views.
In summary, to obtain our main result from the paper, run steps 1-4 as per each example. For each experiment above, config files provide the location of the data (data_root) and where to log the results (logging_root). Specifically, the yml files (e.g., config_train_chair.yml should be updated according to the user's directory structure.
The logging_root flag in the config files and log_dir flag in the arguments specify where each experiment logs its model files and tensorboard events. That is, for each experiment, the relevant output is stored in logging_root/log_dir. Then, to visualize the training, go to this directory for the experiment of interest and run
tensorboard --logdir events/ --port xxxx
which can be accessed at the site localhost:xxxx where xxxx is a 4 digit number like 5000. For remote access make sure to forward xxxx to a local port.
To test the setup as well as see some quick results for multi-shot SRN+Linear (from the paper) go into quick_run/ directory. Once there, first run get_models.sh to get the necessary pretrained models. Then, modify run.sh with the relevant paths. Finally, while in the quick_run/ directory, run run.sh and check out the results in the newly created quick_run/results/ directory.
If you find our work useful in your research, please cite:
@inproceedings{semantic_srn,
	author = {A. Kohli and V. Sitzmann and G. Wetzstein},
	title = {{Semantic Implicit Neural Scene Representations with Semi-supervised Training}},
	booktitle = {International Conference on 3D Vision (3DV)},
	year = {2020},
}
The code in the subdirectory "pytorch_prototyping" comes from a library of custom pytorch modules, you can find it here.
If you have any questions, please email Amit Kohli at apkohli@berkeley.edu.