Cassapa is system that uses augmented-reality to help aiming at pool games.
Here's a demo video of Cassapa:
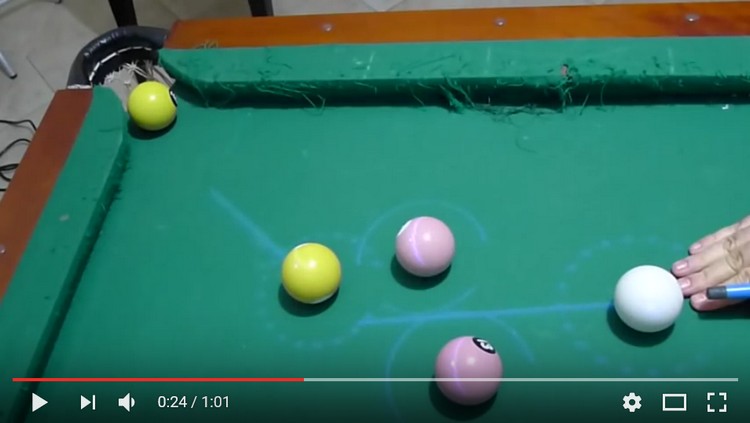
Please note that this video was shot using a really crap projector :)
Download
You can download the binary files by clicking here. There's no installer. Simply create a folder and unzip the contents on it.
Cassapa software is comprised by several files, but the most important are:
· cassapa_server_win.exe: This is the main executable. It is responsible for processing the camera image and detecting the pool game.
· Cassapa_projector.exe: This is the software responsible for the projector output. This functionality was put on a separate application (Not inside cassapa_server_win) in order to support a system with 2 separate computers (One for the camera, one for the projector), but they can run on the same computer as well.
· cassapa_viewer.exe: This is the client software that controls and monitors the system. As the server has a minimalist user interface, all control is done via this viewer.
In order to use Cassapa software, you need to provide the following infrastructure:
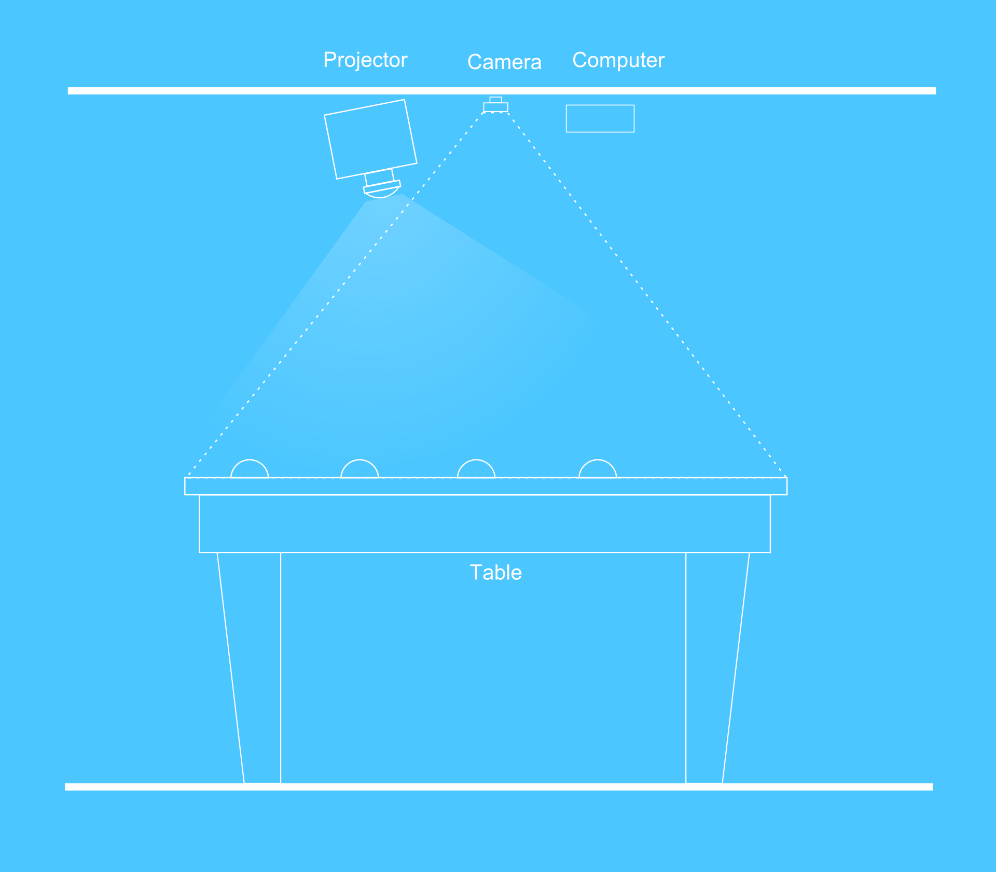
· A computer, to run the software
· A camera, connected to the computer. It shall be placed on the ceiling, exactly on top of the pool table, pointing 90 degrees to the table top. Whenever possible, the camera lens shall be adjusted so the table fills the whole camera images.
· A projector, connected to the computer, to display the augmented reality images over the table cloth. The projector is not mandatory, since you can monitor the game detection using a remote laptop. However, if you want to use the augmented reality resources of Cassapa, you need a projector.
The installer provides two installing options:
· Install for the server
· Install for the client
The server option shall be selected for installing the software on the camera/projector computer. It will install both cassapa_server_win.exe, cassapa_projector.exe and their related files.
The client option shall be selected when installing the software for a user laptop, which will be used to remotely control the system.
Please note that all connections between these 3 applications are done via a local TCP/IP network, so they shall be installed only on computers that are part of the same local network.
In order to install, run the installer and follow its instructions.
Recommendations:
· Do not install it on Windows “Program files” folder. Cassapa configuration files are stored along with the executables, so it need to be installed on a writeable folder
· Install using the same user login that will be used for running the software
After installing both the client and server, on different computers, you shall start cassapa_server_win.exe on the camera/projector computer.
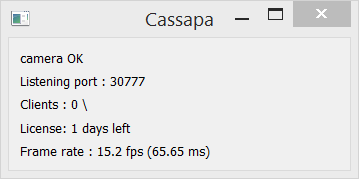
The server shall detect the camera automatically, and start grabbing frames from it. If more than a camera is available at the system, you can change the active camera via the configuration file cassapa_server.ini (All changes to ini files won’t be effective until the related software is restarted)
This is the server GUI:
After making sure the server is running ok, launch the software cassapa_client.exe on the remote control computer.
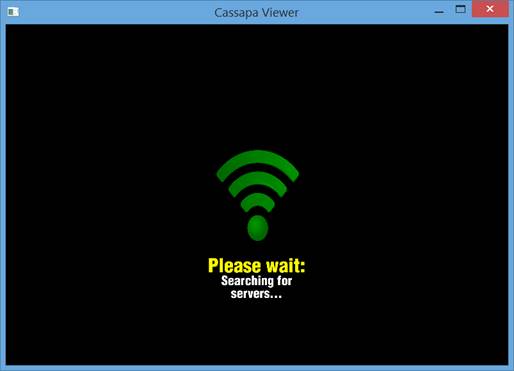
The client will try to find a server on the same network. If it fails to find one, you’ll see the following image on client:
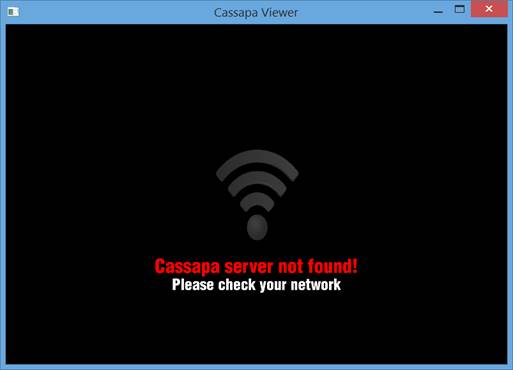
In this case, check your network connections and check if server is running. After fixing the problems, you can force the client to try a new connection by double-clicking any part of the client window. You’ll see the client trying to find a new server:
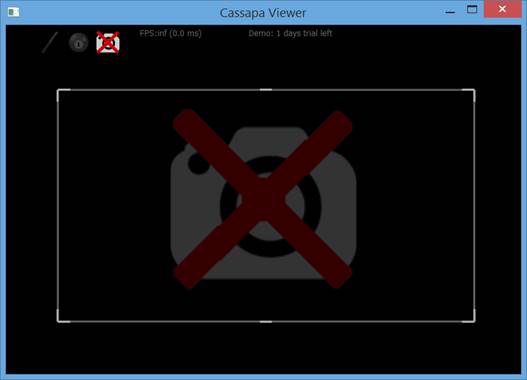
After connecting, the client starts displaying the server camera images, overlayed by server and game data. If the server experiences any problem to capture the camera image, you’ll see the following image on the client software:
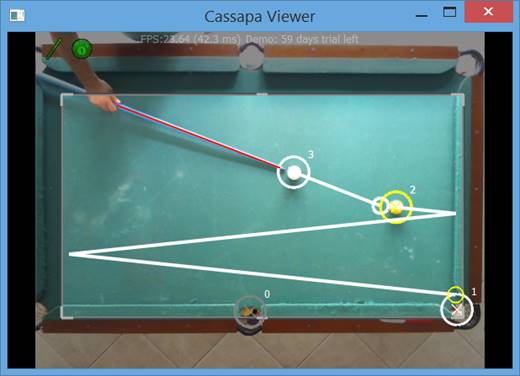
If everything runs ok, you shall see the pool table image on the client window:

But note that the detection of the pool table, cue and balls still depends on the correct configuration of the system, so it’s very unlikely the detection will work out of the box. This depends on several factors like:
· The pool size and positioning
· The pool cloth color
· The cue color
· The environment lighting
On the previous image, you can see that the system is correctly detecting the cue and balls by checking the cue and ball icon on top-left: These icons become lit green when detection is working, and become gray when detection fails.
To configure your system, just double click any part of the client window, while it is displaying the camera image. The configuration window will pop-up:
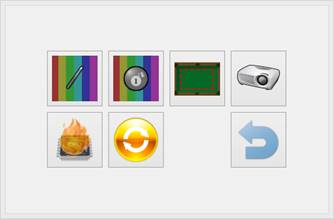
This window has 7 buttons, from top-left to bottom-right:
· Configure the cue detector
· Configure the ball detector
· Configure the table detector
· Configure the projector output
· Toggle (on/off) the fine-detector (Uses more CPU for a better detection)
· Turn-off the server (You can use this to restart the server, if you create a .BAT file to run it again forever whenever it closes)
· Closes the configuration window
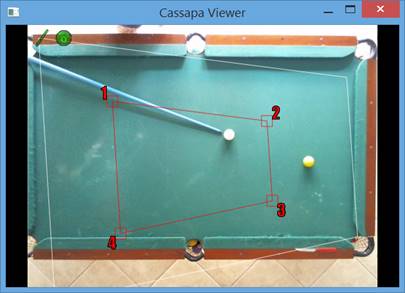
The first thing you shall configure is the table limits. Open the configuration window and click the table configuration button to display this image on the client window:
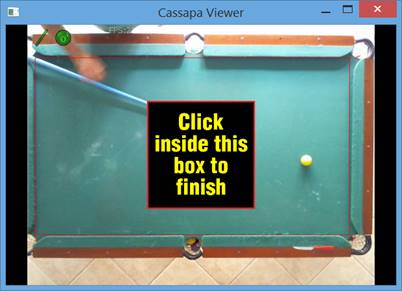
This will display the table limits the server considers during game detection. Use the mouse to drag the top-left and bottom-right limits, so the red rectangle on your system matches the internal borders of your table, as displayed on the previous image. Please note that the camera positioning and rotation may prevent you from getting a good rectangular image from the table limits. After adjusting the positions, click the black box to end this adjust.
After that, you shall configure the cue and balls detector. This detector is based on several factors, buyt most important are luminance and color, so you have to adjust the system according to your table cloth, cue and balls.
Both cue and balls configuration is similar: Click the corresponding config button to open the color adjust window:
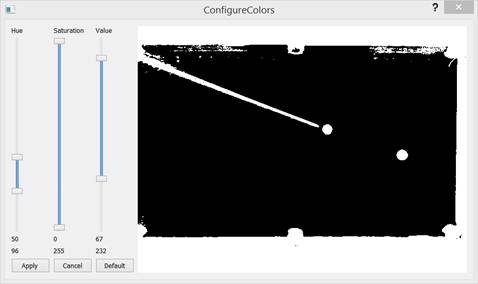
As commented before, detecting the cue and balls correctly and fast is hard. So, the system is highly dependent on using the cue and table cloth color to help the detection. These data is also highly dependent on the ambient light, so it may be hard to get the best configuration at the first time.
Your objective here is to leave only the cue or only the balls visible. Everything white will be used by the detector, while the black area will be ignored. So, you shall adjust the trackbars on the left to leave only the cue or the balls (According to which one you’re configuring) visible/white.
Note that, depending on your table cloth color or cue color, it may be hard to separate these items on these configuration windows. In these case, it’s recommended that you try a different cue color.
After this configuration, you shall be able to watch the game detection on the client window:
If everything went fine, it’s time to start the cassapa_projector.exe application on the server, and configure its output.
As soon as cassapa_projector.exe is started, it shall connect to the server and start outputting the game aiming lines on the projector.
It’s very unlikely that your projector will be positioned exactly on the top of the table center, so you’ll probably need to adjust the projector distortion. You can do this on the configuration window, pressing the projector configuration button:
As soon as the projection configuration starts, you’ll see that the projector starts displaying a calibration pattern (not displayed on the image above), while the client window will display 4 numbered squares on the image.
You can drag these 4 squares to adjust red rectangle so it matches the test pattern projected on the table. After adjusting this, just double-click any part of the client image to finish this configuration.