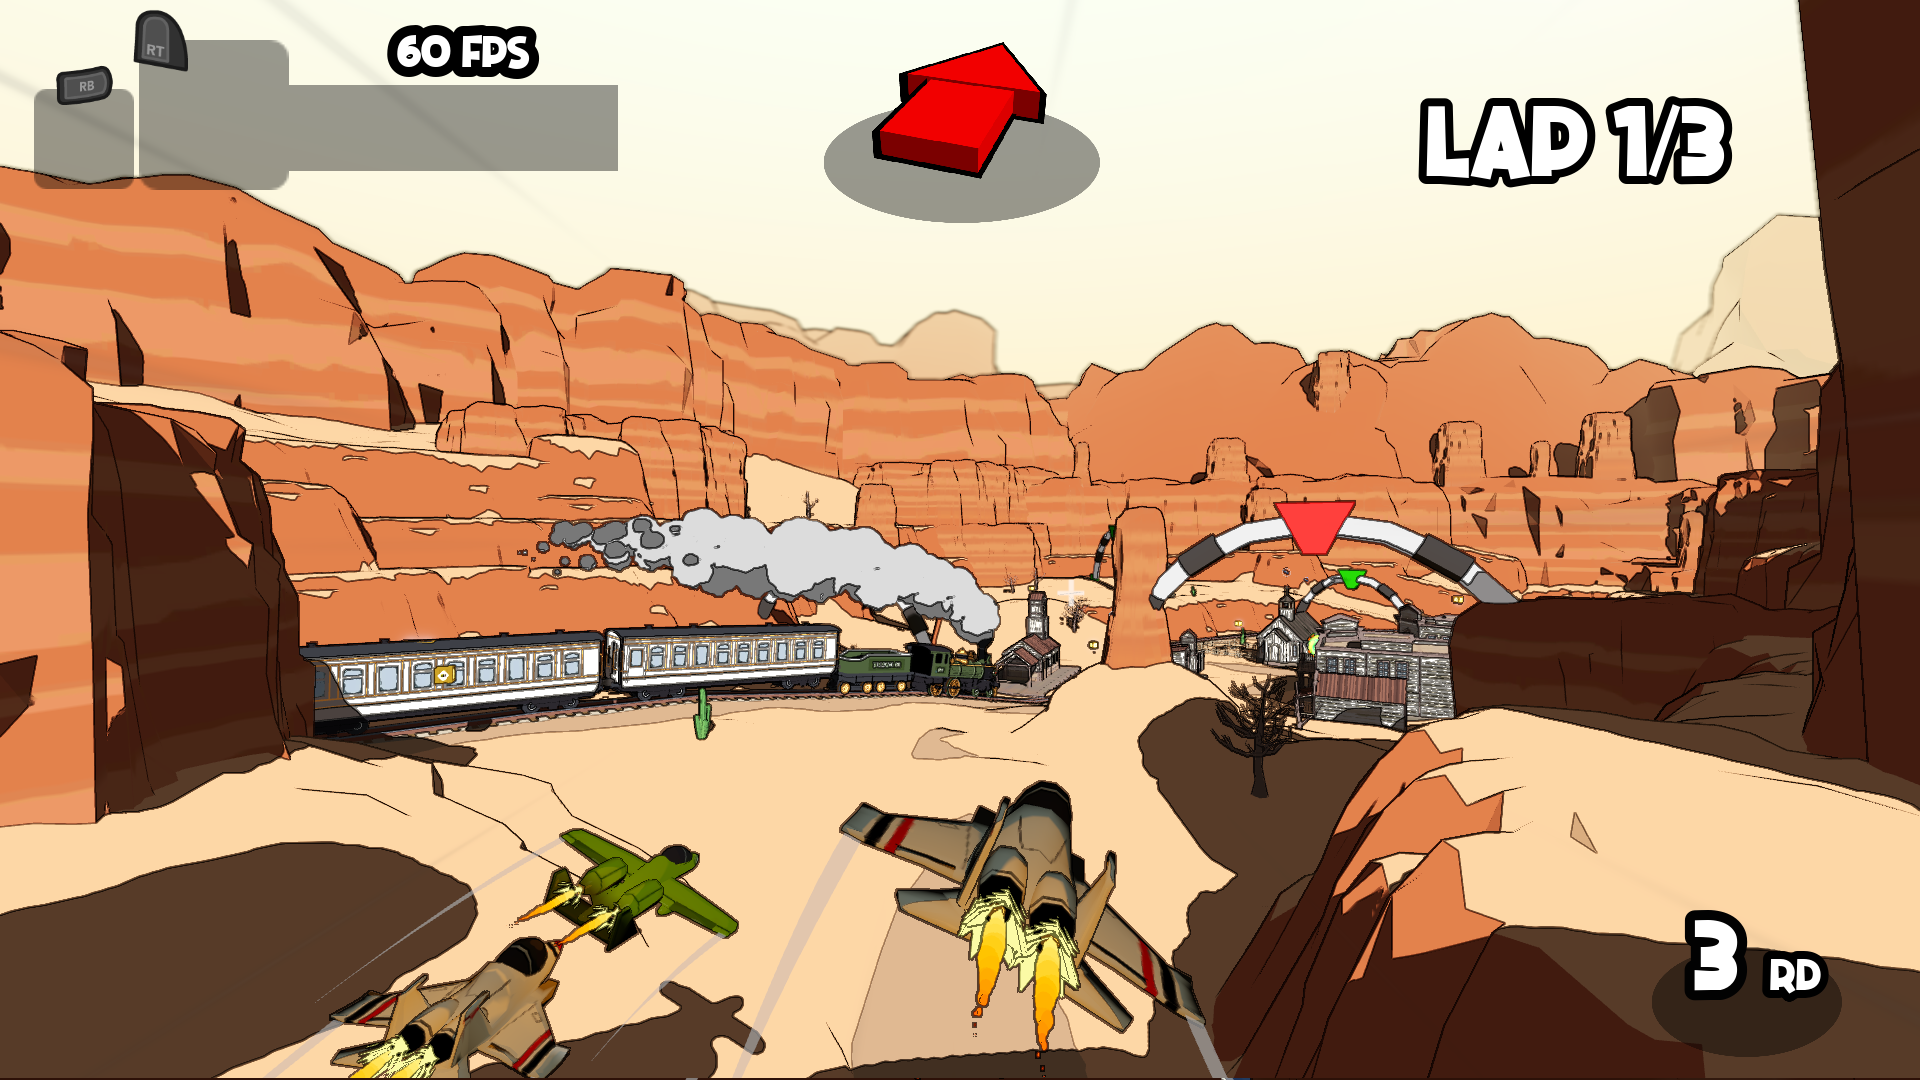
This is an addon for the Godot Engine that includes two shaders and one custom camera node that allows easy use of post-processing based outlines in both 2D and 3D games (though they are usually used more in 3D games). These are the same shaders and the same approach I'm using to get a large part of the outlines in my own Godot game: Windward Rush, which you can see below (and follow on Twitter for updates: https://twitter.com/joaomarinheiro).
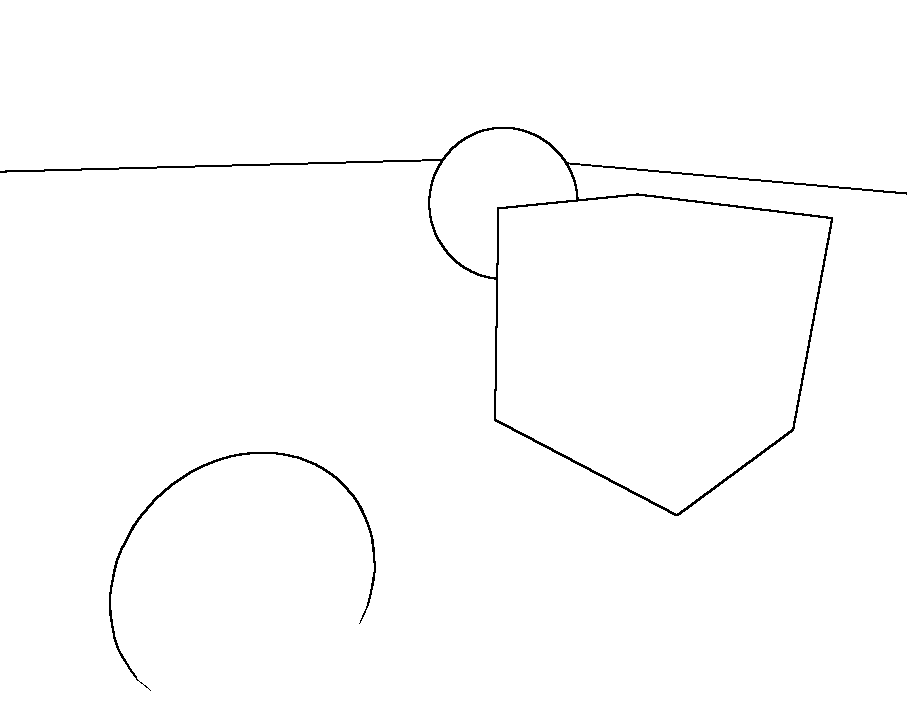
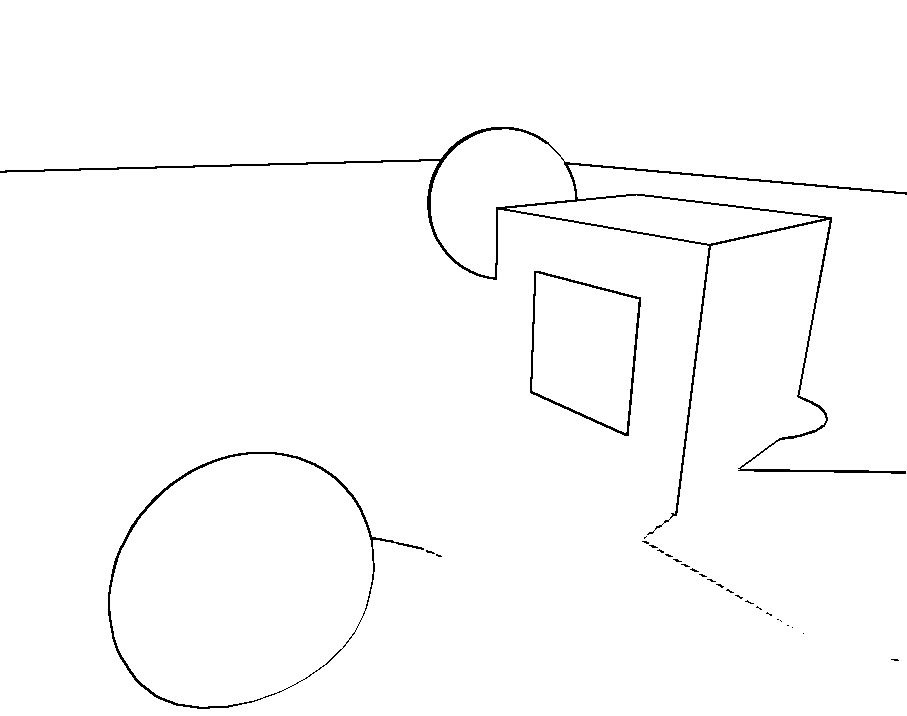
The way I've constantly seen suggested of doing outlines in Godot is usually some variation of this: add an extra draw pass to a material that draws a slightly larger version of the object with frontface culling in a solid color. This works for a lot of cases, and is very easy to implement in Godot, but it has some limitations. The first of which is that depending on the model being used and how its normals are set up it can lead to artifacts, such as the ones shown in the image below, where the lines of the outline are not touching.
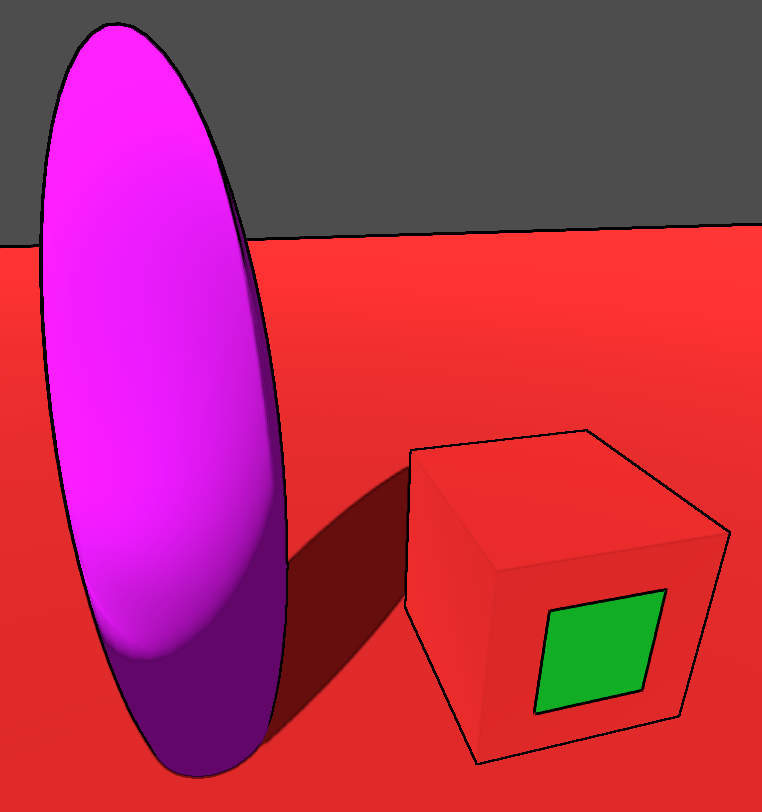
Another issue it has is that non-uniformly scaled objects will have non-uniformly scaled outlines, which can be a problem. Additionally unless care is taken to account for this, objects far away will have smaller outlines that objects close by. This can be a problem if you always want an outline to be visible even when an object is far away.

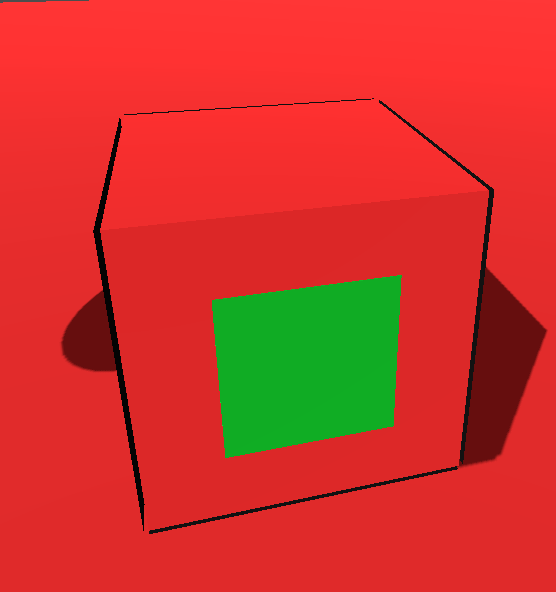
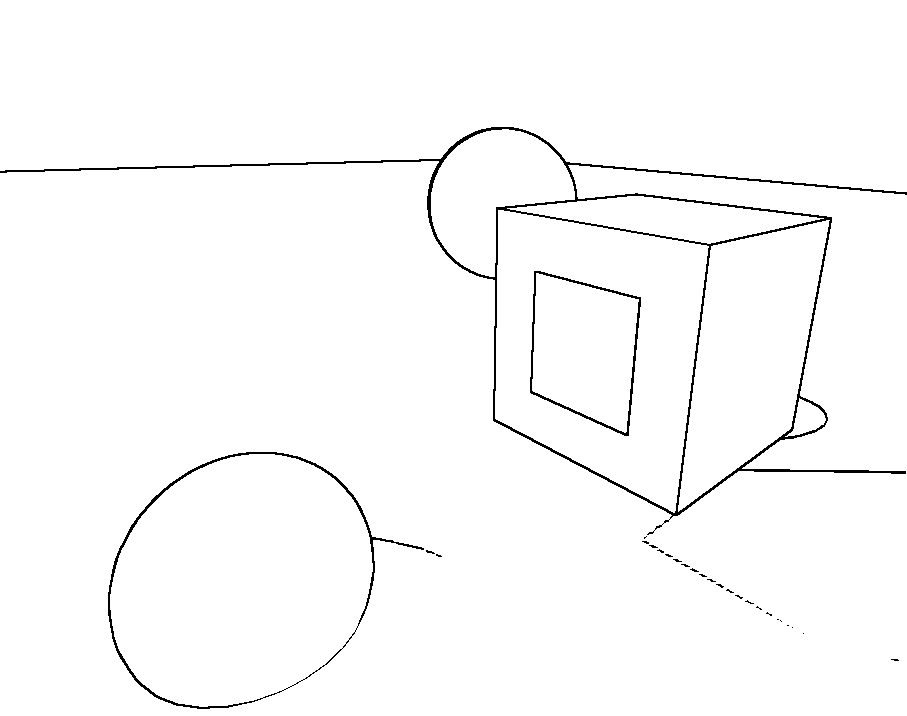
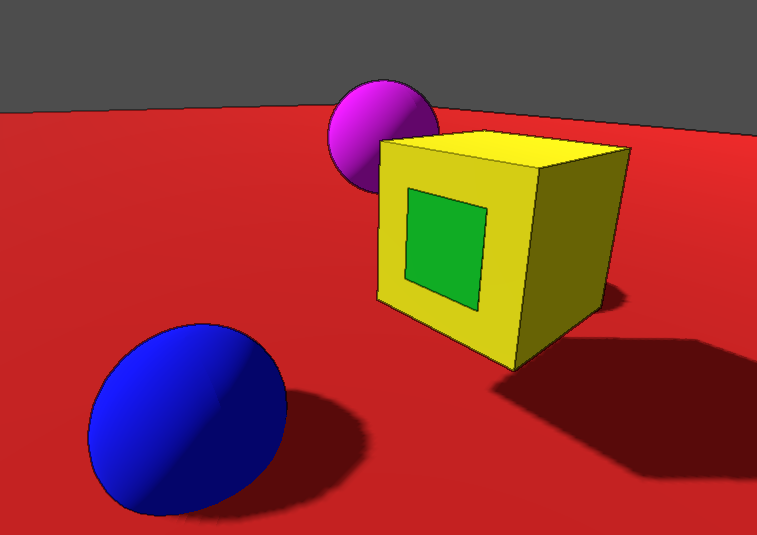
The other main limitation of these kinds of techniques is that they don't allow you to show every kind of outline possible, for example the outlines around the green portion of the red cube in the picture below would not be possible without using a post processing technique. You can also see that the outlines have the same size, even in a non-uniformly scaled object, and there are no artifacts in the cube.
Post-prossing techniques answer a lot of these shortcomings, but they come with shortcomings of their own as well, such as some loss of control over how things get outlined. It's up to you to choose the best approach for your game. In my case I use a combination of both approaches.
This addon adds a new PPOutlinesCamera node to Godot, which uses the shaders bundled with this addon to provide you with a ready made drop-in solution for post-processing outlines. You can also use the shaders themselves in your own materials but using the provided camera is the simplest way. By simply dropping the camera into a scene you should see it work, even in the editor. Depending on your scene you might have to configure some of the parameters to get your outlines to look good though.
The PPOutlinesCamera and the 3D version of the shader support both color based outlines and depth based outlines, while the 2D version of the shader supports only color based outlines since CanvasItem shaders do not have access to the depth buffer.
Note: You can also use the 2D version of the shader in a 3D game by rendering your 3D scene into a Viewport and applying the shader in the ViewportContainer. You will not get the depth based outlines but you will be able to get outlines around transparent objects, which the 3D shader and the PPOutlinesCamera do not do.
Below is an example of the different types of outlines, first just the depth outlines, then the color outlines and finally both combined (I would like to have normal based outlines too, but unfortunately Godot does not give you access to a normals buffer).
Here are the configuration parameters for the PPOutlinesCamera node and the shaders.
- color_outline_scale: affects the size of the color outlines, set to 0 for no color outlines
- depth_outline_scale: affects the size of the depth outlines, set to 0 for no depth outlines
- depth_threshold: controls the depth outline's sensitivity to depth changes, adjust this if you see artifacts with your depth outlines when faces are close to parallel with the camera.
- depth_multiplier: constant multiplier applied to the depth buffer values, adjut this to get more or less depth outlines.
- edge_threshold: general threshold for both color and depth outlines, lower values mean more outlines but also possibly more artifacts.
- max_edge_alpha: this gives adges a maximum alpha value to make them darker or lighter.
- edge_alpha_multiplier: constant multiplier for edge alpha, higher values mean more and harder edges.
- edge_color: color for the edges.
- background_tex: allows you to set a background texture which you can use for some debugging (e.g. the b&w screenshots above) or some neat effects.
- depth_use_laplace: sets the depth edges to use the laplace operator instead of the sobel operator. Depending on your scene one might work better than the other. You will probably have to adjust the other parameters if you change this though.
- color_use_laplace: same as above but for the color edges.
- use_bg_texture: sets the shader to display the background texture.
3D outlines showing both color and depth based outlines:
2D outlines:
![]()
You can also find these working example scenes in the examples folder inside the addon.