Titanic's End is a mutant vehicle designed for Burning Man 2022. (and beyond!)
This repo covers the code for the design and instrumentation of the many LEDS wrapped around this mutant vehicle.
We use LX Studio to control the light show, and this README will get you up and running with LX Studio so you, too, can help us create some great patterns.
What if I want to know more?
This doc sets out the project vision and has so much more information: Lighting Design DocEither go to https://adoptium.net/installation/ or, on a Mac with Homebrew:
brew tap homebrew/cask-versions
brew install --cask temurin17

# verify your installation by running:
/Library/Java/JavaVirtualMachines/temurin-17.jdk/Contents/Home/bin/java --versionThese are geared toward running LX Studio on a Macbook with
gitalready installed. If you need help with anything, ask in the Slack #lighting-software channel!
First, you'll need an IDE (editor). IntelliJ's Community Edition is the best free one available. You can download it here: https://www.jetbrains.com/idea/
Steps for setup:
-
Clone the git repo you're looking at:
git clone https://github.com/titanicsend/LXStudio-TE.git -
Open the project director you cloned to when you're presented with "New Project" and "Open" options. That's the initial screen.
-
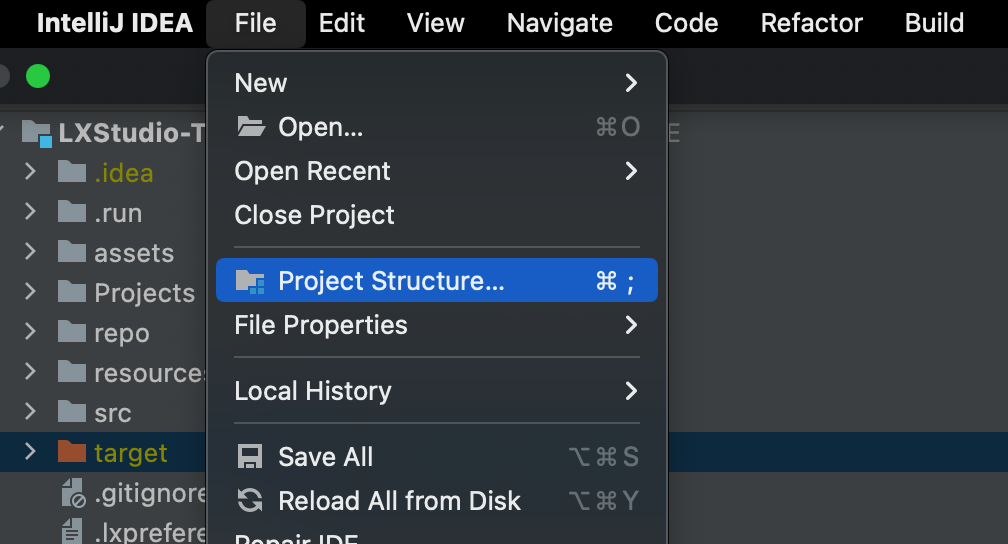
File → Project Structure (or ⌘-;)
-
Platform Settings → SDKs
- Either add the installed Temurin 17 JDK
- Or, if that JDK is not installed, you can click the '+' and then select
"Add JDK..."
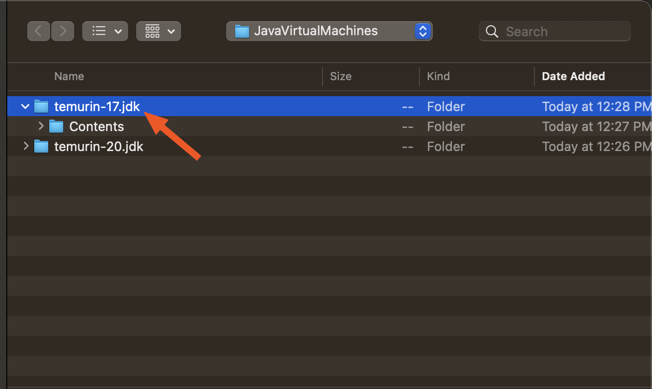
- Navigate to
/Library/Java/JavaVirtualMachines/temurin-17.jdk - Select
temurin-17.jdk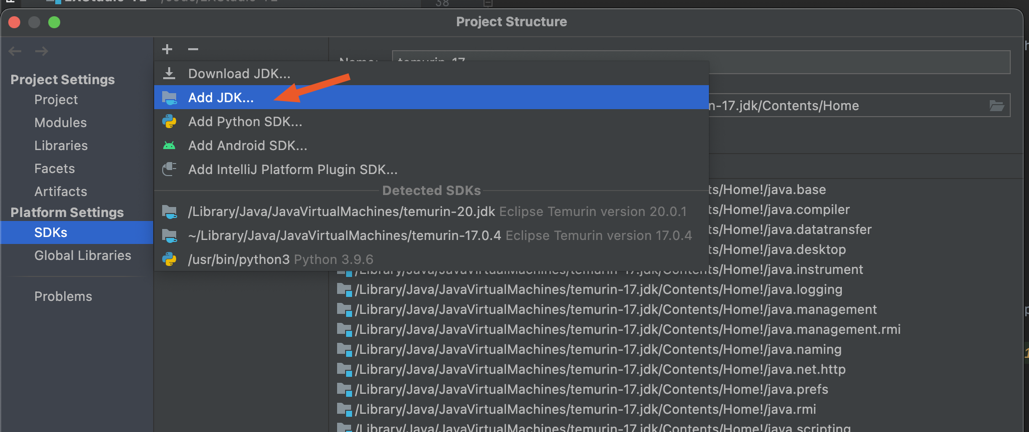
- Navigate to
-
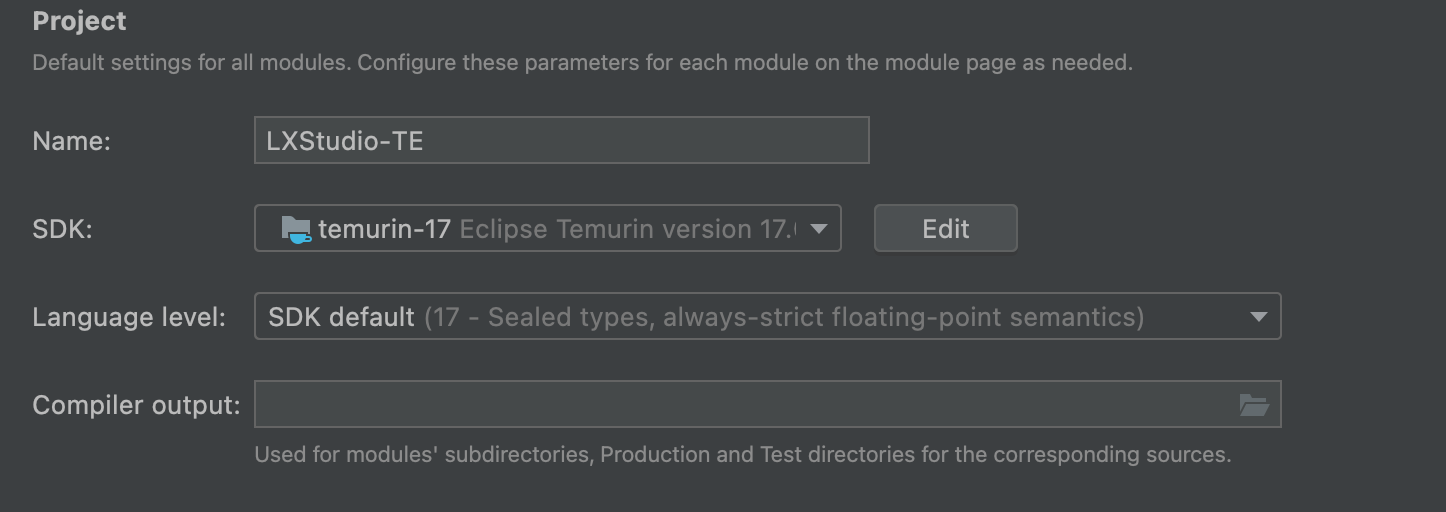
Project Settings → Project
- Select the Temurin 17 JDK
- Select the Temurin 17 JDK
-
-
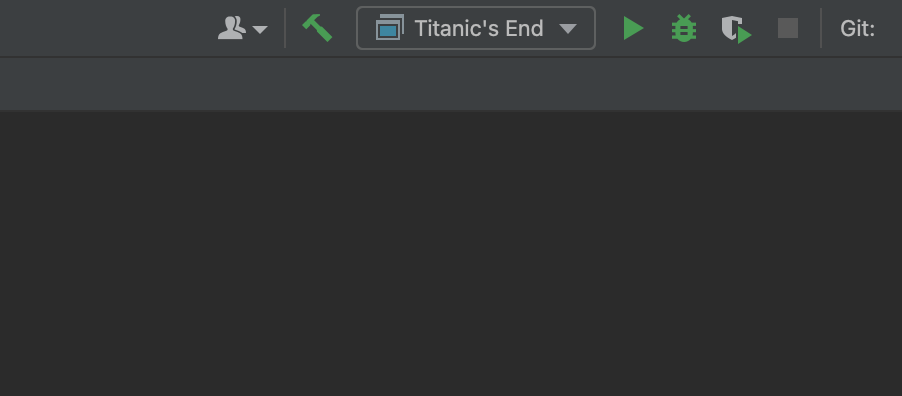
Select "Titanic's End" in the top bar (in the dropdown to the right of the hammer) if you want to use the vehicle model, or "Testahedron" if you want the testahedron model.
-
Hit the green arrow "play" button. (If you just want to build, you can hit the hammer.)
-
Assuming things work okay, a UI for LX Studio will pop up: Great! Now, you can play with the buttons.


Maven resources compiler: Failed to copy [...]/target/generated-test-sources/test-annotations/Icon ' to '[...]/target/test-classes/Icon- Go to the top of your TE repo and run
find . -name Icon\? -delete
- Go to the top of your TE repo and run
So you've got the app up and running. You see some patterns in the code. How do you make sense of them?

To understand the point, edge, and panel naming scheme, see the Visual Map tab of the Modules, Edges and Panels sheet.
TE is using the full IDE-ready distribution instead of the P4 Processing Applet version. Don't struggle - ask questions in #lighting-software on Slack.
The tutorials in the LX Studio Wiki are an effective introduction.
These have been compiled by our team:
As you really get rolling, you’ll appreciate the API docs and public portion of the source.
Once it's running, go tell Slack so we can celebrate with you and maybe give you a tour. Or, if you prefer self-guided tours:
- Read the LX Studio Wiki
- Play with the UI until you have a modulator controlling the parameter for a pattern, and an effect applied on top.
- See this guide from another memorable Burning Man art piece
- Define a new fixture in the UI
- [Optional] Save your playground as a new project with your name:
Playground <YourName>.lxp. You can mess this project up and experiment broadly.
Things that can help improve your experience with LX Studio.
It can be handy to edit LX Studio's JSON config files in the IDE. Add the .lxf and .lxp extensions to be recognized as JSON.
- Open IntelliJ preferences (⌘-, on Mac) and go to Editor → File Types → JSON.
- Next, add "*.lxp" to the list, and so on.

Jeff's enjoying the following (he comes from Sublime and vim):
- CodeGlance
- Rainbow Brackets
- IdeaVim
- CSV
- KeyPromoter X
- Python Community Edition
Many of you may use VS Code in your day-to-day life. If you do, and you'd like IntelliJ to behave more like VS Code, I'd recommend:
- In IntelliJ, open the "IntelliJ IDEA" menu and select "Preferences"
- Click "Plugins"
- Search for "VSCode Keymap"; install
- Go back to "Preferences"
- Go to "Keymap", select one of the VS Code keymap options, (either macOS or not) hit apply, and enjoy increased happiness in your IDE
If you just need to execute LX to run a show without editing anything, you can do that:
-
Install Temurin JDK (see JDK installation above).
-
Build into a runnable JAR:
mvn clean package # Packaging creates the JAR and cleaning is optional -
Execute the JAR (Note that the version number may be different — The version as of this document revision is 0.2.1-SNAPSHOT — substitute the correct version as necessary):
java -jar target/LXStudio-TE-0.2.1-SNAPSHOT-jar-with-dependencies.jar vehicle Vehicle.lxp
-
If the Temurin JDK isn't your default Java, then you can use the full path, for example:
/Library/Java/JavaVirtualMachines/temurin-17.jdk/Contents/Home/bin/java -jar target/LXStudio-TE-0.2.1-SNAPSHOT-jar-with-dependencies.jar vehicle Vehicle.lxp
-
Use Maven to execute the program instead of the
javacommand:mvn clean compile # Cleaning and compiling is optional, depending on your needs mvn exec:exec@Main -Dexec.args="vehicle Vehicle.lxp"
Fun fact: The "Main" target isn't defined in the POM to have arguments, but it could, in which case you wouldn't need the
vehicle Vehicle.lxpargs.
If your ~/.m2 Maven cache has any conflicting things, you may need to delete
the conflicts, otherwise the execution may complain about things like missing
libraries or invalid versions, and the like. Finding the conflicts is a more
advanced approach. A simple one is to just delete that whole directory:
rm -r ~/.m2To run on machine startup (ie: press power button and LX just starts up), you'll need to do three things:
- Add
TE.appto your startup items- System Preferences > Users & Groups
- Click the user to run LXStudio with
- Login Items > "+" button > add TE.app
- Change to automatic login
- System Preferences > Users & Groups
- Click "Login Options" underneath list of accounts (may need to enter password)
- Using the combo box, select desired user, ie "te" or whatever
- Uncheck all the boxes underneath
- Remove the password from your user account
- System Preferences > Users & Groups
- Click the user > "Change Password"
- Leave new password blank
- Keep in Dock
- When TE.app is running, right click on it, and say "Keep in Dock"
- This way, during a show, it's very easy for anyone non-technical to simply quit the program and re-run it if there is an issue
Restart your machine and you should see on startup, LXStudio automatically opens.
If Eclipse is like a warm snuggie to you, we'd appreciate you adding any SDK and environment configuration tips here.
The car's main LX instance runs on a Mac Studio that lives on the car, connected to the car's LAN. The UI is controlled via a remote desktop (VNC) connection over a high-speed PTP wireless bridge. Since the VJ at this remote Front-of-House desk will want to use MIDI surfaces and controllers to perform, we needed to come up with a MIDI-over-WiFi solution to connect the USB MIDI devices to the box running LX on the car.
In 2022, we utilized OSX's arcane built-in support for RTP-MIDI. This was brittle and fickle to maintain.
In 2023 we've changed to using a device called a BomeBox that uses a proprietary encapsulation protocol. To make this work:
- The Bome Network tool should be installed on the computer that runs LX. The "Multiple Named Virtual interfaces" upgrade is required.
- The remote BomeBox should be on the same subnet, with updated firmware
- Optionally, renamed the BomeBox. We changed "BomeBox" to "FoH" for "Front of House"
- Connect the MIDI controllers to the BomeBox USB port via a USB Hub. In the Bome Network tool, enable Remote Direct Midi for those devices.
- You can disable MIDI routes that aren't used, such as the DIN ports or MIDI messaging between the USB devices. This likely helps performance. Leave 2 routes per device: The bidirection pair LX->Device, and Device->LX.
- Register the correct new names in LX. The Bome Remote Direct Midi device
names follow a pattern of "{BomeBoxName}: {DeviceName}", like
"FoH: APC40 mkII". For example, in your main app you may need to
lx.engine.midi.registerSurface(name, class)or match the name with an entry inlx.engine.midi.inputs[].getName(). If using more than one midi device of the same type BoxBox will present each device with a unique name by appending a number such as "FoH: Midi Fighter Twister (2)".registerSurface(name, class)needs to be called for each of these unique names.
Here's a video illustrating our configuration.
Please see LICENSE.md - significant parts of this repository are not open source and we support those authors' wishes.