This code borrows heavily from llSourcell's turtorial which in turn borrows heavily from maheshmurthy's tutorial.
Please head over to each and toss a star on the repositories. Both of them created a wonderful tutorials to learn from.
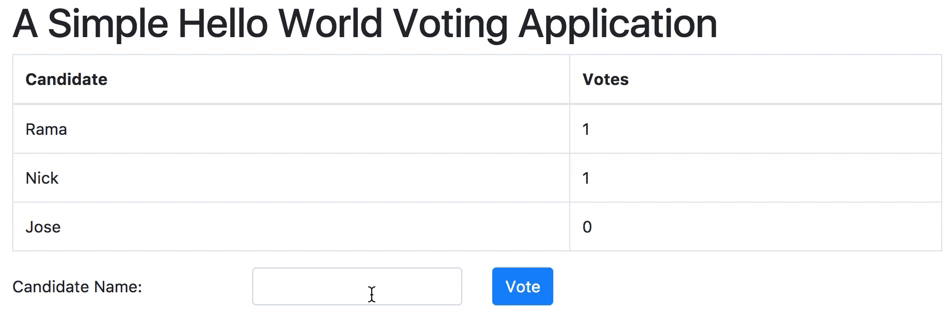
We will be building a decentralized voting application!
The functionality of this repo is nearly identical to llSourcell's but the entire implementation is done in python!
- Python 3.6+
- Solidity 4.20+
- Node.js 6.11.5+
- Create and activate a virtual environment
- Install dependencies with
pip install -r requirements.txt - Install the ganache-cli command line tool with
npm install -g ganache-cli- What does this cli do? It runs an ethereum node locally. Normally we'd have to download a lot of blockchain transactions and run a test ethereum node locally. This tool lets us run a small local node for easy peasey development. This tool used to be called the
testrpc. - Uh... This tool isn't python... True, but I have found the JavaScript tooling for testrpc to be fantastic and easy to use. If you don't want to bother with
npmor just want to try out a full python stack, try out eth-testrpc. It's pip installable but not as maintained asganache-cli.
- What does this cli do? It runs an ethereum node locally. Normally we'd have to download a lot of blockchain transactions and run a test ethereum node locally. This tool lets us run a small local node for easy peasey development. This tool used to be called the
Open up two tabs. In the first tab run ganache-cli. This will start a block chain locally that we can play with.
In the second tab activate your virtual environment and run main.py. This will start our little flask app in debug mode, deploying our contract in the process.
After the python file runs you should see something like:
  Transaction: 0xd3d96eb1d0b8ca8b327d0eca60ff405d0000c5cd249d06712877effbcf73095f
  Contract created: 0x9e4fab9629b8768730d107ae909567974c4c8e35
  Gas usage: 352112
  Block Number: 1
  Block Time: Sat Dec 23 2017 22:31:13 GMT+0200 (SAST)
in the first tab. This is your contract being deployed to the chain on your local node!
main.py is where the bulk of our logic happens. It deploys our smart contract to our test ethereum node and starts serving our flask app. main.py and voting.sol are heavily commented so please give those a read to understand what each is doing.
Next open http://127.0.0.1:5000/ in your browser of choice. The web application will connect to our deployed contract and use it as the backend.
Congrats! You setup your first decentralized application with python!