rehype plugin to highlight code with Starry Night
This package is a unified (rehype) plugin to highlight code with Starry Night in a markdown document. This results into syntax highlighting like what GitHub uses to highlight code.
This project is useful if you want to use the syntax highlighting powered by VS Code syntax highlighter engine, and themes similar to GitHub. It is also useful if you want to build your own syntax highlighting themes based on CSS custom properties.
The following additonal features are also available:
- line numbers
- line highlights
- support for prompt
- captions and language information
- highlighting inline
codeelements (through a custom directive)
This package is ESM only.
In Node.js (version 16.0+), install with npm:
npm install @microflash/rehype-starry-nightIn Deno, with esm.sh:
import rehypeStarryNight from "https://esm.sh/@microflash/rehype-starry-night";In browsers, with esm.sh:
<script type="module">
  import rehypeStarryNight from "https://esm.sh/@microflash/rehype-starry-night?bundle";
</script>Say we have the following file example.md:
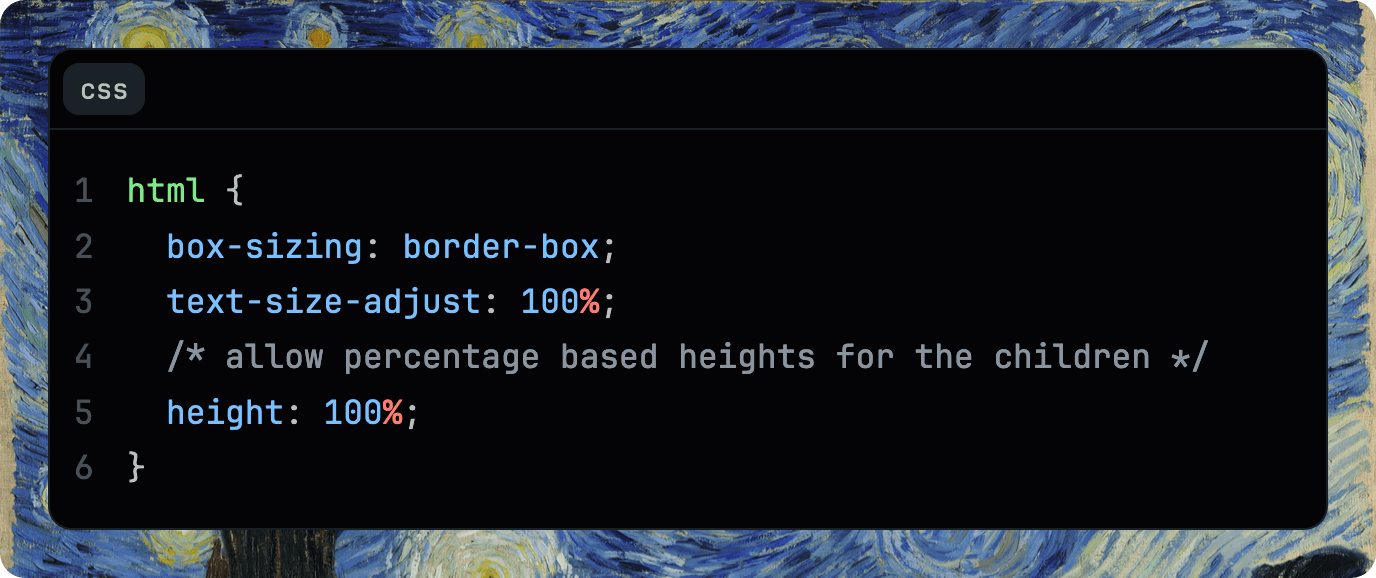
```css
html {
  box-sizing: border-box;
  text-size-adjust: 100%;
  /* allow percentage based heights for the children */
  height: 100%;
}
```
And our module example.js looks as follows:
import { unified } from "unified";
import remarkParse from "remark-parse";
import remarkRehype from "remark-rehype";
import rehypeStringify from "rehype-stringify";
import rehypeStarryNight from "https://esm.sh/@microflash/rehype-starry-night";

main();

async function main() {
  const file = await unified()
    .use(remarkParse)
    .use(remarkRehype, { allowDangerousHtml: true })
    .use(rehypeStarryNight)
    .use(rehypeStringify, { allowDangerousHtml: true })
    .process(markdown);

  console.log(String(file));
}
Running that with node example.js yields:
<div class="highlight highlight-css">
  <div class="highlight-header">
    <div class="highlight-language">css</div>
  </div>
<pre id="MC4zMzc4MTYx"><code tabindex="0"><span class="line"><span class="line-number" aria-hidden="true">1</span><span class="pl-ent">html</span> {</span>
<span class="line"><span class="line-number" aria-hidden="true">2</span>  <span class="pl-c1">box-sizing</span>: <span class="pl-c1">border-box</span>;</span>
<span class="line"><span class="line-number" aria-hidden="true">3</span>  <span class="pl-c1">text-size-adjust</span>: <span class="pl-c1">100</span><span class="pl-k">%</span>;</span>
<span class="line"><span class="line-number" aria-hidden="true">4</span>  <span class="pl-c">/* allow percentage based heights for the children */</span></span>
<span class="line"><span class="line-number" aria-hidden="true">5</span>  <span class="pl-c1">height</span>: <span class="pl-c1">100</span><span class="pl-k">%</span>;</span>
<span class="line"><span class="line-number" aria-hidden="true">6</span>}</span>
</code></pre>
</div>To highlight inline code elements, you can import rehype-starry-night-inline plugin. This plugin relies on a custom directive which requires importing remark-directive and remark-code-directive.
Say we have the following file example.md:
To print a greeting, use :code[console.log("Hello, world!");]{syntax=js}. When executed, it prints `Hello, world!`.And our module example.js looks as follows:
import { unified } from "unified";
import remarkParse from "remark-parse";
import remarkDirective from "remark-directive";
import remarkCodeDirective from "https://esm.sh/@microflash/rehype-starry-night/remark-code-directive";
import remarkRehype from "remark-rehype";
import rehypeStringify from "rehype-stringify";
import rehypeStarryNightInline from "https://esm.sh/@microflash/rehype-starry-night/rehype-starry-night-inline";

main();

async function main() {
  const file = await unified()
    .use(remarkParse)
    .use(remarkDirective)
    .use(remarkCodeDirective)
    .use(remarkRehype, { allowDangerousHtml: true })
    .use(rehypeStarryNightInline)
    .use(rehypeStringify, { allowDangerousHtml: true })
    .process(markdown);

  console.log(String(file));
}
Running that with node example.js yields:
<p>To print a greeting, use <code data-code-lang="js"><span class="pl-en">console</span>.<span class="pl-c1">log</span>(<span class="pl-s"><span class="pl-pds">"</span>Hello, world!<span class="pl-pds">"</span></span>);</code>. When executed, it prints <code>Hello, world!</code>.</p>The default export is rehypeStarryNight. The following options are available. All of them are optional.
aliases: an object to alias languages to force syntax highlighting. By default, unknown languages are highlighted as plain text. Applicable to bothrehype-starry-nightandrehype-starry-night-inline.grammars: a list of Starry Night compatible grammar definitions. By default, all grammars provided by Starry Night are used. Applicable to bothrehype-starry-nightandrehype-starry-night-inline.headerExtensions: a list of functions to customize the header. Applicable to onlyrehype-starry-night. By default, language-extension and caption-extension are used. A header extension has access to the following arguments.headerOptions: an object with a randomly generatedidattached to thepreelement,metadatacontaining the caption, list of highlighted lines, etc., andlanguagetag specified on the codechildren: an array of nodes contained in the header
Check out the available themes on Starry Night repository.
Import index.css or use it as a base for your own custom styles to style codeblock headers (containing language and captions) and gutters (providing line number, highlighting and prompt).
There are multiple ways to support light and dark themes. Here's one way to do this; the appropriate theme will get activated based on system preferences.
:root {
  /* light theme variables specific to rehype-starry-night plugin */
  --highlight-background-color: hsl(0, 0%, 100%);
  --highlight-border-color: hsl(208, 21%, 86%);
  --highlight-code-highlight: hsl(208, 19%, 82%);
}

@media (prefers-color-scheme: dark) {
  :root {
    /* dark theme variables specific to rehype-starry-night plugin */
    --highlight-background-color: hsl(240, 20%, 2%);
    --highlight-border-color: hsl(208, 21%, 12%);
    --highlight-code-highlight: hsl(208, 19%, 13%);
  }
}

/* import a Starry Night theme that supports both dark and light themes */
@import "https://raw.githubusercontent.com/wooorm/starry-night/main/style/both.css";

/* import CSS specific to rehype-starry-night plugin */
@import "https://raw.githubusercontent.com/Microflash/rehype-starry-night/main/index.css";
Warning
URL imports for external styles is not recommended. You should either self-host them, bundle them, or copy-paste the entire CSS in one single file.
```sh
docker ps -a
```
The above codeblock will yield:
<div class="highlight highlight-sh">
  <div class="highlight-header">
    <div class="highlight-language">sh</div>
  </div>
<pre id="MC40OTg1ODA0"><code tabindex="0"><span class="line">docker ps -a</span>
</code></pre>
</div>```css
* {
display: revert;
}
```
The above codeblock will yield:
<div class="highlight highlight-css">
  <div class="highlight-header">
    <div class="highlight-language">css</div>
  </div>
<pre id="MC4yODM1ODY3"><code tabindex="0"><span class="line"><span class="line-number" aria-hidden="true">1</span><span class="pl-ent">*</span> {</span>
<span class="line"><span class="line-number" aria-hidden="true">2</span>  <span class="pl-c1">display</span>: <span class="pl-c1">revert</span>;</span>
<span class="line"><span class="line-number" aria-hidden="true">3</span>}</span>
</code></pre>
</div>
Line numbers are automatically padded to ensure that they are aligned properly.
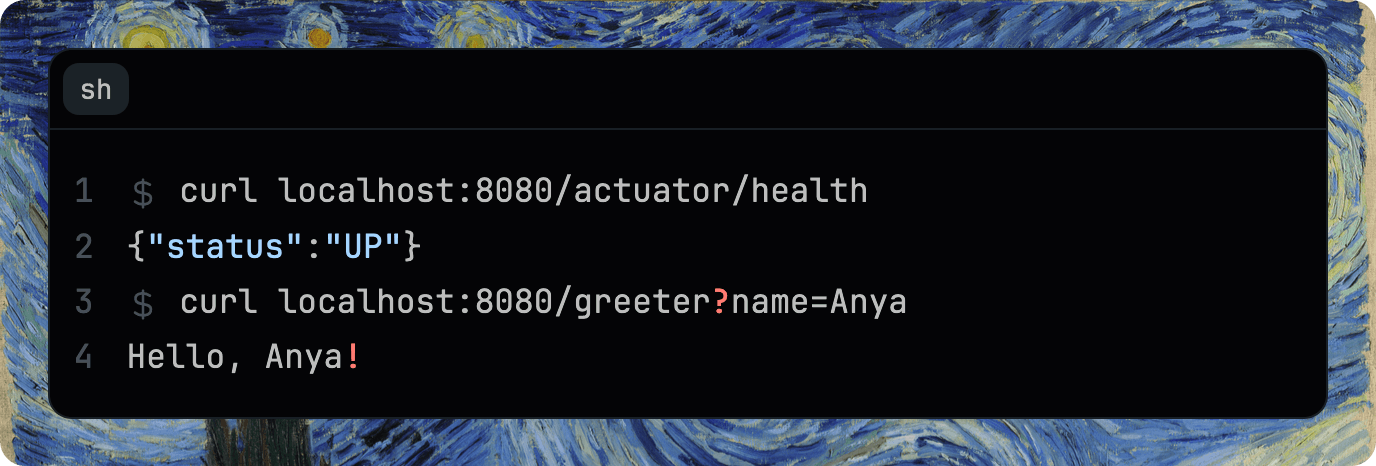
Sometimes you may want to show a prompt while displaying a command-line instruction. Prompts on multiple lines can be specified as follows.
```sh prompt{1,3}
curl localhost:8080/actuator/health
{"status":"UP"}
curl localhost:8080/greeter?name=Anya
Hello, Anya!
```
The above codeblock will yield:
<div class="highlight highlight-sh">
  <div class="highlight-header">
    <div class="highlight-language">sh</div>
  </div>
<pre id="MC4zMDQ2MjUy"><code tabindex="0"><span class="line"><span class="line-number" aria-hidden="true">1</span><span class="line-prompt" aria-hidden="true"></span>curl localhost:8080/actuator/health</span>
<span class="line"><span class="line-number" aria-hidden="true">2</span>{<span class="pl-s"><span class="pl-pds">"</span>status<span class="pl-pds">"</span></span>:<span class="pl-s"><span class="pl-pds">"</span>UP<span class="pl-pds">"</span></span>}</span>
<span class="line"><span class="line-number" aria-hidden="true">3</span><span class="line-prompt" aria-hidden="true"></span>curl localhost:8080/greeter<span class="pl-k">?</span>name=Anya</span>
<span class="line"><span class="line-number" aria-hidden="true">4</span>Hello, Anya<span class="pl-k">!</span></span>
</code></pre>
</div>
index.css disables user-selection of prompts to make sure that when a user copies the content of a codeblock, the prompt is not copied.
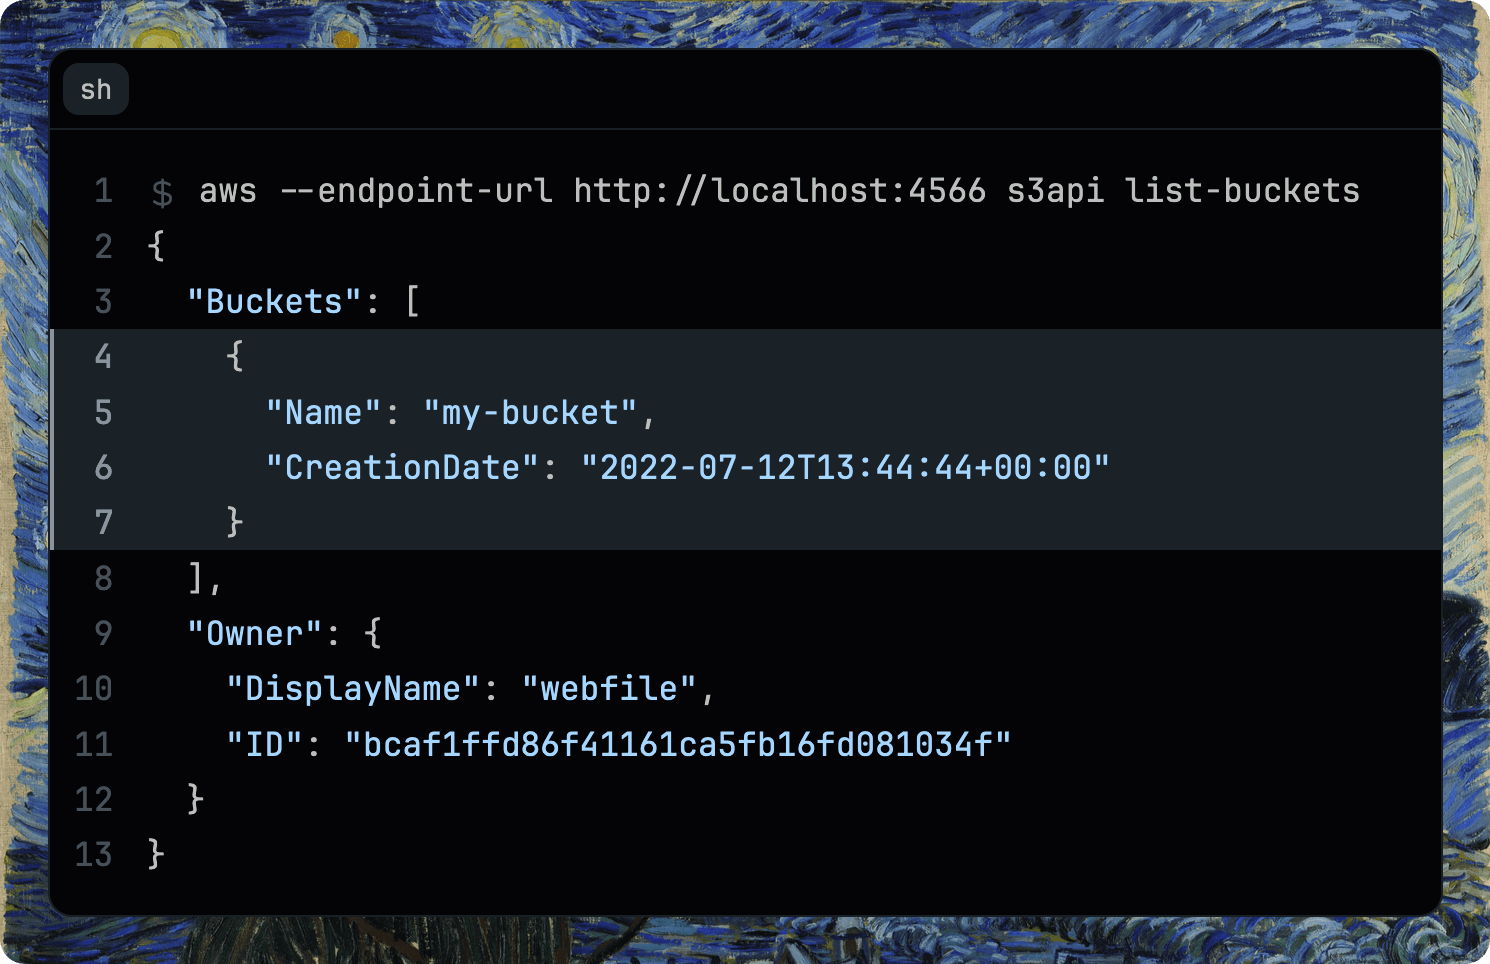
You can highlight multiple lines by specifying the line numbers (or even, range of line numbers) between curly braces in the codeblock metadata.
```sh {4-7} prompt{1}
aws --endpoint-url http://localhost:4566 s3api list-buckets
{
  "Buckets": [
    {
      "Name": "my-bucket",
      "CreationDate": "2022-07-12T13:44:44+00:00"
    }
  ],
  "Owner": {
    "DisplayName": "webfile",
    "ID": "bcaf1ffd86f41161ca5fb16fd081034f"
  }
}
```
The above codeblock will yield:
<div class="highlight highlight-sh">
  <div class="highlight-header">
    <div class="highlight-language">sh</div>
  </div>
<pre id="MC44MTc0Njk1"><code tabindex="0"><span class="line"><span class="line-number" aria-hidden="true"> 1</span><span class="line-prompt" aria-hidden="true"></span>aws --endpoint-url http://localhost:4566 s3api list-buckets</span>
<span class="line"><span class="line-number" aria-hidden="true"> 2</span>{</span>
<span class="line"><span class="line-number" aria-hidden="true"> 3</span>  <span class="pl-s"><span class="pl-pds">"</span>Buckets<span class="pl-pds">"</span></span>: [</span>
<span class="line" data-highlighted><span class="line-number" aria-hidden="true"> 4</span>    {</span>
<span class="line" data-highlighted><span class="line-number" aria-hidden="true"> 5</span>      <span class="pl-s"><span class="pl-pds">"</span>Name<span class="pl-pds">"</span></span>: <span class="pl-s"><span class="pl-pds">"</span>my-bucket<span class="pl-pds">"</span></span>,</span>
<span class="line" data-highlighted><span class="line-number" aria-hidden="true"> 6</span>      <span class="pl-s"><span class="pl-pds">"</span>CreationDate<span class="pl-pds">"</span></span>: <span class="pl-s"><span class="pl-pds">"</span>2022-07-12T13:44:44+00:00<span class="pl-pds">"</span></span></span>
<span class="line" data-highlighted><span class="line-number" aria-hidden="true"> 7</span>    }</span>
<span class="line"><span class="line-number" aria-hidden="true"> 8</span>  ],</span>
<span class="line"><span class="line-number" aria-hidden="true"> 9</span>  <span class="pl-s"><span class="pl-pds">"</span>Owner<span class="pl-pds">"</span></span>: {</span>
<span class="line"><span class="line-number" aria-hidden="true">10</span>    <span class="pl-s"><span class="pl-pds">"</span>DisplayName<span class="pl-pds">"</span></span>: <span class="pl-s"><span class="pl-pds">"</span>webfile<span class="pl-pds">"</span></span>,</span>
<span class="line"><span class="line-number" aria-hidden="true">11</span>    <span class="pl-s"><span class="pl-pds">"</span>ID<span class="pl-pds">"</span></span>: <span class="pl-s"><span class="pl-pds">"</span>bcaf1ffd86f41161ca5fb16fd081034f<span class="pl-pds">"</span></span></span>
<span class="line"><span class="line-number" aria-hidden="true">12</span>  }</span>
<span class="line"><span class="line-number" aria-hidden="true">13</span>}</span>
</code></pre>
</div>
Refer to the documentation of fenceparser to learn about the additional ways in which you can specify the information about highlighted lines.
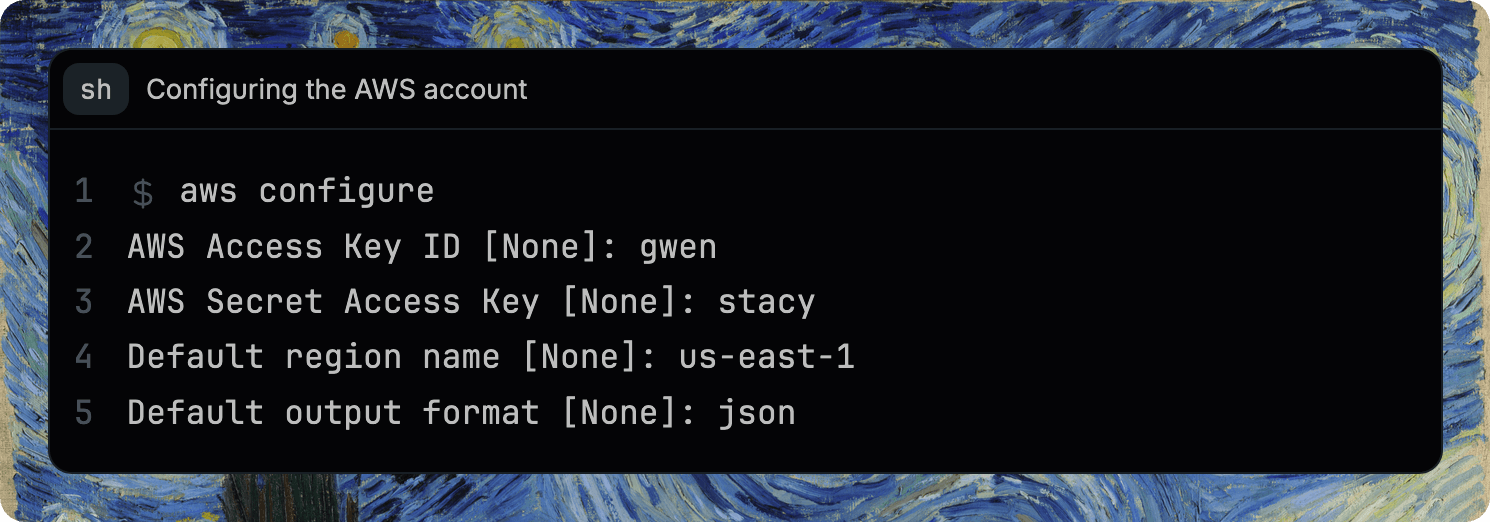
Captions are useful to describe the context of a piece of code.
```sh caption='Configuring the AWS account' prompt{1}
aws configure
AWS Access Key ID [None]: gwen
AWS Secret Access Key [None]: stacy
Default region name [None]: us-east-1
Default output format [None]: json
```
The above codeblock will yield:
<div class="highlight highlight-sh">
  <div class="highlight-header">
    <div class="highlight-language">sh</div>
    <div class="highlight-caption">Configuring the AWS account</div>
  </div>
<pre id="MC40NTMzMDQx"><code tabindex="0"><span class="line"><span class="line-number" aria-hidden="true">1</span><span class="line-prompt" aria-hidden="true"></span>aws configure</span>
<span class="line"><span class="line-number" aria-hidden="true">2</span>AWS Access Key ID [None]: gwen</span>
<span class="line"><span class="line-number" aria-hidden="true">3</span>AWS Secret Access Key [None]: stacy</span>
<span class="line"><span class="line-number" aria-hidden="true">4</span>Default region name [None]: us-east-1</span>
<span class="line"><span class="line-number" aria-hidden="true">5</span>Default output format [None]: json</span>
</code></pre>
</div>Although Starry Night supports a huge number of languages, it is not all encompassing. In such cases, you can configure aliases to force syntax highlighting a codeblock containing code in a language not yet supported by Starry Night.
Say we have the following file example.md:
```xjm
language = "en"
customization = false
features = [ "io", "graphics", "compute" ]
```
You can alias xjm to toml as follows with example.js:
import { unified } from "unified";
import remarkParse from "remark-parse";
import remarkRehype from "remark-rehype";
import rehypeStringify from "rehype-stringify";
import rehypeStarryNight from "https://esm.sh/@microflash/rehype-starry-night";

main()

async function main() {
  const file = await unified()
    .use(remarkParse)
    .use(remarkRehype, { allowDangerousHtml: true })
    .use(rehypeStarryNight, { aliases: { xjm: "toml" } })
    .use(rehypeStringify, { allowDangerousHtml: true })
    .process(markdown);

  console.log(String(file));
}
Running that with node example.js yields:
<div class="highlight highlight-toml">
  <div class="highlight-header">
    <div class="highlight-language">xjm</div>
  </div>
<pre id="MC41Nzk3ODE2"><code tabindex="0"><span class="line"><span class="line-number" aria-hidden="true">1</span><span class="pl-smi">language</span> = <span class="pl-s"><span class="pl-pds">"</span>en<span class="pl-pds">"</span></span></span>
<span class="line"><span class="line-number" aria-hidden="true">2</span><span class="pl-smi">customization</span> = <span class="pl-c1">false</span></span>
<span class="line"><span class="line-number" aria-hidden="true">3</span><span class="pl-smi">features</span> = [ <span class="pl-s"><span class="pl-pds">"</span>io<span class="pl-pds">"</span></span>, <span class="pl-s"><span class="pl-pds">"</span>graphics<span class="pl-pds">"</span></span>, <span class="pl-s"><span class="pl-pds">"</span>compute<span class="pl-pds">"</span></span> ]</span>
</code></pre>
</div>Suppose you want to add a copy to clipboard button in the header. You can do so by adding a custom header extension.
Say we have the following file example.md:
```html
<mark>highlighted</mark>
```
You can pass a custom header extension as follows with example.js:
import { unified } from "unified";
import remarkParse from "remark-parse";
import remarkRehype from "remark-rehype";
import rehypeStringify from "rehype-stringify";
import rehypeStarryNight from "https://esm.sh/@microflash/rehype-starry-night";
import rehypeStarryNightHeaderCaptionExtension from "@microflash/rehype-starry-night/header-caption-extension";
import rehypeStarryNightHeaderLanguageExtension from "@microflash/rehype-starry-night/header-language-extension";

main()

async function main() {
  const file = await unified()
    .use(remarkParse)
    .use(remarkRehype, { allowDangerousHtml: true })
    .use(rehypeStarryNight, {
      headerExtensions: [
        rehypeStarryNightHeaderLanguageExtension,
        rehypeStarryNightHeaderCaptionExtension,
        (headerOptions, children) => {
          children.push({
            type: "element",
            tagName: "button",
            properties: { className: ["highlight-copy"], for: headerOptions.id },
            children: [
              {
                type: "text",
                value: "Copy"
              }
            ]
          })
        }
      ]
    })
    .use(rehypeStringify, { allowDangerousHtml: true })
    .process(markdown);

  console.log(String(file));
}
Running that with node example.js yields:
<div class="highlight highlight-html">
<div class="highlight-header">
<div class="highlight-language">html</div>
<button class="highlight-copy" for="MC41MTc4MjIz">Copy</button>
</div>
<pre id="MC41MTc4MjIz"><code tabindex="0"><span class="line"><<span class="pl-ent">mark</span>>highlighted</<span class="pl-ent">mark</span>></span>
</code></pre>
</div>rehype-highlight— highlight code with highlight.js (through lowlight)rehype-prism— highlight code with Prism (via refractor)rehype-prism-plus— highlight code with Prism (via refractor) with additional line highlighting and line numbers functionalitiesrehype-shiki— highlight code with shiki


