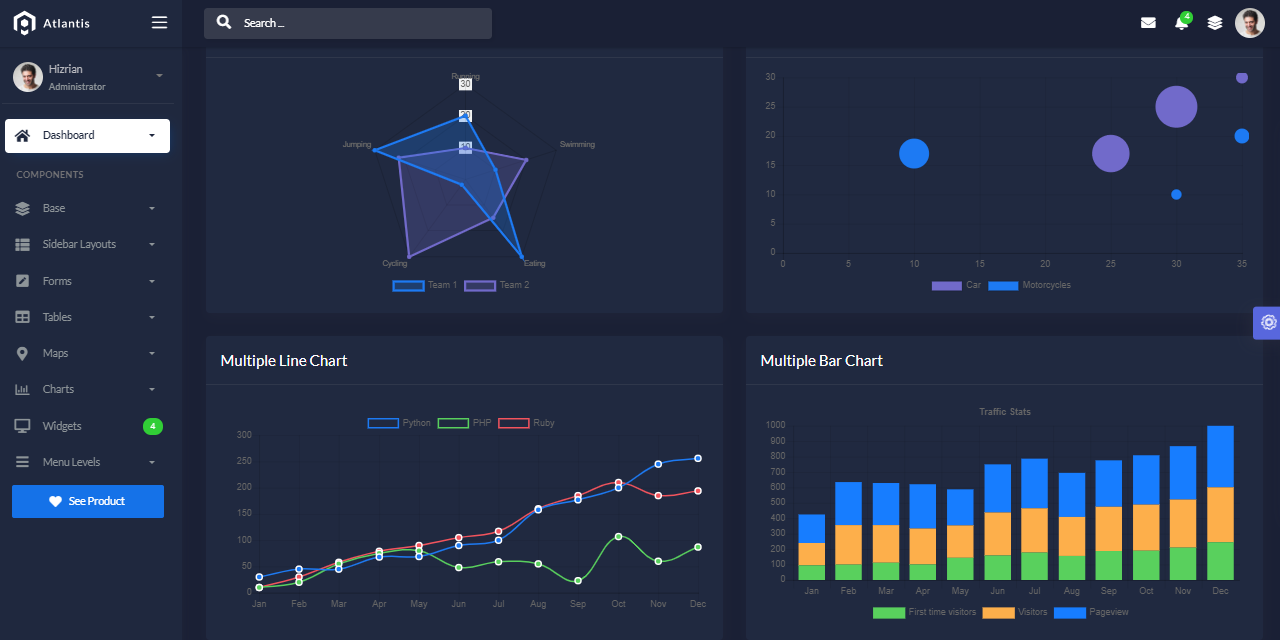
Flask Sample project that provides an integration of SQLAlchemy ORM on top of a simple Flask Codebase. Flask Database project might help beginners to code a real project on top of Flask. For newcomers, Flask is a lightweight web application framework written in Python. By using a database in our project, we can have a persistent data layer that can be reused and updated according to application requirements.
Features
- Simple Flask codebase built with
simplicityin mind - DBMS:
SQLiteStorage - DB Tools:
SQLAlchemyORM,Flask-Migrate(schema migrations) - Permissive MIT License - allows unlimited copies for hobby and commercial products
- Support via Github (issues tracker) and Discord.
Implementation
- Add
SQLAlchemyORM to therequirements.txt- SqlAlchemy - v1.4.5
- Flask-SQLAlchemy - v2.5.1
Update codebaseto useSQLAlchemy- Define a
new model Populatethe new table withnew data- Visualize the information using
SQLiteBrowsertool - Use a
migrationto update the model (add new field)- Integrate/Use Flask-Migrate v2.7.0
- Visualize the information using
SQLiteBrowsertool
Links
- Atlantis Lite Flask - Free Starter with more features:
- Authentication, Blueprints, Dual Config (dev & production), Deploy scripts.
- Atlantis Lite Flask - Demo - LIVE Deployment
$ # Clone the sources
$ git clone https://github.com/app-generator/flask-database-sample.git
$ cd flask-database-sample
$
$ # Virtualenv modules installation (Unix based systems)
$ virtualenv env
$ source env/bin/activate
$
$ # Virtualenv modules installation (Windows based systems)
$ # virtualenv env
$ # .\env\Scripts\activate
$
$ # Install requirements
$ pip3 install -r requirements.txt
$
$ # Set the FLASK_APP environment variable
$ (Unix/Mac) export FLASK_APP=run.py
$ (Windows) set FLASK_APP=run.py
$ (Powershell) $env:FLASK_APP = ".\run.py"
$
$ # Set up the DEBUG environment
$ # (Unix/Mac) export FLASK_ENV=development
$ # (Windows) set FLASK_ENV=development
$ # (Powershell) $env:FLASK_ENV = "development"
$
$ # Run the Jinja Template
$ # --host=0.0.0.0 - expose the app on all network interfaces (default 127.0.0.1)
$ # --port=5000    - specify the app port (default 5000)
$ flask run --host=0.0.0.0 --port=5000
$
$ # Access the UI in browser: http://127.0.0.1:5000/The project has a simple structure, represented as bellow:
< PROJECT ROOT >
   |
   |-- app/__init__.py
   |-- app/
   |    |-- static/
   |    |    |-- <css, JS, images>         # CSS files, Javascripts files
   |    |
   |    |-- templates/
   |    |    |
   |    |    |-- includes/                 # Page chunks, components
   |    |    |    |
   |    |    |    |-- navigation.html      # Top bar
   |    |    |    |-- sidebar.html         # Left sidebar
   |    |    |    |-- scripts.html         # JS scripts common to all pages
   |    |    |    |-- footer.html          # The common footer
   |    |    |
   |    |    |-- layouts/                  # App Layouts (the master pages)
   |    |    |    |
   |    |    |    |-- base.html            # Used by the common pages like index, UI
   |    |    |    |-- base-fullscreen.html # Used by auth pages (login, register)
   |    |    |
   |    |  index.html                      # The default page
   |    |  login.html                      # Auth Login Page
   |    |  register.html                   # Auth Registration Page
   |    |  page-404.html                   # Error 404 page (page not found)
   |    |  page-500.html                   # Error 500 page (server error)
   |    |    *.html                        # All other pages provided by the UI Kit
   |
   |-- requirements.txt
   |
   |-- run.py
   |
|-- ************************************************************************The project is forked from a simple Flask template, without database or other hard dependencies. The design was translated to Jinja template and ... that's all.
Added libraries required by the project:
- sqlalchemy, version 1.4.5
- flask_sqlalchemy, version 2.5.1
- flask_migrate, version 2.7.0
The changes required by this phase:
- Update
requirements.txt: addedsqlalchemyandflask_sqlalchemy - Update
app/__init__.pyto use SqlAlchemy- import
SQLAlchemylibrary - define the configuration:
SQLALCHEMY_DATABASE_URIandSQLALCHEMY_TRACK_MODIFICATIONS - Bind SqlAlchemy to
appobject - SqlAlchemy interface is exposed via
dbobject
- import
Note: we don't have any tables yet
Test the set up via Flask CLI
$ flask shell
Python 3.8.4 ...
App: app [development]
>>> from app import db
>>> db.create_all()
The above code will invoke SQLAlchemy db object and create all defined tables. At this moment we don't have any tables but the db.sqlite3 (SQLite) file is created inside the app folder.
The Location of the file is determined by this code snippet used in app/__init__.py:
# Grabs the folder where the script runs.
basedir = os.path.abspath(os.path.dirname(__file__))
...
app.config['SQLALCHEMY_DATABASE_URI']        = 'sqlite:///' + os.path.join(basedir, 'db.sqlite3')
...Optional phase - Configuration variables defined in app/__init__.py file will be moved to a separate file for a cleaner design.
The changes required by this phase:
- Create
config.pyfile inappfolder - Move all configuration variables used in
app/__init__.pytoapp/config.pySECRET_KEY- used by Flask for security purposesSQLALCHEMY_DATABASE_URI- defines SQLite database pathSQLALCHEMY_TRACK_MODIFICATIONS- used by SqlAlchemy core
- Remove variable
basedirfrom__init__.py(no longer needed) - Update
__init__.pyto load the configuration fromconfig.py
Test the set up via Flask CLI
$ flask shell
Python 3.8.4 ...
App: app [development]
>>> app.config['SECRET_KEY'] # access a configiguration variable
'VALUE_FROM_CONFIG_HERE'
Using Flask CLI to print the variables defined in app/config.py we should see the values used in the file.
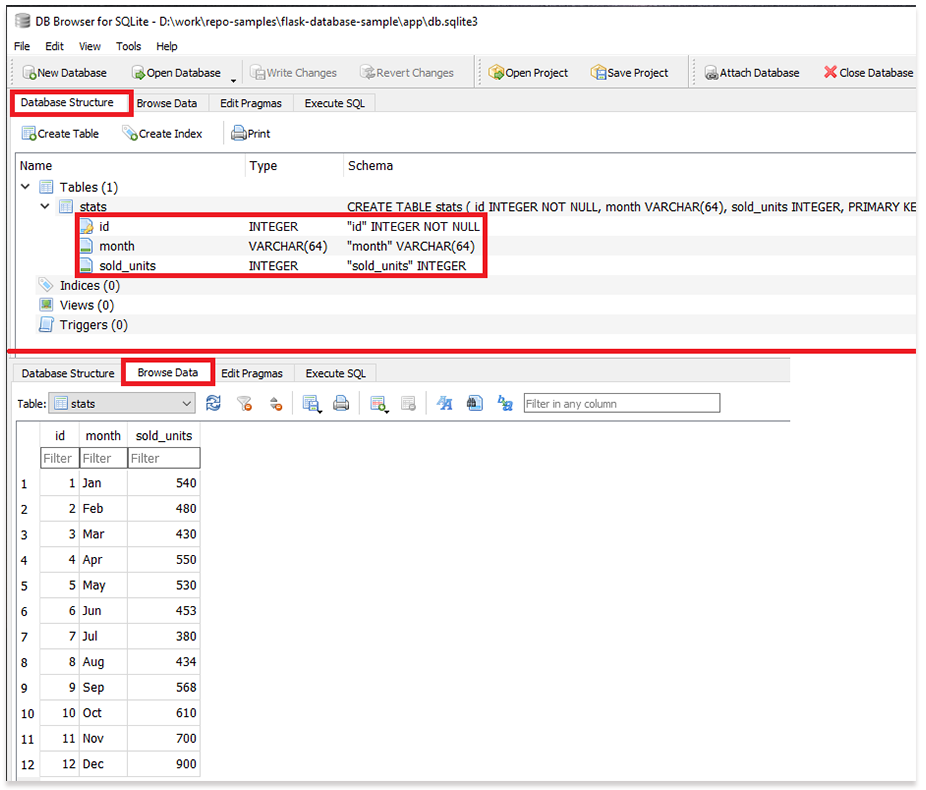
In this phase we will define and integrate a simple table called Stats with three columns: Id, Month (unique string), Sold_units (Integer)
The changes required by this phase:
- Define the new table in
app/models.py - Update
__init__.pyto use it - Delete
app/db.sqlite3to recreate the database with the new table
Test the set up via Flask CLI
$ flask shell
Python 3.8.4 ...
App: app [development]
>>> from app import db
>>> db.create_all()
>>>
>>> from app.models import Stats
>>> Stats.query.all()
[]
Above code snippet does the following:
- Invoke
dbobject (SqlAlchemy interface) - Call
create_all()SqlAlchemy helper to create all tables - Import into the CLI context
StatsORM object - List all rows via helper
query.all()
Obviously, we have an empty list - no rows defined so far. Let's create new records using the CLI:
>>> from app.models import Stats
>>> Stats.query.all()
[] # No rows yet
>>>
>>> # Define a new object
>>> ian = Stats(id=1, month='Jan', sold_units=540)
>>> db.session.add(ian) # Add the new object to the DB Session
>>> db.session.commit() # Save changes in the database
>>>
>>> Stats.query.all()
[Jan - 540] # we have an object now
Code a DB helper for lazy devs
Add the following snippet to Stats model to speed up the saving.
# Contents of `app/models.py`
...
class Stats(db.Model):
...
    def save(self):
        # inject self into db session
        db.session.add ( self )
        # commit change and save the object
        db.session.commit( )

        return self
...
Now we can save the new objects by calling the save() helper:
>>> from app.models import Stats
>>> # Define a new objects
>>> febr = Stats(id=2, month='Feb', sold_units=480)
>>> febr.save()
>>>
>>> Stats.query.all()
[Jan - 540, Feb - 480]
In the same way we can save the information for all months:
>>> feb = Stats(id=2,  month='Feb', sold_units=480)
>>> mar = Stats(id=3,  month='Mar', sold_units=430)
>>> apr = Stats(id=4,  month='Apr', sold_units=550)
>>> may = Stats(id=5,  month='May', sold_units=530)
>>> jun = Stats(id=6,  month='Jun', sold_units=453)
>>> jul = Stats(id=7,  month='Jul', sold_units=380)
>>> aug = Stats(id=8,  month='Aug', sold_units=434)
>>> sep = Stats(id=9,  month='Sep', sold_units=568)
>>> oct = Stats(id=10, month='Oct', sold_units=610)
>>> nov = Stats(id=11, month='Nov', sold_units=700)
>>> dec = Stats(id=12, month='Dec', sold_units=900)
>>>
>>> Stats.query.all()
[Jan - 540, Feb - 480, Mar - 430, Apr - 550, May - 530, Jun - 453, Jul - 380, Aug - 434, Sep - 568, Oct - 610, Nov - 700, Dec - 900]
Hint: to visualize the information we can use SQLiteBrowser an open-source and free editor for SQLite. If we download the tool and open
app/db.sqlite3we should see something like this:
In this phase, we will update the Stats with a new column: total sales (Integer)
The changes required by this phase:
- Add flask_migrate to the
requirements.txtfile - Update
app/__init__.pyto integrate the migrations- Import
flask_migrate - Inject
Migrateconstructor in our app
- Import
How it works
After Flask-Migrate is properly integrated we should run db init and db migrate to generate the initial state for our database.
$ # This command will create a migrations folder
$ flask db init
$ flask db migrate -m "Initial migration."
After this step is complete, we will add the new field (total_sales) to the Stats table and apply the new changes on the database.
$ flask db migrate -m "Stats - Added Total_Sales Column"
Generating ... migrations\versions\d26f9f5f6e4f_stats_added_total_sales_column.py ...  done
$ flask db upgrade
INFO  [alembic.runtime.migration] Context impl SQLiteImpl.
INFO  [alembic.runtime.migration] Will assume non-transactional DDL.
INFO  [alembic.runtime.migration] Running upgrade  -> d26f9f5f6e4f, Stats - Added Total_Sales Column
At this point, we can use the new structure. Let's update an object via Flask CLI:
>>> from app.models import Stats
>>> ian = Stats.query.all()[0]
>>> ian.total_sales = 1000
>>> ian.save()
By inspecting the app/db.sqlite3 (SQLite database) we should see the new changes:
The project comes with a basic configuration for Docker, Gunicorn, and Waitress.
Docker execution
The steps to start the template using Docker:
Get the code
$ git clone https://github.com/app-generator/flask-database-sample.git
$ cd flask-database-sample
Start the app in Docker
$ sudo docker-compose pull && sudo docker-compose build && sudo docker-compose up -dVisit http://localhost:5005 in your browser. The app should be up & running.
- Flask Framework - The official website
Flask Database Sample - Open-source sample provided by AppSeed App Generator.