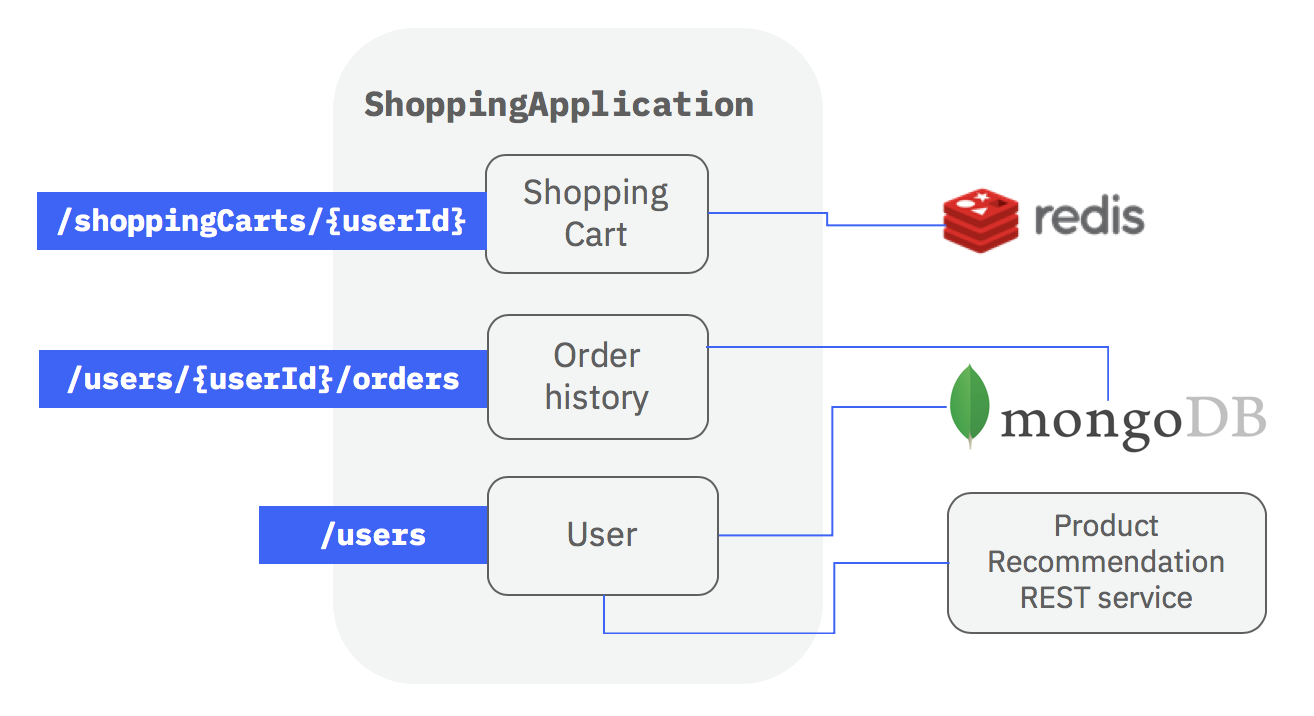
This project aims to represent an online ecommerce platform APIs to validate / test the LoopBack 4 framework readiness for GA. See loopbackio/loopback-next#1476 for more information.
Make sure you have Node.js >= 8.9.0 installed. Then do the following to clone and start the project.
git clone https://github.com/strongloop/loopback4-example-shopping.git
cd loopback4-example-shopping
npm i
npm start
The main app will be running at http://[::1]:3000.
You will also see Recommendation server is running at http://127.0.0.1:3001.,
it is the server to which the services/recommender.service service will
connect to get the recommendations for a user.
This app is intended to be interacted with using the API Explorer located at http://[::1]:3000/explorer/.
This app has the following models:
User- representing the users of the system.UserCredentials- representing sensitive credentials like a password.Product- a model which is mapped to a remote service byservices/recommender.service.ShoppingCartItem- a model for representing purchases.ShoppingCart- a model to represent a user's shopping cart, can contain many items (items) of the typeShoppingCartItem.Order- a model to represent an order by user, can have many products (products) of the typeShoppingCartItem.
ShoppingCart and Order are marked as belonging to the User model by the
use of the @belongsTo model decorator. Correspondingly, the User model is
marked as having many Orders using the @hasMany model decorator. Although
possible, a hasMany relation for User to ShoppingCart has not be created
in this particular app to limit the scope of the example.
User is also marked as having one UserCredentials model using the @hasOne
decorator. The belongsTo relation for UserCredentials to User has not been
created to keep the scope smaller.
Controllers expose API endpoints for interacting with the models and more.
In this app, there are four controllers:
ping- a simple controller to checking the status of the app.user- controller for creating user, fetching user info, updating user info, and logging in.shopping-cart- controller for creating, updating, deleting shopping carts, and getting the details about a shopping cart.user-order- controller for creating, updating, deleting orders, and getting the details about an order.
Services are modular components that can be plugged into a LoopBack application in various locations to contribute additional capabilities and features to the application.
This app has five services:
services/recommender.service- responsible for connecting to a "remote" server and getting recommendations for a user. The API endpoint atGET /users/{userId}/recommend, is made possible by this service.services/user-service- responsible for verifying if user exists and the submitted password matches that of the existing user.services/hash.password.bcryptjs- responsible for generating and comparing password hashes.services/validator- responsible for validating email and password when a new user is created.services/jwt-service- responsible for generating and verifying JSON Web Token.
Note: This app contains a login endpoint for the purpose of spike and demo,
the authentication for the CRUD operations and navigational endpoints of model
User is still in progress.
The endpoint for logging in a user is a POST request to /users/login.
Once the credentials are extracted, the logging-in implementation at the
controller level is just a four step process. This level of simplicity is made
possible by the use of the UserService service provided by
@loopback/authentication.
const user = await this.userService.verifyCredentials(credentials)- verify the credentials.const userProfile = this.userService.convertToUserProfile(user)- generate user profile object.const token = await this.jwtService.generateToken(userProfile)- generate JWT based on the user profile object.return {token}- send the JWT.
You can see the details in
packages/shopping/src/controllers/user.controller.ts.
To see authorization in action in this example, all requests to the endpoint
/users/{userId}/orders (i.e, UserOrderController) are validated for specific
user access.
Endpoint authorization is done using @loopback/authorization package and the
provisions in it are implemented using
Casbin configurations.
Below is a scenario illustrating how authorization works in this example:
-
Bob logs into the shopping app using his existing user credential via endpoint
/users/login. The JWT token returned has the user name asboband id as123. -
Bob invokes endpoint GET
/users/123/orderswith the JWT token obtained in the previous step. The corresponding controller operationfindOrdersis configured authorization scope['find']. -
The authorization provider in
packages/shopping/src/services/authorizor.tsuses the casbin configuration/packages/shopping/fixtures/casbin/rbac_policy.csvto validate thatbobhasfindscope for resourceorder. -
Bob invokes endpoint DELETE
/users/123/orderswith the JWT token. The endpoint operation in the controllerdeleteOrdersis configured with@authorizedecorator with scopes['delete']. The decorator also has a voter function (packages/shopping/src/services/id.compare.authorizor.ts) to check if theuserIdin the path matches with theuser idin the JWT token. This serves as an additional data level restriction to avoid tokens of other users delete bob's orders.
There is a tutorial which shows how to apply the JWT strategy to secure your
endpoint with @loopback/authentication@2.x. You can check more details in
https://loopback.io/doc/en/lb4/Authentication-Tutorial.html
Please check the try it out section in the tutorial.
The example application can be packaged as multiple Docker containers and deployed to a cloud environment as a Kubernetes cluster.
Please check out Deploy Shopping Application as Cloud-native Microservices.
This project uses DCO. Be sure to sign off
your commits using the -s flag or adding Signed-off-By: Name<Email> in the
commit message.
Example
git commit -s -m "feat: my commit message"
Other LoopBack 4 Guidelines apply. See the following resources to get you started:
See all contributors.

-@2x.png?raw=true)