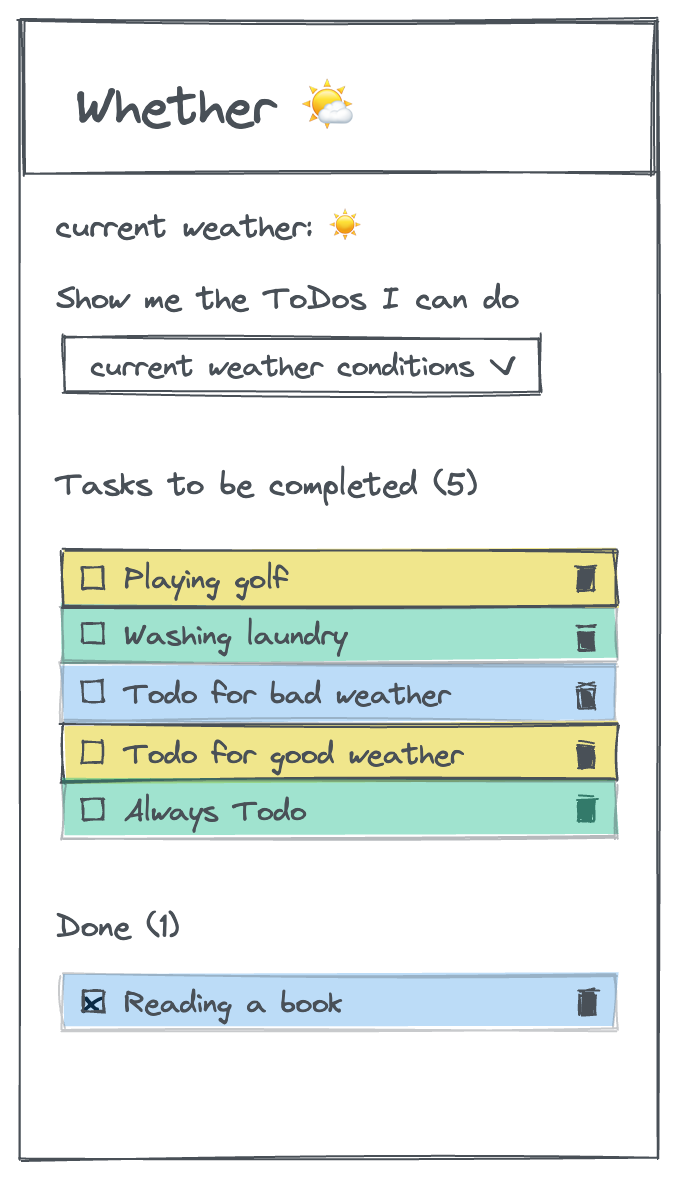
In this recap project you are going to work in a group to create a ToDo App, which organizes your ToDos according to different weather conditions.
You can find the starter template here. Create only one repository per group, but each member of the group clones the repository to their local machine.
💡 Don't forget to run
npm installto install all necessary dependencies (e.g. styled-components).
💡 Don't forget to work on feature branches, otherwise you might run into merge conflicts!
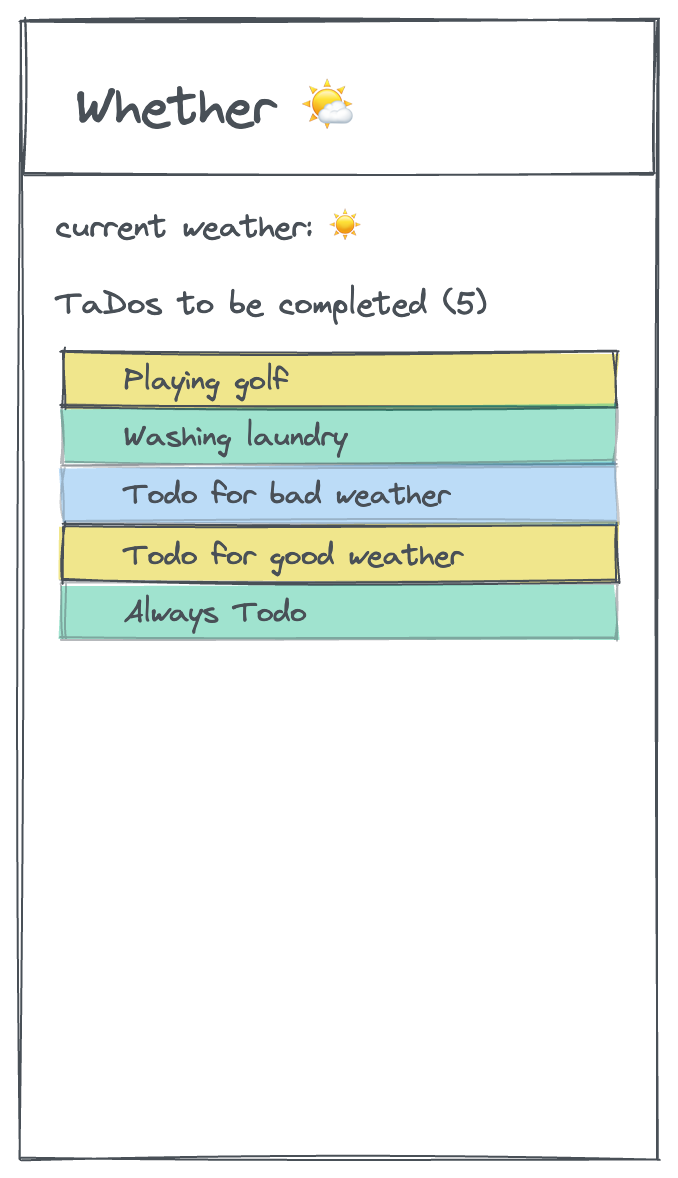
Your first task is to render ToDos in a list. For now you have only a few hardcoded ToDos in the data.js file. These ToDos are passed to the todos state in the App component as initialTodos.
- Create a
Todocomponent for a single ToDo list item. - In the
TodoListcomponent use an array method to render theToDocomponent for each todo list item. - Your
ToDoListcomponent should also include a heading with the name of the ToDo list and the amount of ToDos in the list. - Add styling according to the provided wireframe. The
background-colorof theTodocomponent should correspond to the respective weather status. (e.g. a "good weather ToDo" should be yellow, a "bad weather ToDo" should be blue, an "always or any weather ToDo" should be green).
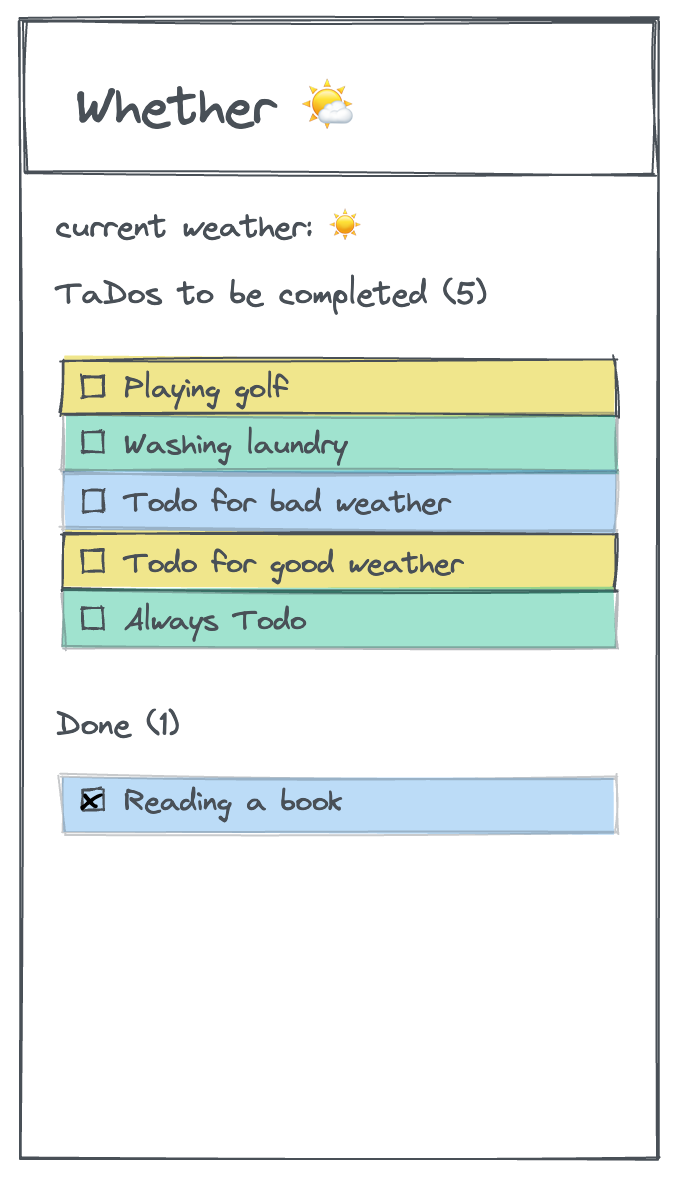
Now we want to be able to mark ToDos as completed. Additionally, all completed ToDos should be rendered in a separate list.
- Add a checkbox to the
Todocomponent. - Create a function
toggleCheckTodoin theAppcomponent. The function should update thetodosstate, so that theisCheckedproperty of the respective ToDo item is toggled.💡 This is an uplifted state, passed down through props.
- Make sure the function is called in the
Todocomponent when the checkbox is checked.💡 This is a callback from the lifted state.
- Reuse the
TodoListcomponent to render a second ToDo list in theAppwith the title "Done". - Adjust the ToDos you pass as a prop to both ToDoLists, so that the first list only shows the unfinished ToDos and the second one the completed ones.
Now we can fetch the weather data from an API and implement a filter, so that the user can pick the appropriate ToDos for current weather conditions.
But first let's have a look at what happens in our App component:
On initial render of the Whether App the function determineCurrentWeather inside the useEffect is called. This function first calls the function getUserLocation which determines the current location of the user (the user will receive a built-in browser notification asking for permission). After that the function getWeatherData will fetch the weather data for the specific coordinates of the user's location. The weather API returns a weatherCode which will be converted with the function convertWeatherCodeToEmoji and saved inside the state weatherStatus.
- Right now
getWeatherDatareturns the weather code0, so theInfoboxcomponent always displays best weather conditions ☀️. Write the fetch to receive the weather code for the user's location inside the functiongetWeatherData. Use the following url for the fetch:
`https://api.open-meteo.com/v1/forecast?latitude=${latitude}&longitude=${longitude}¤t_weather=true`;- 💡 Keep in mind that, after successfully fetching the weather data, the function
getWeatherDatashould return only the weather code which is a single number. Logging the fetched data to the console first, might help you to find the weather code in the object we fetched.
If you have done everything correctly, the Infobox should now show the current weather conditions of the user's location.
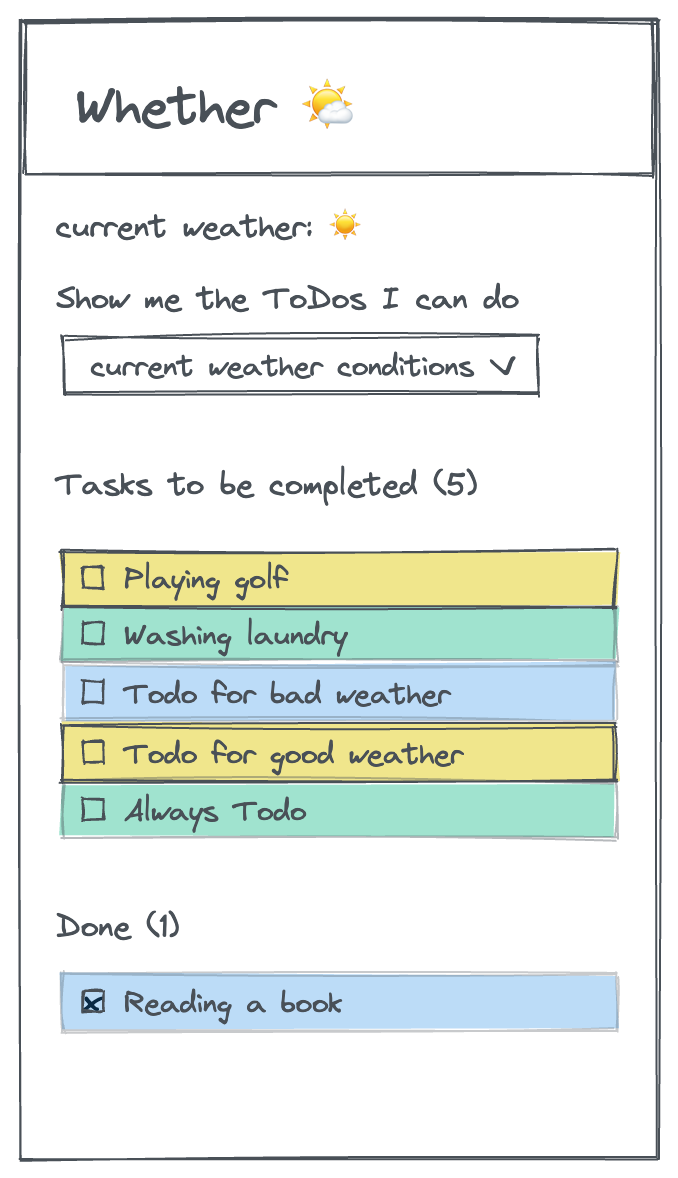
Now we need to implement the filter, so that the user can choose to only see ToDos for good, bad or any weather conditions.
- Uncomment the
SelectWeathercomponent in theAppto render the filter element. When the user picks an option from theselectelement the corresponding ToDos should be shown in the ToDo list. - The filter does not work properly yet. Have a look at the constant
filteredTodosright above the return statement in theAppcomponent. You will need to adjustfilteredTodos, so that the functionfilterTodoscan do it's job. Keep in mind that you also need to adjust the ToDos you pass as a prop to your two ToDo lists.
As a next step we want to enable the user to add new ToDos to the list.
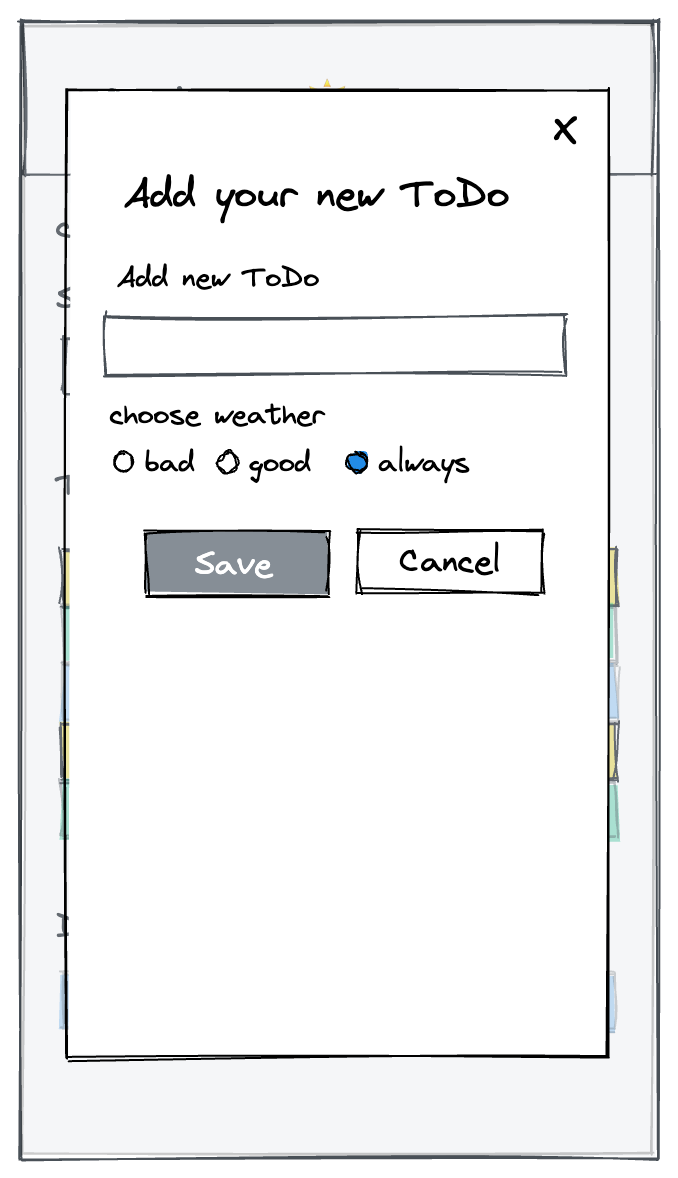
- Add a
forminside theAddTodocomponent. The form should include the following elements:- an input element for the ToDo text - this field should be required and accept a maximum length of 20 characters.
- 3 radio buttons with the values "always", "good" and "bad", so the user can decide with which weather conditions the ToDo can be done - the option "always" should be selected by default
- a submit button
- a cancel button
- Render the
AddToDocomponent in theApp. You will see a floating button to open the modal with the form. - Create a function
addTodoin theAppcomponent. The function should add the new ToDo to thetodosstate. Keep in mind, that every new ToDo needs an id. You can generate an id with the npm package nanoid.💡 Don't forget to install the package first.
- In the
AddTodocomponent use this function andFormDataon form submission to append the newly created ToDo to yourtodosstate. - After form submission the modal with the form should close automatically. Use
setTimeoutand theisOpenstate in the submit function to close the modal shortly after submission. - Adjust the cancel button, so that on click the modal will close directly.
💡 Have a look at the different variants of your
Buttoncomponent. You can use the different variants to add some styling to your buttons.
Now we want to be able to delete ToDos.
- Add a "delete" button to the
Todocomponent by using the already existingButtoncomponent. - Create a function
deleteTodoin theAppcomponent. The function should delete the ToDo with the respective ID from thetodosstate. - Make sure the function is called in the
Todocomponent when the delete button is clicked. - With the
Svgcomponent you can render a 🗑 icon on the delete button. Use the variantdeletefrom thesvgObjectin theSvgcomponent to render the correct icon.
