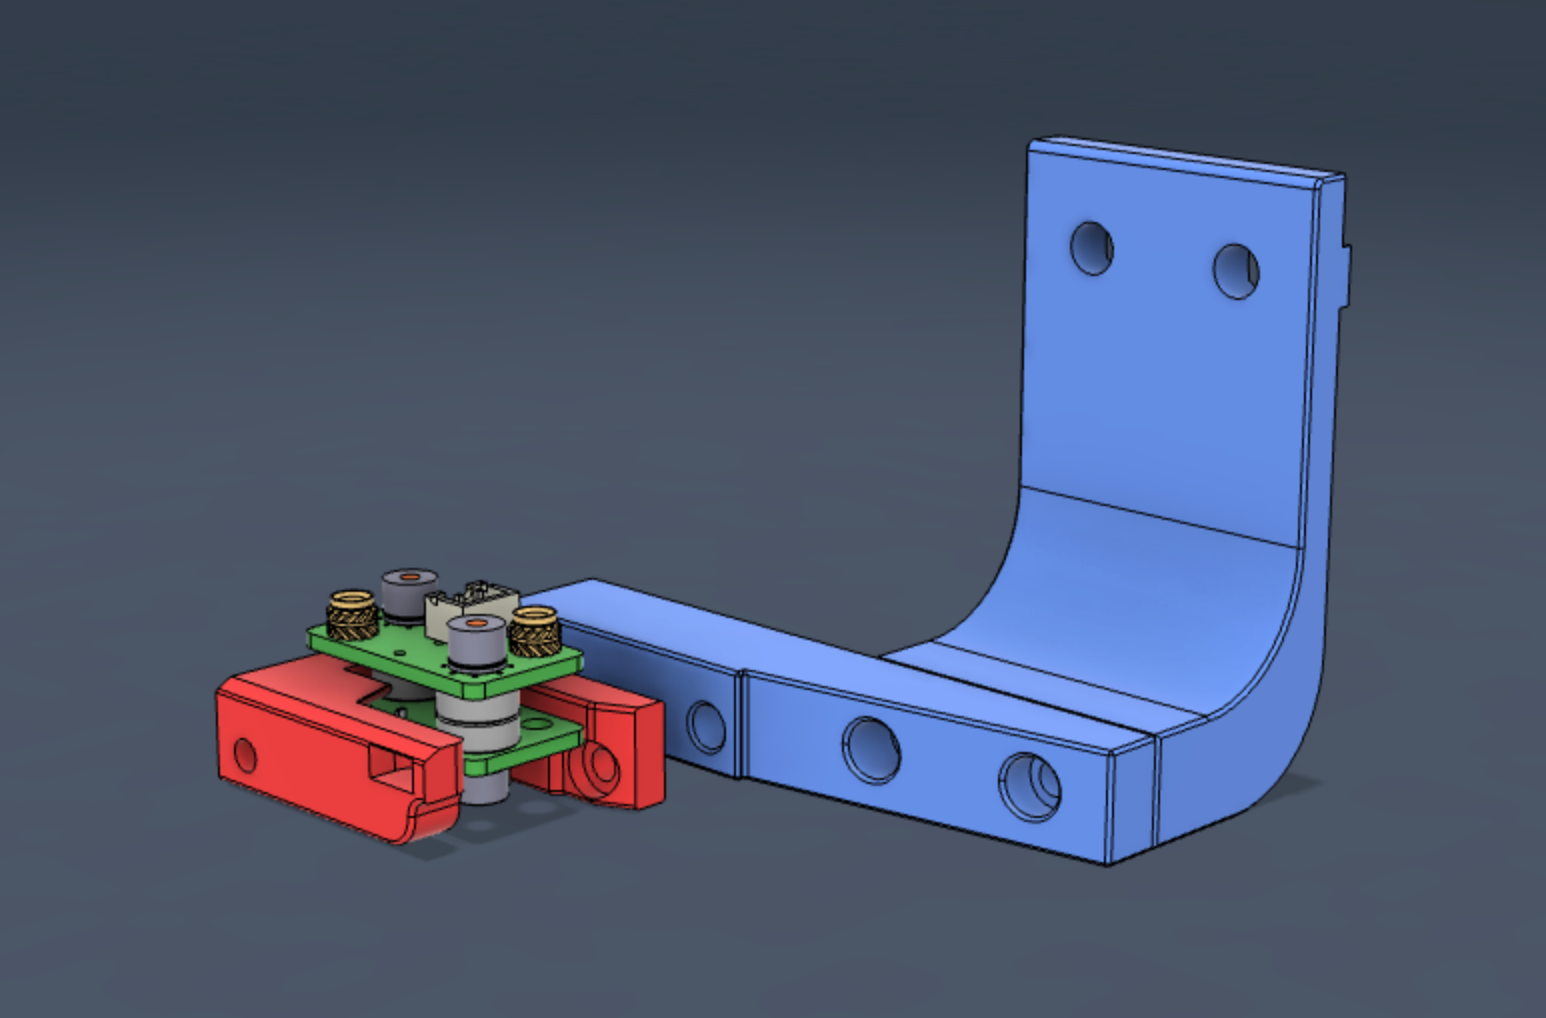
The EurekaProbe is a PCB based microswitch probe for 3D printers. This project takes inspiration from Klicky, Euclid and QuickDraw.
The aim of this project is to synthesise some of the best ideas from those other projects and distill them into a highly reliable, simple, robust, cost effective and easy to source alternative.
EurekaProbe is initially developed to be paired with the DirtyBird toolhead for Voron CoreXY printers, however can be adapted to to all other toolheads (AfterBurner, StealthBurner, etc).
Construction of EurekaProbe uses two identical PCBs which are magnetically coupled with countersunk 8x3 magnents. The PCBs are reversible, with one soldered as the Probe PCB and the other is attached onto the toolhead.
Operation of the probe uses Klicky based macros to ensure the probe correctly attaches from the dock before probing the bed.
- PCB based design ensures the magnets are always secured and correctly seated. No glues required, no ongoing maintenance, always repeatable coupling
- Unlike Euclid which has a voltage input and rating due to the LED circuit, Eureka does away with any voltage in the circuit because it is just a microswitch like any other endstop. So there is virtually no chance of backfeeding 24V or similar back to your MCU. All you need is to connect it to signal and ground on a endstop port
- Cheaper, easier to source than Euclid (at least for us Aussies), with a more generous licence arrangement
Thank you to the MakerBogans for supporting and assisting with development of this project.
- Solder SMTSO nuts to both PCBs
- Solder microswitch to one of the PCBs
- Solder JST header to the other PCB
- Screw countersunk magents to PCBs via SMTSO nuts with Torx screws. Ensure you have mixed polarity across the pairs
- Attach toolhead PCB to carriage via M3x5 low profile bolts into heat inserts
- 2 * EurekaProbe PCB
- 4 * 8x3-3 Countersunk magnets Aliexpress
- 4 * M2.5x5mm Torx countersunk screw Aliexpress
- 4 * SMTSO-M2.5-2.5ET Aliexpress
- 2 * M3x5mm low profile bolt Aliexpress
- 2 * M3x5x4 heat inserts Aliexpress
- 1 * Omron D2F DigiKey
- 1 * JST B2B-XH-A Aliexpress
A Eureka compatible carriage is avilable for the DirtyBird toolhead over on the projects GitHub Page
A dock is available and tested for the Voron Trident. It is compatible with Klicky style mounts and includes a fixed sidemount designed to suit the Trident with a Dirtybird toolhead carriage. Other printers are likely to work with the variable Klicky arm but are untested.
Printed parts are pre-oriented for printing. Use your typical Voron part settings to print.
- 1 x Eureka Dock
- 1 x Eureka Trident Dock Arm
- 1 x Trident Dock Sidearm
BOM
- 4 * M3x8mm SHCS
- 4 * M3x5x4mm heat inserts Aliexpress
- 2 * M5x10mm BHCS
- 2 * M5 T-Nuts for 2020 extrusion
- 2 * 6mmx3mm round magnets
Assembly
- Fit heat inserts into the dock arm and dock sidearm
- Screw the sidearm to the gantry arm using 2 x M3x8
- Fit 6x3 magnets into the side of the dock. It is normal for it to crack the top plastic slightly. If it has made the dock prone to breaking then the dock may need to be printed with a lower extrusion multiplier to allow more room for the magnets
- Screw the dock to the to the side arm using 2 x M3x8
- Insert the two t-nuts into the gantry extrusion
- Screw the dock to the gantry using 2 x M5x10
Example klick configuration
The Trident dock is designed to dock and undock the probe at the real left max units of the printer. On a Trident 250 this would be X,Y = 0,250. You are free to position the dock anywhere you like, this is what works for me.
Main klicky-variables.cfg changes required to get up and running.
# Set to 0 to have the probe move to center of bed
variable_z_endstop_x: 0
variable_z_endstop_y: 0

# Dock location
variable_docklocation_x:   0 # X Dock position
variable_docklocation_y: 250 # Y Dock position

# Dock move.
# Final toolhead movement to release the probe on the dock.
# Values are a relative move.
Variable_dockmove_x:   0
Variable_dockmove_y: -40
Variable_dockmove_z:   0

# Attach move.
# Final toolhead movement to attach the probe on the mount.
# Values are a relative move.
Variable_attachmove_x: -50
Variable_attachmove_y:   0
Variable_attachmove_z:   0

# Back off from Y endstop when homing to avoid accidentality
# docking the probe.
variable_home_backoff_y: 40Remember: these values are a guide only. Follow the Klicky-macros documentation when setting up the dock location for the first time.


