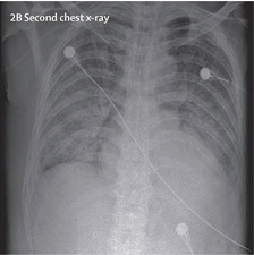
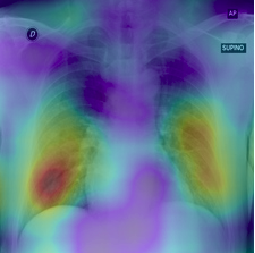
This is an extention of work done by arpanmangal. The model takes a CXR as an input and outputs the probability scores for 3 classes (NORMAL, Pneumonia and COVID-19) or 4 classes (Normal, Bacterial Pneumonia, Viral Pneumonia, Covid-19)
It is based on Diagnose like a Radiologist: Attention Guided Convolutional Neural Network for Thorax Disease Classification and its reimplementation by Ien001. The initial weights used for training were obtained from arnoweng.
CovidAID uses the covid-chestxray-dataset, BSTI-dataset, BIMCV, IIT-KGP for COVID-19 X-Ray images and chest-xray-pneumonia, RSNA dataset for data on Pneumonia and Normal lung X-Ray images.
More datasets can be added as required by making changes in data_tools/prepare_covid_data.py and data_tools/prepare_data.py. It is recommmended to use 3-class classification as much of the viral and bacterial pneumonia data is of pediatric patients which induces a bias. The above mentioned datasets should be downloaded and placed in the root of this directory.
Clone this repo:
git clone https://github.com/aaekay/CovidAid_V2.git
Create venv:
conda env create -f env.yml
conda activate covid
It would throw an error that torch is not availabe as torch has been updated continuously, and torchvision wont be installed so do the following thing (ref https://stackoverflow.com/questions/56181581/how-to-install-torch-0-3-1-in-python-3-6) but it refers to cpu version so find for version >= cuda 9.0
conda activate covid
mkdir torch
cd torch
wget -P ./torch/ https://download.pytorch.org/whl/cu90/torch-0.3.1-cp36-cp36m-linux_x86_64.whl
pip install ./torch/torch-0.3.1-cp36-cp36m-linux_x86_64.whl
pip install torchvision==0.2.0
conda install opencv
( it is to prepare your covid data for training, if you dont have your dataset just skip this step)
Remove the --combine_pneumonia flag in below cases for 4-class classification.
- Prepare Covid-19 Dataset:
python data_tools/prepare_covid_data.py --bsti --kgp_action --bmcv
- Make sure that the name of folders is similar to that mentioned in
prepare_covid_data.pyfor the above mentioned datasets.
- Combine all Data:
python data_tools/prepare_data.py --combine_pneumonia --bsti --kgp_action --bmcv
- Labels Assigned to respective categories:
- Class 0: Normal
- Class 1: Pneumonia
- Class 2: Covid-19
This script is used to transfer the CheXNet weights from here to our model and replace the final layer with 3 or 4 classes respectively. By default, the transferred weights have been provided in data/ folder and you won't need to run this. But in case you want to initialize the model with different number of classes then you can run this.
python tools/transfer.py --combine_pneumonia
By default the weights are saved in models/ folder but it is advised to specify some other directory for saving the weights.
the below code wont work because it has no data to use
python tools/train_AGCNN.py --mode train --ckpt_init data/CovidXNet_transfered_3.pth.tar --combine_pneumonia --epochs 100 --bs 16 --save <path_to_save_dir>
In order to resume training:
python tools/train_AGCNN.py --mode train --resume --ckpt_G <Path_To_Global_Model> --ckpt_L <Path_To_Local_Model> --ckpt_F <Path_To_Fusion_Model> --save <Path_To_Save_Dir> --combine_pneumonia
python tools/train_AGCNN.py --mode train --resume --ckpt_G ./models/Global_Best.pth --ckpt_L ./models/Local_best.pth --ckpt_F ./models/Fusion_Best.pth --save ./resume --combine_pneumonia
Binary evaulation can be done i.e Non-Covid V/s Covid by setting binary_eval=True in test function in tools/train_AGCNN.py. By default, it will compute metrics for classes based on --combine_pneumonia flag.
python tools/train_AGCNN.py --mode test --combine_pneumonia --ckpt_G ./models/Global_Best.pth --ckpt_L ./models/Local_best.pth --ckpt_F ./models/Fusion_Best.pth --bs 16 --cm_path plots/cm_best --roc_path plots/roc_best
In order to get RISE visualizations and class probabilities on a set of images:
python tools/inference.py --combine_pneumonia --checkpoint ./models/Global_Best.pth --img_dir ./samples --visualize_dir ./results
In order to get Attention maps and class probabilities:
python tools/train_AGCNN.py --mode visualize --combine_pneumonia --img_dir testsample --visualize_dir testresults --ckpt_G models/Gloval_Best.pth --ckpt_L models/Local_Best.pth --ckpt_F models/Fusion_Best.pth
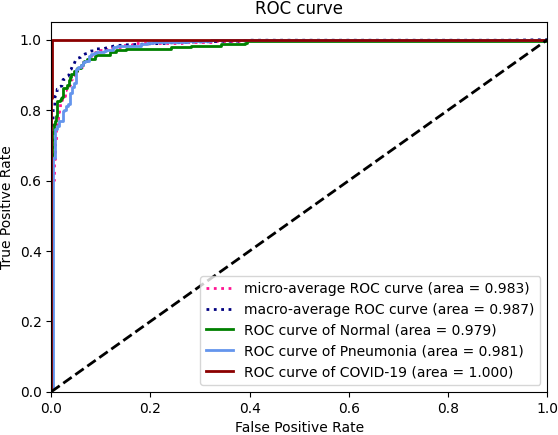
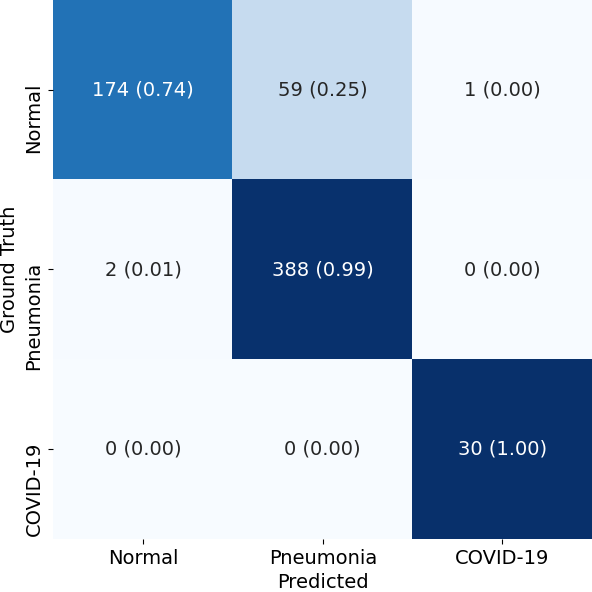
We present the results in terms of both the per-class AUROC (Area under ROC curve) on the lines of CheXNet, as well as confusion matrix formed by treating the most confident class prediction as the final prediction. We obtain a mean AUROC of 0.9738 (4-class configuration).
| 3-Class Classification | |||||||||||||||||
|---|---|---|---|---|---|---|---|---|---|---|---|---|---|---|---|---|---|
| |||||||||||||||||
| ROC curve | |||||||||||||||||
| Confusion Matrix |
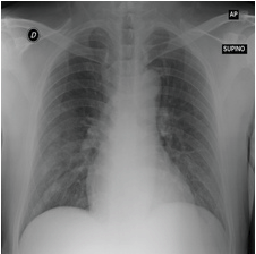
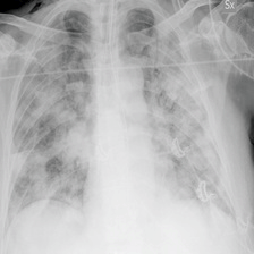
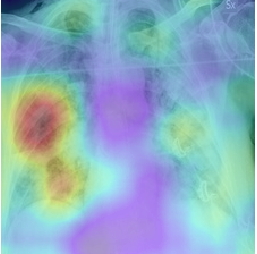
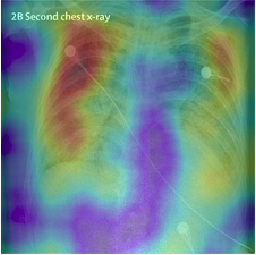
To demonstrate the results qualitatively, we generate saliency maps for our model’s predictions using RISE. The purpose of these visualizations was to have an additional check to rule out model over-fitting as well as to validate whether the regions of attention correspond to the right features from a radiologist’s perspective. Below are some of the saliency maps on COVID-19 positive X-rays.
- Update Result Section
- Update Visualization Section. Add Images of Attention Maps
