FMRI2IMG
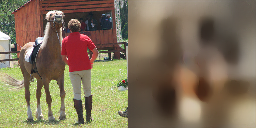
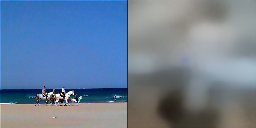
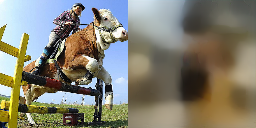
Sample basic autoencoder outputs.
WanDB: https://wandb.ai/aaalgo/fmri2img
Updates:
-
Mar 27, 2023: week signal obtained with autoencoder.
-
Mar 25, 2023: Using betas as input. The data fitting becomes much faster, but the test set barely have any signal.
-
Mar 24, 2023: No signal yet. Currently using a simple up-scaling conv net for decoding, so we avoid the hidden bugs when connecting to stable diffusion. The code is in the "new" branch. Some signal is visible in the training images on WanDB, but that is likely caused by overfitting.
1. Intro
This is an effort to reproduce the results of Takagi and Nishimoto (https://sites.google.com/view/stablediffusion-with-brain/).
Currently the implementation is very preliminary.
2. Method
Overview
Currently only a basic AutoEncoder model is implemented to validate that our handling of the dataset is correct and that visual signals can indeed be decoded from fMRI. Fancy models are to be added later.
Basic AutoEncoder (basic_ae)
Visual voxels transformed into a small latent image of 16x16x4 via a
small encoding network, the latent image is then decoded to
128x128x3 with the decoder of the autoencoder used in Stable Diffusion
1.5. The decoder is frozen and only the our small encoding network is
trained.
3. Running
3.1 Hardware Requirement
I'm currently training the model with 4xA40 (40GB each), each epoch
of about 9000x3 samples takes about 1.5 minutes. One should
be able to train the model on one GTX 1080 be reducing the BATCH_SIZE
(and also DATALOADER_NUM_WORKERS).
3.2 Environment Setup
The repo is designed to be used within the source directory.
So if you clone the repo to fmri2img, you should be executing the
scripts within that directory.
The configurable items are in config.py. In order to override
them, create a new file local_config.py and set the parameters to
new values.
If you need to run convert_roi.py, you need to clone the following
repo:
git clone https://github.com/cvnlab/nsdcode/
So that nsdcode/nsdcode/nsd_mapdata.py is present within the current
directory.
3.1 Data Download
(Option 1) NSD Data Download and Process
NSD data should be downloaded to configurable parameter NSD_ROOT,
which by default is data/raw/{nsddata, nsddata_betas, nsddata_stimuli}.
Only a subset of NSD is needed, and only the subjects/resolution of interest need to be downloaded. For example, I've been using the 1.8mm data of subject 1, and I need the following data components. Out of the 8 subjects, Subject 1 and 2 are of the best quality.
nsddata/ppdata/subj01/anatfor visual ROI.nsddata_betas/ppdata/subj01/func1pt8mmfor betas.nsddata_stimuli: the COCO images.
If you decide to change the SUBJECT or FUNC_SPACE (functional data
resolution), make sure you update them in local_config.py.
After data are downloaded, run the following:
./convert_roi.py        # convert visual ROI to functional space.
./extract_beta.py       # extract the betas of the ROI voxels
(Option 2) Work with Extracted Voxels
The NSD data is big. I'll make the visual voxels available. Contact me if you need the data.
3.2 Train Basic AutoEncoder Model
./create_dataset.py     # Pool related data into data/examples01.pkl
./split.py              # Split the above file into training and testing
set.
./train_basic_ae.py     # accelerate launch ./train_basic_ae.py
After snapshots are generated in snapshots, run the following to
test the newest snapshot. The output galleries will be within output.
./predict_basic_ae.py
3. Links
-
NSD Dataset:
- Paper: https://www.biorxiv.org/content/10.1101/2021.02.22.432340v1.full.pdf
- Download: https://cvnlab.slite.page/p/CT9Fwl4_hc/NSD-Data-Manual
- For now we only need the
nsddata_timeseries/ppdata/*/func1pt8mm/timeseriesof one subject. Subject 1 or 2 have the best correct scores; use one of these.
-
Textual Inversion:
-
fMRI Tutorial:


