lxc-gpu
Enjoy computation resources sharing at your laboratory with lxc-gpu!
How to use (for users)
This section is for users, and the rest of this document is for sysadmins. I'd recommend sysadmins to write a guide for your laboratory. If there is not, this section gives you a basic grasp of lxc-gpu.
lxc-gpu is designed to be password-less. When you login to servers, you use your SSH keys. Use ssh-keygen to generate one if you don't have yet. Put your SSH public key at the IAM (Ask your sysadmin for the URL), enter the password for your laboratory domain account (Ask your sysadmin), and click save. You can save the .ssh/config from the IAM so that you don't need to type each server's IP and port.
- The first time you login to a server, you need to register on the server. Run
ssh register@SERVERNAME-manage USERNAME. - To boot your container, run
ssh SERVERNAME-manage. - To login to your container, run
ssh SERVERNAME. - There are some other functions, see
ssh SERVERNAME-managefor more detail, includingssh SERVERNAME-manage port: Port forwardingssh SERVERNAME-manage snapshot: Take a snapshotssh SERVERNAME-manage recover: Recover from a snapshotssh SERVERNAME-manage rebuild: Recover from the templatessh SERVERNAME-manage stop: Shutdown the container
Once you've logged in to your container, you can operate it just like a bare metal while sharing computation and storage resources with other users. Especially, you have the root privilege and the access to GPUs.
There is also a webpage that refreshes every few seconds to show you the load of each server. Ask your sysadmin for the URL.
Enjoy researching!
How to use the IAM
How to login to the container

Server Load Monitor

The rest of this document is for sysadmins.
Motivation
Back in the first days when I joined the APEX Data & Knowledge Management Lab at Shanghai Jiao Tong University in 2016, I found researchers frequently distracted by software misconfigurations, especially when they were using shared GPU servers. The server administrator had to give sudo privileges to all researchers because lots of software are difficult to install without apt-get. However, most researchers don't have the skill set to properly set up the software environment (They don't have to!). Usually, they just copy and paste commands from the web (This is alright!), which might indeed suits the researcher's need but destroys all others'. For example, Caffee and TensorFlow might need different versions of CUDA.
Of course, those researchers who broke the system are not to blame, as I believe that researchers should focus on research itself thus only have to know basic system operation skills (like copy and paste commands from the web). I, as a sysadmin and a researcher, would like to create a system so that
- Users are isolated. Software misconfiguration won't affect other users.
- Computation resources are shared. Because the funding might not be rich enough :(
- Especially, users should be able to share GPUs.
- Also, easy access to SSD (for faster IO), HDD (for larger storage), and NAS (for network storage)
- Users should have the "
rootprivilege" to install whatever they want. - Users should not have any chance to accidentally jeopardize the functioning of this system, even though they have the "
rootprivilege". - Performance overhead should be extremely small.
- The system should have user-friendly interfaces to both researchers and sysadmins.
What it is
lxc-gpu consists of series of shell scripts and simple utilities. All the hard work are carried by LXC. Our project is a template for sysadmins to provide user-friendly computation resources sharing system.
The project contains the following parts:
iam/: Website for Identity & Access Managementmonitor/: Website for hardware resources monitoringscripts/: Scripts served as a more user-friendly interfacesetup/: Installation scripts
Installation
Before installing lxc-gpu, make sure your laboratory has a LDAP-compatible directory service, such as OpenLDAP and Active Directory, as lxc-gpu authenticates users through the LDAP service.
I also recommend your laboratory to have a NAS server, such as FreeNAS. lxc-gpu does not have to rely on NAS, but without NAS, the installation could be more complicated (you need to copy scripts and NVIDIA driver to all machines) and some features could be less user-friendly (users need to ask the sysadmin to copy their snapshots of the container to the target machine).
Our laboratory has the following infrastructures, for you reference:
- Ubuntu Server x64 16.04 / 18.04
- FreeNAS
- Active Directory
Installation scripts locate at setup/ directory. Although these scripts should be able to run successfully given correct configuration, I recommend that you read them carefully, adapt them to fit the infrastructure of your laboratory, and finally execute them line by line instead of running in batch. The scripts are designed for Ubuntu only. If you use other Linux distribution, especially non-deb package manager, you would need lots of modification to the scripts.
To install lxc-gpu:
- Rename
env.example.shtoenv.sh - Edit environment variables in
env.sh - Edit scripts in
scripts/directory to fit the infrastructure of your laboratory - Copy related files to the corresponding path as specified in
env.sh - Create the template LXC container by running
create-lxc-template.bashon an arbitrary machine - Read
setup-gpu-server.bashcarefully, adapt it to fit the infrastructure of your laboratory, and finally execute it line by line instead of running in batch on each computation server - Install
iam/andmonitor/on a web server- Rename
settings.example.pytosettings.pyand change the settings pip3 install -r requirements.txt- Both IAM and monitor are Flask applications in Python 3. Refer to Flask Deployment Options for more detail.
- Rename
- Write a guide for users. For your reference, here is the guide at the APEX Lab (Chinese only)
How it works
Let's assume:
gpu17is the server name172.16.2.17is the server IPlqchenis the username22031is the port number for the userhttp://iam.mylab.comis the URL to IAMldap://ldap.mylab.com/mylab.comis the LDAP or Active Directory
Start the Container
- User:
ssh gpu17-managewith the SSH key- Alias to
ssh lqchen@172.16.2.17based on~/.ssh/config
- Alias to
- Server:
sshdvalidates the SSH key in/home/lqchen/.ssh/authorized_keys - Server:
do_start()in the custom shell/public/login.bash - Server:
curlIAM to know that the port number for the userlqchenis22031 - Server:
lxc-startand wait until the container is up - Server: Check if the NVIDIA driver inside the container matches the host's
- If not, install the same version of the driver inside the container
- Server:
lxc-infoto know that the IP of the container is10.0.3.160 - Server:
iptablesmap172.16.2.17:22031to10.0.3.160:22
Login the Container
- User:
ssh gpu17with the SSH key- Alias to
ssh lqchen@172.16.2.17 -p 22031based on~/.ssh/config
- Alias to
- Server: forward
172.16.2.17:22031to10.0.3.160:22 - Container:
sshdvalidates the SSH key in/home/lqchen/.ssh/authorized_keys - Container: run user shell, e.g.,
bash
Read Configurations on IAM
It's a really simple and straightforward procedure. IAM reads from its database and returns the corresponding result.
Write SSH Public Key to IAM
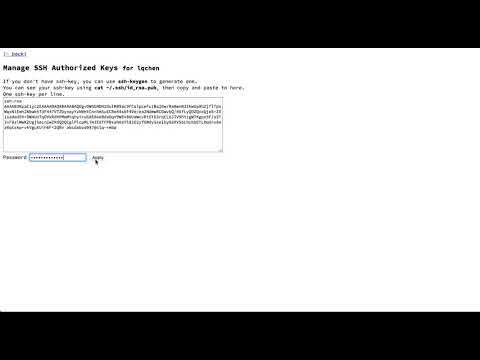
- User: copy
~/.ssh/id_rsa.puband paste onhttp://iam.mylab.com/manage/ssh-key/lqchen - User: enter the LDAP password of the user and hit the save button
- IAM:
post_manage_ssh_key()iniam.pystarts to handle the request - IAM: ask
ldap://ldap.mylab.com/mylab.comif the username and the password matches - IAM: save the pair of the username and the SSH public key to IAM database
- IAM: ask the IAM background worker to update SSH keys on servers
IAM Updates SSH Keys
- IAM: ask the IAM background worker to update SSH keys on servers
- Worker:
thread_copy_ssh_key()iniam.pywakes up - Worker: query the full name of all users on
ldap://ldap.mylab.com/mylab.comwith the LDAP account for IAM and update IAM database - Worker: read all users' SSH public keys from IAM database and encode them as a JSON string
- Worker:
ssh iam@172.16.2.17with the IAM SSH key to each server and send the JSON encoded string - Server:
sshdvalidates the SSH key in/home/iam/.ssh/authorized_keys - Server: run the custom shell
/home/iam/iam-shell.bashasiam - Server: run
/home/iam/set_authorized_keys.pyasroot - Server: write SSH public keys to each user account
- of the host:
/home/lqchen/.ssh/authorized_keys - of the container:
/home/lqchen/.local/share/lxc/lqchen/rootfs/home/lqchen/.ssh/authorized_keys
- of the host:
- Server: merge all users' SSH public keys and write to the
registeraccount/home/register/.ssh/authorized_keys
Register a Container on a Sever
- User:
ssh register@gpu17-manage lqchenwith the SSH key- Alias to
ssh register@172.16.2.17based on~/.ssh/config
- Alias to
- Server:
sshdvalidates the SSH key in/home/register/.ssh/authorized_keys - Server: run the custom shell
/home/register/register.bashasregister - Server: run
/root/new-lxc.bashasroot - Server:
curlIAM to know the userlqchen's port number,subuid,.ssh/authorized_keys, and generated.ssh/config - Server: create user account
lqchenon the host machine- add to the
sudogroup - set
subuidandsubgid - save
.ssh/authorized_keys - grant LXC virtual network permission in
/etc/lxc/lxc-usernet
- add to the
- Server: clone a container from the template
- decompress the template container
- fill the LXC configuration file:
subuid,subgid,rootfs, hostname, NVIDIA device mount points
- Server:
lxc-startthe container - Container: create user account
lqcheninside the container- add to the
sudogroup - save
.ssh/authorized_keysand.ssh/config
- add to the
- Server:
lxc-stopthe container - Server: set the default shell of user
lqchento the custom shell/public/login.bash
video tutorial
https://asciinema.org/a/9hRrDb6DxV3B2uVcjdrcwwnkt