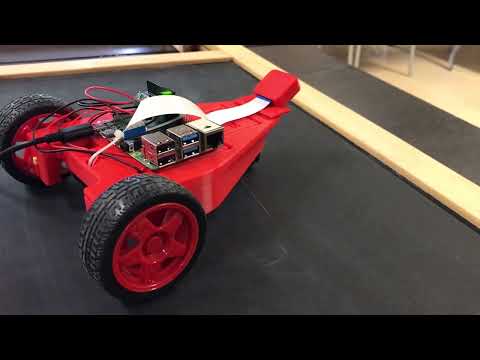
The Fetchbot interface allows users to connect to and control a Raspberry Pi based robot "Fetchbot", without internet connection. The connection between a computer and the robot is established through serial-over-bluetooth.
Please refer to the last section for interface description & editing.

This project has been tested on a Windows 10 64-bit machine and a Raspberry Pi 4.
Presentation & installation video:
Using Raspberry Pi Imager (https://www.raspberrypi.com/software/), download and install the custom image from: https://drive.google.com/file/d/1mQ5GR-Hh-p75FYHY6_OlHBRY7kKcDEiC/view
Once the OS is loaded onto the SD card, connect a display, mouse and a keyboard to the Raspberry Pi.
Skip step if you installed the custom image.
Using Raspberry Pi Imager (https://www.raspberrypi.com/software/), install Raspberry Pi OS full 32-bit (Debian version 11 (version is not default): https://downloads.raspberrypi.org/raspios_full_armhf/images/raspios_full_armhf-2022-04-07/2022-04-04-raspios-bullseye-armhf-full.img.xz)
Once the OS is loaded onto the SD card, connect a display, mouse and a keyboard to the Raspberry Pi. Start by configuring the basic preferences according to your region.
After the configuration is complete, open a new terminal window and enter:
sudo raspi-config
Enable legacy camera in Interface Options>Legacy Camera.
Enable SSH in Interface Options>SSH.
Enable Auto Login in System Options>Boot/Auto Login>Console Auto Login.
Wifi and bluetooth tend to interfere because of their similar frequencies, it is recommended to disable the wifi while using bluetooth. In the terminal enter:
sudo ifconfig wlan0 down
Clone the project repository by entering the following in the terminal:
Connect the Raspberry Pi to the internet with ethernet. It is recommended to use SSH (with ethernet) for the following steps.
In the terminal, enter the following commands:
sudo apt-get update
sudo apt-get install build-essential cmake pkg-config libjpeg-dev libtiff5-dev libjasper-dev libpng-dev libavcodec-dev libavformat-dev libswscale-dev libv4l-dev libxvidcore-dev libx264-dev libfontconfig1-dev libcairo2-dev libgdk-pixbuf2.0-dev libpango1.0-dev libgtk2.0-dev libgtk-3-dev libatlas-base-dev gfortran libhdf5-dev libhdf5-serial-dev libhdf5-103 python3-pyqt5 python3-dev -y
cd fetchbot
pip install pyserial
pip install opencv-python==4.5.3.56
pip install -U numpy
To enable serial communication over bluetooth, in the terminal on the Raspberry Pi enter:
sudo nano /etc/systemd/system/dbus-org.bluez.service
Replace the line starting with ExecStart= with:
ExecStart=/usr/lib/bluetooth/bluetoothd --compat --noplugin=sap
ExecStartPost=/usr/bin/sdptool add SP
Save and exit the file with CTRL+X.
Restart the bluetooth service with:
sudo systemctl daemon-reload;
sudo systemctl restart bluetooth.service;
Download the recommended Windows installer for Python 3 from: https://www.python.org/downloads/windows/.
Navigate to https://github.com/adityachugh02/fetchbot/ and click on code>Download ZIP. Extract the files once the download is complete.
Or if git is installed on Windows, in the command prompt enter:
In the command prompt, enter the following commands:
cd "path of the downloaded the fetchbot repository"
pip install -r requirements.txt
Tensorflow requires a few additional libraries which can be downloaded from https://docs.microsoft.com/fr-FR/cpp/windows/latest-supported-vc-redist?view=msvc-170 (X64 version recommended).
On the Raspberry Pi, click on the task bar bluetooth icon in the upper right corner of the desktop and select Add Device.
On your Windows PC go to Settings>Devices>Bluetooth and other devices and turn Bluetooth on. Next, click on Add Bluetooth or other device and select Bluetooth. A device named "raspberry_pi_1" should appear.
Connect to the device and confirm the security code on both devices.
On your Windows PC go to Settings>Devices>Bluetooth and other devices, on the right, click on Devices and printers. While the bluetooth connection is active, right-click the Raspberry Pi and select Properties. In the Properties window, select services and make a note of the COM port number next to the Serial Port (SPP) checkbox.
Finally, reboot the Raspberry Pi from Applications menu (raspberry icon upper left corner)>Logout>Reboot.
Optional: If you wish to change the bluetooth name of your Raspberry Pi, enter in a new terminal window:
CTRL+C
sudo bluetoothctl
To choose a new name for the Raspberry Pi, enter in bluetoothctl:
system-alias 'raspberry_pi_1'
Exit bluetoothctl:
exit
And reboot:
sudo reboot
Skip step if you paired from the desktop.
In the Rasberry Pi terminal, enter:
sudo bluetoothctl
To choose a new name for the Raspberry Pi and make it discoverable and pairable in bluetoothctl, enter:
system-alias 'raspberry_pi_1'
discoverable on
pairable on
On your Windows PC go to Settings>Devices>Bluetooth and other devices and turn Bluetooth on. Next, click on Add Bluetooth or other device and select Bluetooth. A device named "Raspberry Pi" should appear.
Connect to the device and confirm the security code.
In the Raspberry Pi bluetoothctl, accept the service authorisation requests and enter:
trust XX:XX:XX:XX:XX:XX
(Where XX:XX:XX:XX:XX:XX is the MAC Adress of the Windows PC.)
And exit bluetoothctl:
exit
On your Windows PC go to Settings>Devices>Bluetooth and other devices, on the right, click on Devices and printers. While the bluetooth connection is active, right-click the Raspberry Pi and select Properties. In the Properties window, select services and make a note of the COM port number next to the Serial Port (SPP) checkbox.
On your Windows PC, navigate to preferences.txt in the fetchbot folder. Replace the COM port number with the one noted. Save and exit the file.
The program can be executed from the command prompt with:
cd "path of the downloaded the fetchbot repository"
python3 main.py
The program starts automatically on startup (auto login).
To disable the auto start, open a new terminal window and enter:
CTRL+C
nano /home/pi/.bashrc
Comment out the two last lines of the file:
Starting Fetchbot... ress CTRL+C to exit
#python /home/pi/fetchbot-rpi/main.py
Save and exit the file with CTRL+X.
And reboot:
sudo reboot
Make sure that the bluetooth connection is active between the Raspberry Pi and the Windows PC before launching the program on the Windows PC. (The Raspberry Pi is ready for connection when the green led (pin 14) of the motor shield turns on for longer than 5 seconds.)
If the bluetooth connection hangs (disconnects after a few seconds), check that all checkboxes have been checked in the properties of the connected device. (On your Windows PC go to Settings>Devices>Bluetooth and other devices, on the right, click on Devices and printers. While the bluetooth connection is active, right-click the Raspberry Pi and select Properties. In the Properties window, select services, and check all the checkboxes.)
The index.html file holds 3 iframes:
- Blockly Interface (JS)
- Video & test box (Python Flask)
- AI Classifier (Python Flask)
Code for the Blockly Interface are found in blockly/demos/code/.
The html files for the video & text box and the AI classifier are found in templates/.
Main.py or master program runs a flask server which serves the video & test box and the AI classifier. When the "start" button is pressed on the blockly interface, a POST request with the python translated code is sent to the master program. The master program creates a new temp.py python file based on this translated code, which is then executed as subprocess.
The temp.py file uses the fetchbot.py library in src/ to send mouvement and text commands by POST requests to the master program, the latter then sends those commands to the robot via serial-over-bluetooth (as only one serial connection can exist at a time).
The image feed is sent from the robot to the master program via the serial-over-bluetooth connection.
The AI classifier allows the user to take image stills from the video feed and save them to a created class. The created classes and images are found in classes.
A new block can be created using the Blockly block factory tool in blockly/demos/blockfactory/index.html.
New blocks are created by defining their inputs, fields, types and colours using the drag and drop interface on the left.

The Block Definition specifies what the block looks like and the Generator stub specifies what the code does (the python line of code associated to it).
Once a new block is created, copy the Block Definition (select JavaScript) and the Generator stub (select Python), and paste it at the end of blockly/demos/code/fetchbot.js.
Blockly.Blocks['print_hello'] = {
  init: function() {
    this.appendDummyInput()
        .appendField("this block prints hello");
    this.setPreviousStatement(true, null);
    this.setNextStatement(true, null);
    this.setColour(230);
 this.setTooltip("");
 this.setHelpUrl("");
  }
};
Blockly.Python['print_hello'] = function(block) {
  // TODO: Assemble Python into code variable.
  var code = 'print("hello")\n';
  return code;
};
To display this block on the blockly interface, add the following line between the <category name="Fetchbot" colour="#a83236"></category> tags in blockly/demos/code/index.html:
<block type="print_hello"></block>