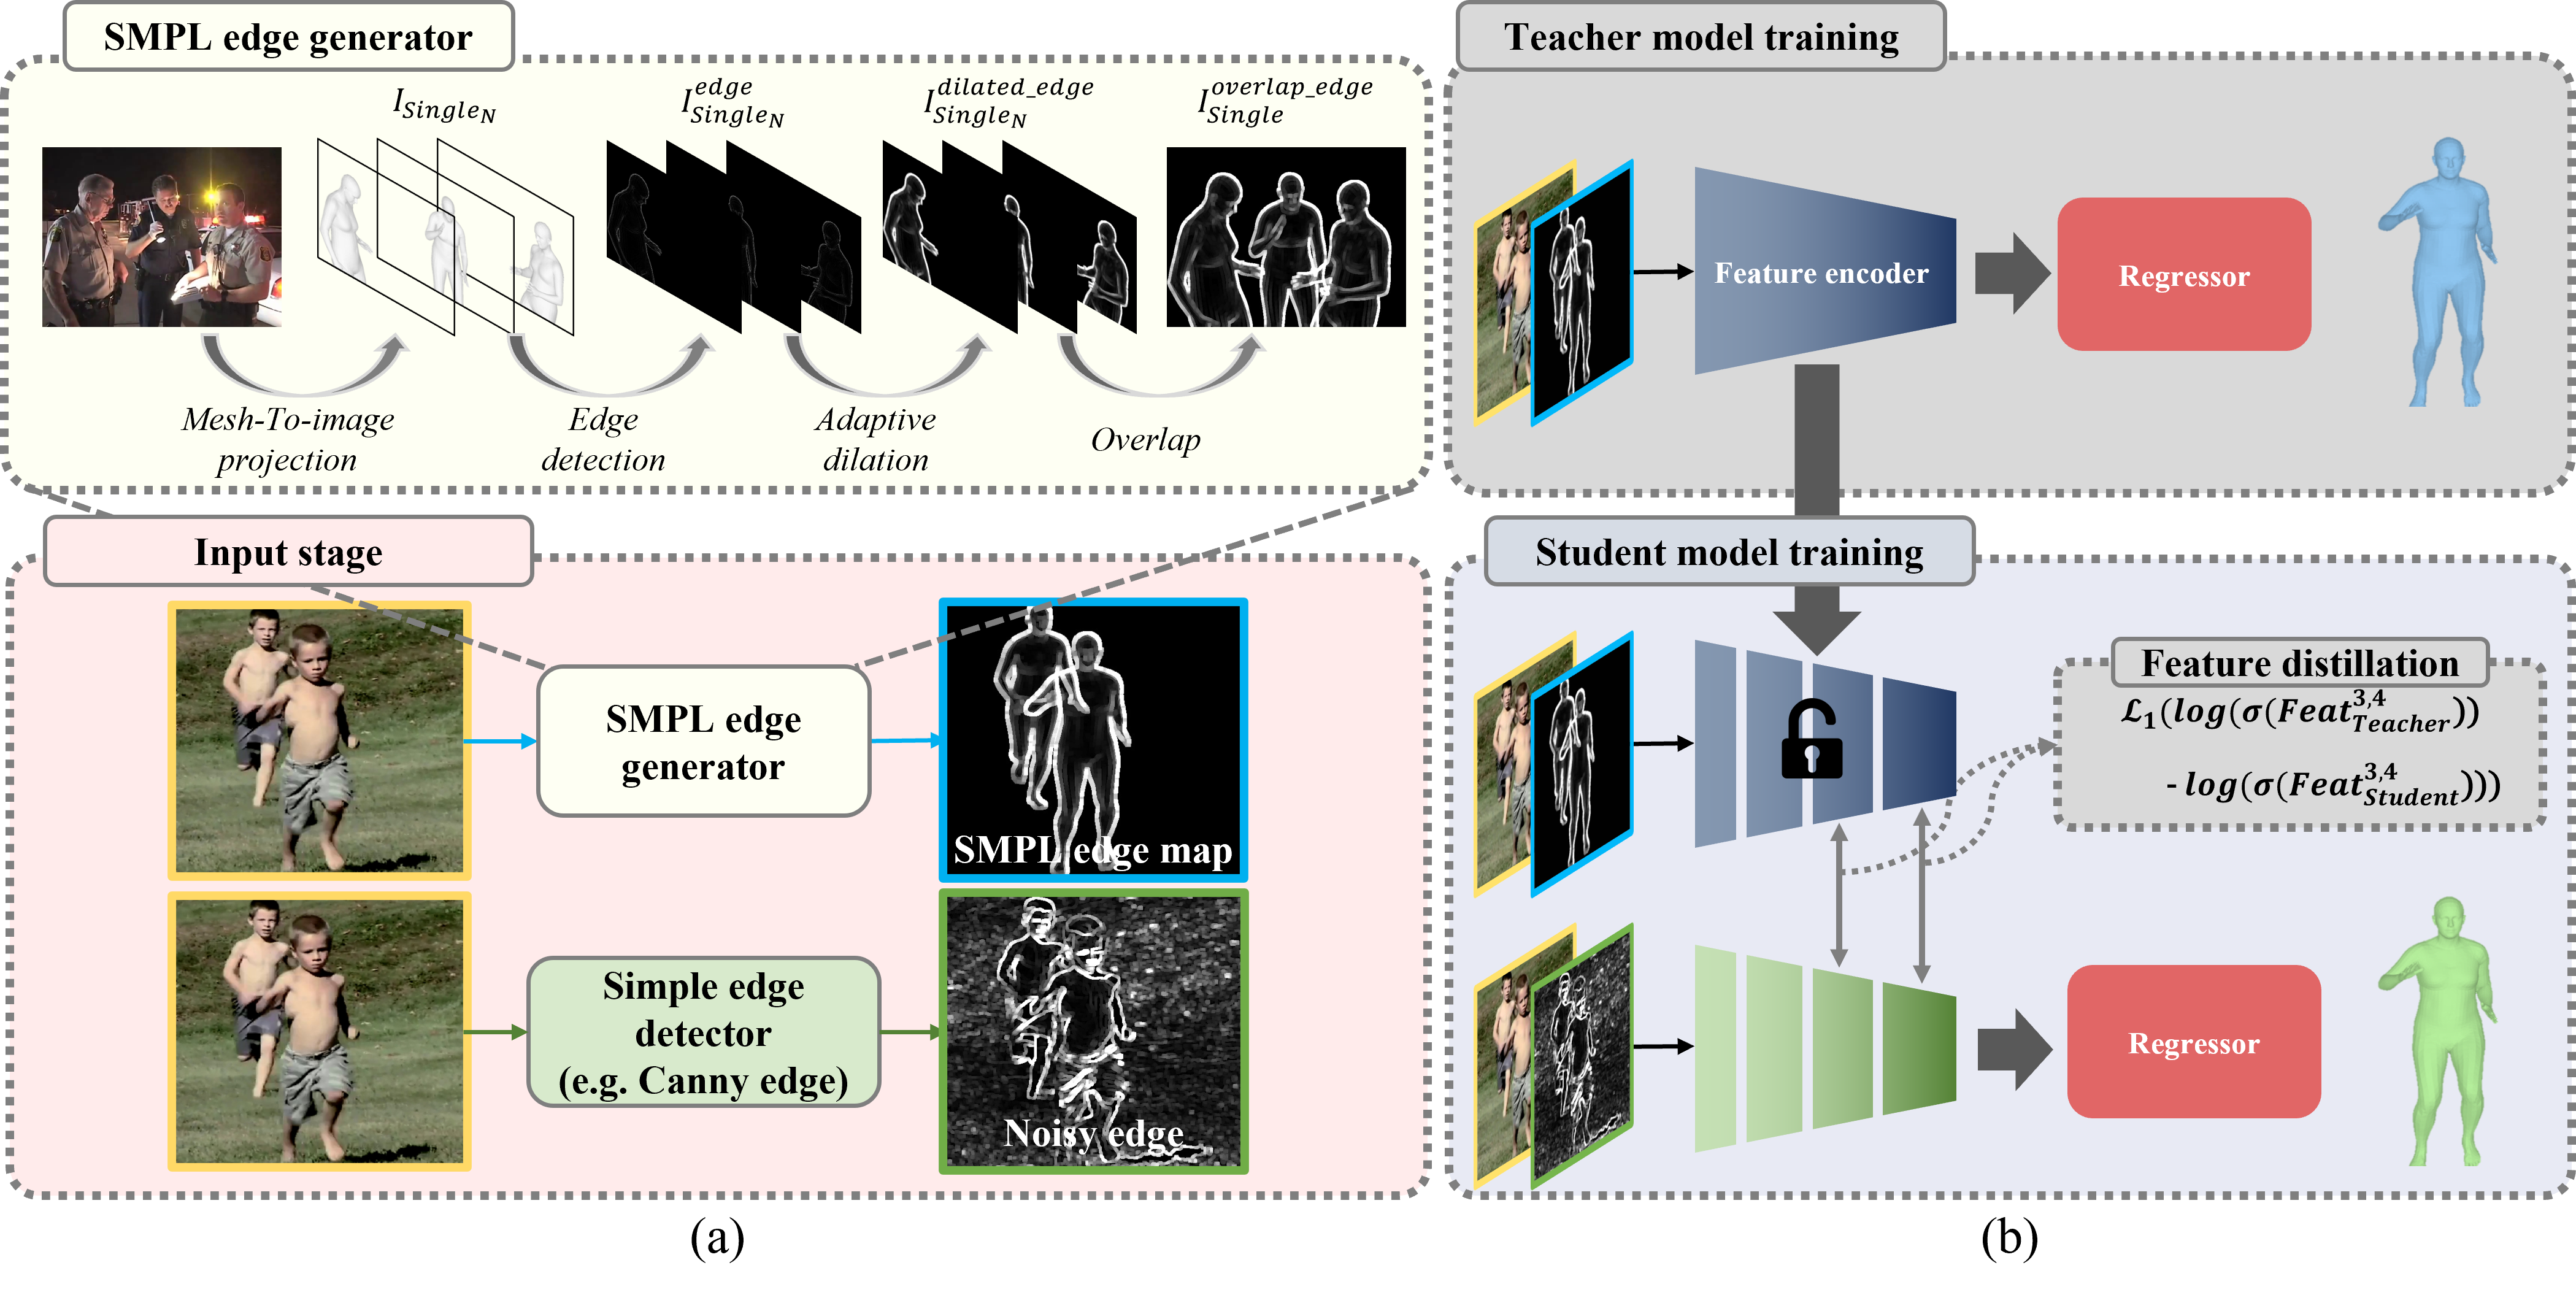
- [ICCV 2023] SEFD : Learning to Distill Complex Pose and Occlusion
- Our Project Page URL : https://yangchanghee.github.io/ICCV2023_SEFD_page/
- The training code be updated!!(2023/10/16)
- We've managed to make it work to some extent, but we anticipate that many issues may arise because we only uploaded very basic code. If you encounter any problems, please report them as issues immediately. We will make updates promptly! :)
You can check our project page at here.
(To access smoothly, you need to hold down the Ctrl key and click with the mouse.)
We used 3DCrowdNet as a baseline, and whenever an issue occurred, the author of 3DCrowdnet responded kindly. I am always grateful to him
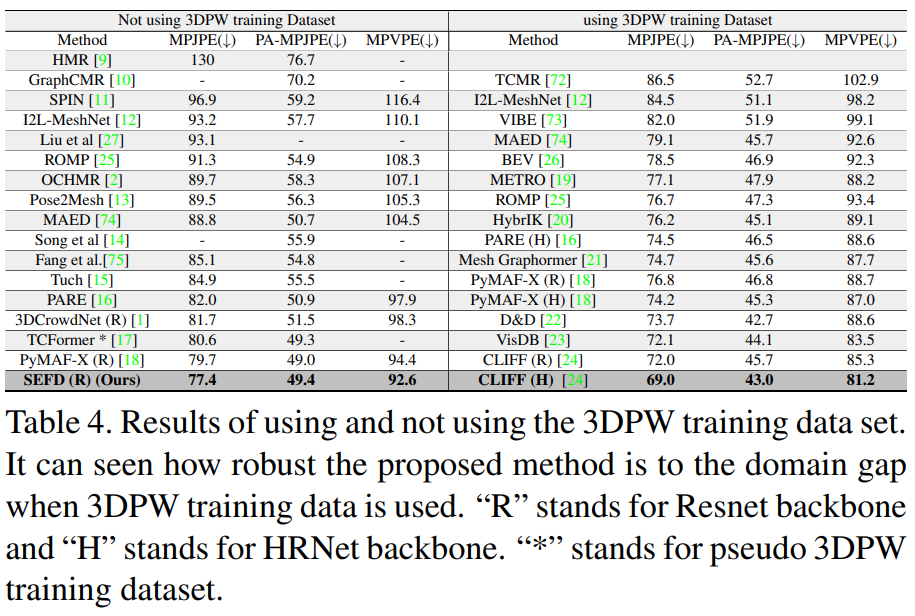
🎇 SEFD achieves the SOTA on 3DPW
🎇 We improved MPJPE to 77.37 PA-MPJPE to 49.39mm and MPVPE to 92.60mm using a ResNet 50 backbone!
(Our model has no difference between baseline 3DCrowdNet model parameter and MACs.)
This repo is the official PyTorch implementation of [SEFD : Learning to Learning to Distill Complex Pose and Occlusion].
We recommend you to use an Anaconda virtual environment. Install PyTorch >=1.6.0 and Python >= 3.7.3.
To implement RCF edge detection, mmcv here must be installed.
You need to install kornia here to implement canny edge detection.
(This makes it possible to implement on GPU and canny edge is implemented many times faster than Opencv.)
All this toolkit is on requirements.sh here.
Then, run sh requirements.sh. You should slightly change torchgeometry kernel code following here.
- Download the pre-trained Baseline(3DCrowdNet) and SEFD checkpoint from here and place it under
${ROOT}/demo/. - Download demo inputs from here and place them under
${ROOT}/demo/input(just unzip the demo_input.zip). - Make
${ROOT}/demo/outputdirectory. - Get SMPL layers and VPoser according to this.
- Download
J_regressor_extra.npyfrom here and place under${ROOT}/data/.
- Run
python demo.py --gpu 0 --model_path SEFD.pth.tarorpython demo.py --gpu 0. You can change the input image with--img_idx {img number}. - a rendered mesh image, and an input 2d pose are saved under
${ROOT}/demo/.
- Run
python demo.py --gpu 0 --model_path baseline.pth.tar. You can change the input image with--img_idx {img number}. - a rendered mesh image, and an input 2d pose are saved under
${ROOT}/demo/.
if you run the baseline, change ${ROOT}/main/config.py
distillation_module=True => False
distillation_loss="KD_loss" => ""
dilstillation_edge="Canny" => ""
distillation_pretrained=True => False
SMPL_overlap=True => False
SMPL_edge=True => False
first_input=True => False
nothing=False => True
The demo images and 2D poses are from CrowdPose and HigherHRNet respectively.
🌝 Refer to the supplementary material for diverse qualitative results
Refer to here.
- If you want to make your own SMPL_overlap_edge, check here
- If you want to Download SMPL overlap edge data here
- If you downloaded SMPL_overlap_edge, check here.
Frist finish the directory setting. then, refer to here to train and test SEFD.
refer to here to train and test SEFD with various edges.
refer to here to train and test without feature distillation.
- To use variable edges, you must change the path of
${ROOT}/main/config.py. - line in 82, 84, 87 "putting your path" is your project directory. So you have to change it.
refer to here to train and test SEFD with various losses.
refer to here to train and test SEFD with various feature connections.


