In this course we will learn how websites are made and teach you how to build your own.
Note this website uses Just The Docs, a well-known Jekyll theme, customized with ReDI colors and logos.
For instuctions and examples of what the theme can do, and how you can do the same in your course pages, please see: https://pmarsceill.github.io/just-the-docs
In the course, each student will be working on a personal portfolio website (or project). This project is the way to show that you are following the topics taught in class. Checkpoints are stages of work that use topics you are taught in class to achieve a small part of the project.
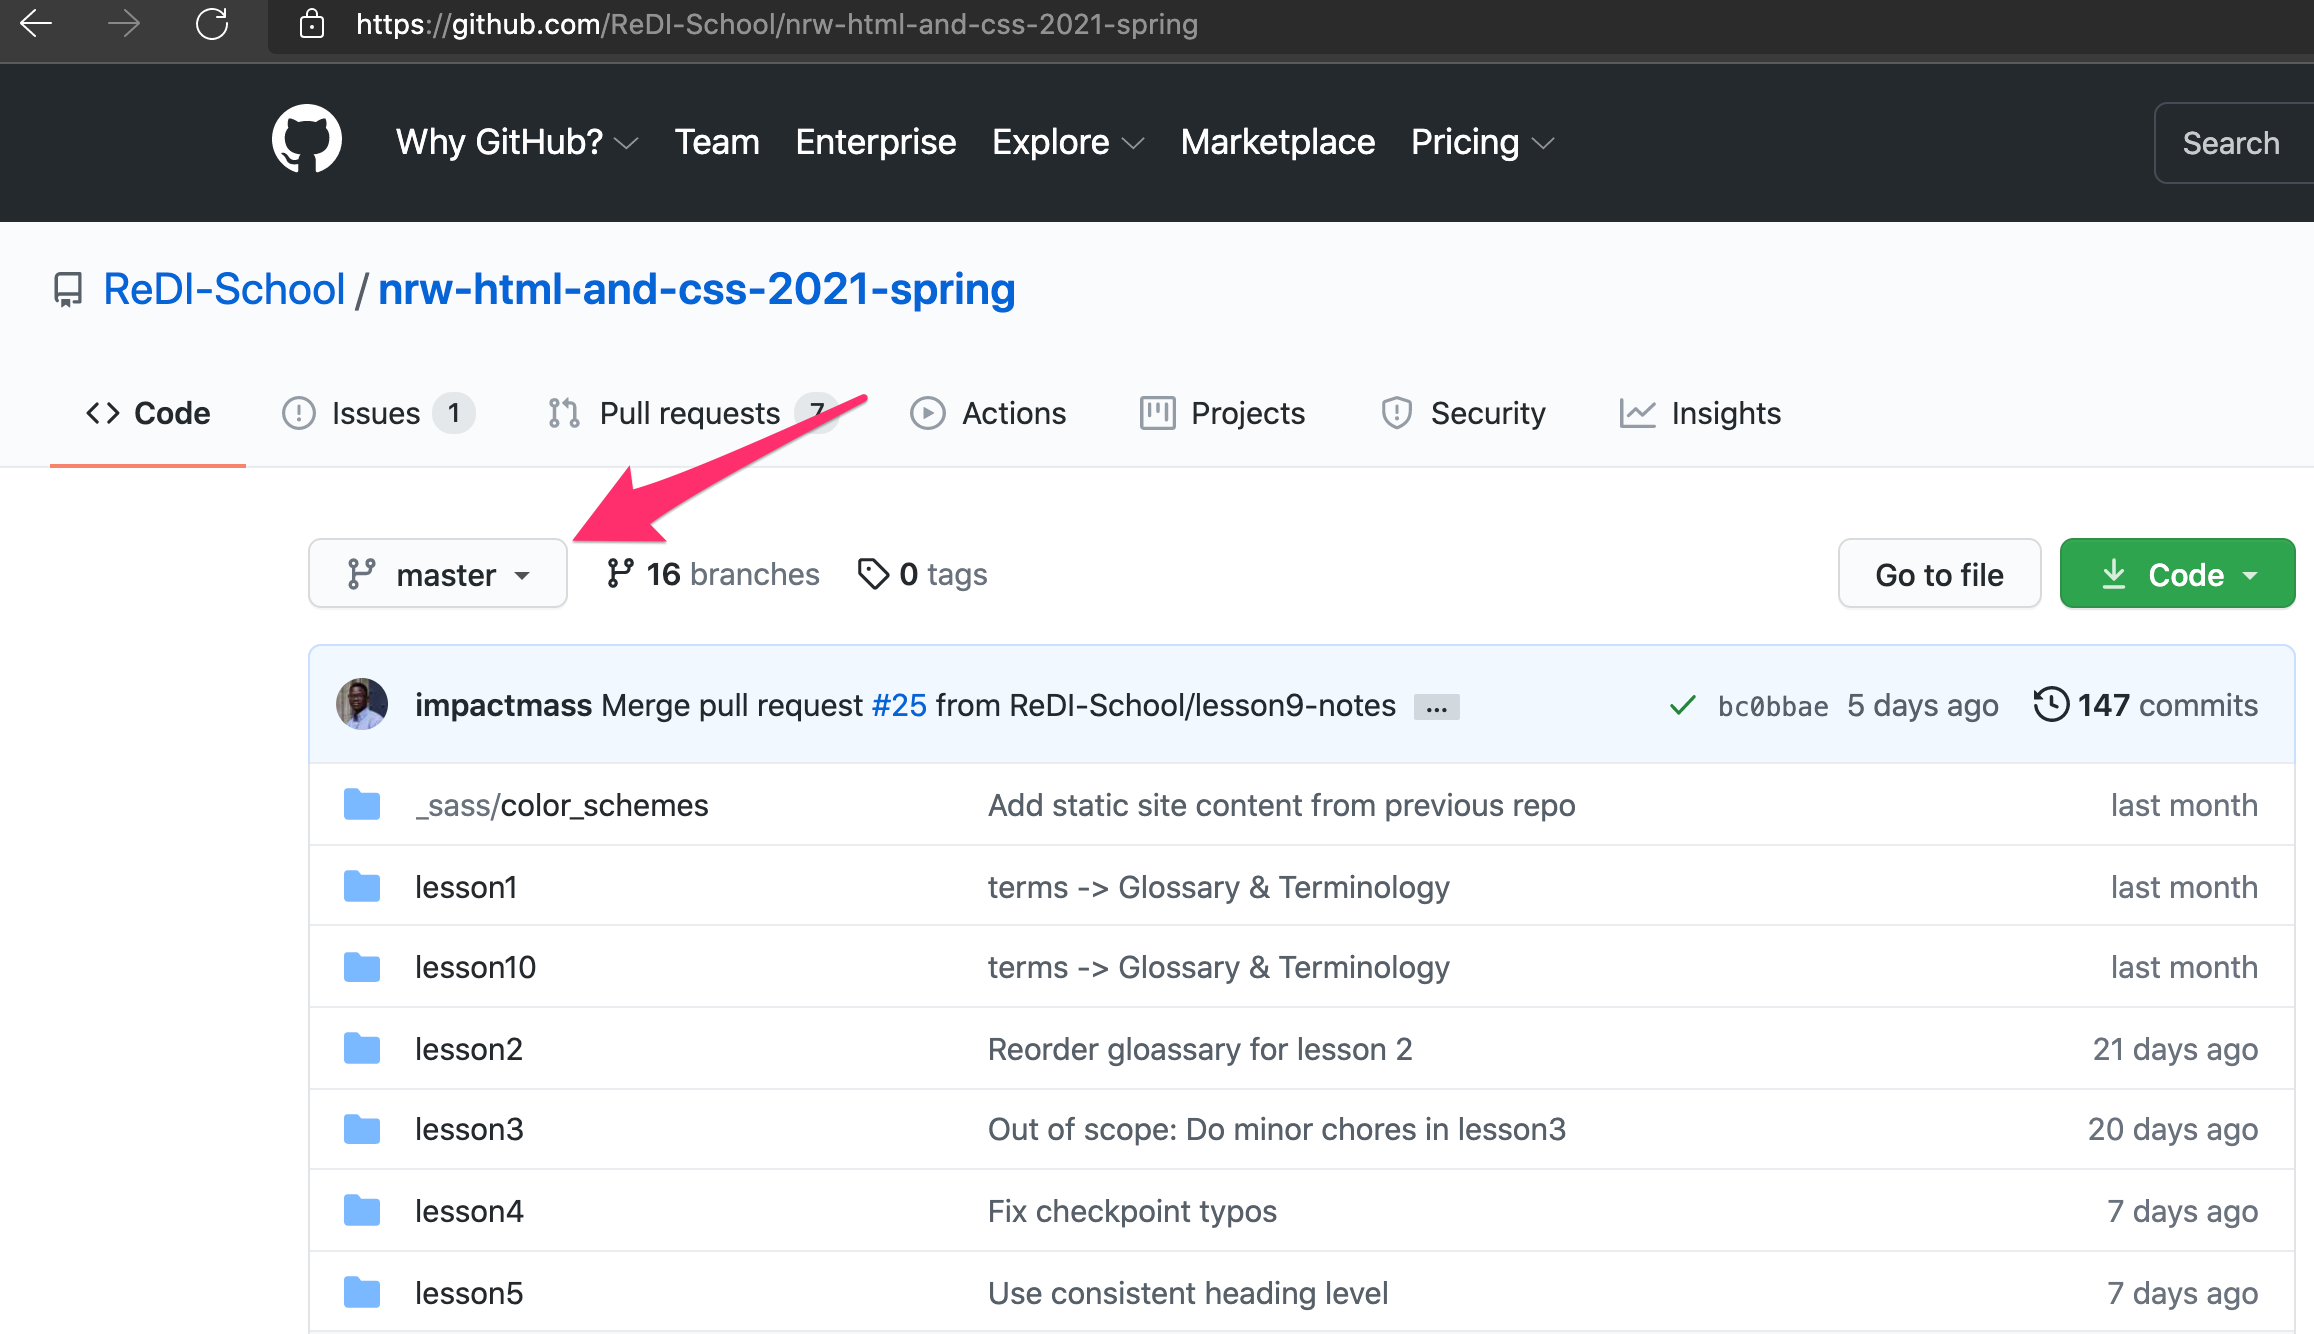
- Visit the course's GitHub page. You should see something similar to the screenshot below.
- Click on the Branch dropdown (shown in the screenshot)
-
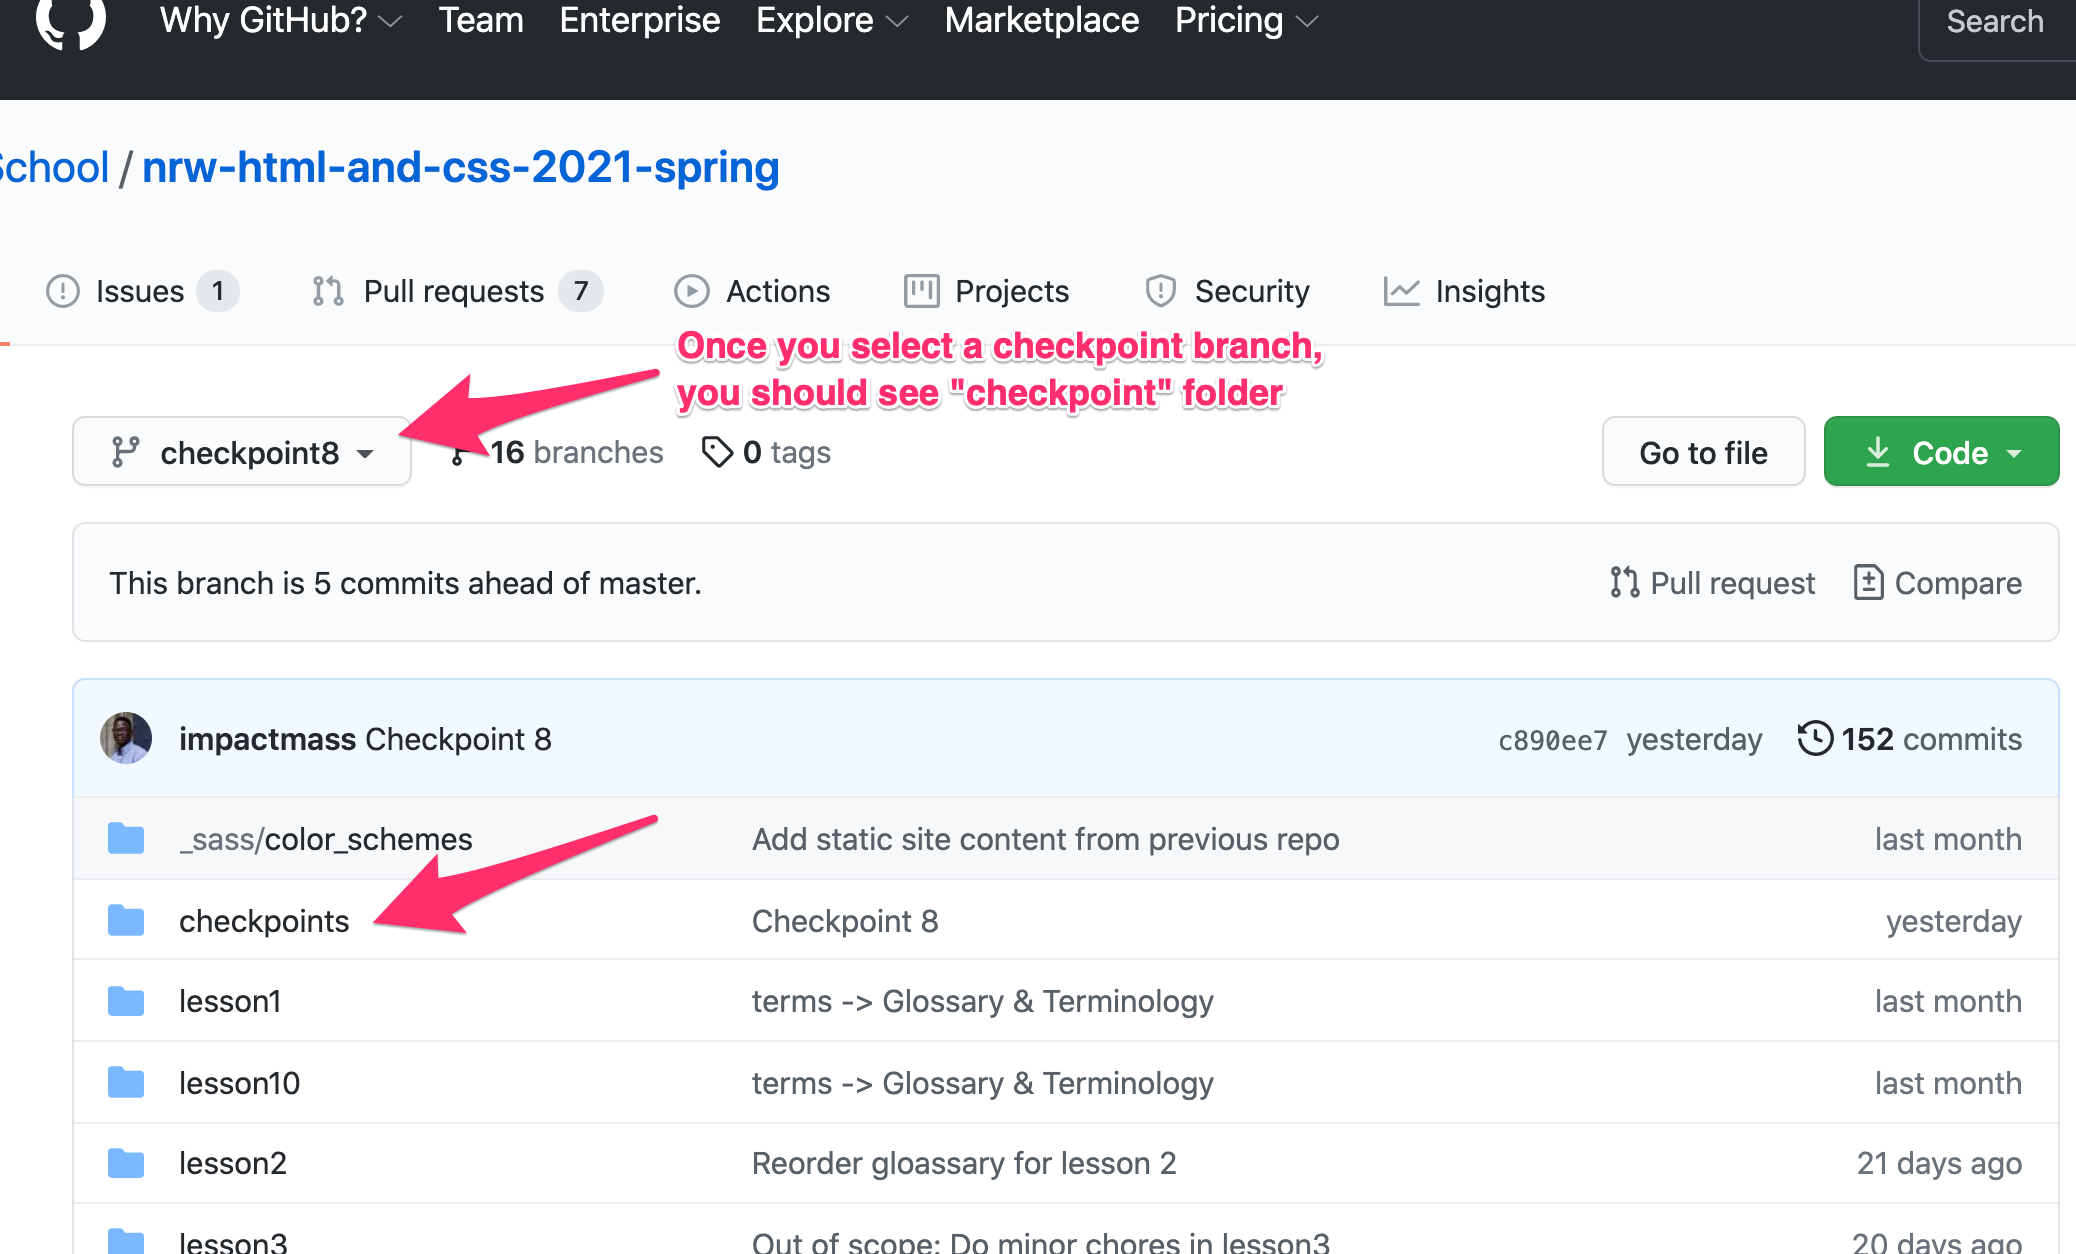
In the dropdown, select a checkpoint branch that matches the lesson you want to see. For example, if you want to see the Checkpoint for Lesson 8, select "checkpoint8" branch. Note that not all Lessons have a corresponding checkpoint branch.
-
Once you select a checkpoint branch, you will see a folder named "checkpoint". This folder contains the checkpoint files you are looking for.
-
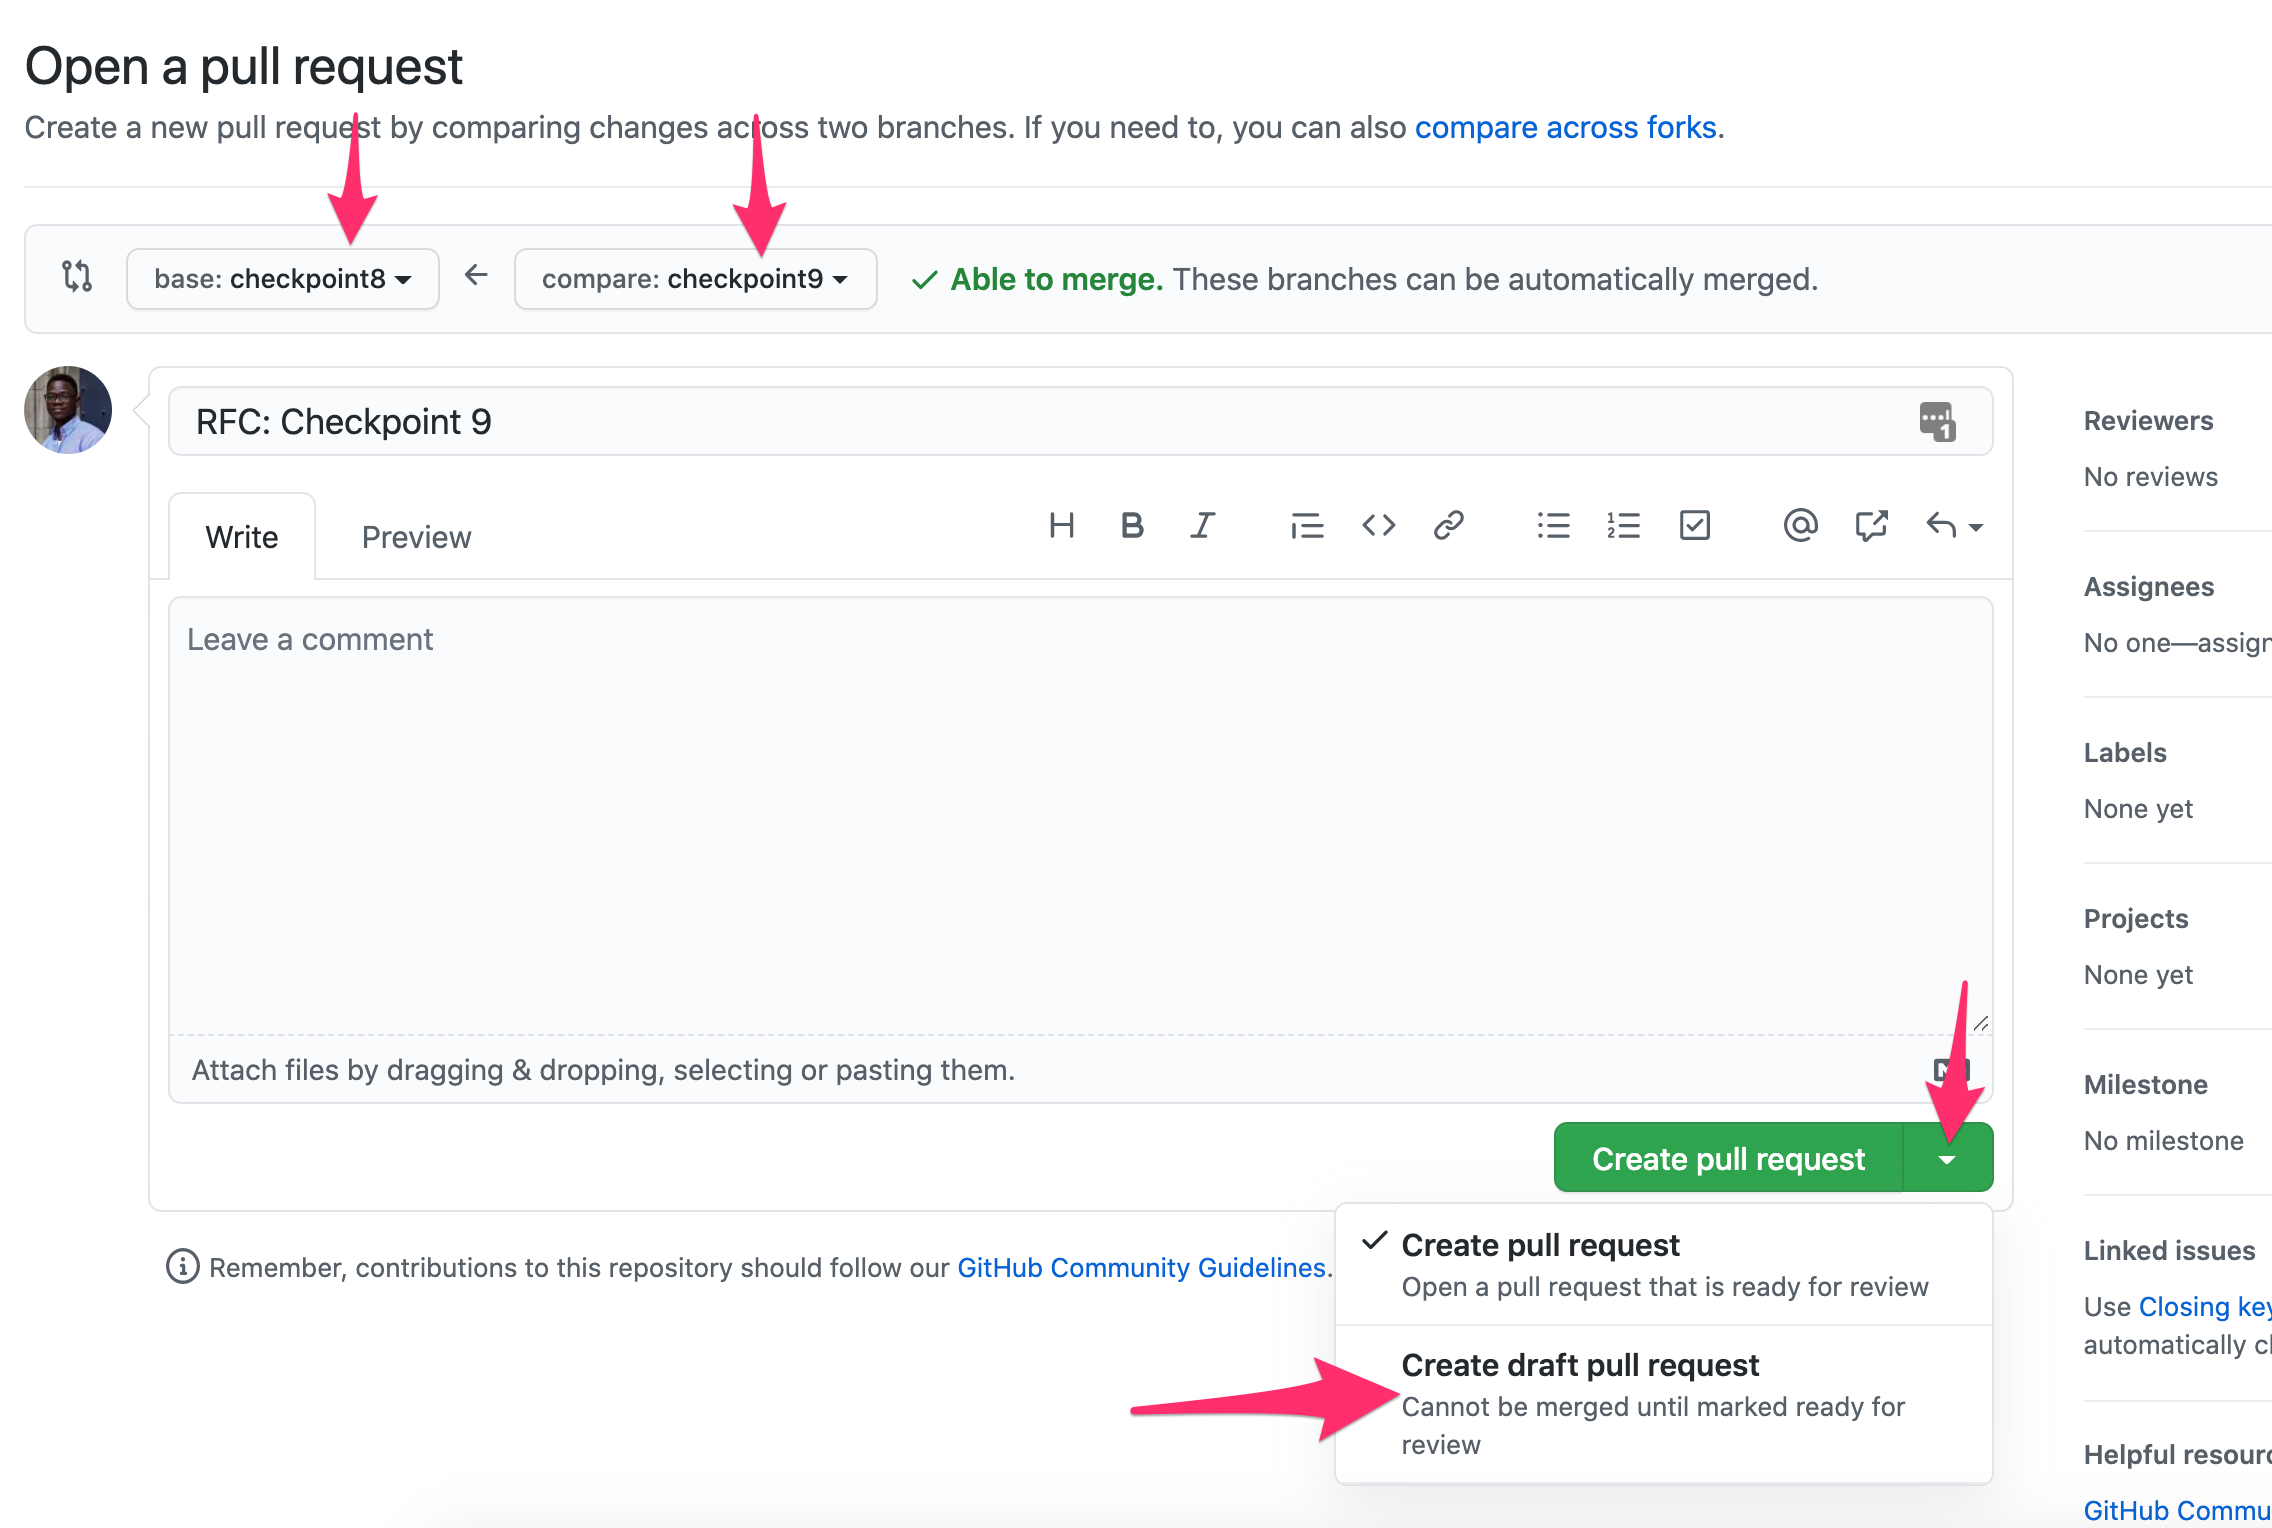
Create a branch from the previous checkpoint branch. For example, to create a Checkpoint for Lesson 9, first go to "checkpoint8", then create a branch off "checkpoint8" called "checkpoint9".
-
Make your modifications in the "checkpoint" directory.
-
When done, push the new branch
-
Open a Draft PR on GitHub against the previous checkpoint branch. (see screnshot). Use the draft PR option because you are not merging these braching. You do this only to get feedback from other teachers.
- Once feedback is done, the PR should be closed.
- The branch should be left on GitHub for the students to find as described above.


