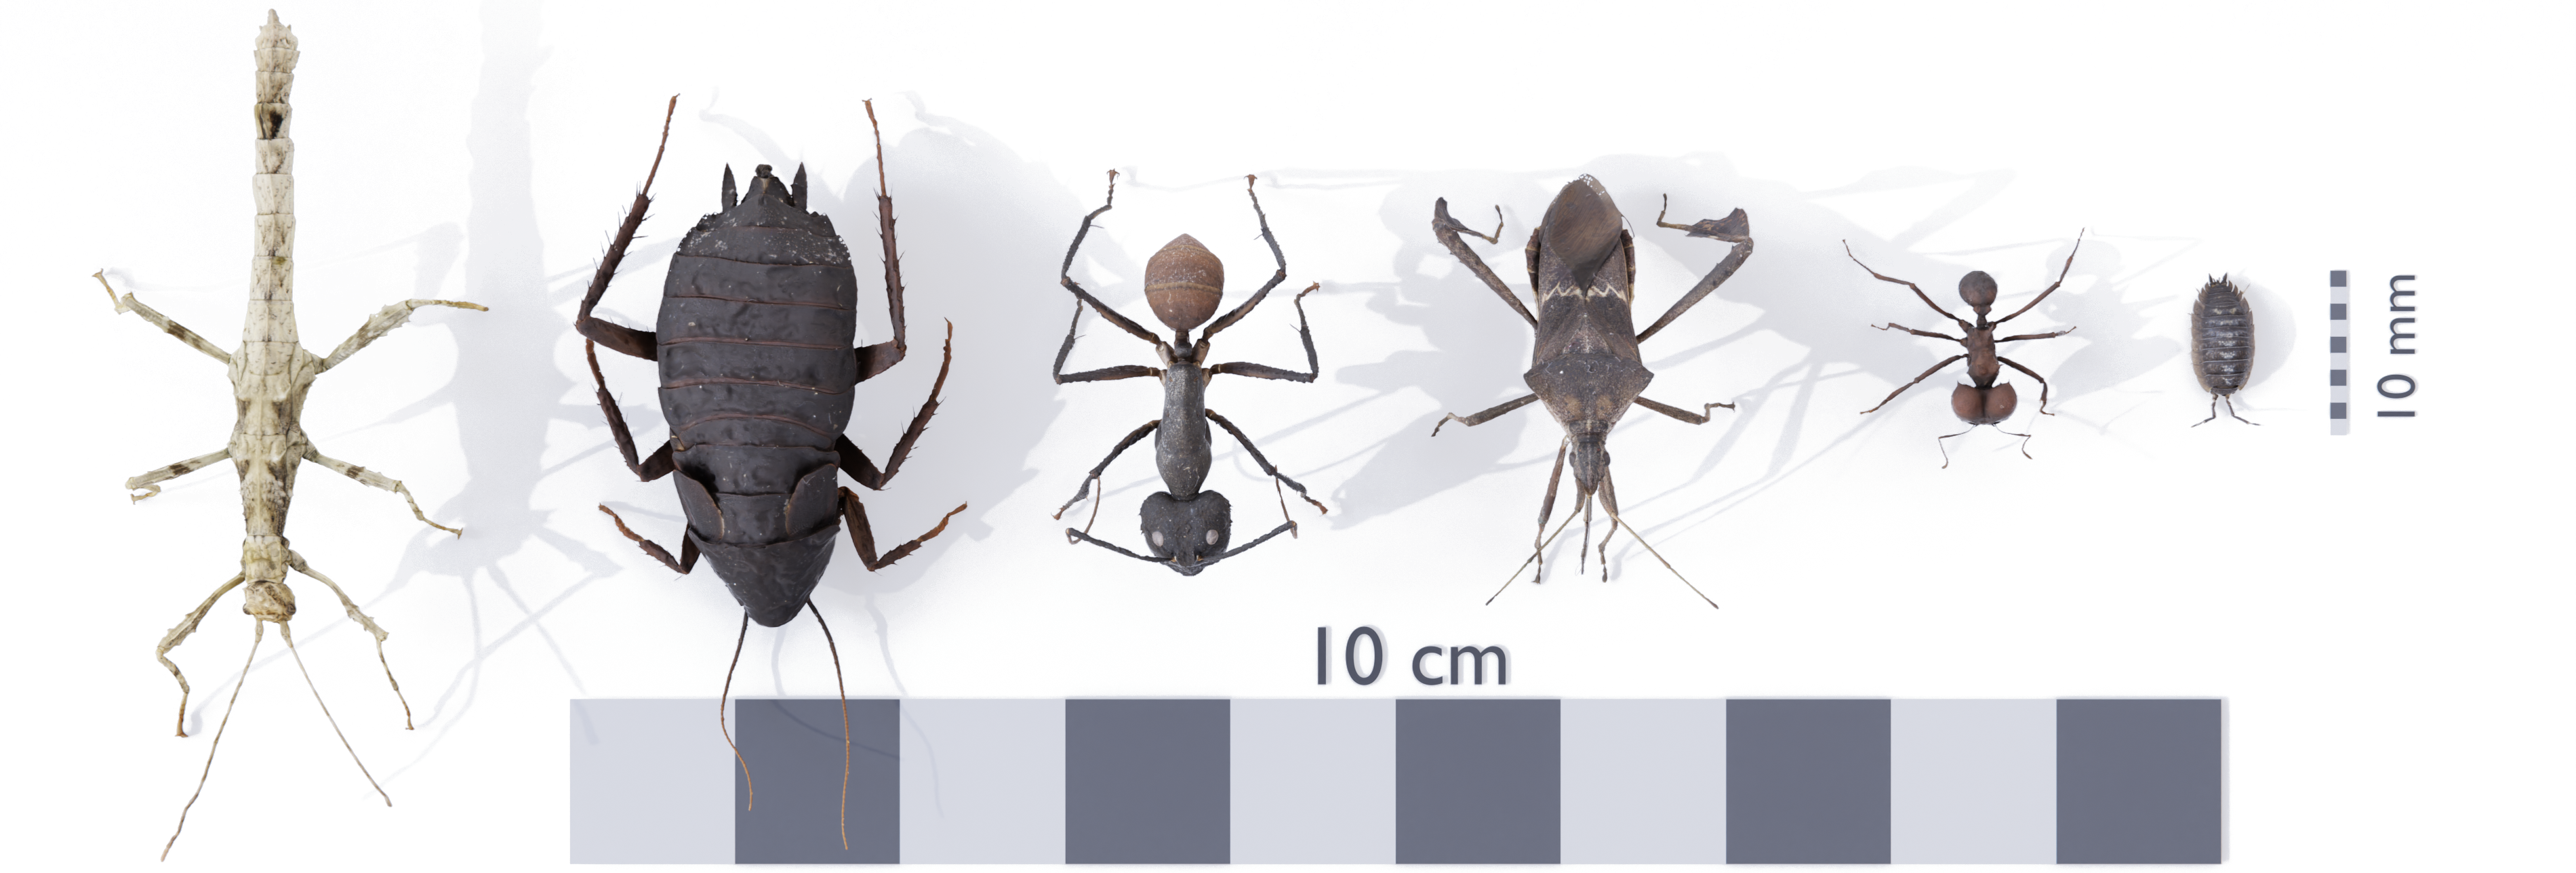
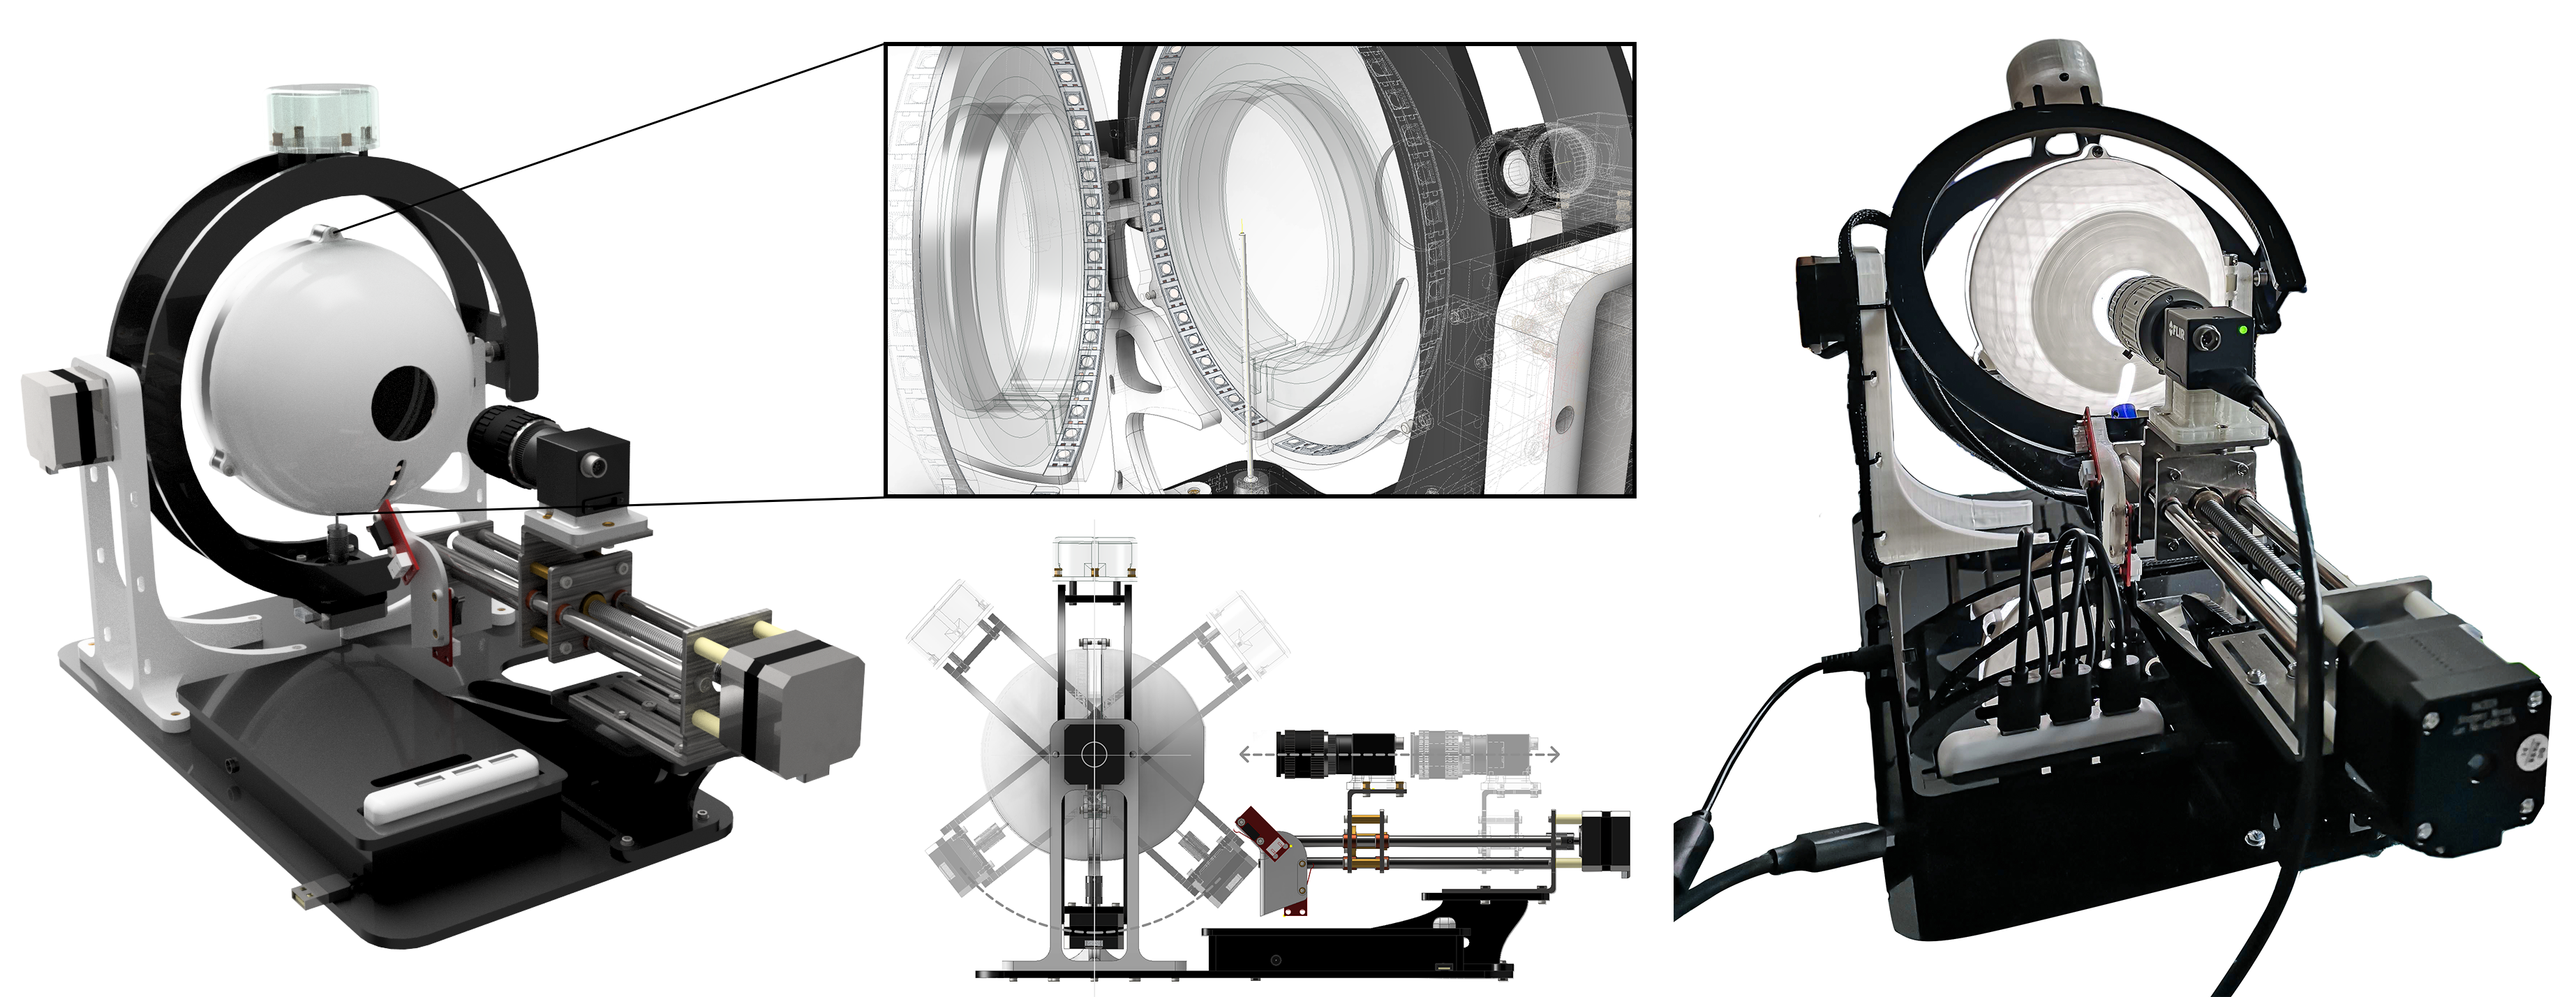
scAnt is a completely open source and low-cost macro 3D scanner, designed to digitise insects of a vast size range and in full colour. Aiming to automate the capturing process of specimens as much as possible, the project comes complete with example configurations for the scanning process, as well as additional scripts including stacking and complex masking of images to prepare them for various photogrammetry software of your choice! For a look at a few scAnt results check-out http://bit.ly/ScAnt-3D as well as our Sketchfab Collection!
All structural components of the scanner can be manufactured using 3D-printing and laser cutting and are available for download as .ipt, .iam, .stl, and .svg files from our thingiverse page.
scAnt is supported by 64 bit versions of Windows 10 and Ubuntu 18.04. Newer releases of Ubuntu will likely not pose an issue but only these configurations have been tested so far. The pipeline and GUI have been designed specifically for use with FLIR Blackfly cameras, and Pololu USB Stepper drivers to limit the number of required components for the scanner as much as possible. We are planning on including support for other cameras and stepper drivers in the future as well. Please refer to our thingiverse page for a full list of components.
The easiest way to get your scanner up and running is by installing our pre-configured anaconda environment.
cd conda_environment
conda env create -f scAnt_UBUNTU.yml
After the environment has been created successfully, close the terminal and open a new one. Run the following line to activate your new environment and continue the installation.
conda activate scAntIf you instead prefer to use other package managers or want to integrate the scanner into an existing environment, here is a list of package requirements:
- python >= 3.6
- pip
- numpy
- matplotlib
- opencv >= 4.1.0
- pyqt 5
- imutils
- pillow
- scikit-image
Additionally, drivers and libraries for the used camera and stepper drivers need to be installed, specific to your system.
Ubuntu 18.04
Download the drivers and python bindings for Spinnaker & Pyspin from the official FLIR page:
FLIR Support / Spinnaker / Linux Ubuntu / Ubuntu 18.04
download the tar.gz file for your architecture (usually amd64)
FLIR Support / Spinnaker / Linux Ubuntu / Python / Ubuntu 18.04 / x64
depending on your python version, download the respective file. For our conda environment download ...cp37-cp37m_linux_x86_64.tar.gz
Unpack all files in a folder of your choice before you continue
- Install all required dependencies before installing FLIR's Spinnaker software
sudo apt-get install libavcodec57 libavformat57 libswscale4 libswresample2 libavutil55 libusb-1.0-0 libgtkmm-2.4-dev- Once all dependencies are installed, install spinnaker from its extracted folder
sudo sh install_spinnaker.sh-
during installation ensure to add your user to the user-group and accept increasing allocated USB-FS memory size to 1000 MB in order to increase the video stream buffer size
-
Reboot your computer to make the installation become effective
-
launch spinview and connect your FLIR camera to verify your installation (if the application is already launched when plugging in your camera, refresh the list in case it is not listed right away)
-
now install the downloaded .whl file for your python environment. Ensure you activate your python environment before running the pip install command below.
pip install spinnaker_python-1.x.x.x-cp37-cp37m-linux_x86_64.whl- To verify everything has to be installed correctly run Live_view_FLIR.py from the GUI folder.
cd scant/GUI
python Live_view_FLIR.py
If a live preview of the camera appears for a few seconds and an example image is saved (within the GUI folder), all camera drivers and libraries have been installed correctly!
Stepper driver setup
-
The Pololu stepper drivers can be controlled and set up via console based commands. Simply download the drivers specific to your system from pololu.com Additional information regarding installation and a list of supported commands can also be found there. As all drivers used are open source as well, their code can be found on Pololu's Git as well.
-
Simply unpack the downloaded .tar.xy file and install the driver by:
sudo pololu-tic-*/install.sh-
Afterwards, reboot your computer to update your user privileges automatically, otherwise you will have to use sudo to access your USB stepper drivers.
-
If one or all of the stepper controllers were previously plugged into your computer unplug them and then plug them back in, so they are recognised correctly by your computer. Now, open the terminal and run the following command:
ticcmd –listThis should output a list of all connected USB stepper drivers.
- Now that your camera and steppers are all set up, you can run a complete functionality check of the scanner by running the Scanner_Controller.py script.
cd scAnt/scripts
python Scanner_Controller.py- the scanner will then home all axes, drive to a set of example positions and capture images as it would during scanning for a very coarse grid.
- If no errors appear, images will be saved and “Demo completed successfully” is printed to the console
Image Processing
A number of open source tools are used for processing the RAW images captured by the scanner. For a detailed explanation of each, refer to the official hugin and exiftool documentation. The following lines will install all that good stuff:
sudo add-apt-repository ppa:hugin/hugin-builds
sudo apt-get update
sudo apt-get install hugin enblend
sudo apt install hugin-tools
sudo apt install enfuse
sudo apt install libimage-exiftool-perl
Windows installation guide coming soon
Add your camera to the sensor database
Within the directory of the downloaded Meshroom installation go to the following folder and edit the file “cameraSensors.db” using any common text editor:
…/Meshroom-2019.2.0/AliceVision/share/AliceVision/cameraSensors.db
The entry should contain the following:
Make;Model;SensorWidthEnsure to enter these details as they are listed in your project configuration file, thus, metadata of your stacked and masked images. There should be no spaces between the entries. For our configuration add the following line:
FLIR;BFS-U3-200S6C-C;13.1Adding the correct sensor width is crucial in computing the camera intrinsics, such as distortion parameters, object scale, and distances. Otherwise the camera alignment, during feature matching and structure-from-motion steps are likely to fail.
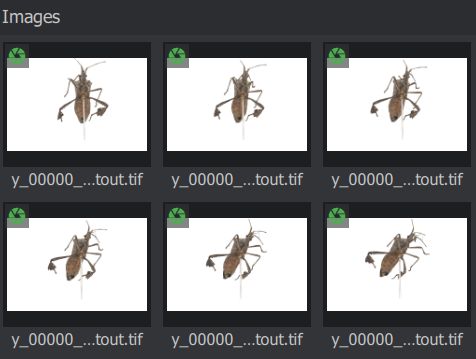
Once these details have been added, launch Meshroom and drag your images named …cutout.tif into Meshroom. If the metadata and added camera sensor are recognised, a green aperture icon should be displayed over all images.
If not all images are listed, or the aperture icon remains red / yellow, execute the helper script “batch_fix_meta_data.py” to fix any issues resulting from your images' exif files.
Setting up the reconstruction pipeline
Try to run the pipeline with this configuration, before attempting to use approximated camera positions. Only if issues with the alignment of multiple camera poses arise, you should use approximated positions, as fine differences in the scanner setup can cause poorer reconstruction results, without guided matching (available only in the 2020 version of Meshroom)!
- CameraInit
- No parameters need to be changed here.
- However, ensure that only one element is listed under Intrinsics. If there is more than one, remove all images you imported previously, delete all elements listed under Intrinsics, and load your images again. If the issue persists, execute the helper script “batch_fix_meta_data.py” to fix any issues resulting from your images exif files.
- FeatureExtraction
- Enable Advanced Attributes** by clicking on the three dots at the upper right corner.
- Describer Types: Check sift and akaze
- Describer Preset: Normal (pick High if your subject has many fine structures)
- Force CPU Extraction: Uncheck
- ImageMatching
- Max Descriptors: 10000
- Nb Matches: 200
- FeatureMatching
- Describer Types: Check sift and akaze
- Guided Matching: Check
- StructureFromMotion
- Describer Types: Check sift and akaze
- Local Bundle Adjustment: Check
- Maximum Number of Matches: 0 (ensures all matches are retained)
- PrepareDenseScene
- No parameters need to be changed here.
- DepthMap
- Downscale: 1 (use maximum resolution of each image to compute depth maps)
- DepthMapFilter
- Min View Angle: 1
- Compute Normal Maps: Check
- Meshing
- Estimate Space from SfM: Uncheck (while this will potentially produce “floaters” that need to be removed during post processing it assists in reserving very fine / long structures, such as antennae)
- Min Observations for SfM Space Estimation: 2 (only required if above attribute remains checked)
- Min Observations Angle for SfM Space Estimation: 5 (only required if above attribute remains checked)
- Max Input Points: 100000000
- simGaussianSizeInit: 5
- simGaussianSize: 5
- Add landmarks to the Dense Point Cloud: Check
- MeshFiltering
- Filter Large Triangles Factor: 40
- Smoothing Iterations: 2
- Texturing
- Texture Side: 16384
- Unwrap Method: LSCM (will lead to larger texture files, but much higher surface quality)
- Texture File Type: png
- Fill Holes: Check
Now click on start and watch the magic happen. Actually, this is the best time to grab a cup of coffee, as the reconstruction process takes between 3 and 10 hours, depending on your step size, camera resolution, and system specs.
Exporting the textured mesh:
All outputs within Meshroom are automatically saved in the project’s environment. By right clicking on the Texturing node and choosing “Open Folder” the location of the created mesh (.obj file) is shown.
Pull requests are welcome. For major changes, please open an issue first to discuss what you would like to change.
Please make sure to update tests as appropriate.
scAnt - Open Source 3D Scanner and Processing Pipeline
© Fabian Plum, 2020 MIT License


