*add link for SSH key install
Hi all! For the interactive lab today, please do the following:
- Have a question? Put it as an issue. We might want to add it to the documentation in an FAQ section or expand it to be it's own section too!
- Note any issues you see with spelling, grammar, or general information you feel needs presented differently. Put it as an issue, as we are going to fix it during the demo today to get some hands-on practice using git.
Go here: https://github.com/git-guides/install-git
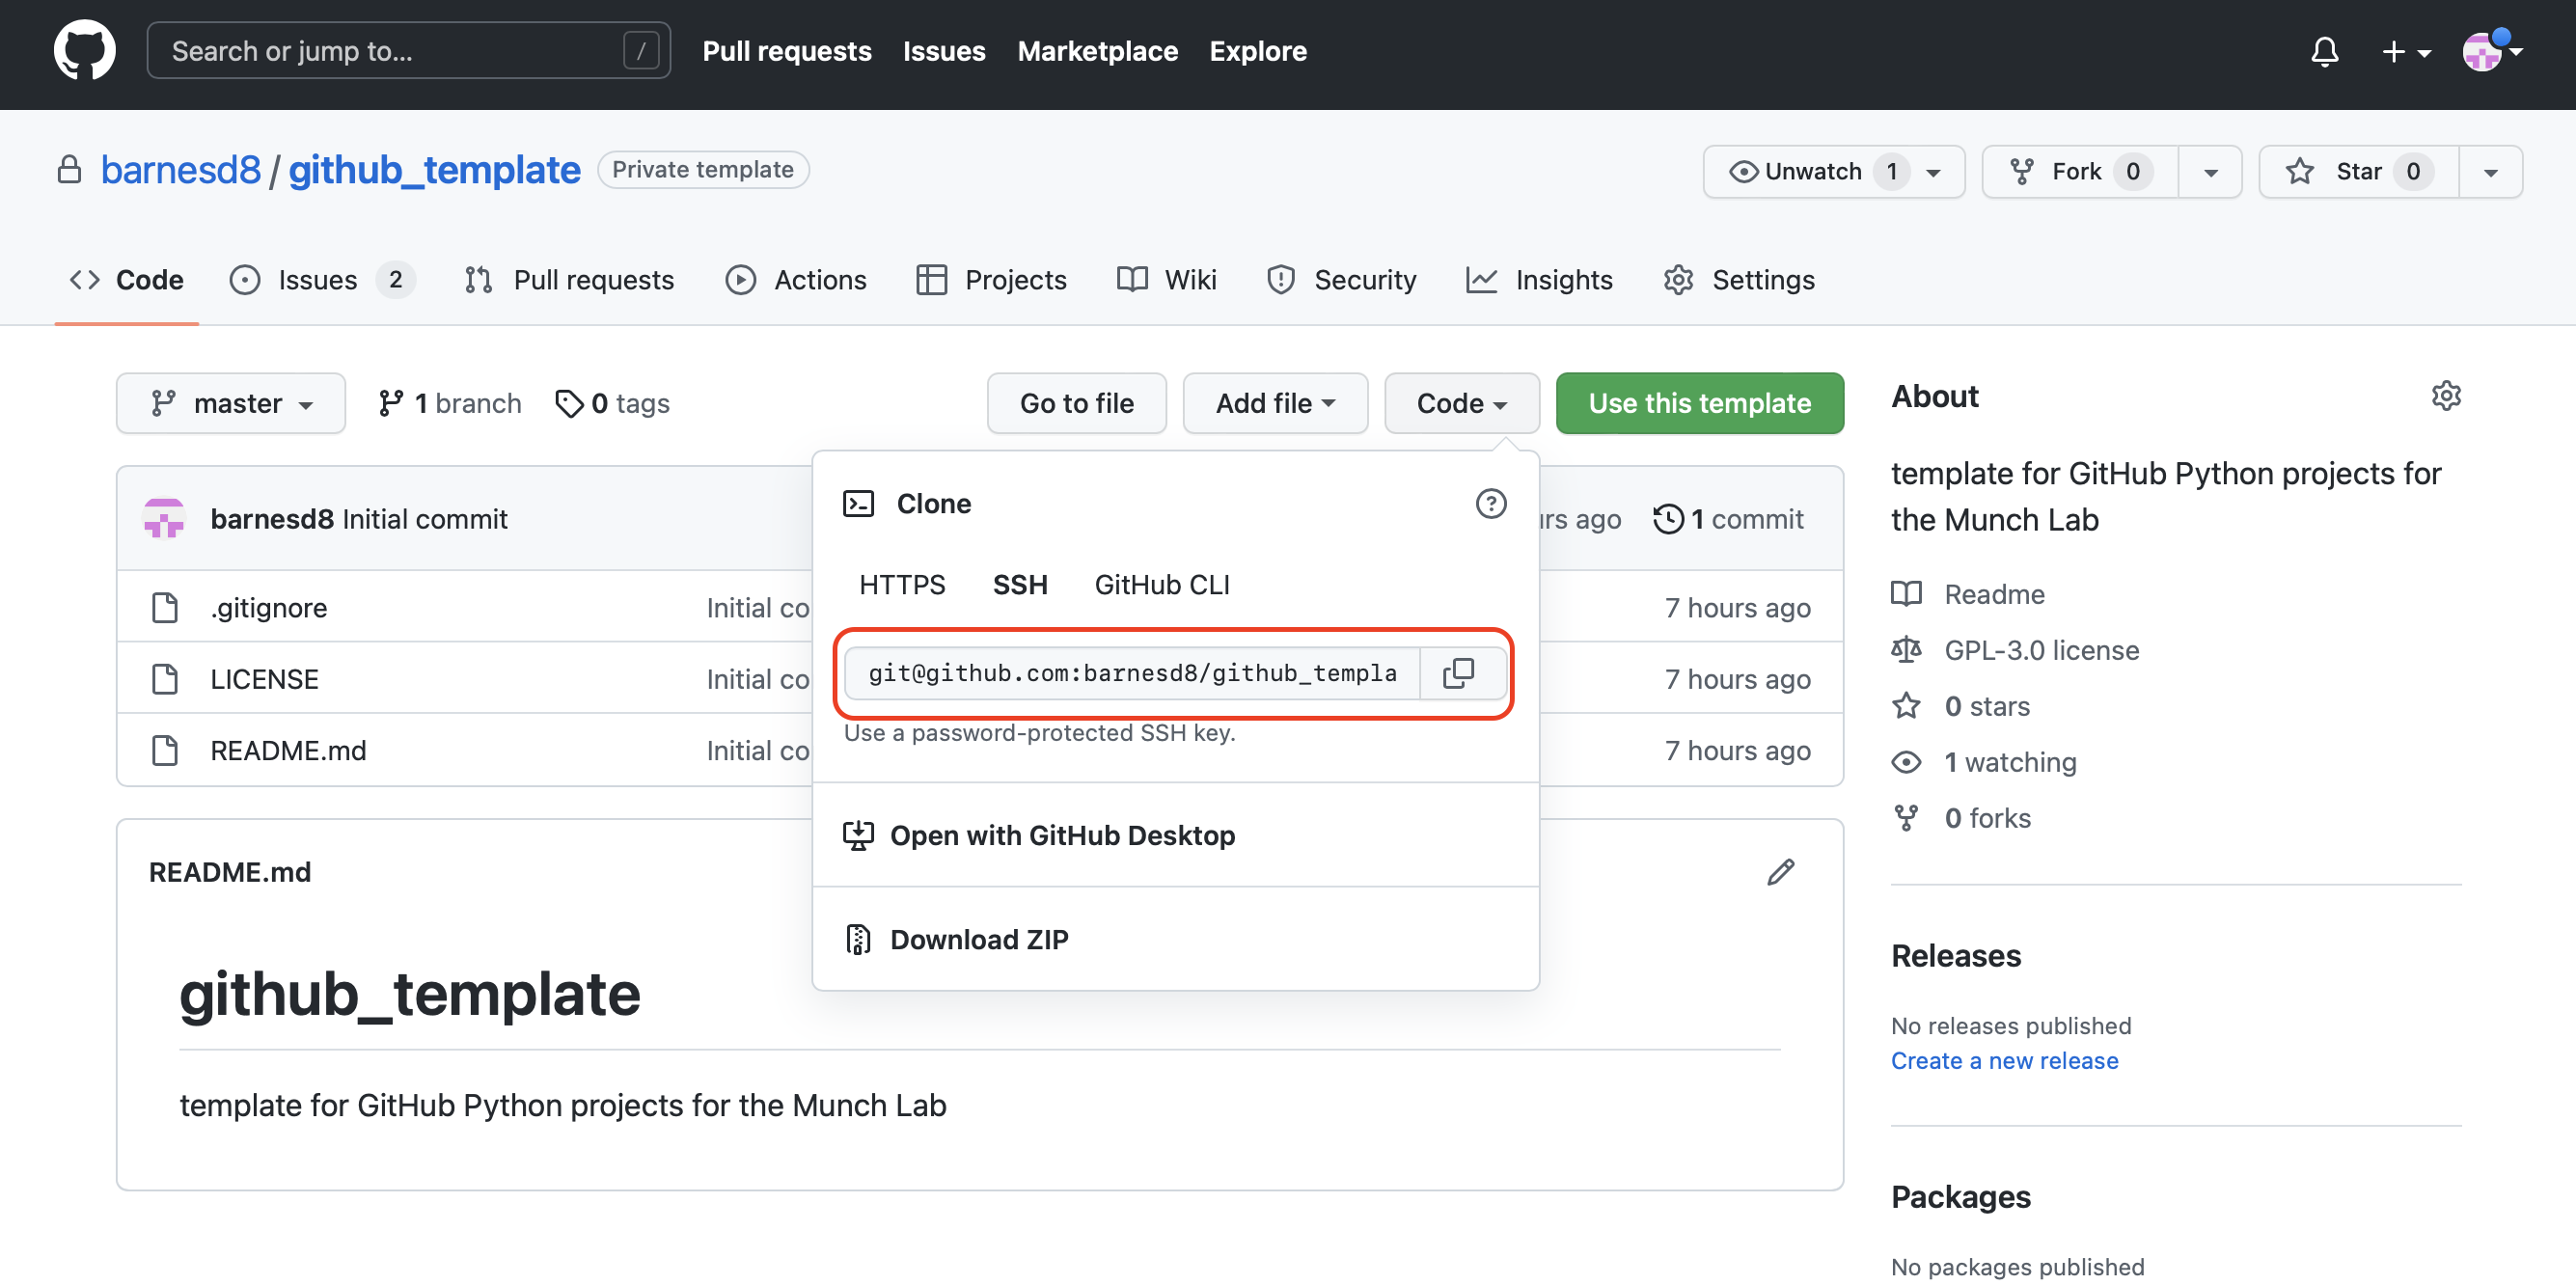
To contribute to a project, the first thing you want to do is clone the projecct. This creates a local copy that you can work from, keep history of code changes, and ultimately merge your changes with collaborators. To do this the command you use is git clone. To clone a repository, you first need to find the respository name, which can be found here:
Note you can use multiple methods to authenticate, and the url is different for each one. Once you know the repository name, you would type the following command into your terminal:
git clone 'repository name'
If that wasn't successful, and you received an error, refer to this
help page https://docs.github.com/en/repositories/creating-and-managing-repositories/cloning-a-repository.
Before you make any changes to any files, you first need to create your own branch. This repository has a few branches that are protected, or branches that you can't directly make changes on. These branches, the master and test-pypi branches can be configured to integrate directly with pypi for package distribution, and as such, require approval and code review to merge any changes. Each branch should correspond to a software feature or issue with the code, and be named accordingly. For example, for the creation of this readme file, we can create a branch called readme, and then make changes on that branch. To do so navigate to the main repository folder in terminal and type:
git branch readme
git switch readme
Any changes you make should now be saved in the branch named readme. If you aren't sure what branch you are on you can always check:
git branch
It's important to note that when creating new branches, they make a copy of the branch you are currently on. So if you are on master and create a new branch, it will be a copy of master. In the section below on structuring releases in git we will review a recommended workflow.
You can learn git commands on Git branching here: Git branching Interactive tool
Once you've made progress you'd like to save on a branch, you need to commit your changes, which saves them to the branch and allows you to save them on the repository on the GitHub servers for other people to access, review, and approve merges. To see what changes are available to be committed, you can check the status:
git status
which will show something like:
Anything under Changes not staged for commit will save when you commit your changes. Anything in Untracked files needs to be added for commit, or listed in the .gitignore file. For now, assume this is a file or folder we do want to save in our changes, and we will discuss .gitignore later in the document. To add the file, you use the git add command, and to add all files and folder that are untracked you would type:
git add .
You can then check the status again:
git status
and get the following output:
To commit your changes:
git commit -m 'status message'
The status message should describe the changes you made in some detail so someone reviewing your code would understand the intention of this code. Once you've committed the changes, you can push them to the GitHub server:
git push origin readme
The origin readme says to push to the GitHub server to a branch named readme. To configure the GitHub server readme branch to correspond with your local readme branch to be able to just run git push do the following:
git push --set-upstream origin readme
Now any changes you need to push to the github server on the readme branch can be done by just running:
git push
When working on a project in git, it's a good idea to organize the features you want to include into groupings of functionality that make sense to be included together, called releases. For each feature you create a branch, and then these branches are merged together on another branch for the release. So for example, if I have three branches that are all basic features of a package that I want to include in the same release, I'll first create a release branch and merge these onto the release branch. Here we introduce a new command that creates and switches to the new branch at the same time.
git switch -c version-0.1
And we can see we've created and switched to the new branch named version-0.1
We also see we already have a readme branch, so let's create some new branches. We can do this in the terminal, but since we are going to tie them to releases, we will actually show how to create them in the GitHub web interface. First, I'm going to commit and push all changes to make sure it is up to date between the local branches and the remote branches.
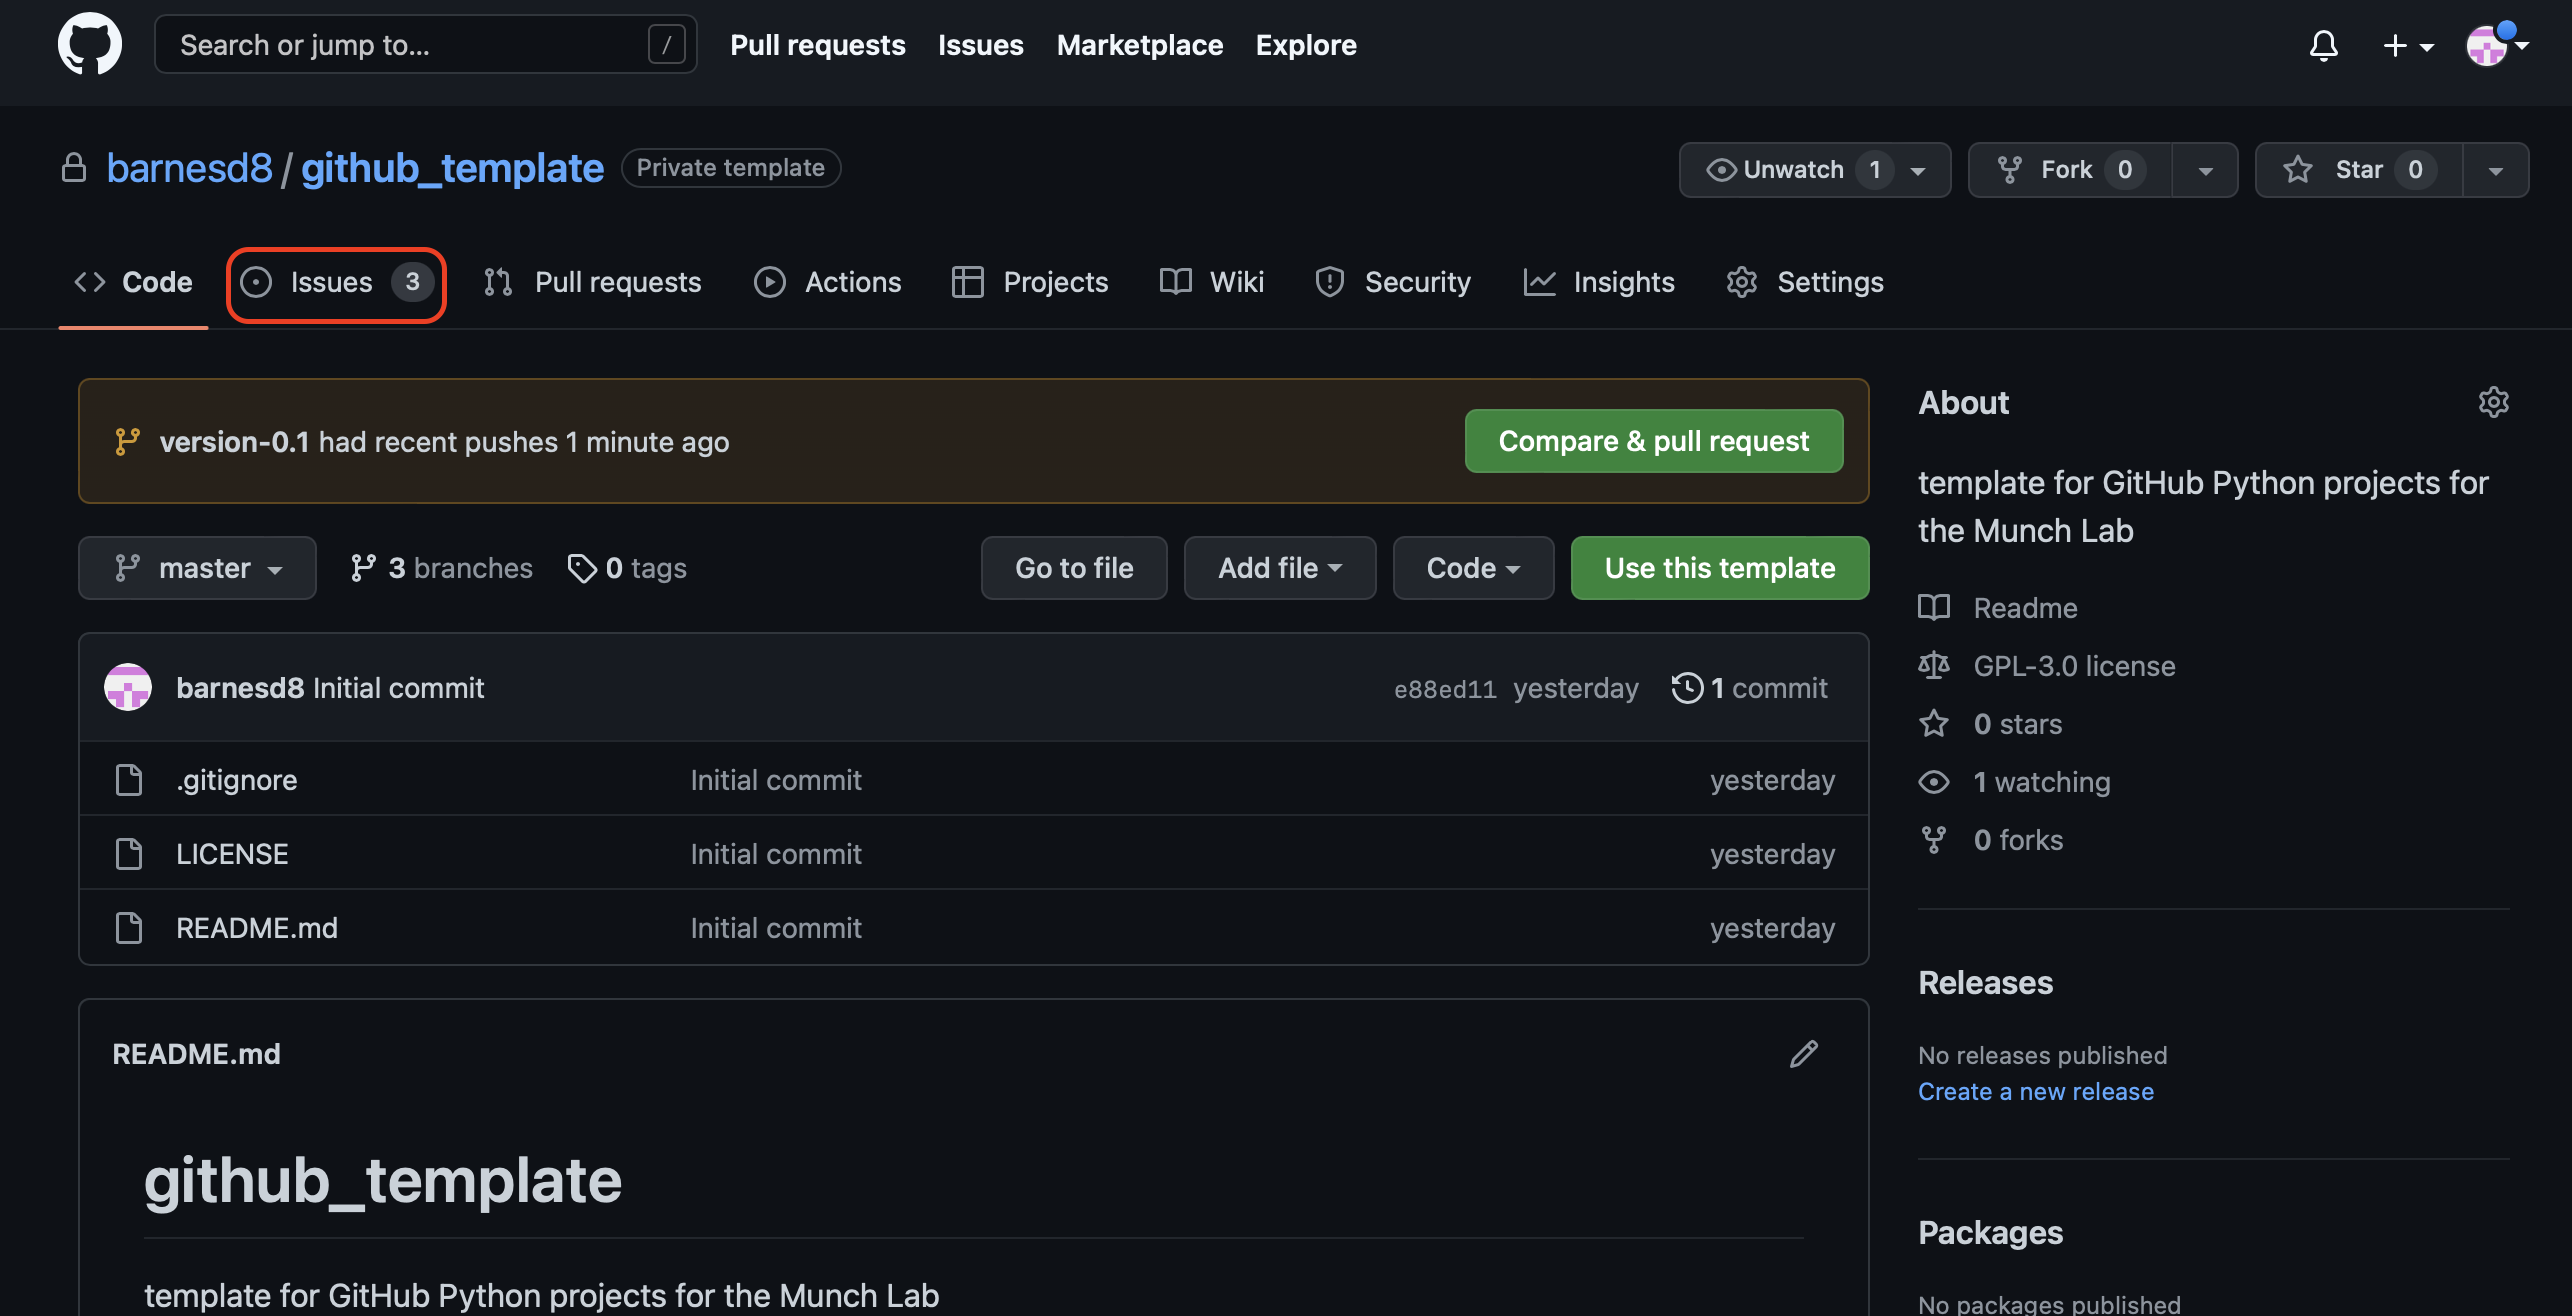
I'll navigate to the repo here: https://github.com/barnesd8/github_template and go to the issues area.
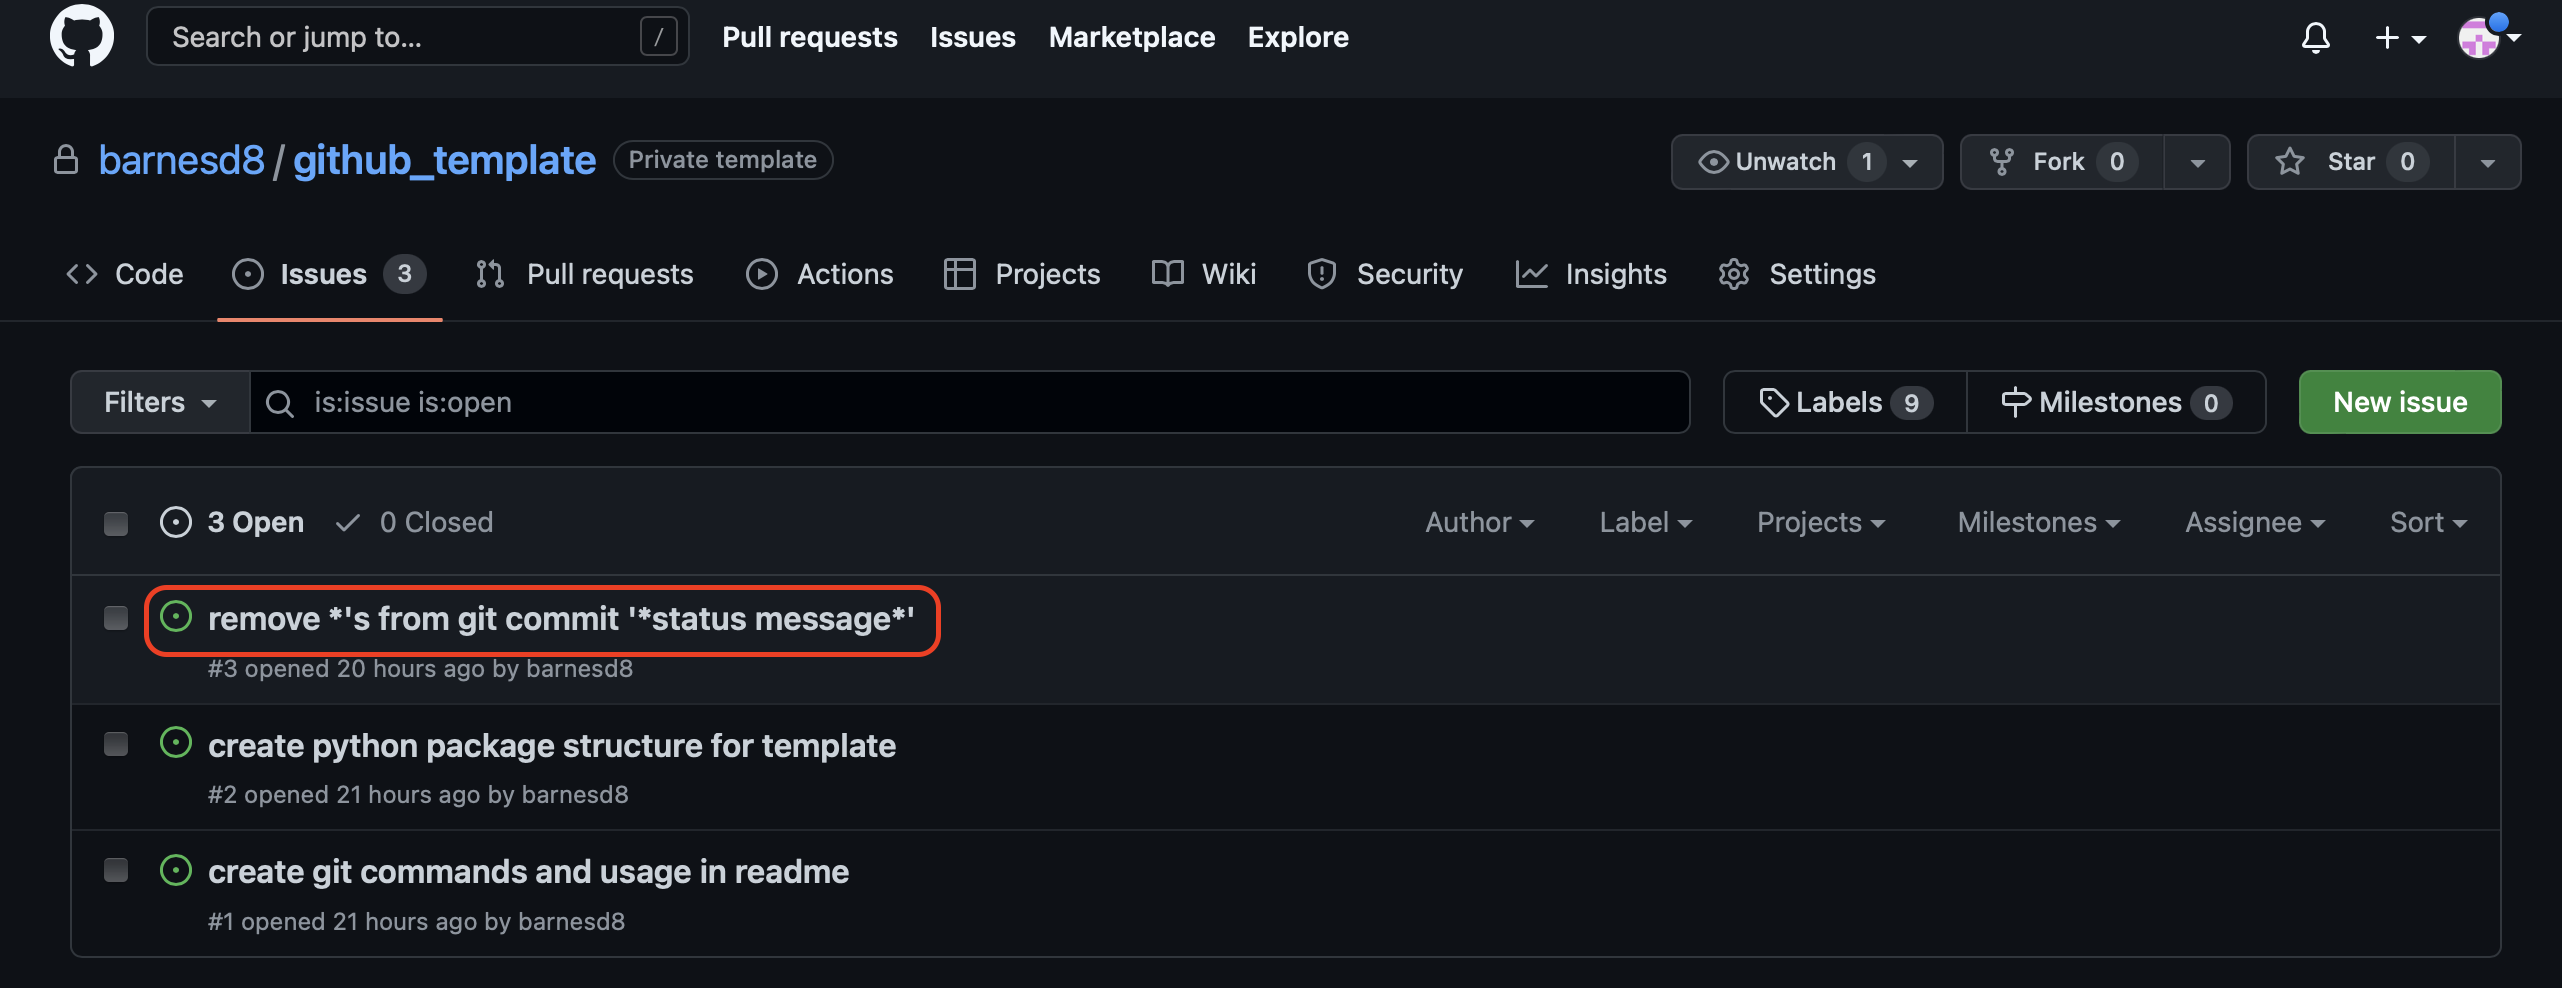
I'll then drill into the highlighted one here:
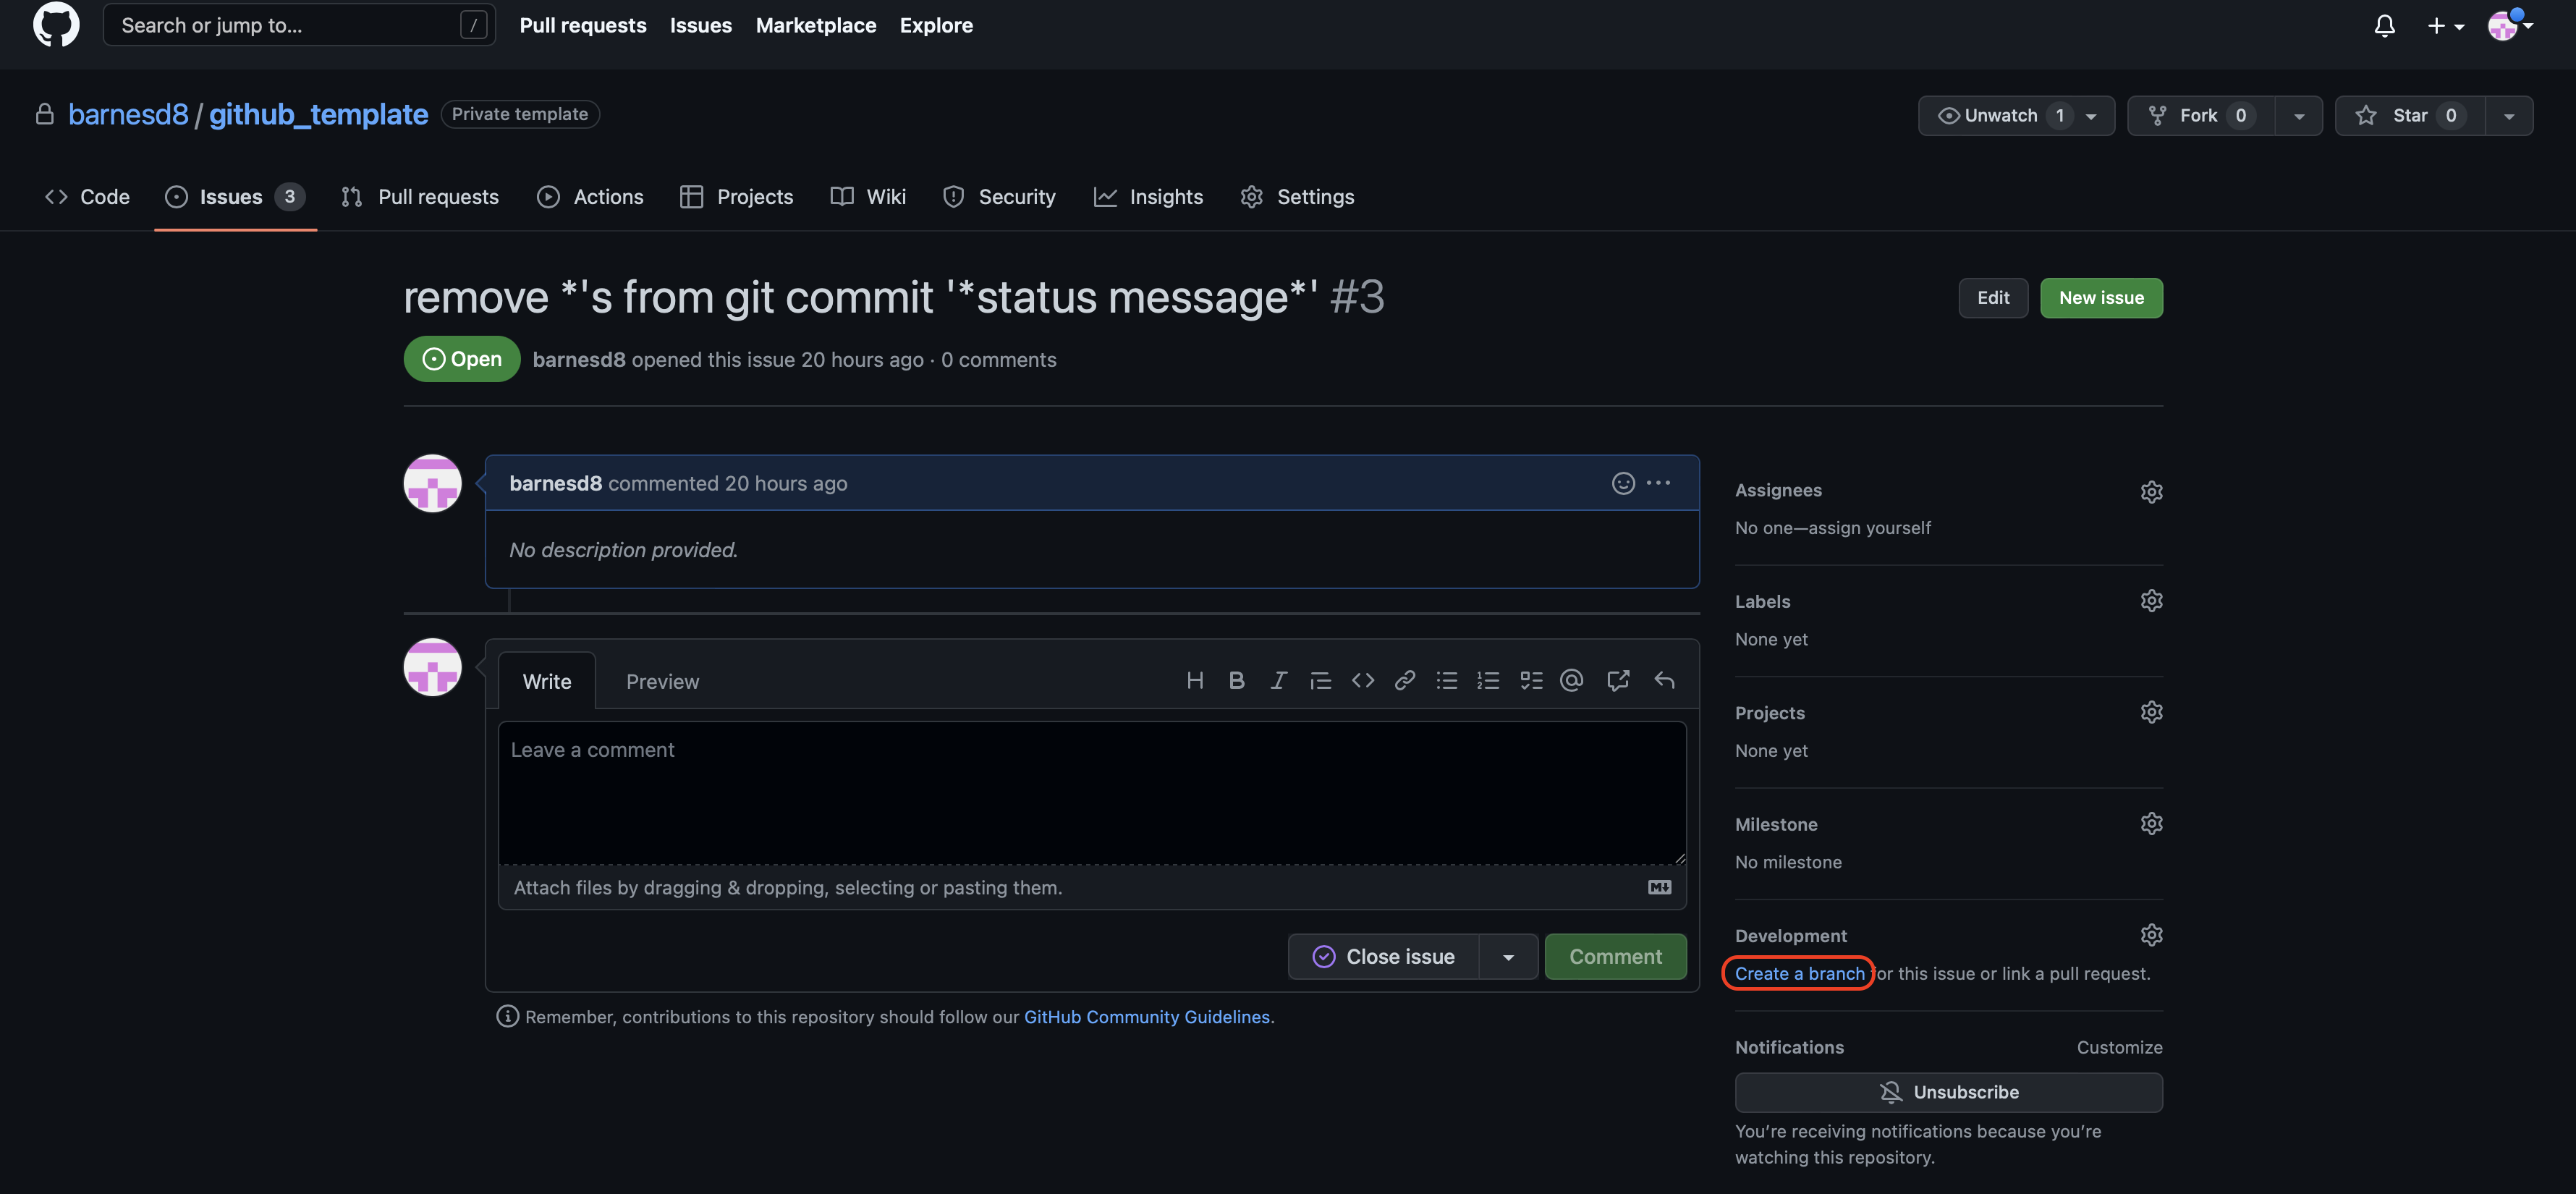
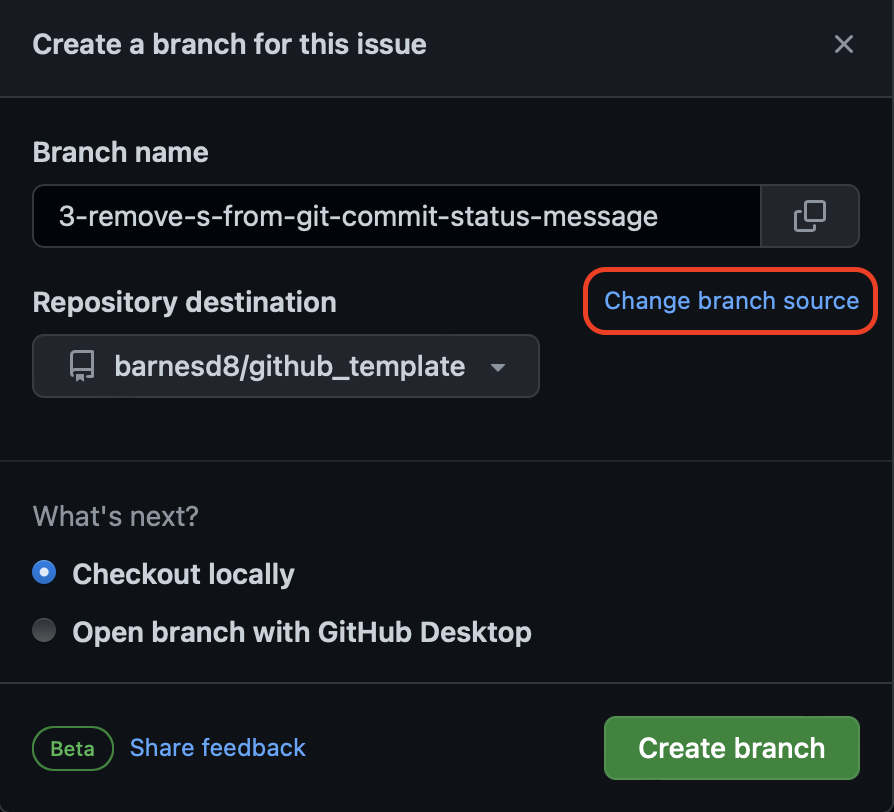
And then click Create a branch:
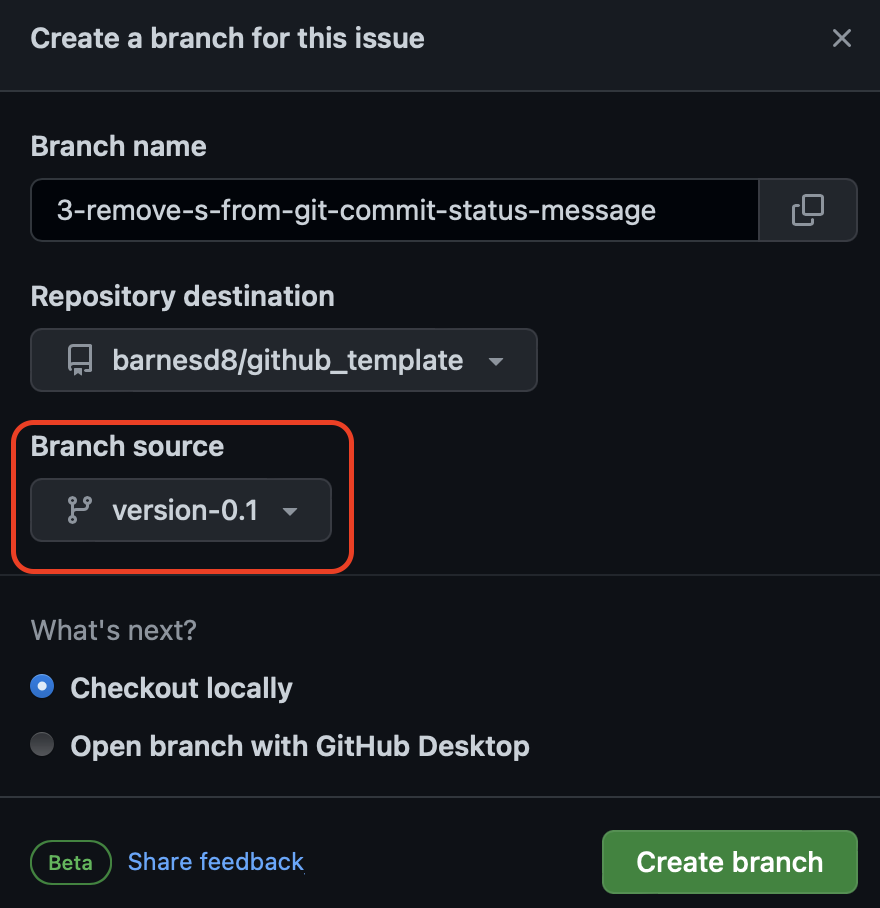
You can also change which branch you are copying from by choosing change branch source:
I am going to choose to create the branch from the version-0.1 branch:
This is then displayed to copy and paste and get the version locally to start working on the issue:
And then this is shown when it is run in the terminal:
You've now created a new branch to work on your issue!
There are a few ways to merge code, and I recommend using github.com to request merges, request code reviews, merge code, and resolve merge conflicts. To get started, we need to understand a merge, which means we are combining the code from two different branches to be one branch. Most of the time this is simple, but sometimes a manual review is required to fix merge conflicts, or issues where two sets of code are not able to be merged without manual review. First let's go through the process for a simple merge.
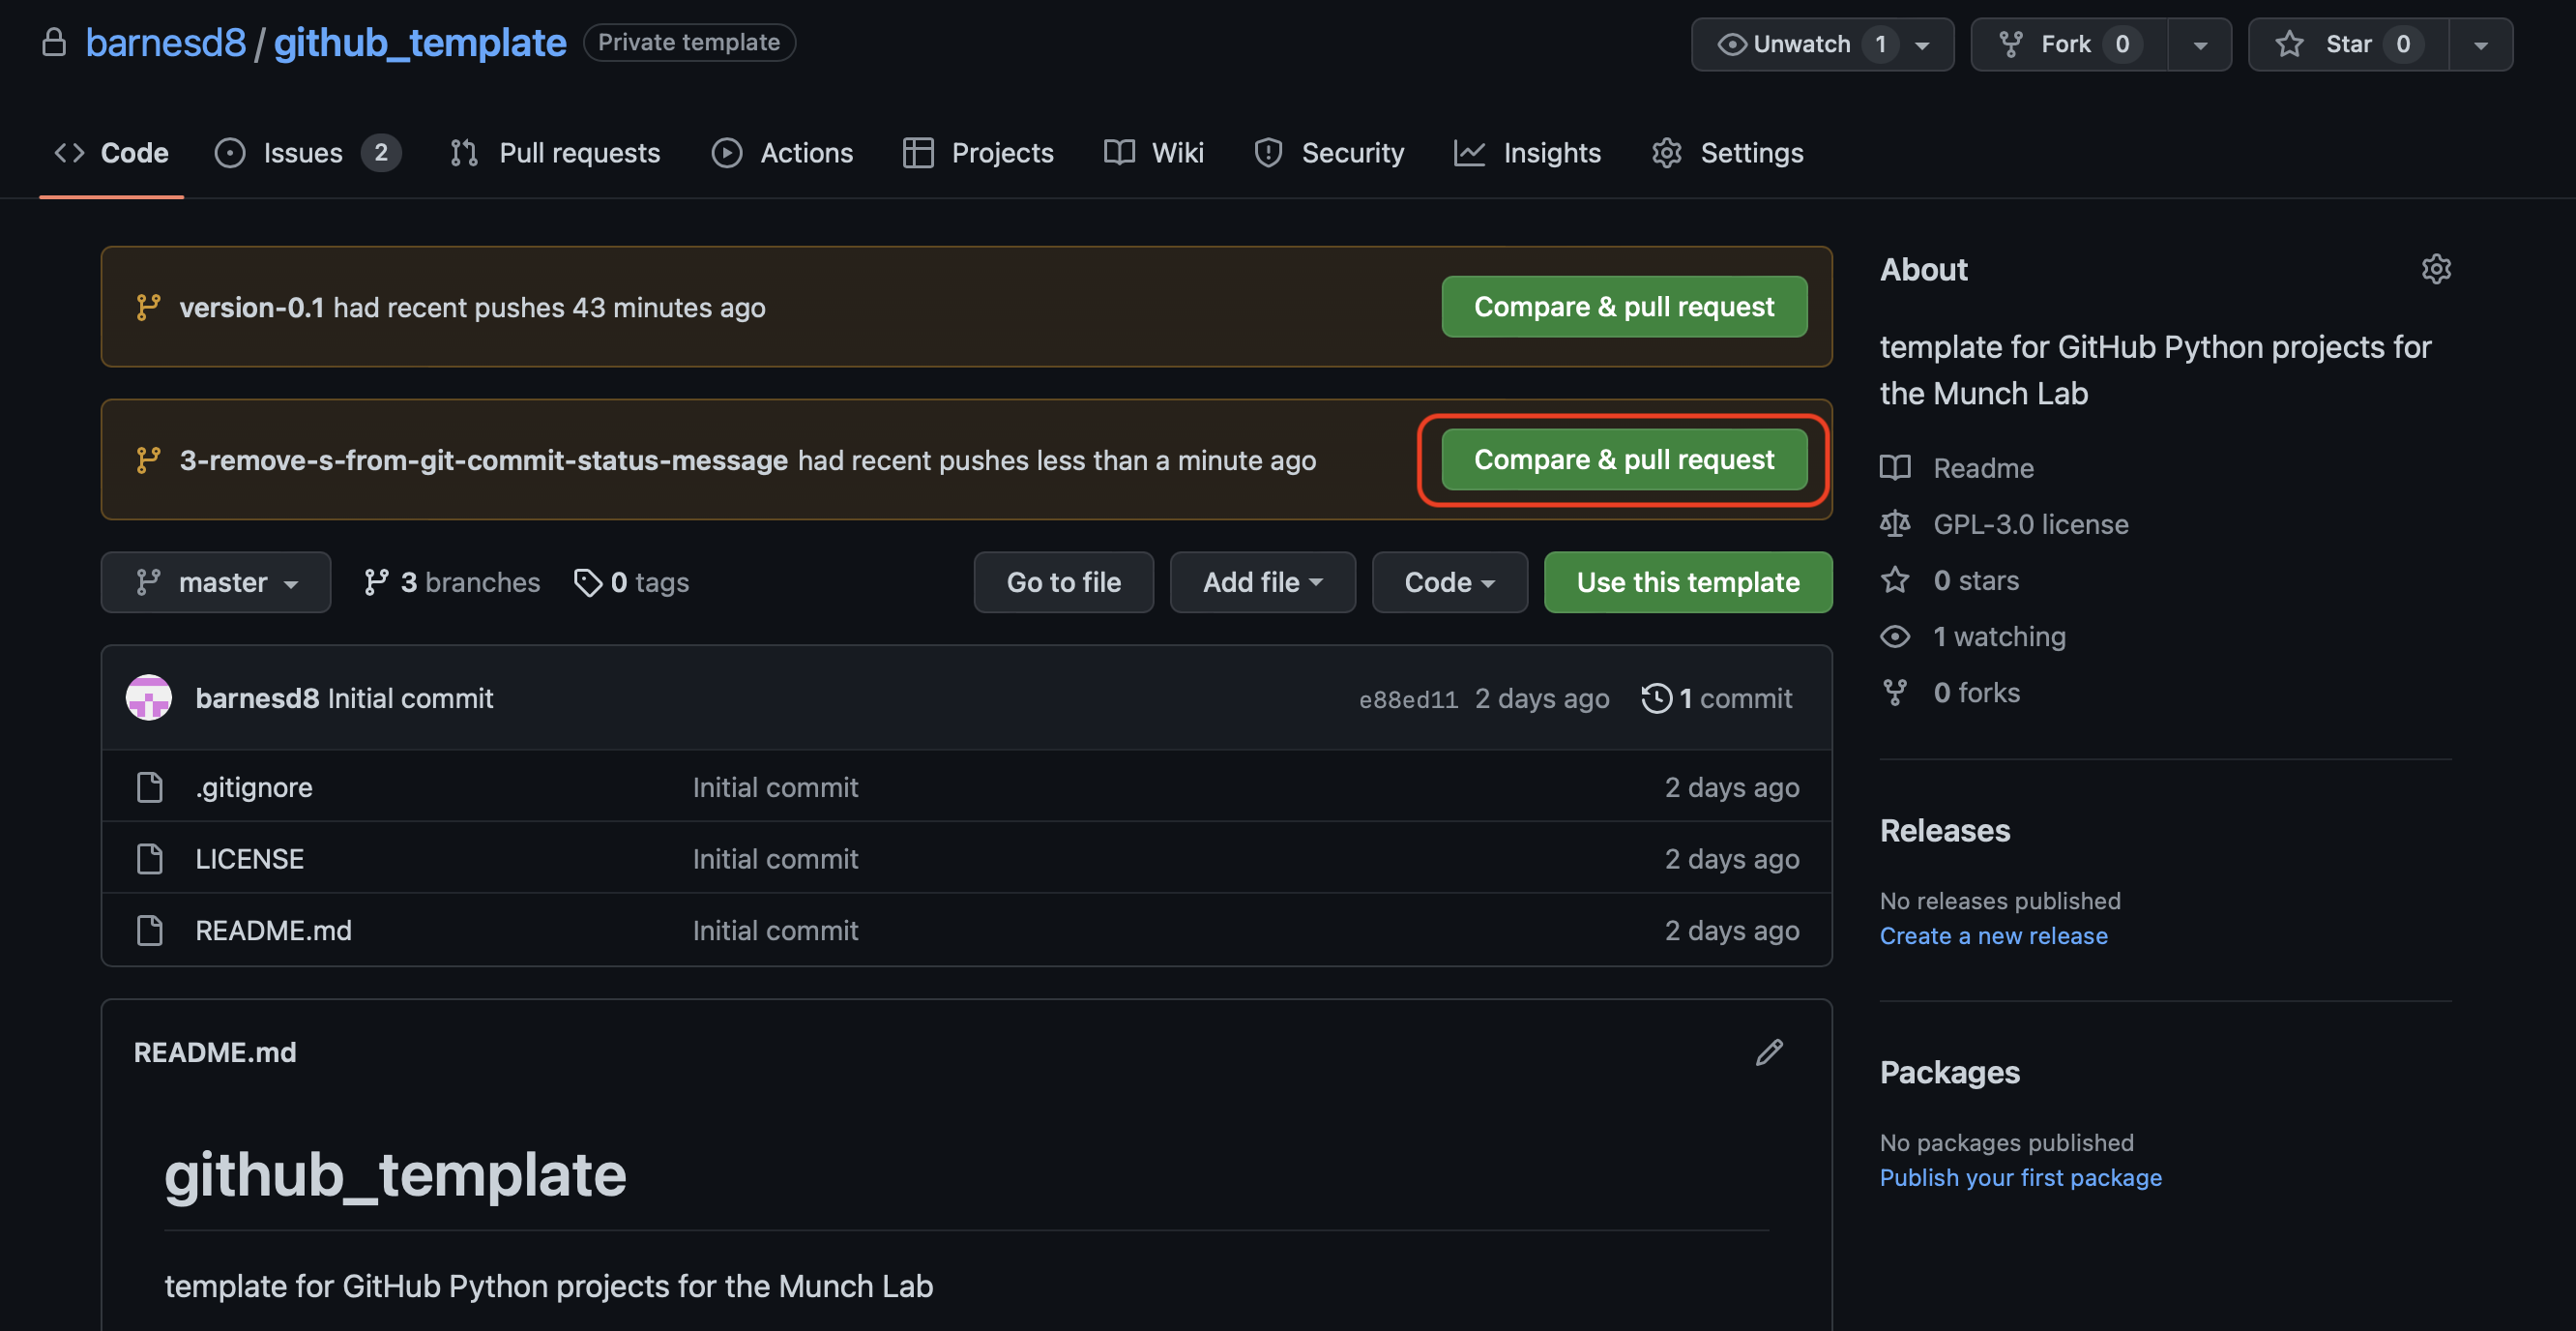
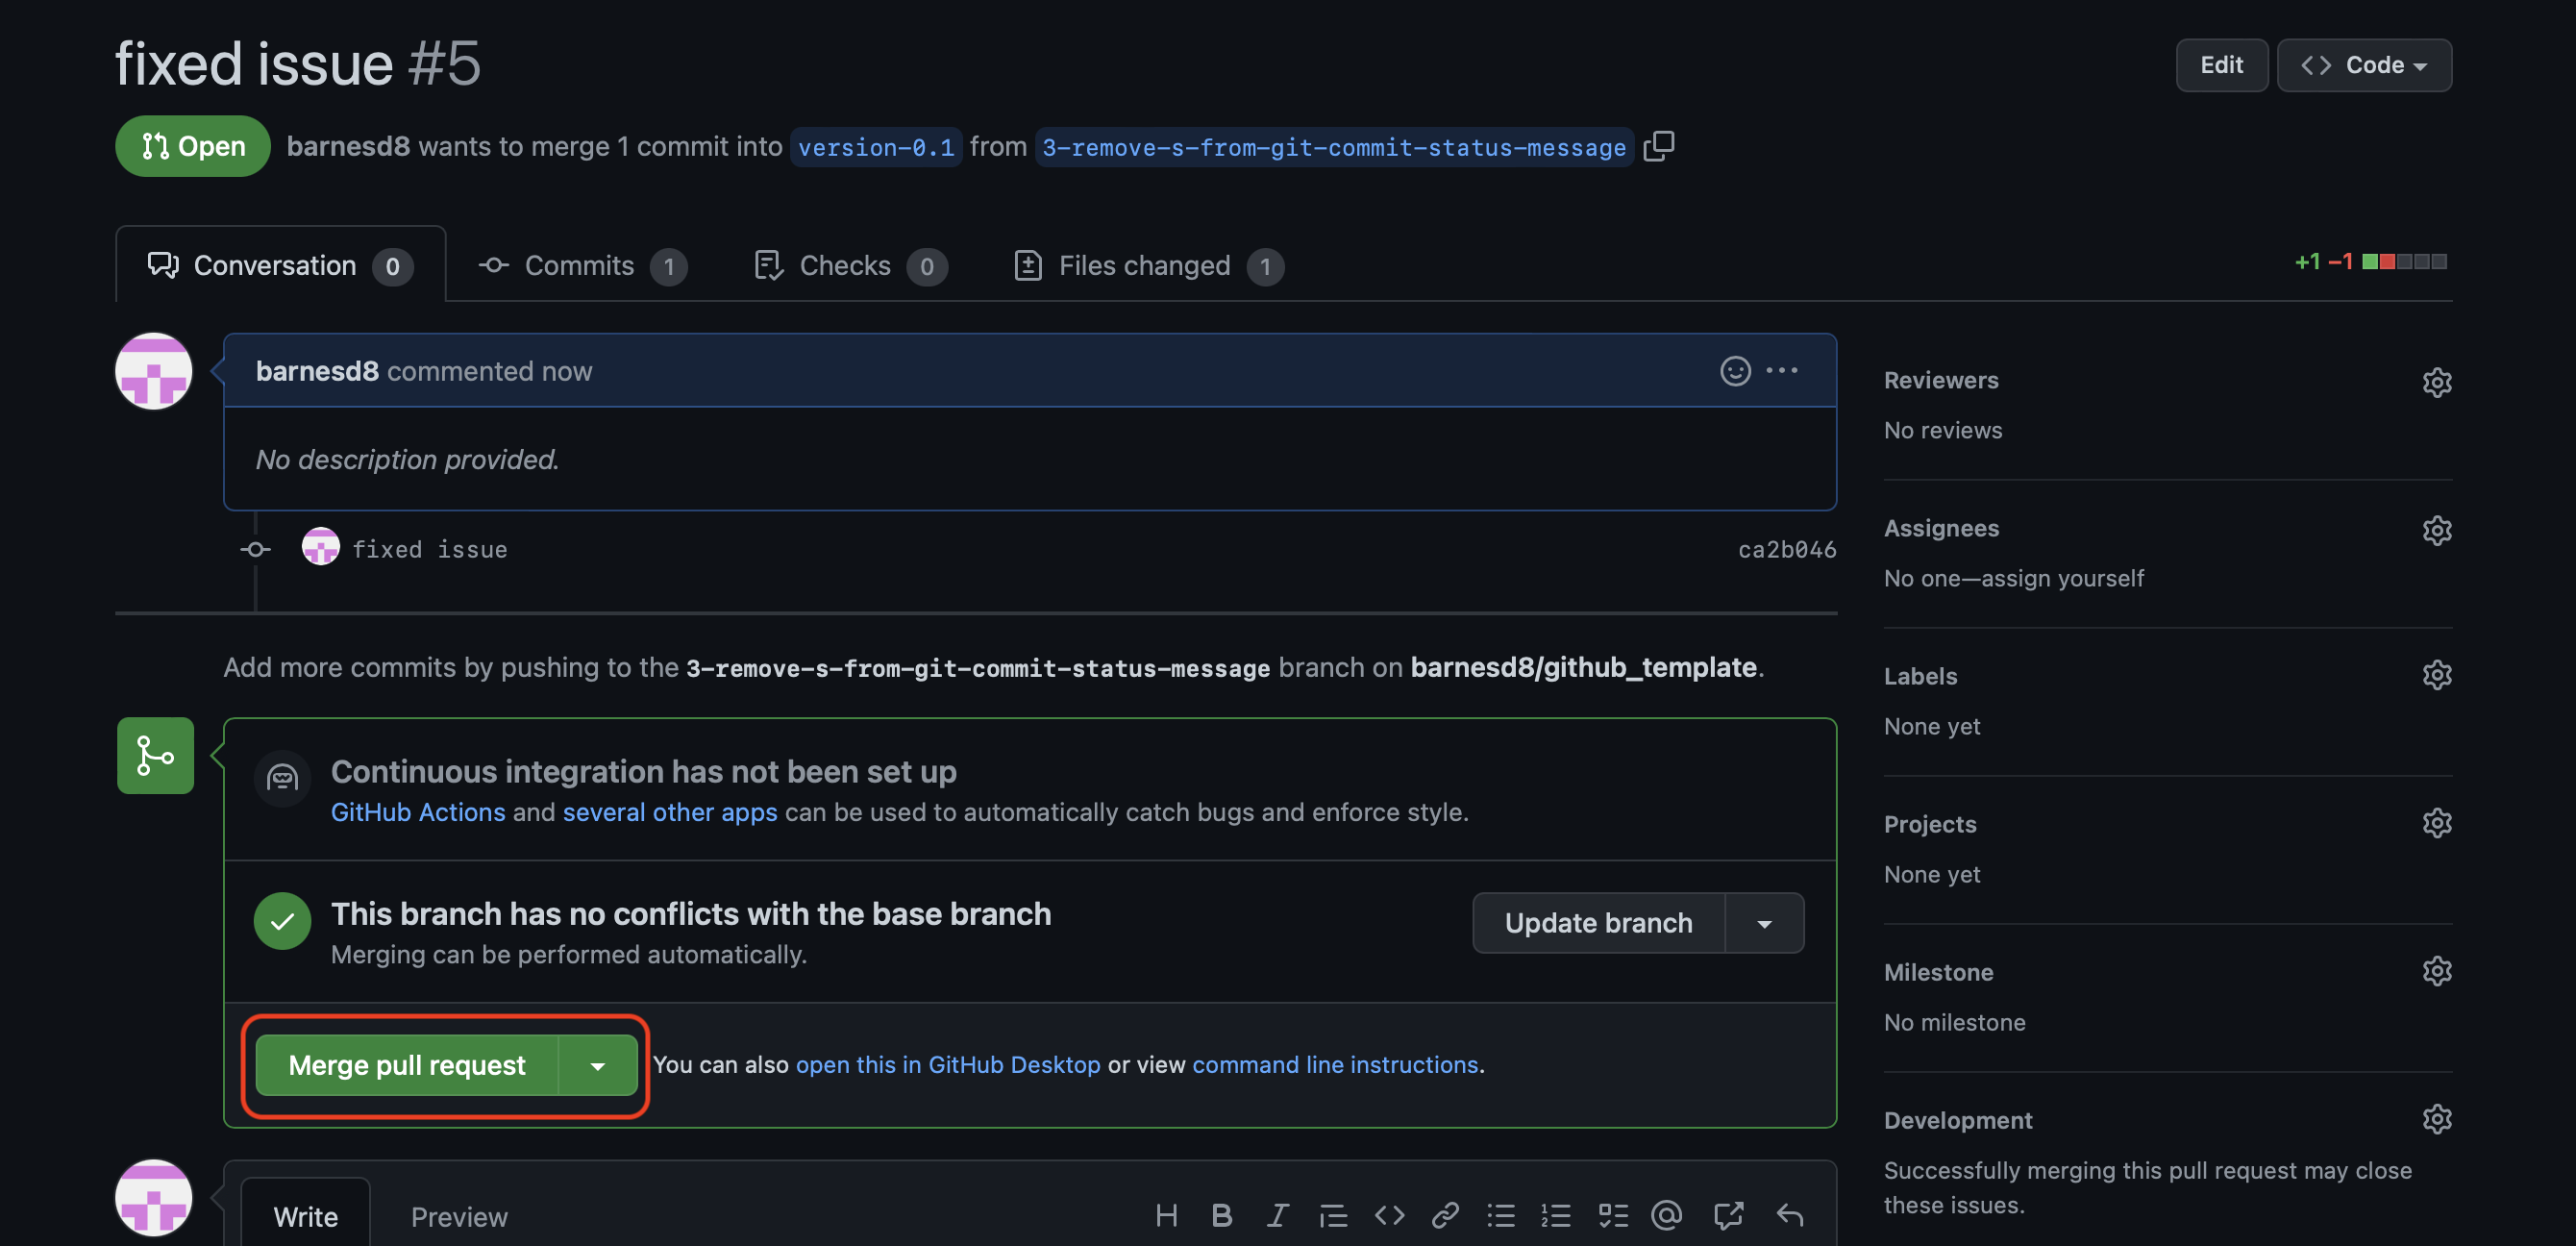
We first identify the branch we'd like to merge and initiate the merge:
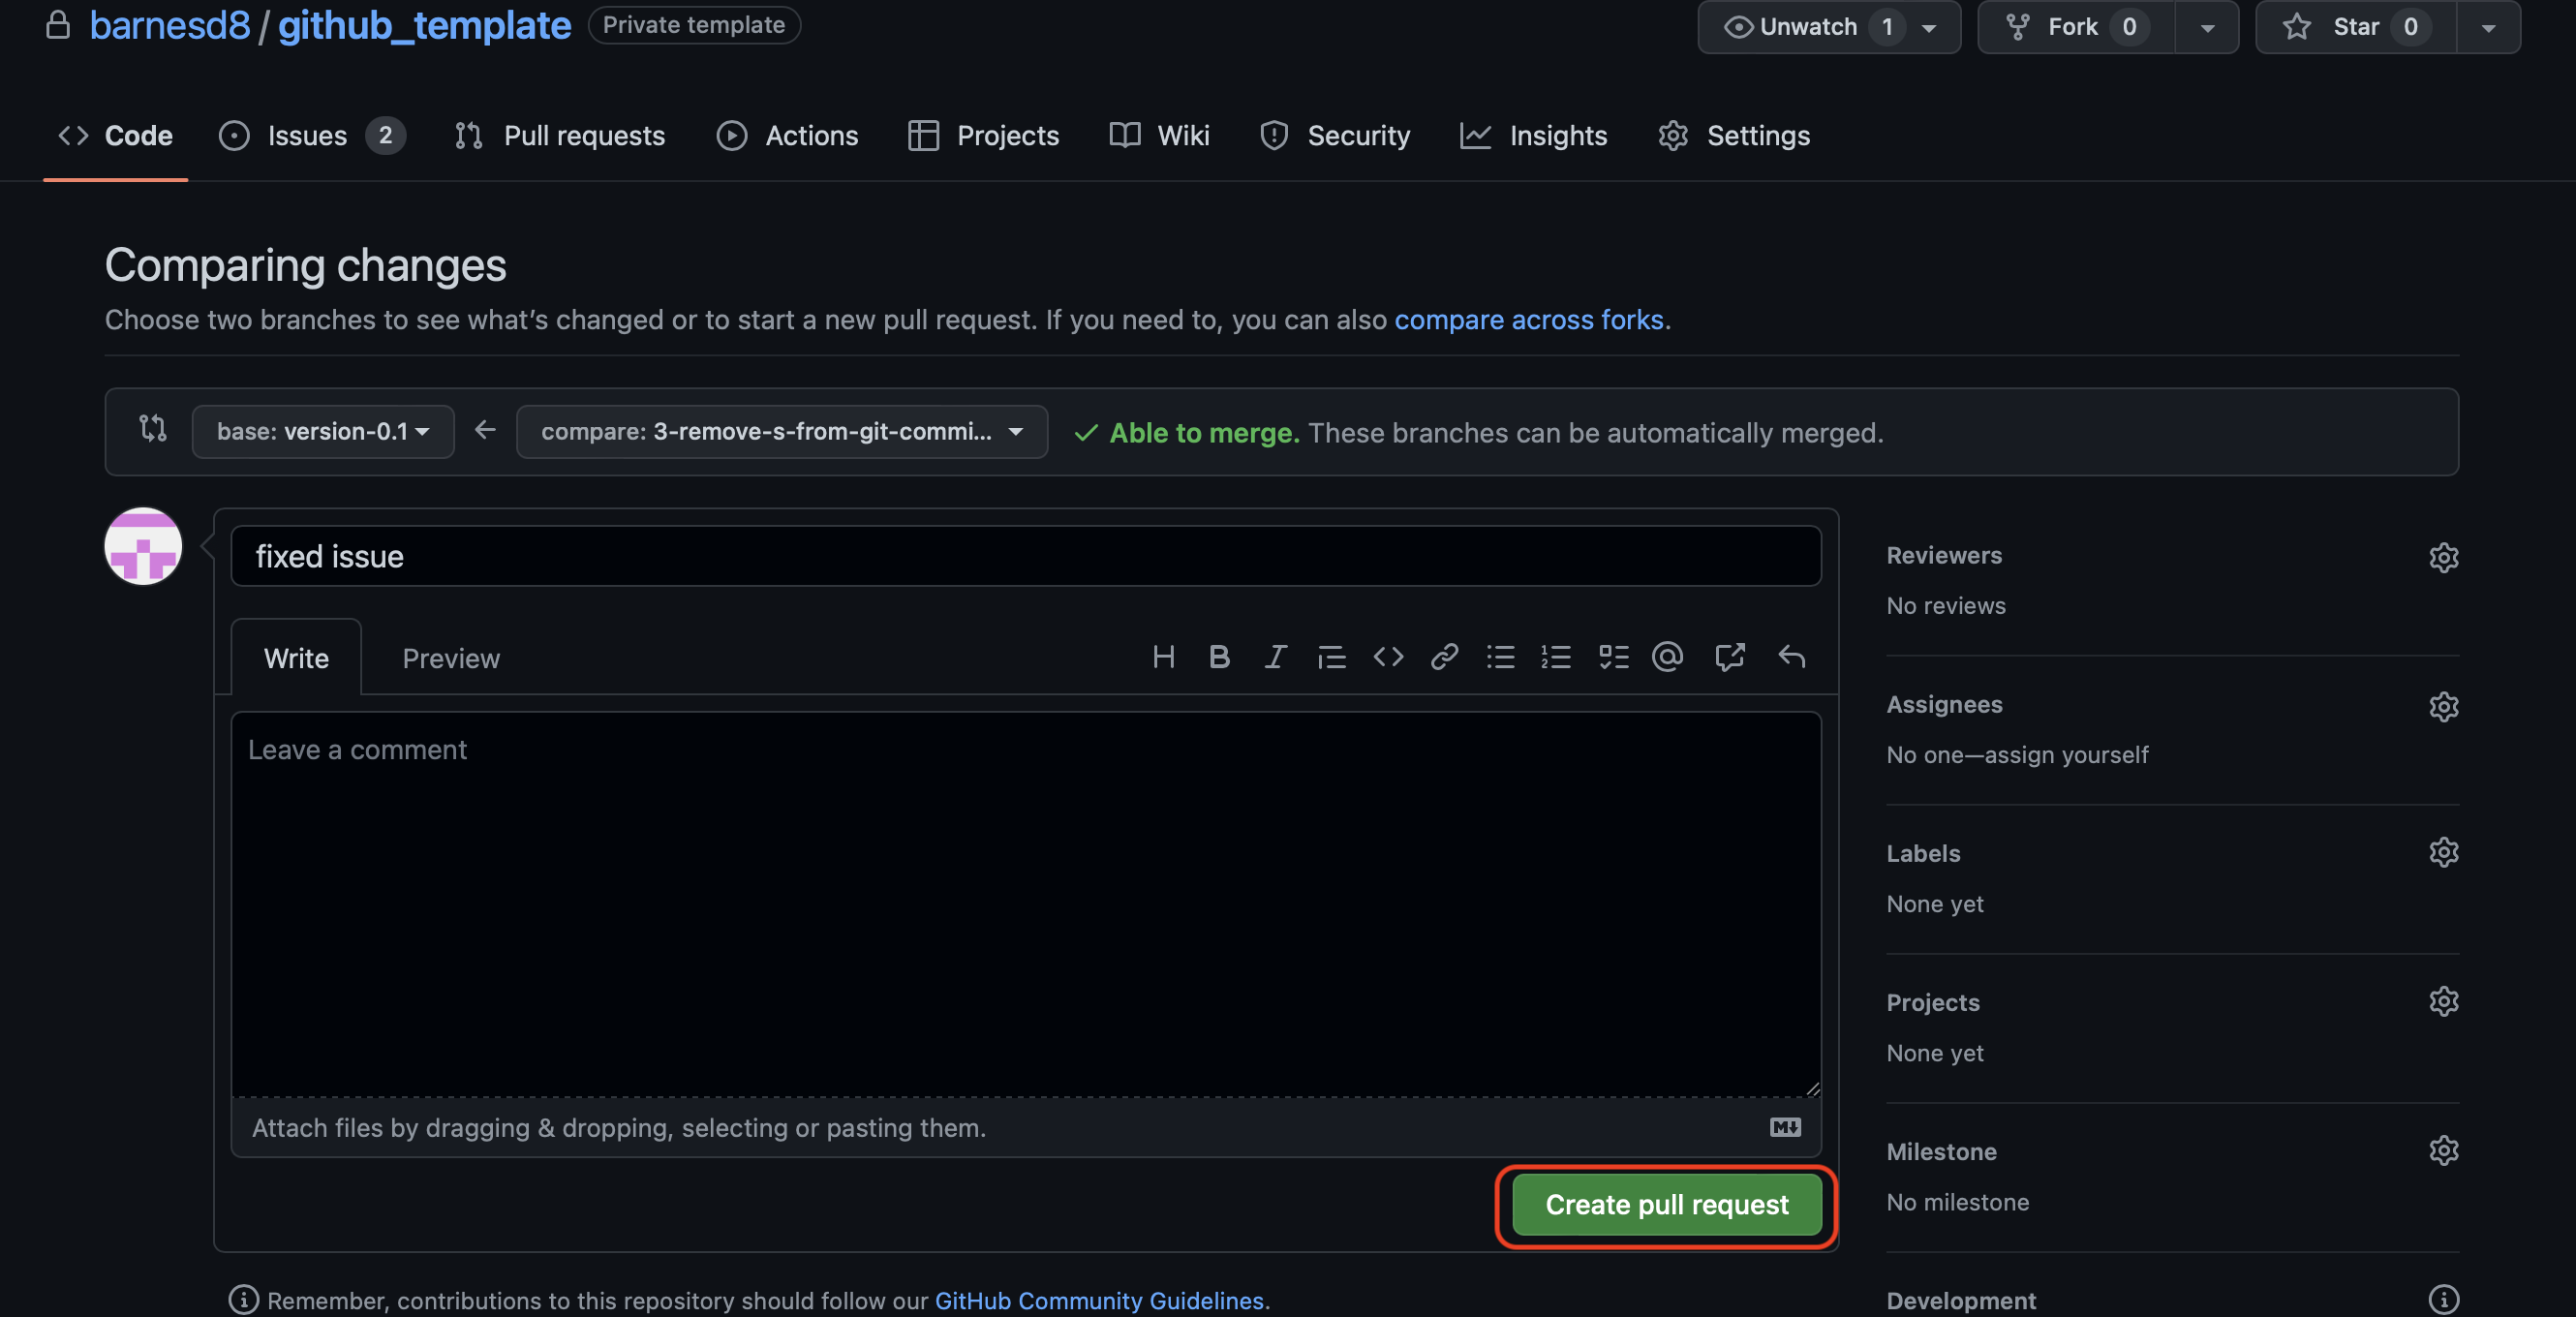
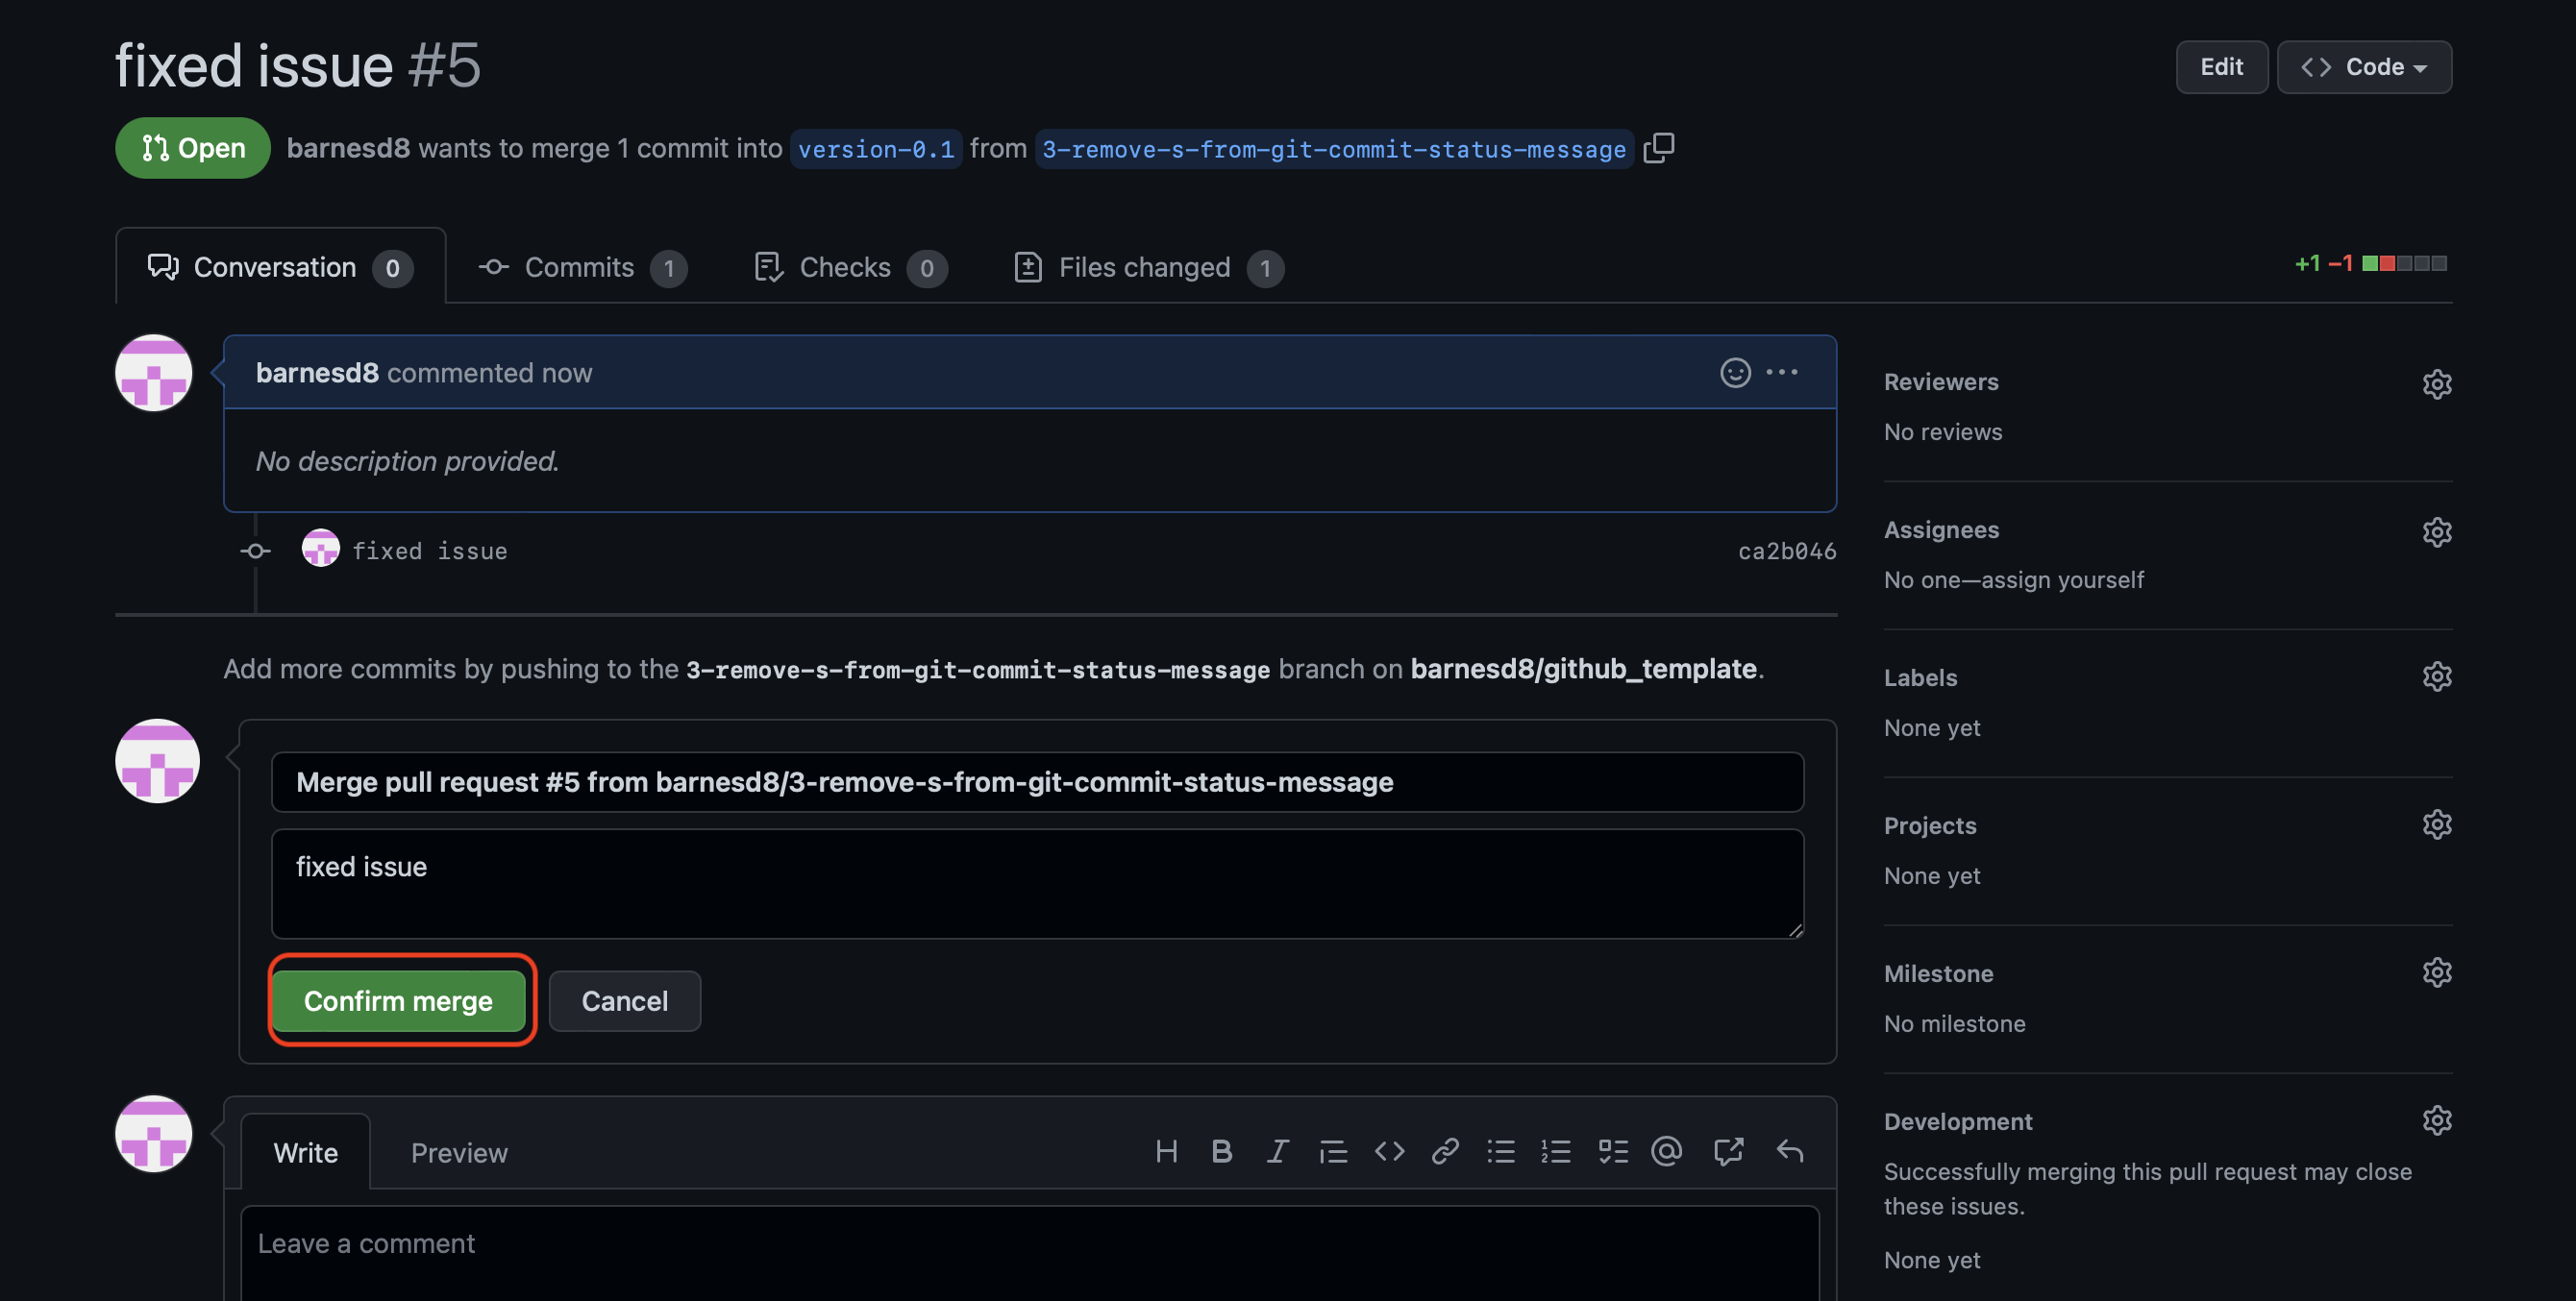
We then review the branches that will be merged, and confirm the request:
And:
And:
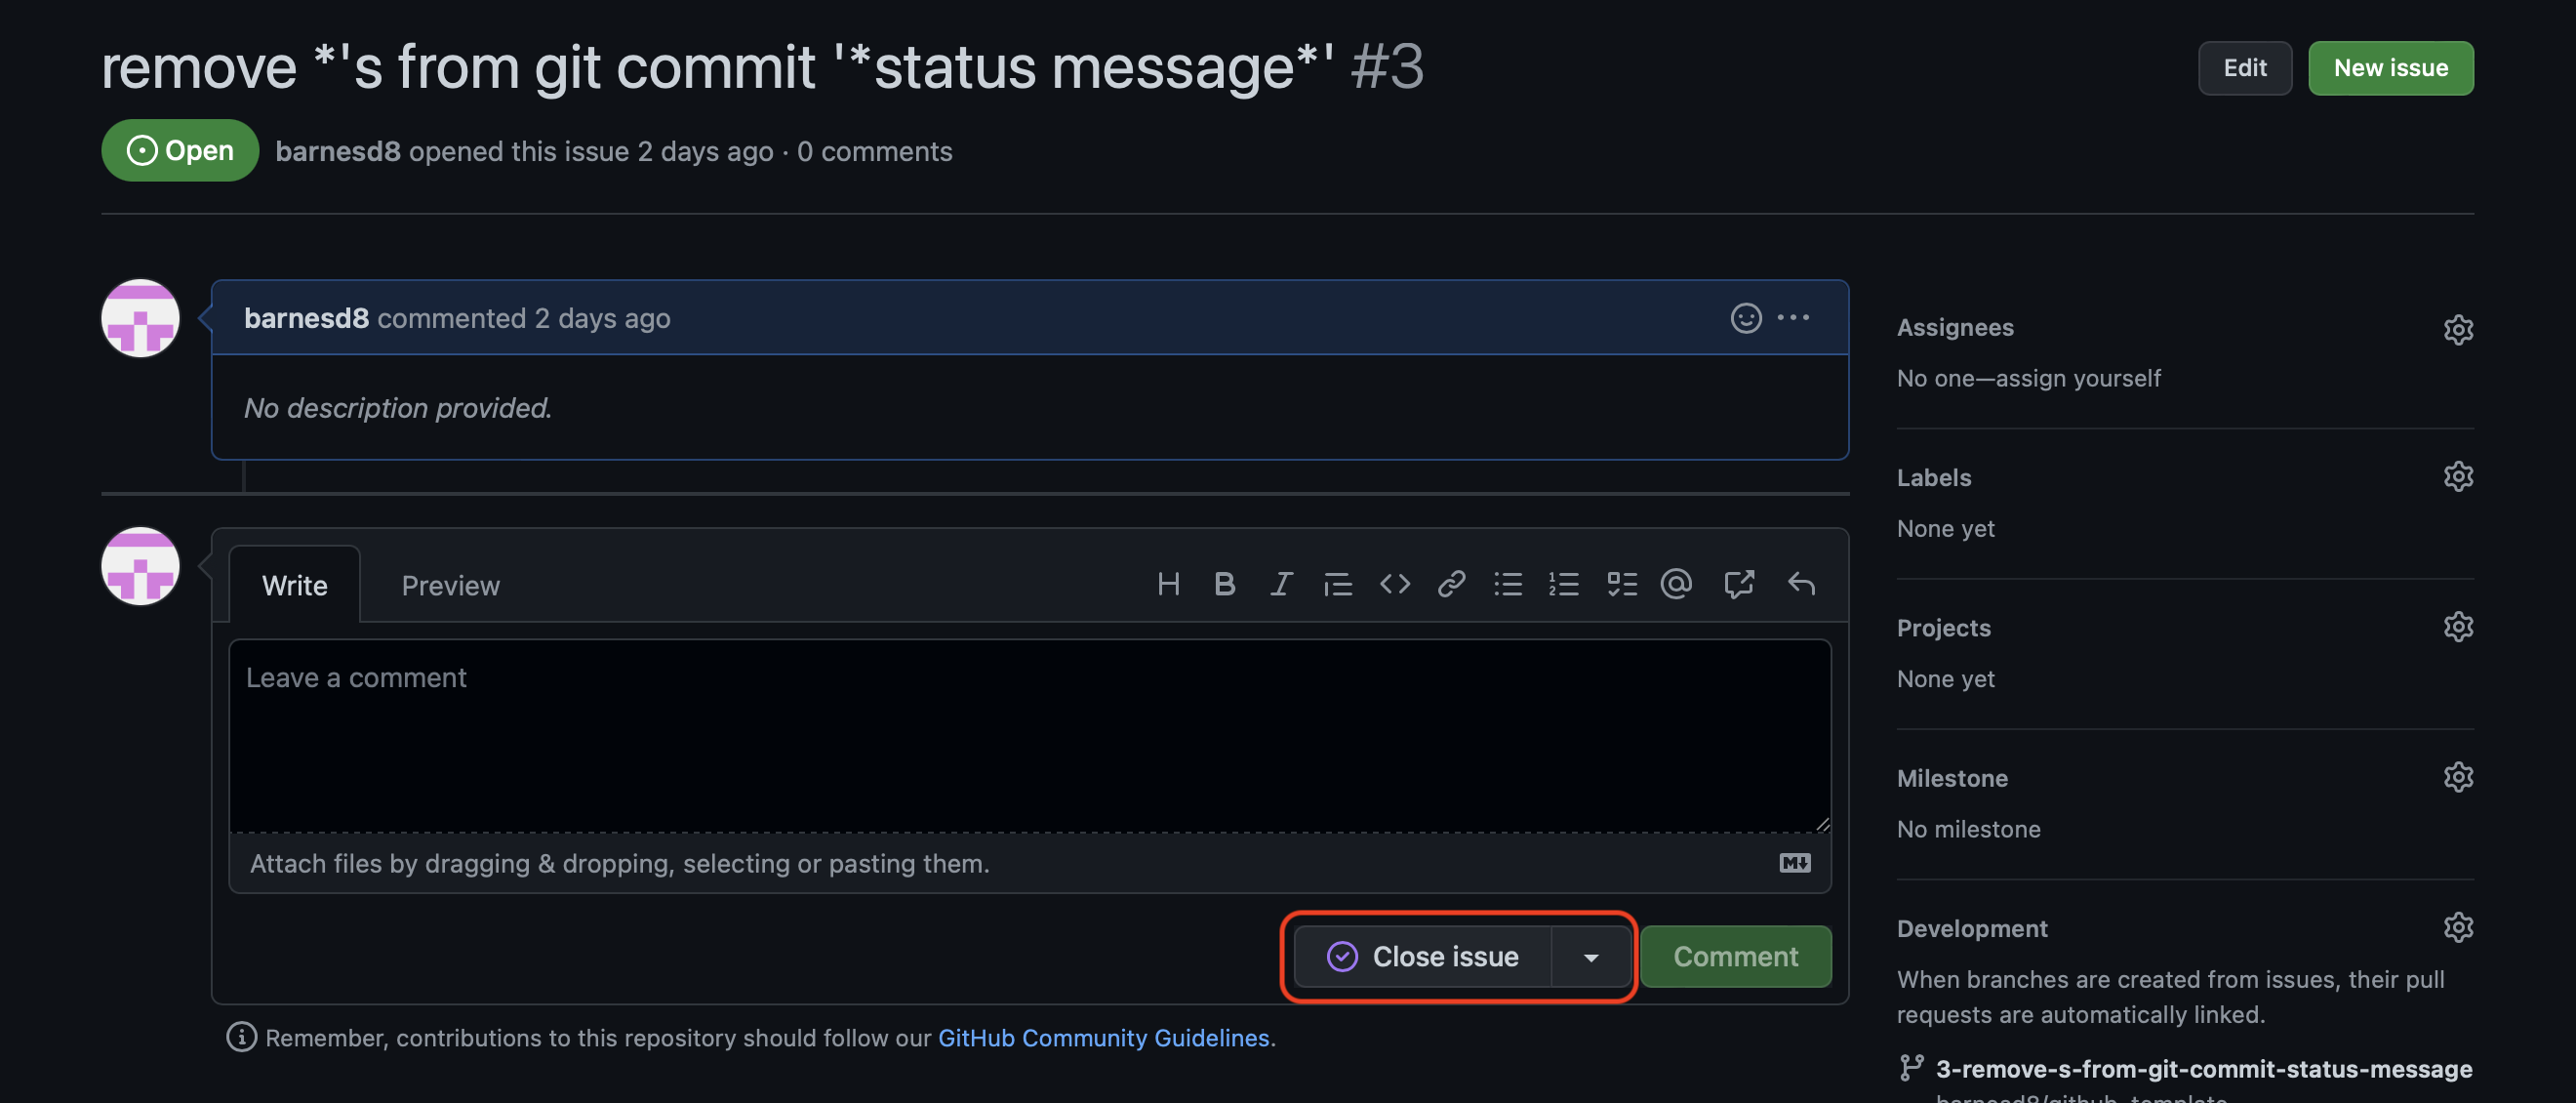
And because this was connected to an issue, we go head and close it:
Our simple merge is now complete, and the issue is closed. We now need to update our local repository to match the github server. First we switch to the branch that we merged onto - in this example is it the version-0.1 branch - and then pull the changes from the remote repository.
git switch version-0.1
git status
git pull
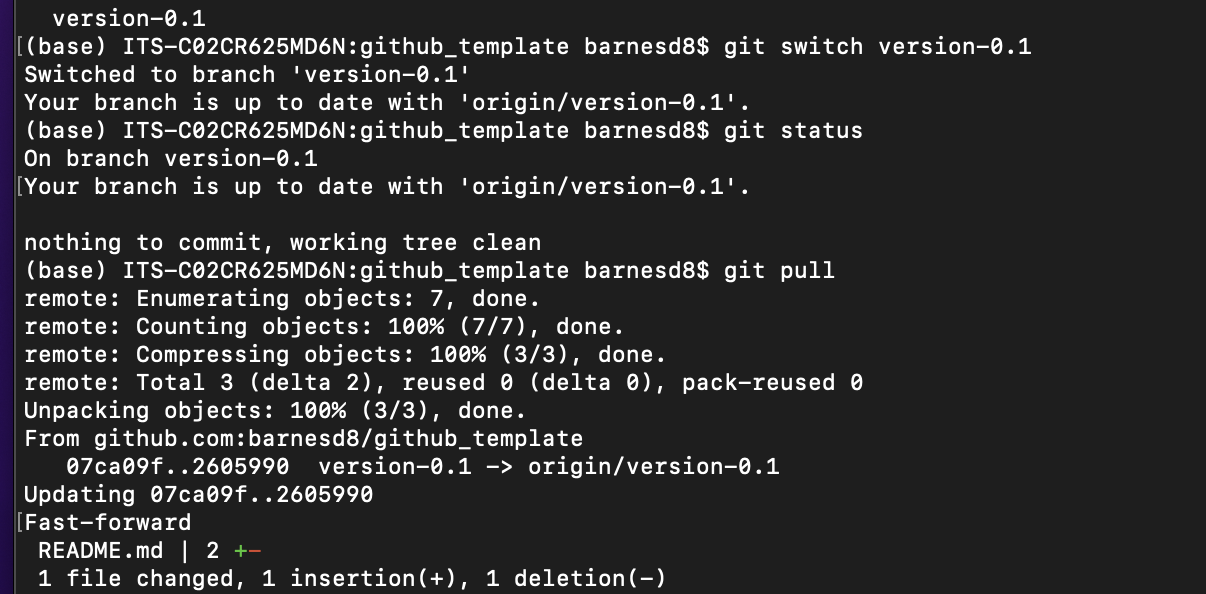
The following is displayed and validates our local branch is now up to date with our remote changes.
The last thing we need to do, since when we merge branches we have our github repository to automatically delete branches that have been merged onto other branches, is delete that branch locally. We can do that with the following command:
git branch -d 3-remove-s-from-git-commit-status-message
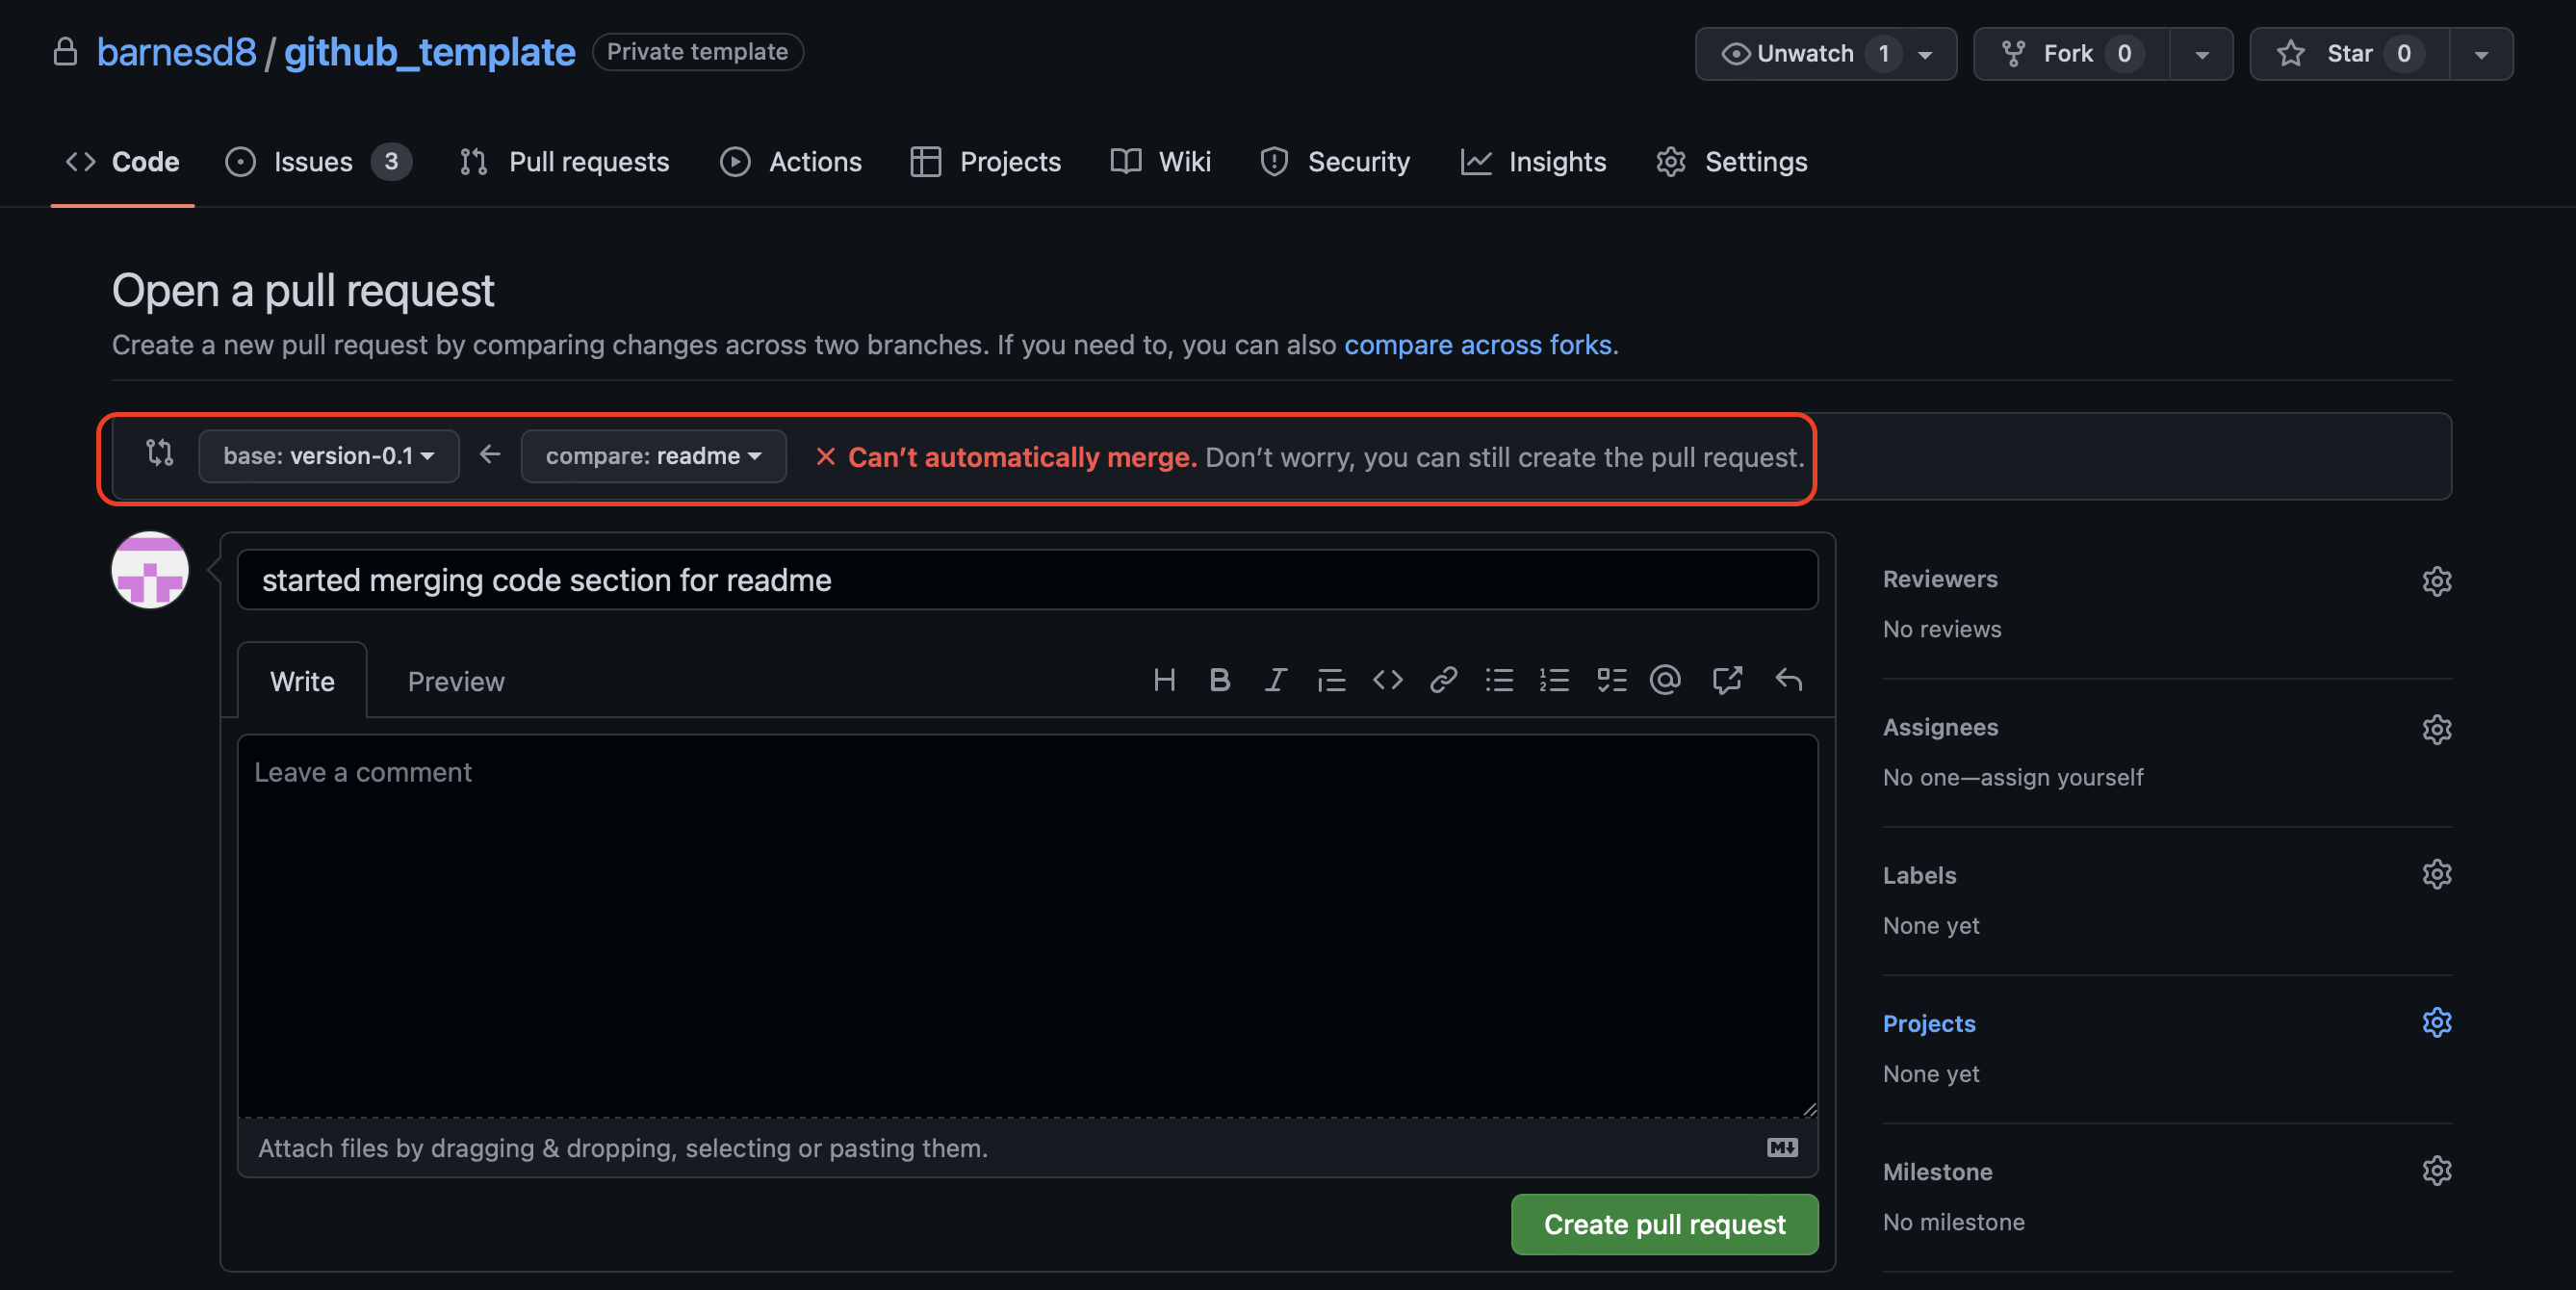
You won't always be able to automatically merge code - sometimes changes with conflict with each other, so you need to modify code to solve the conflict. When this is the case, you'll end up at a screen like this:
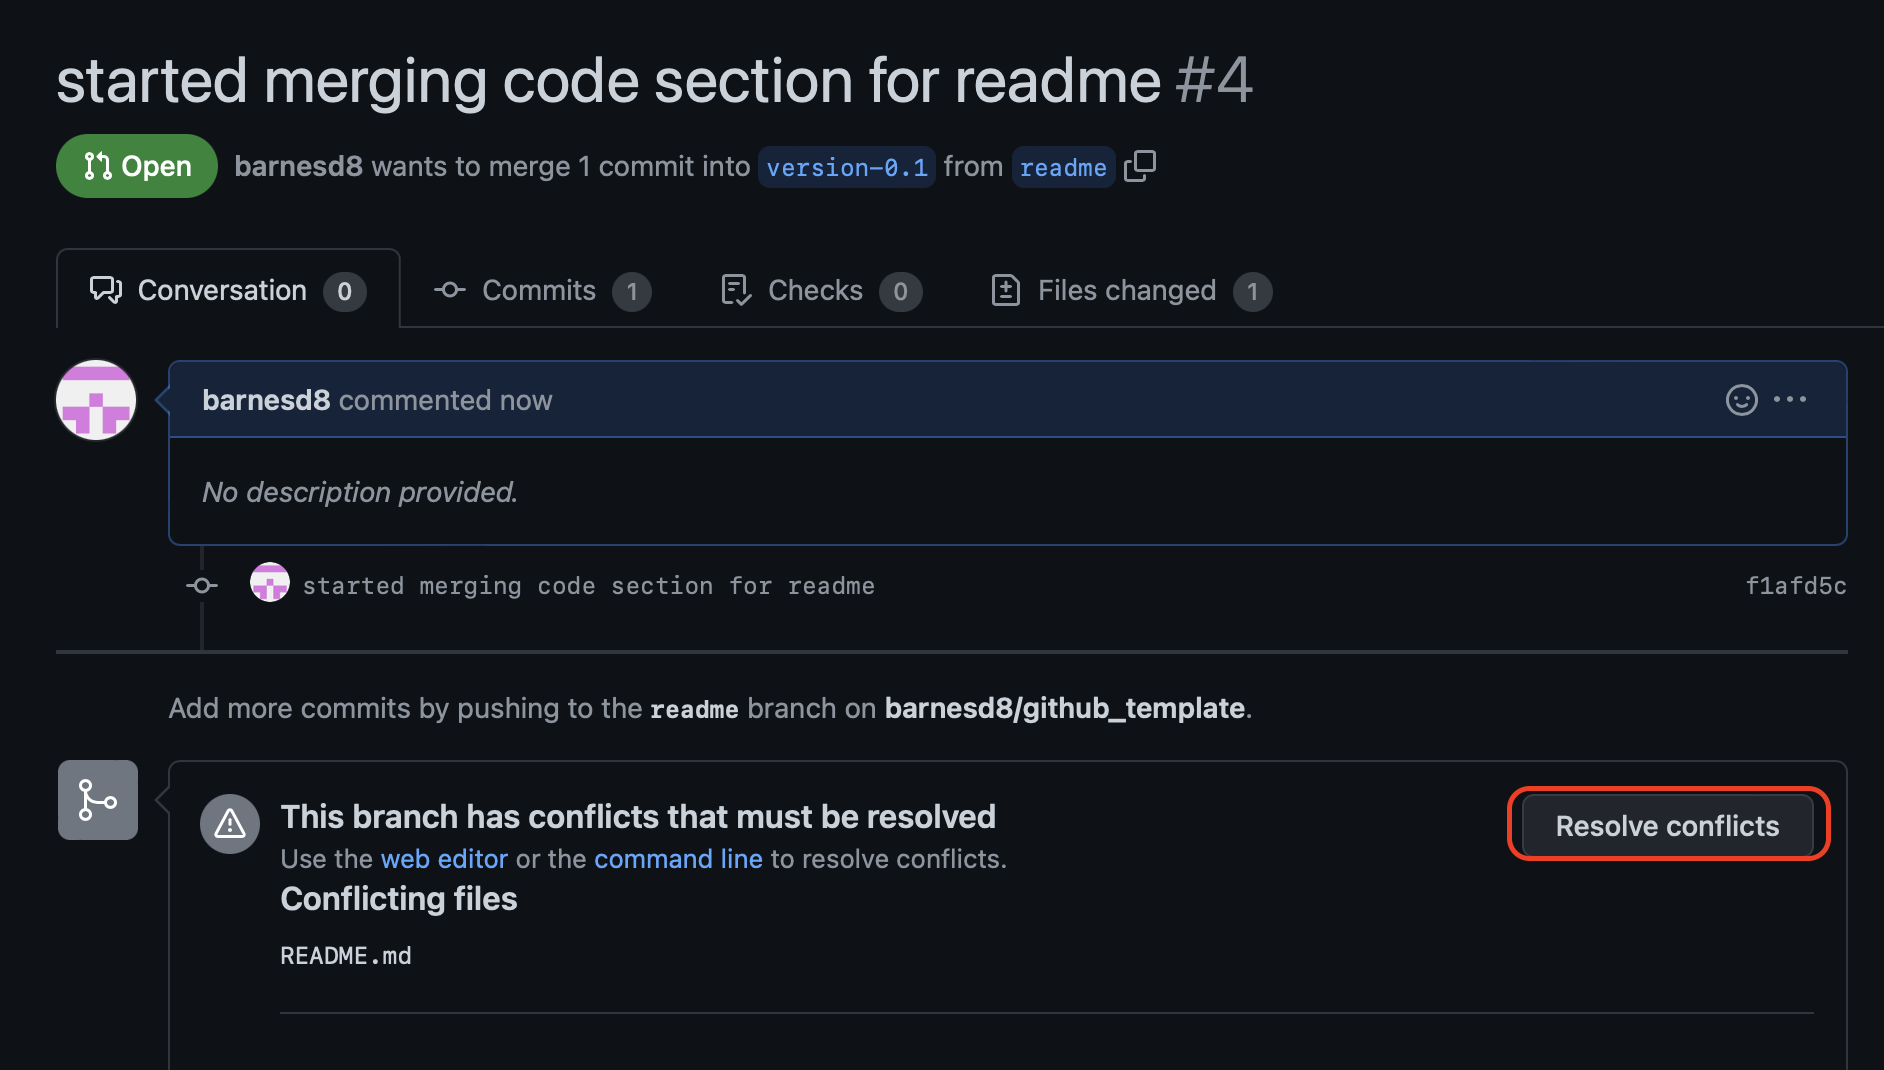
This means to merge your code, you need to manually review. And then another to allow you to review the conflicts.
Choose the option to resolve the conflicts, and you're looking for an area like the circled one below:
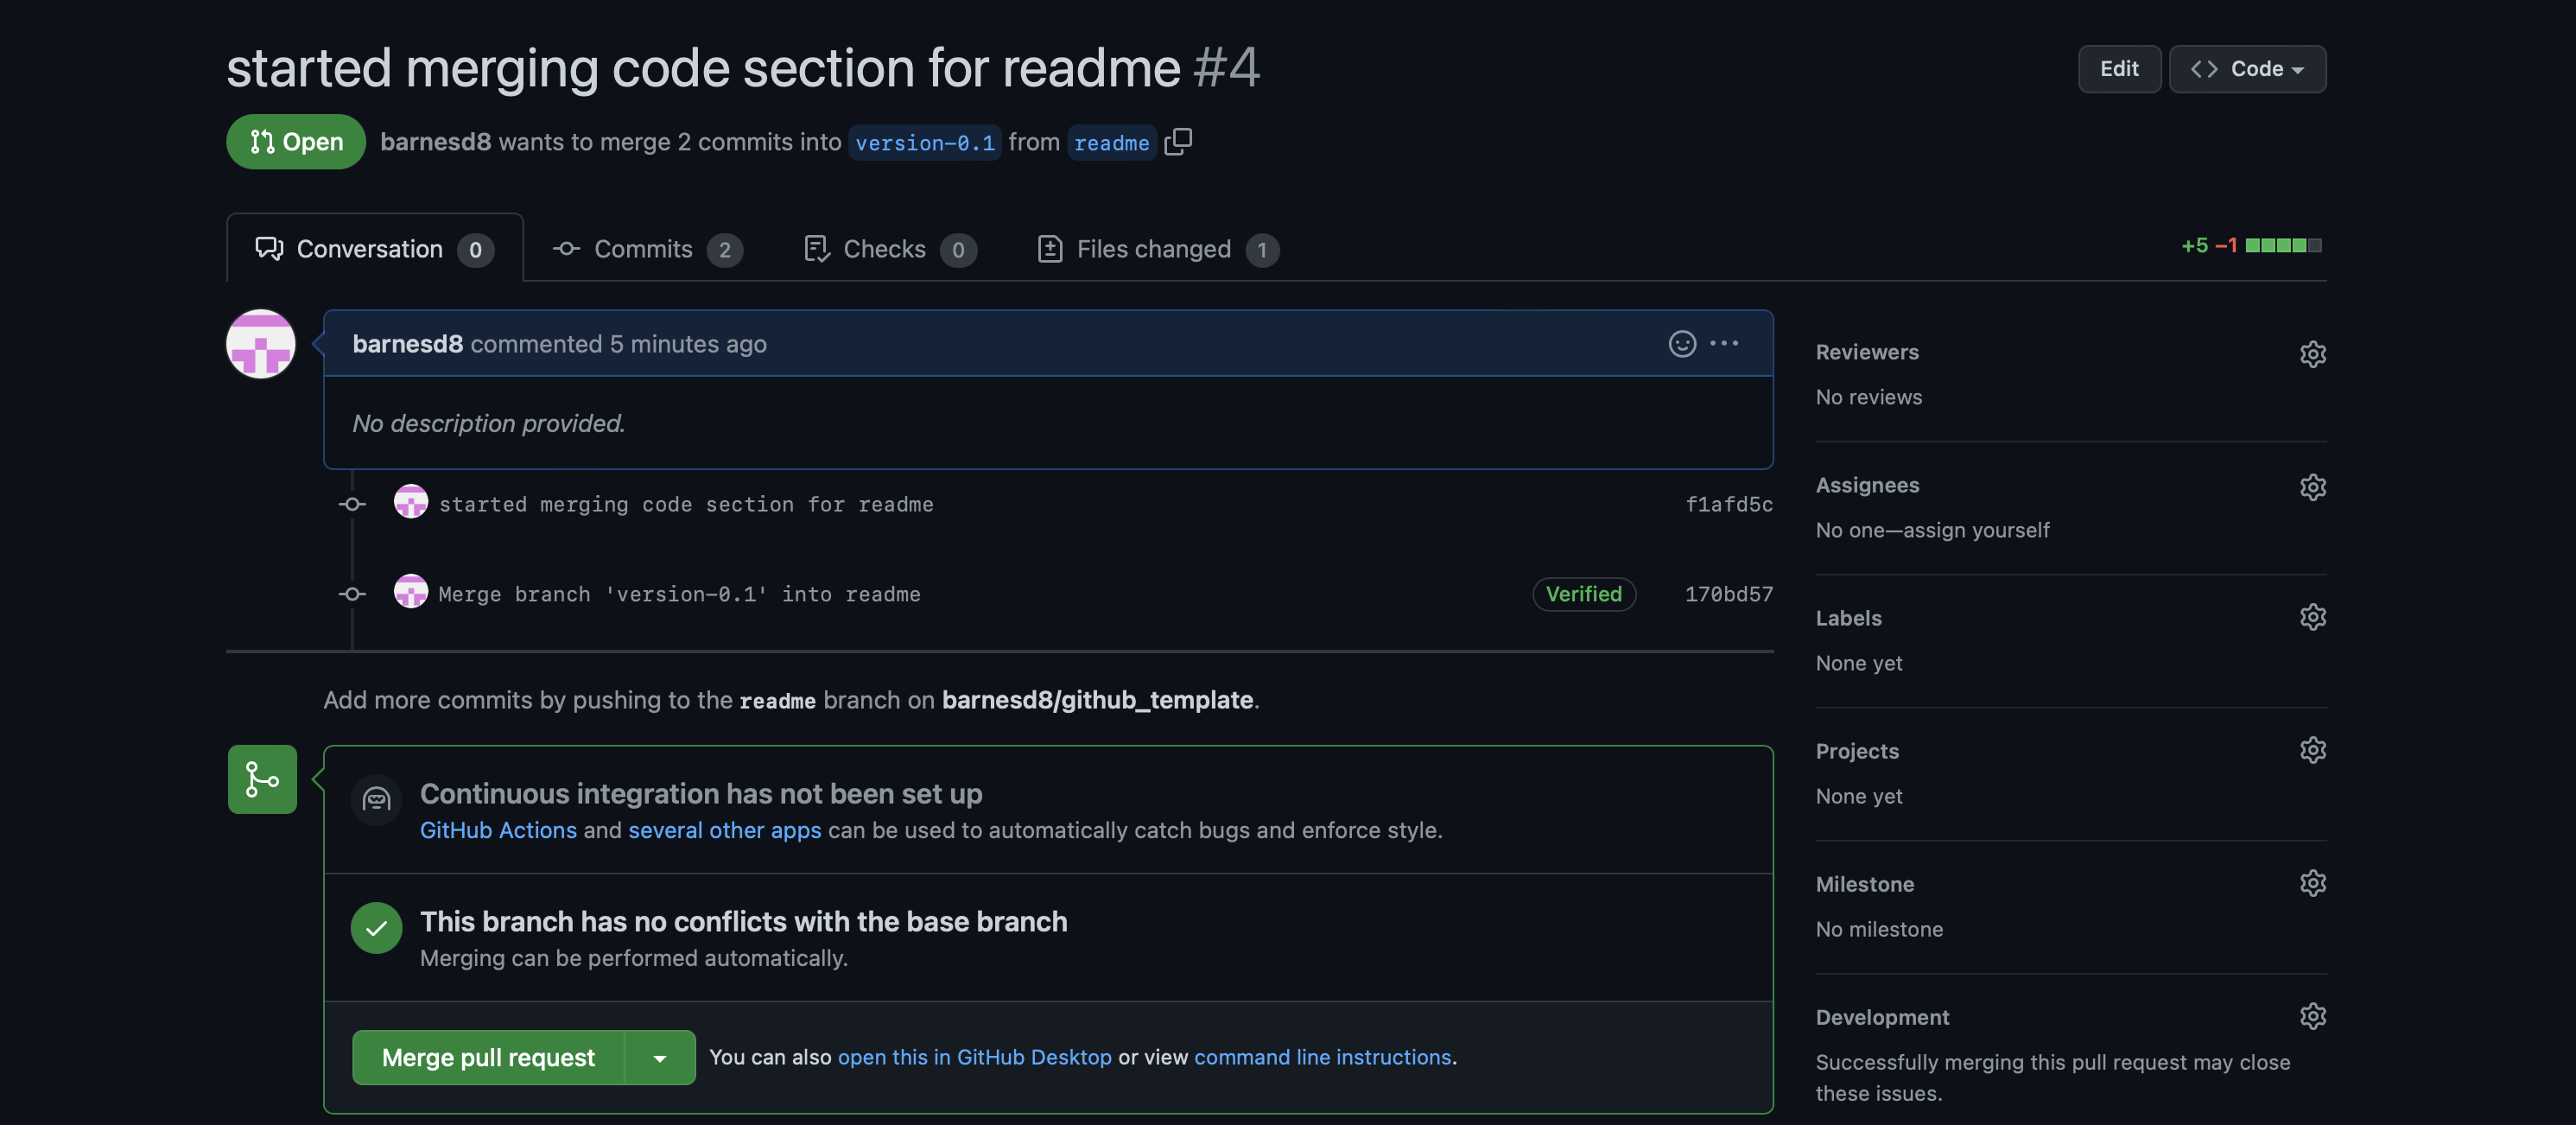
Make the appropriate updates to your code, save, and you should then be able to merge since the conflict is resolved!
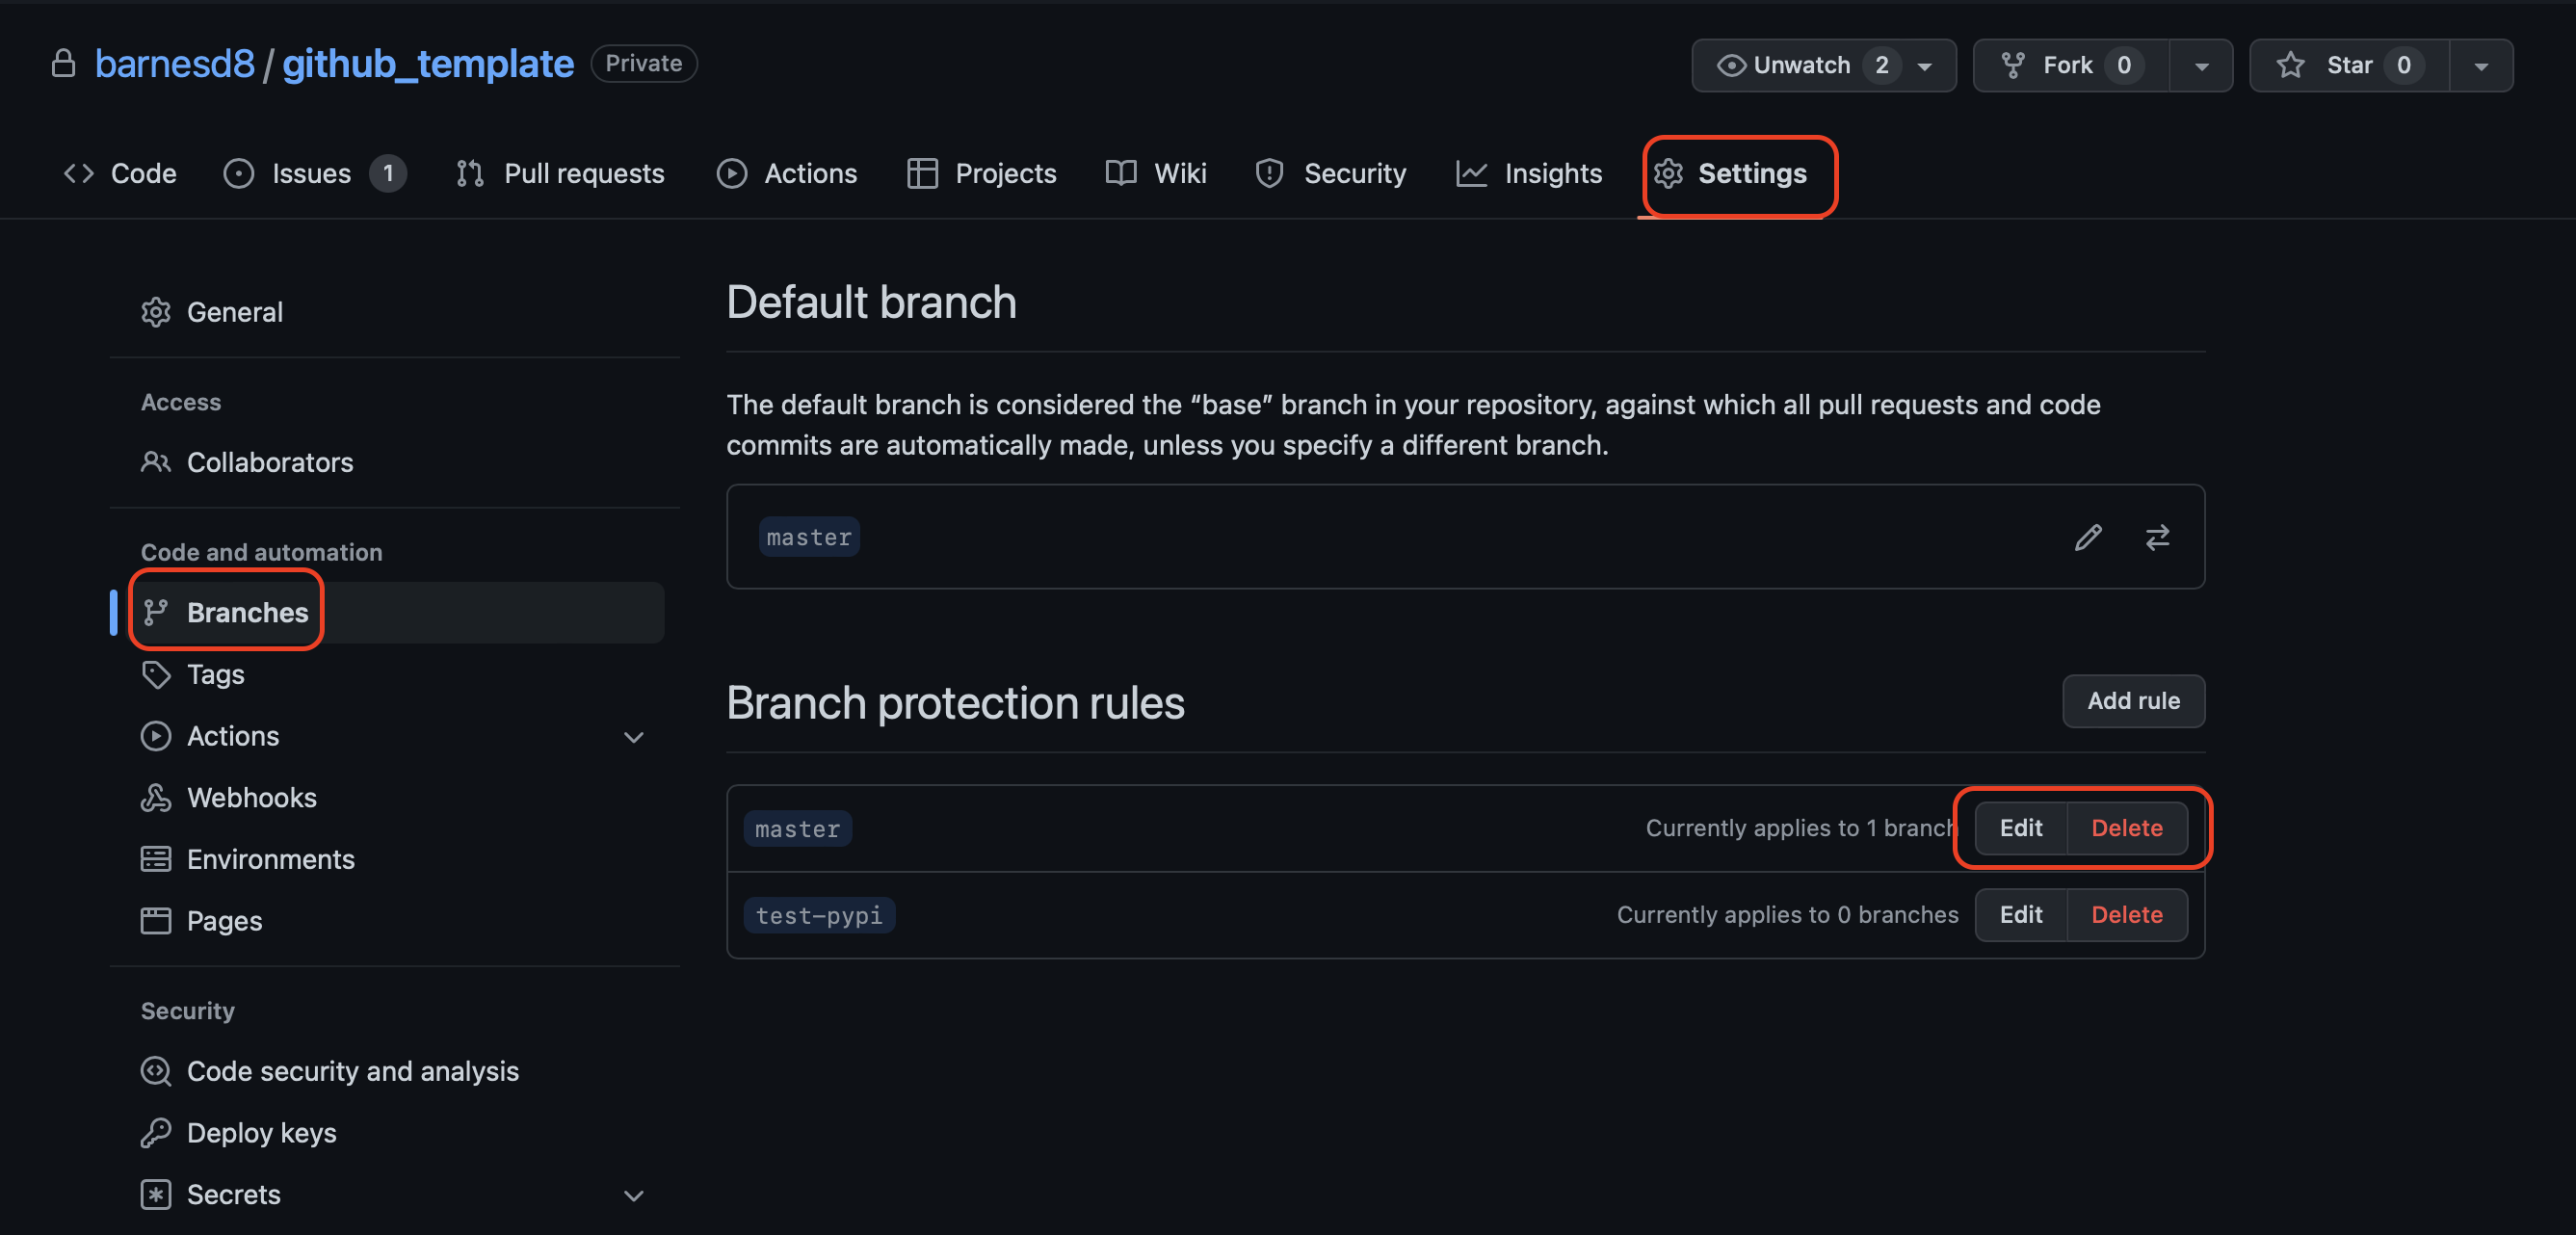
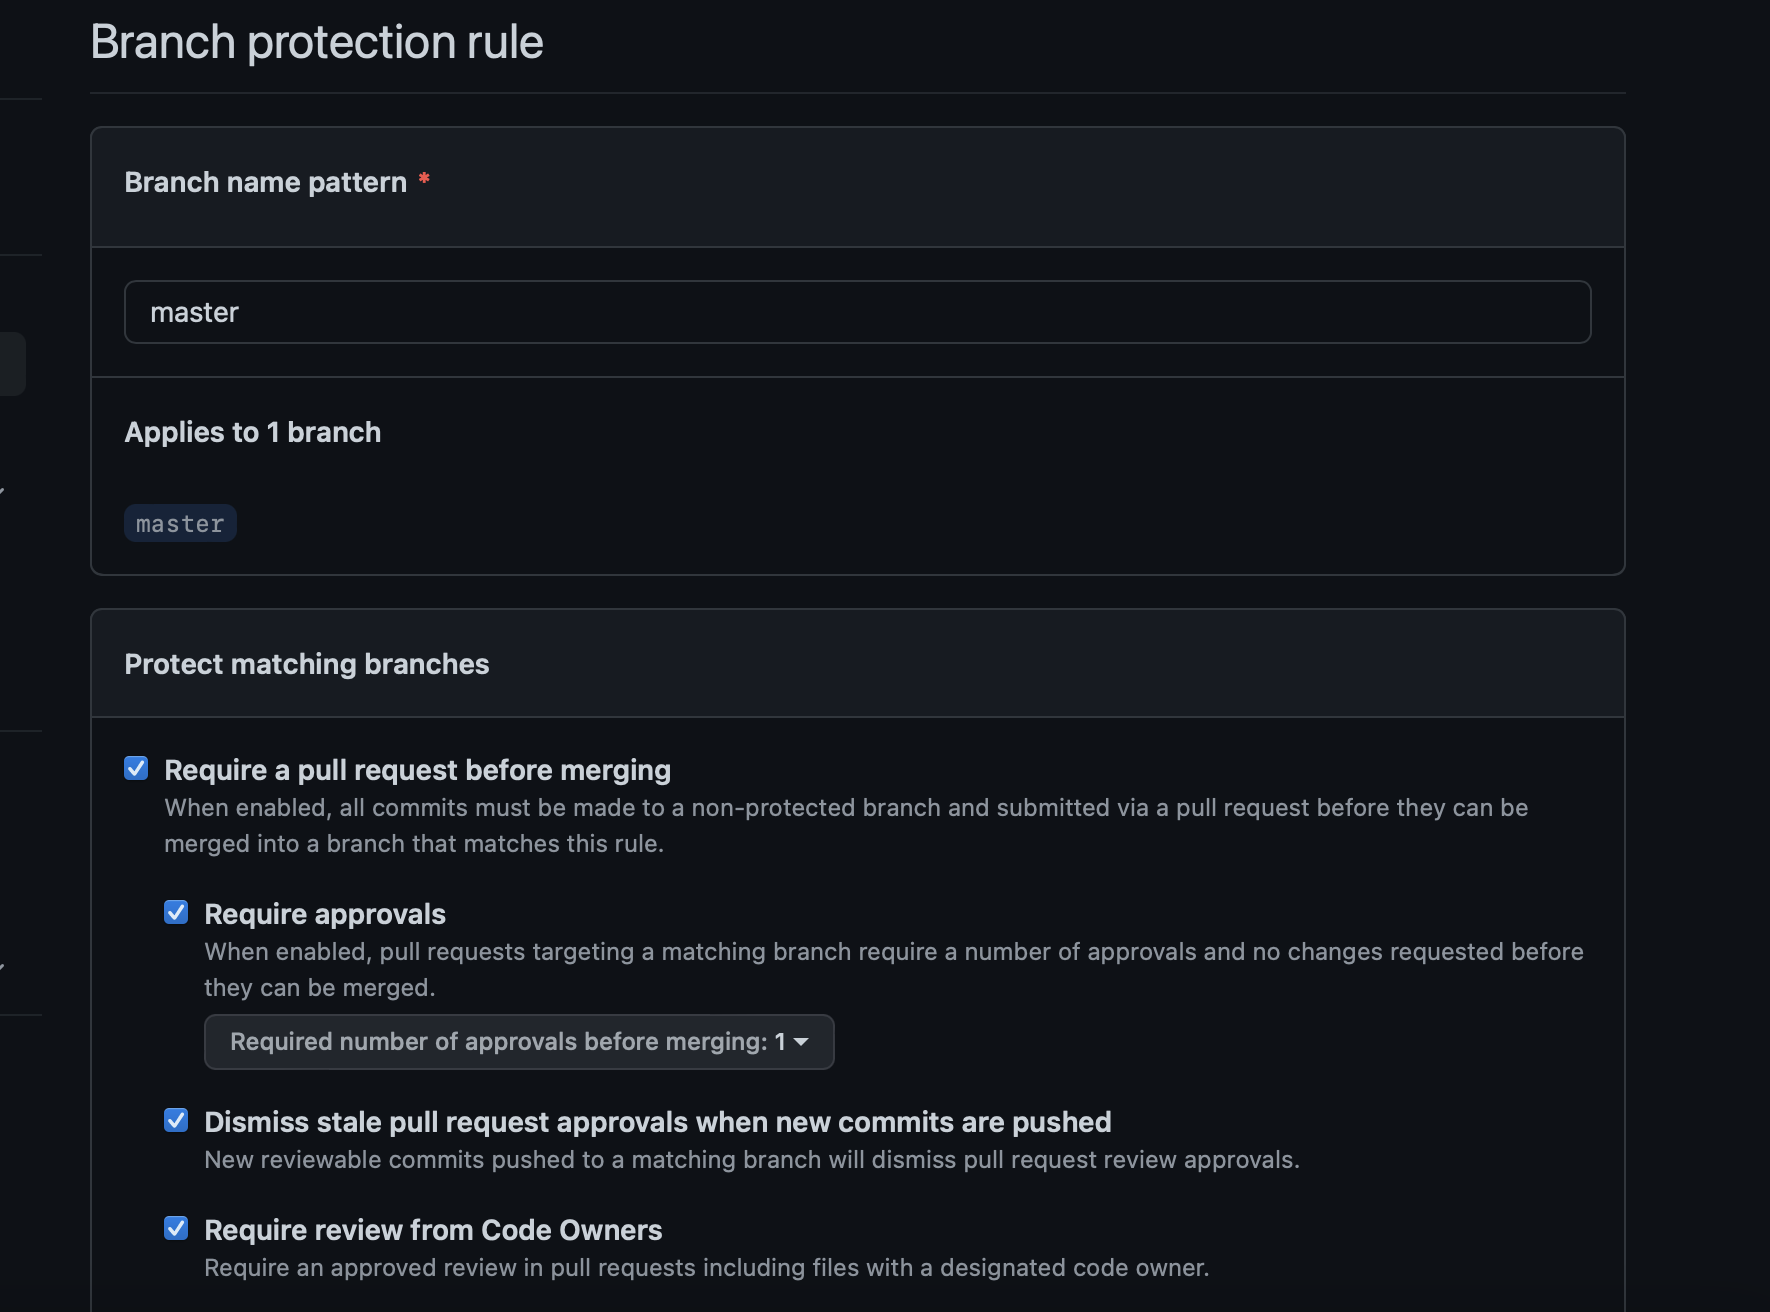
The way our projects are configured is with a master branch that is protected, which will not allow you to directly commit changes to that branch. You first need to commit changes to a different branch, and then do a merge request. Because the branch is protected, a code review will be required before the merge request is approved. Different projects might have different settings, and they can be modified in the settings tab, under branch protection rules:
And drilling in gives the following options:
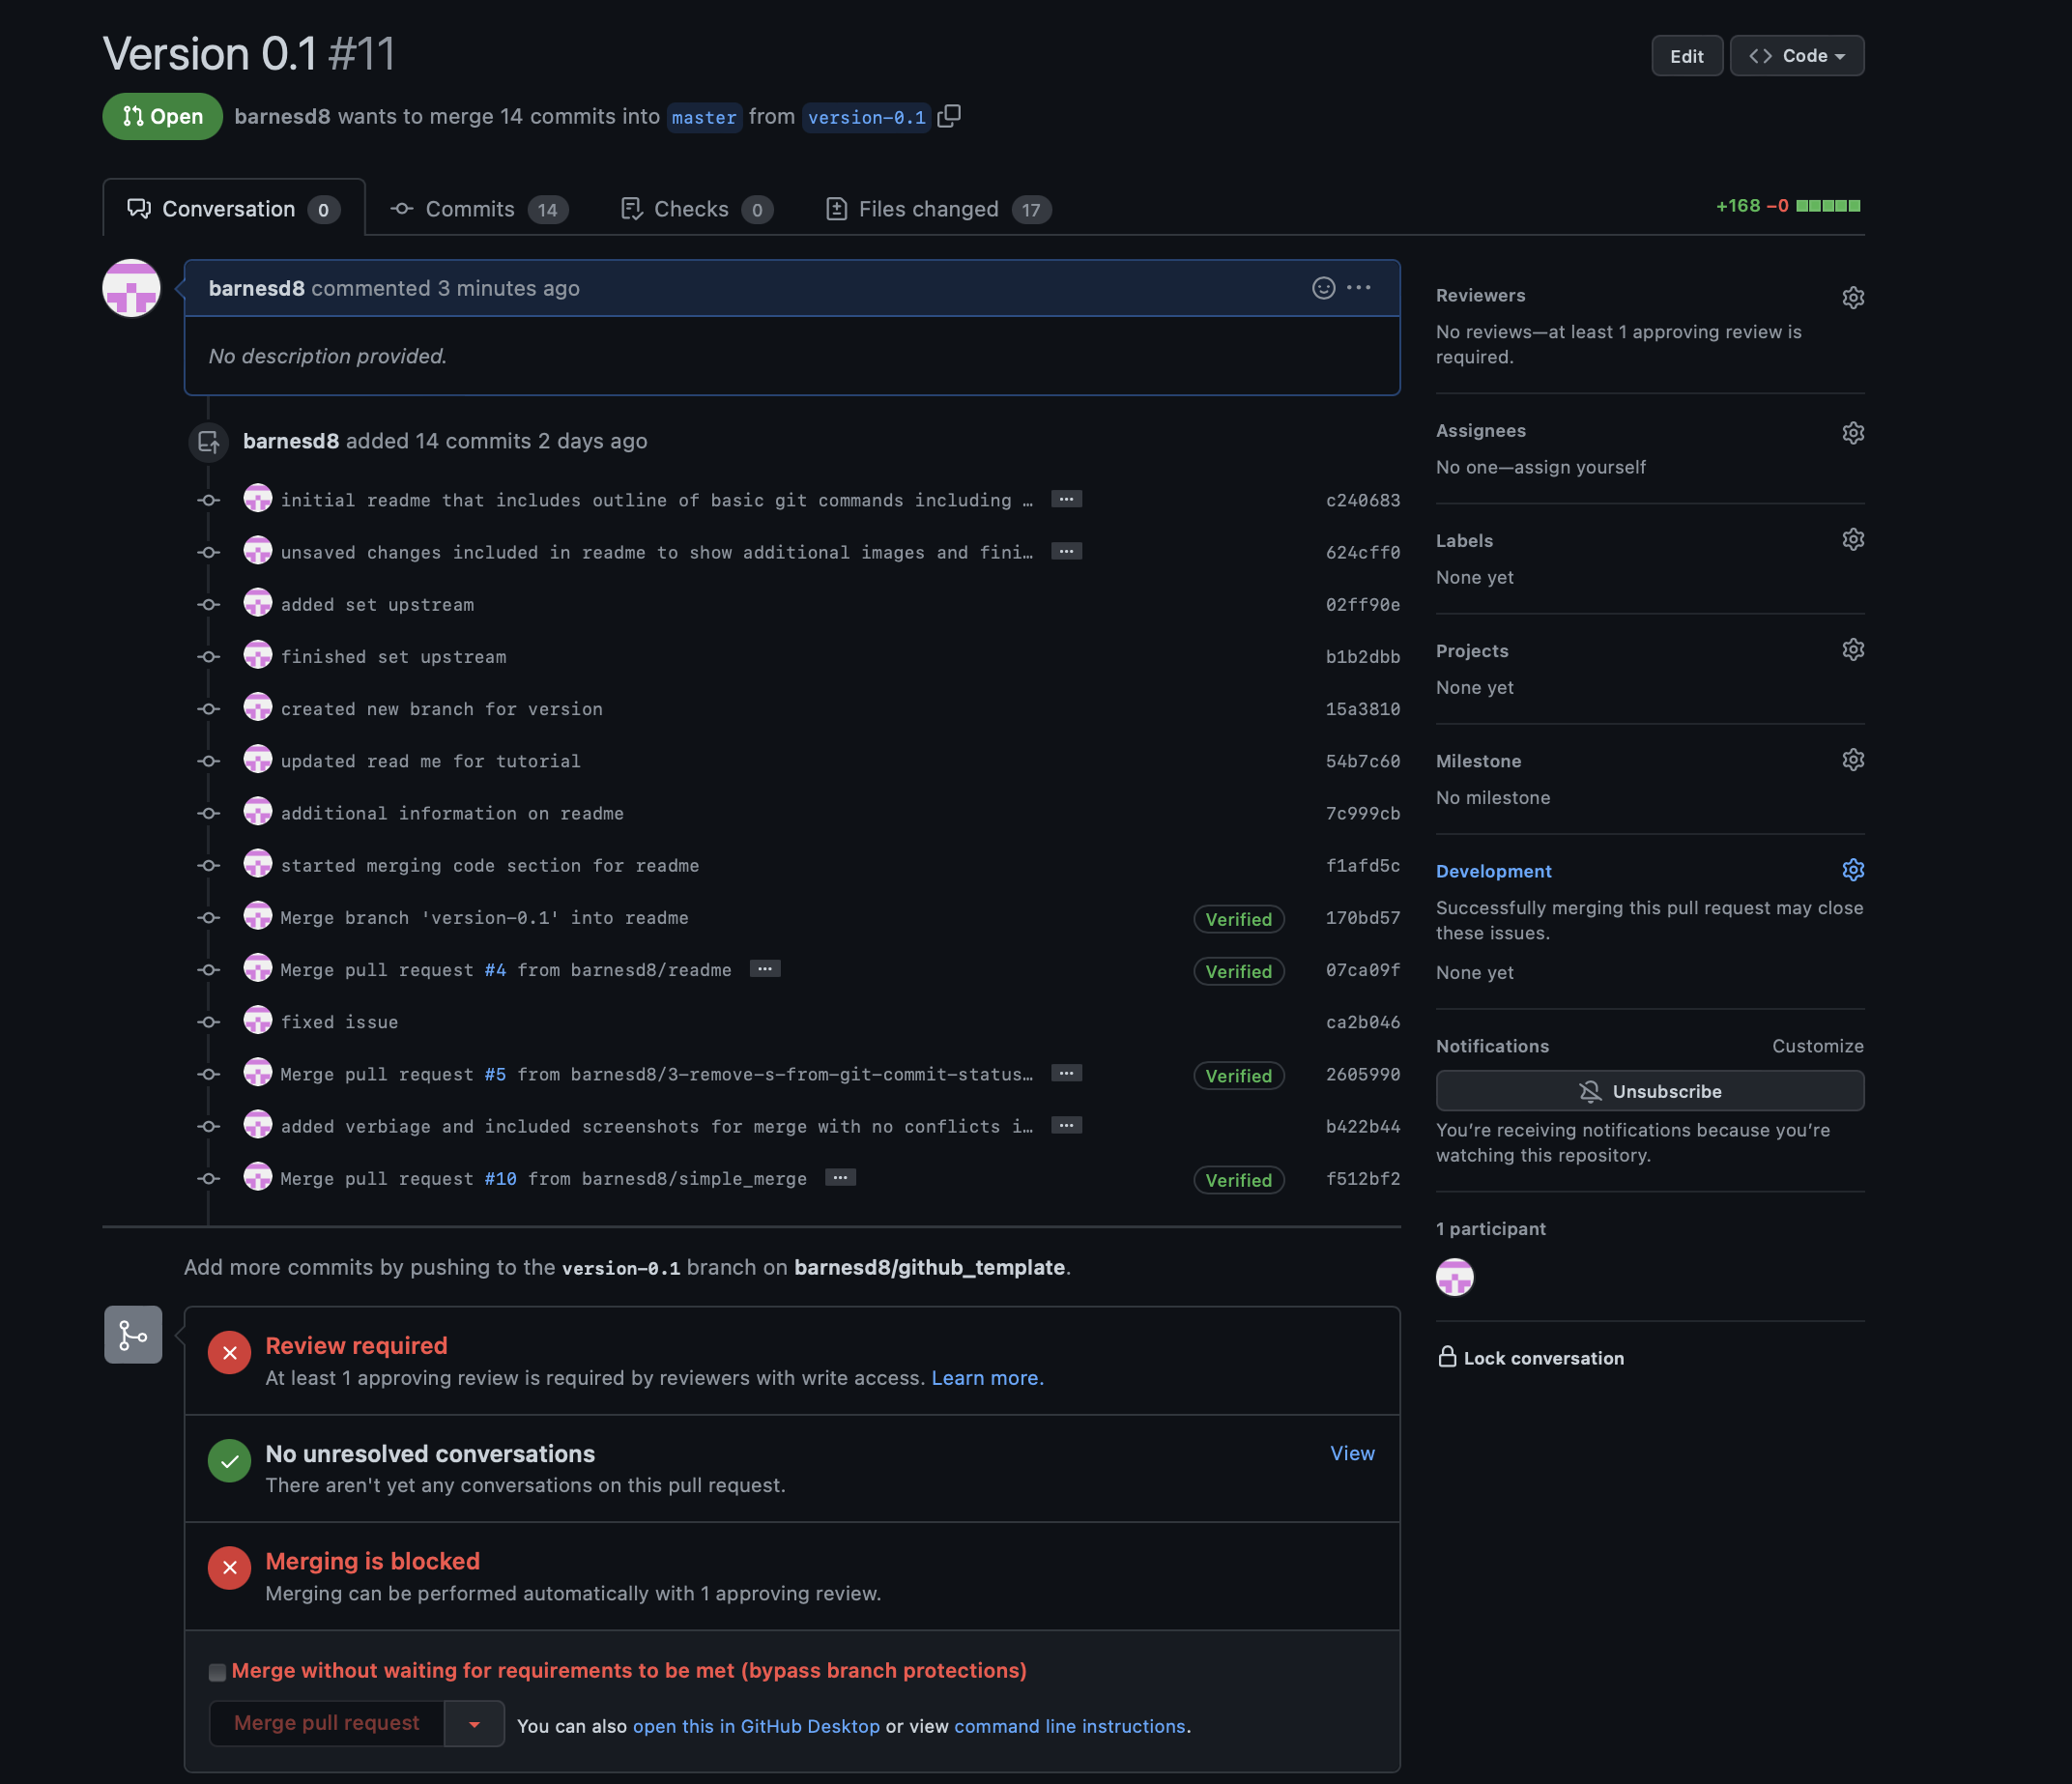
So to merge onto the master branch, you initiate the merge request as normal. You will then get this:
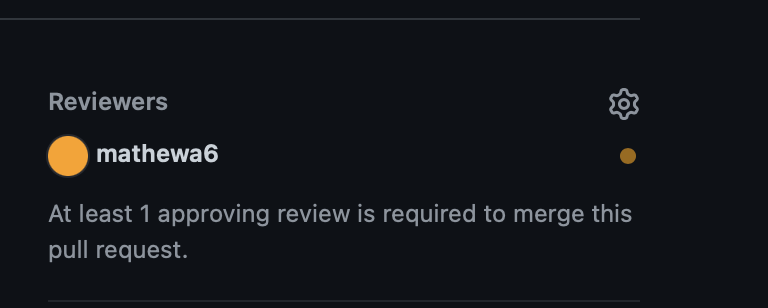
You will need to add a reviewer:
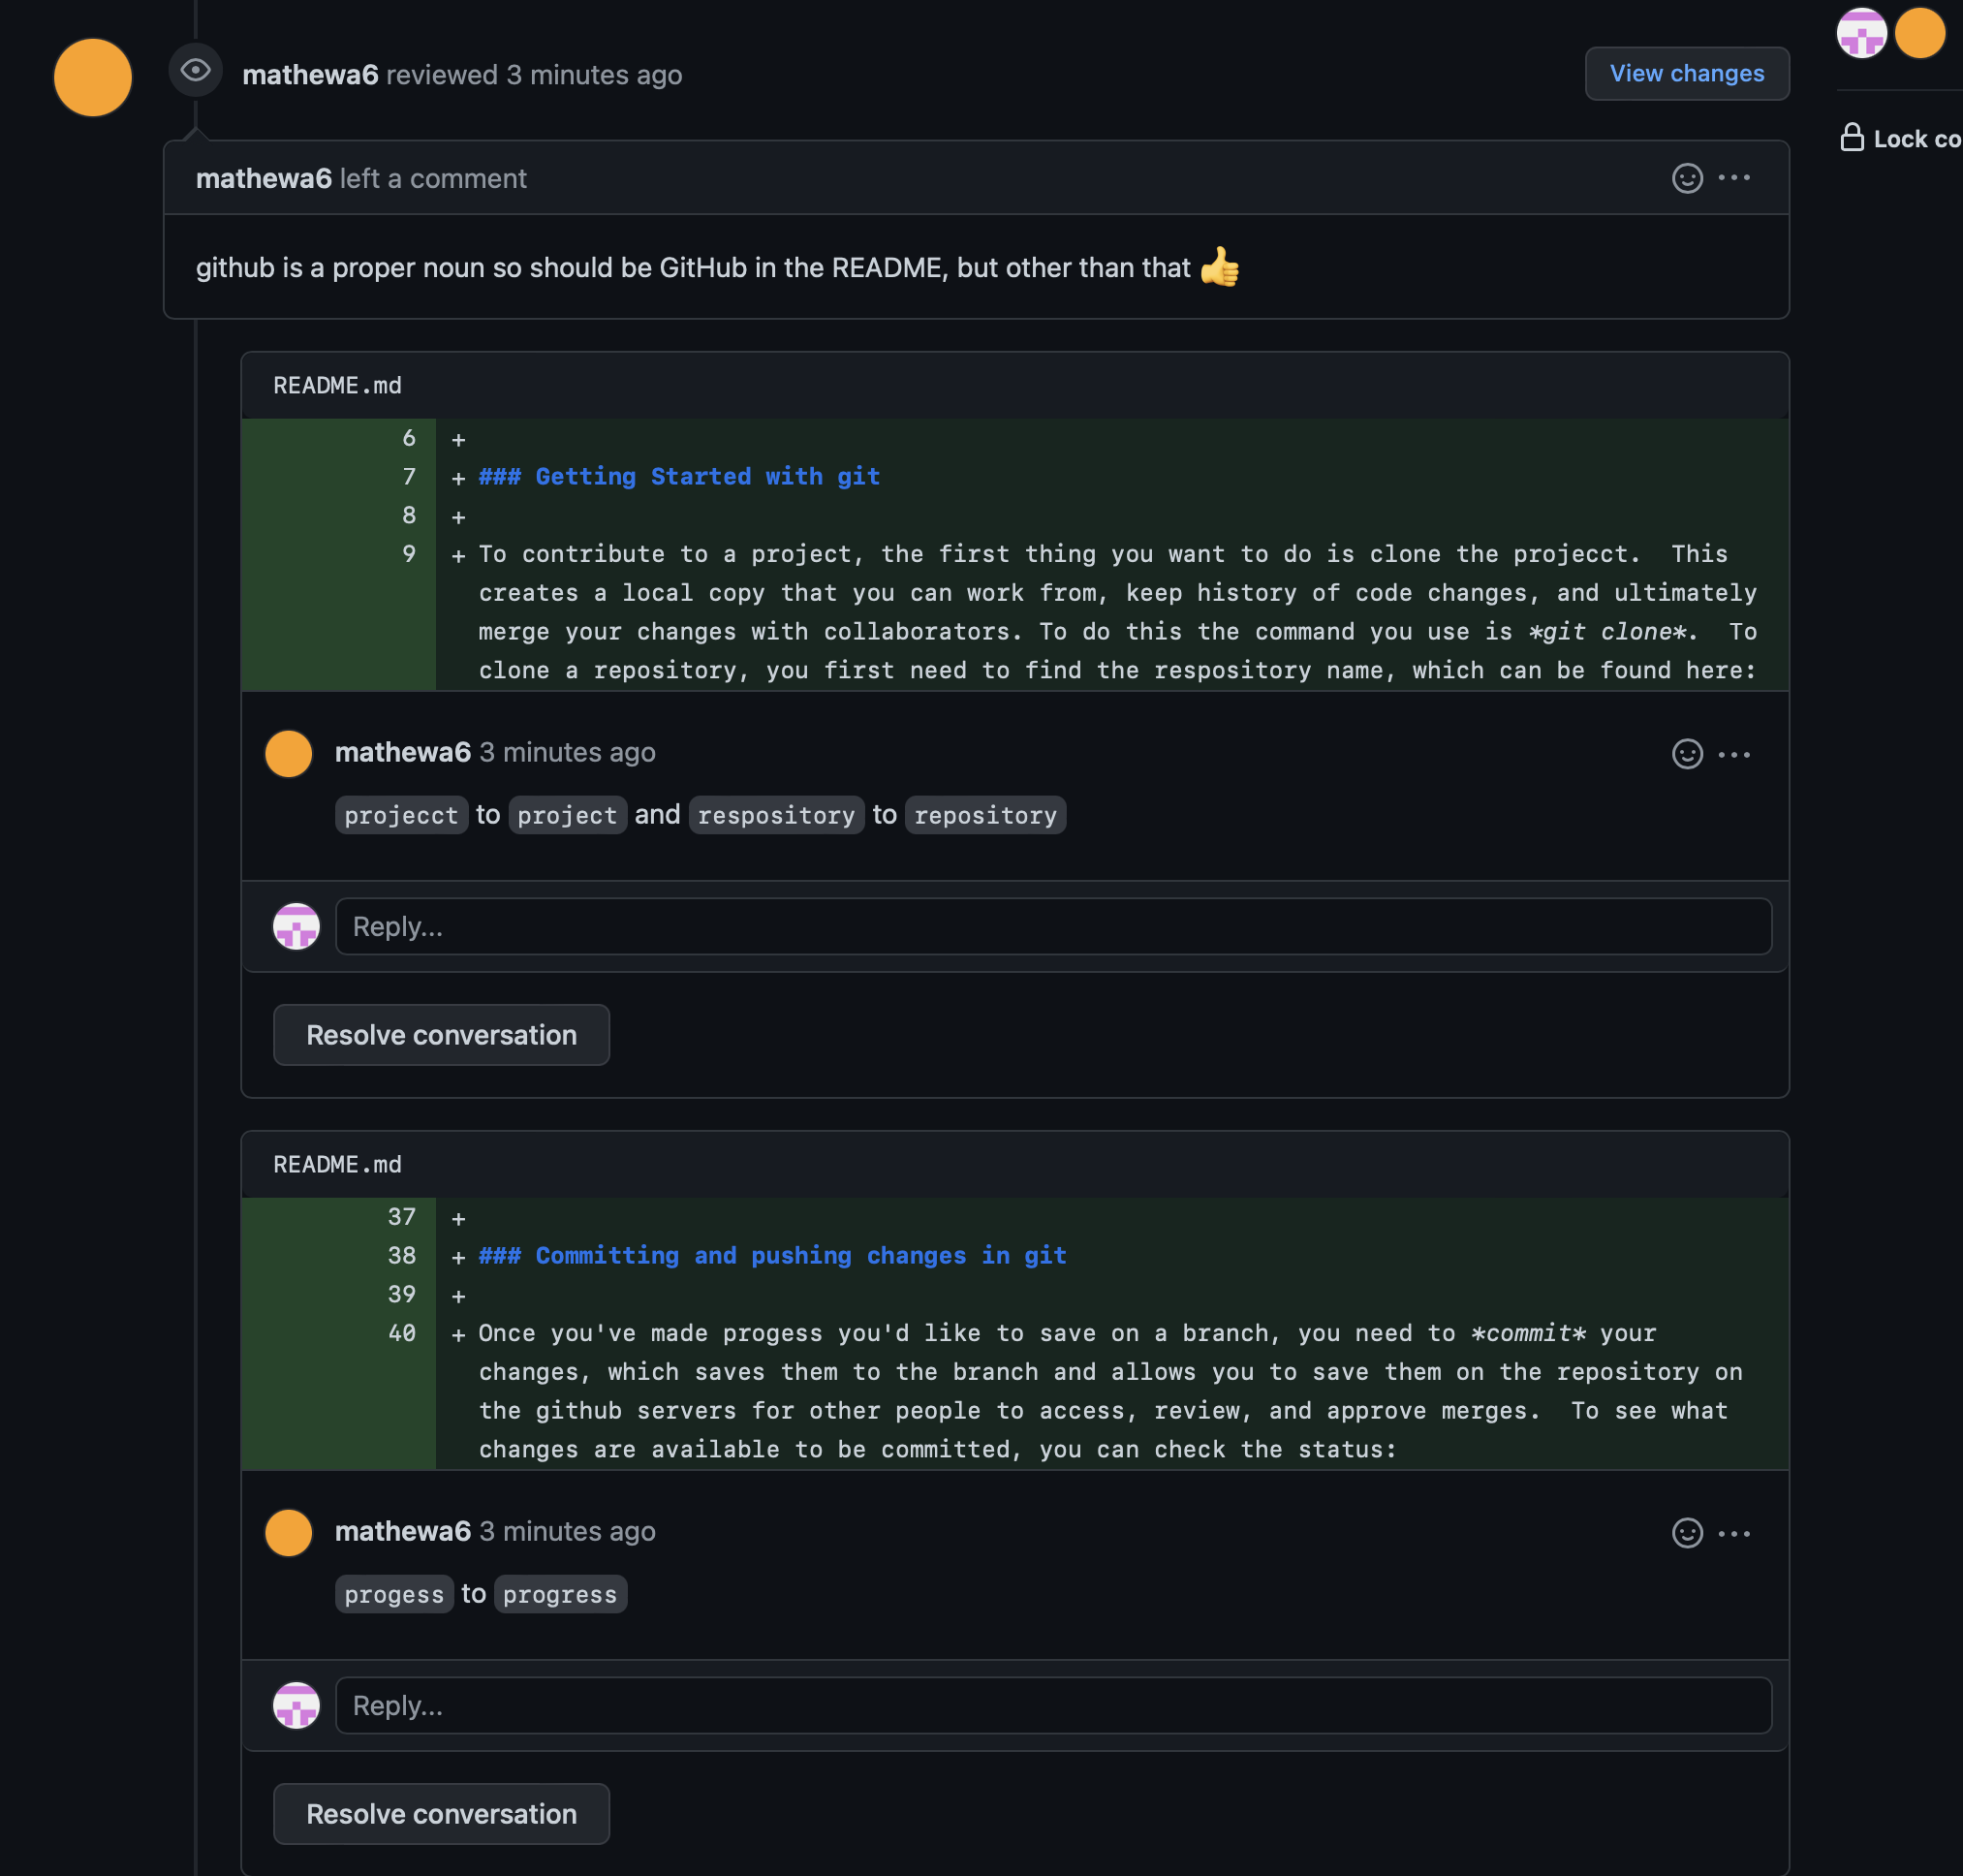
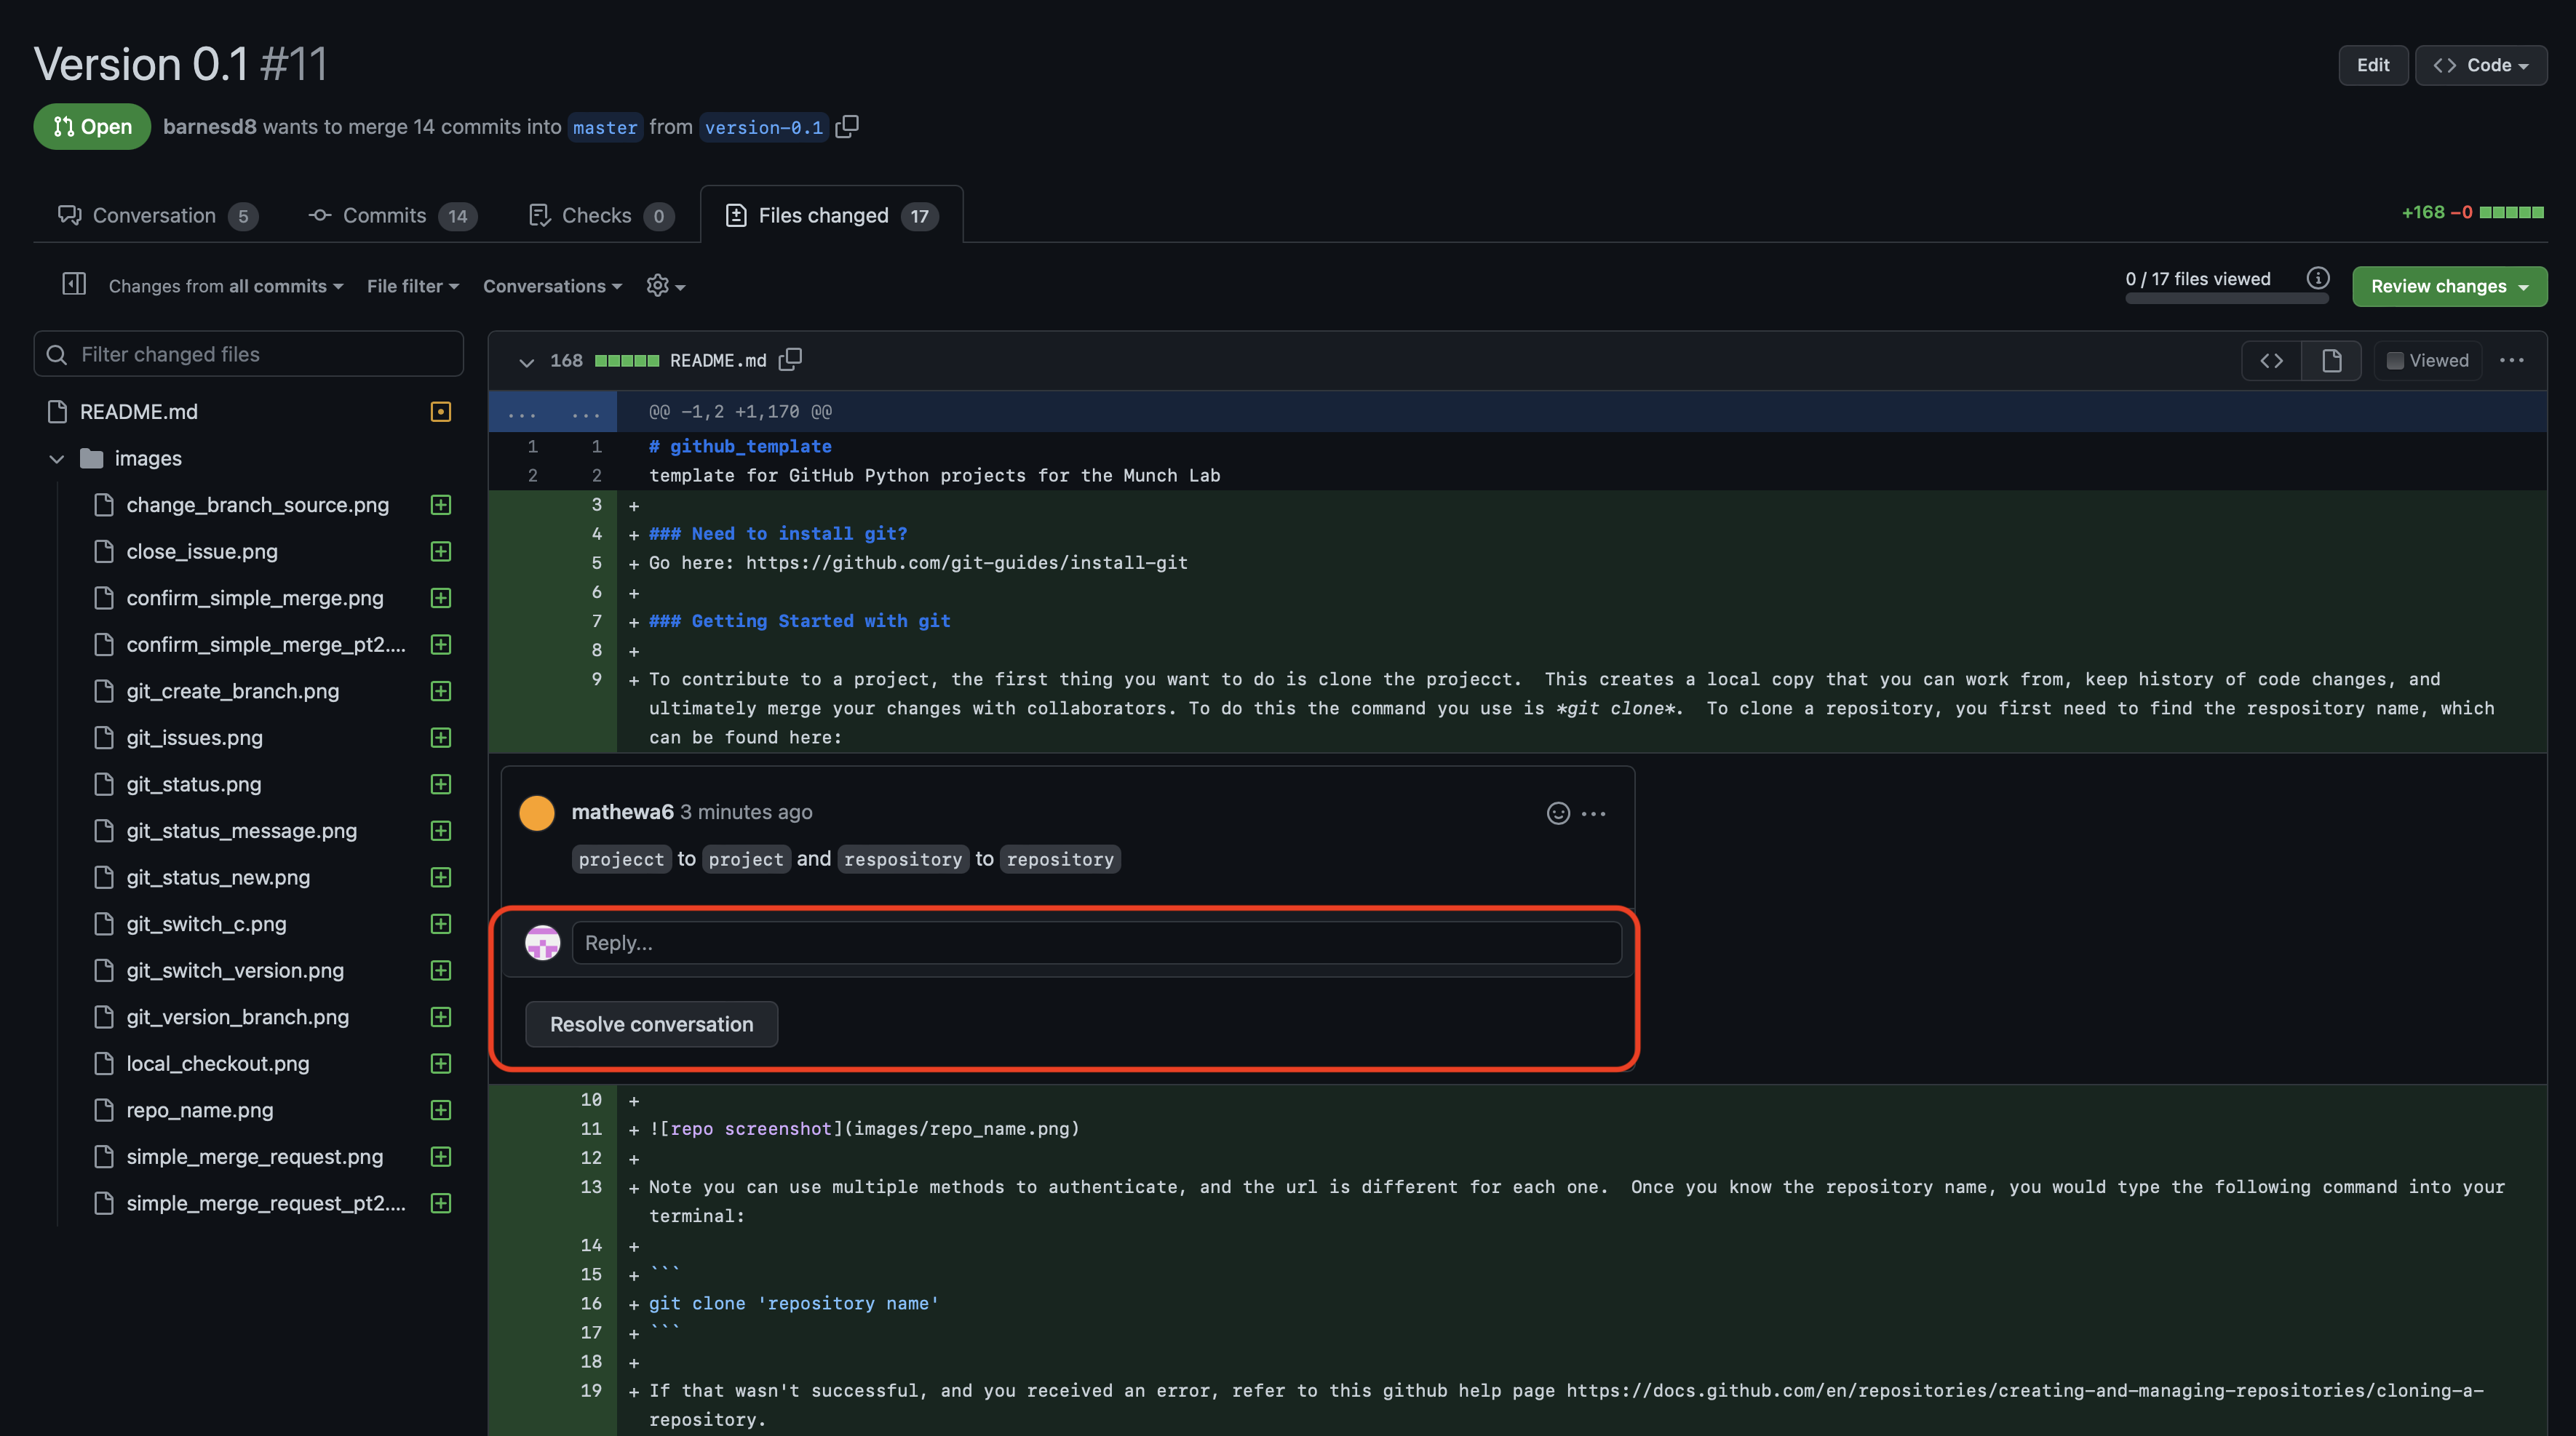
The reviewer will get a notification, and once they've completed their review, you'll get a notification. You'll be provided feedback like this:
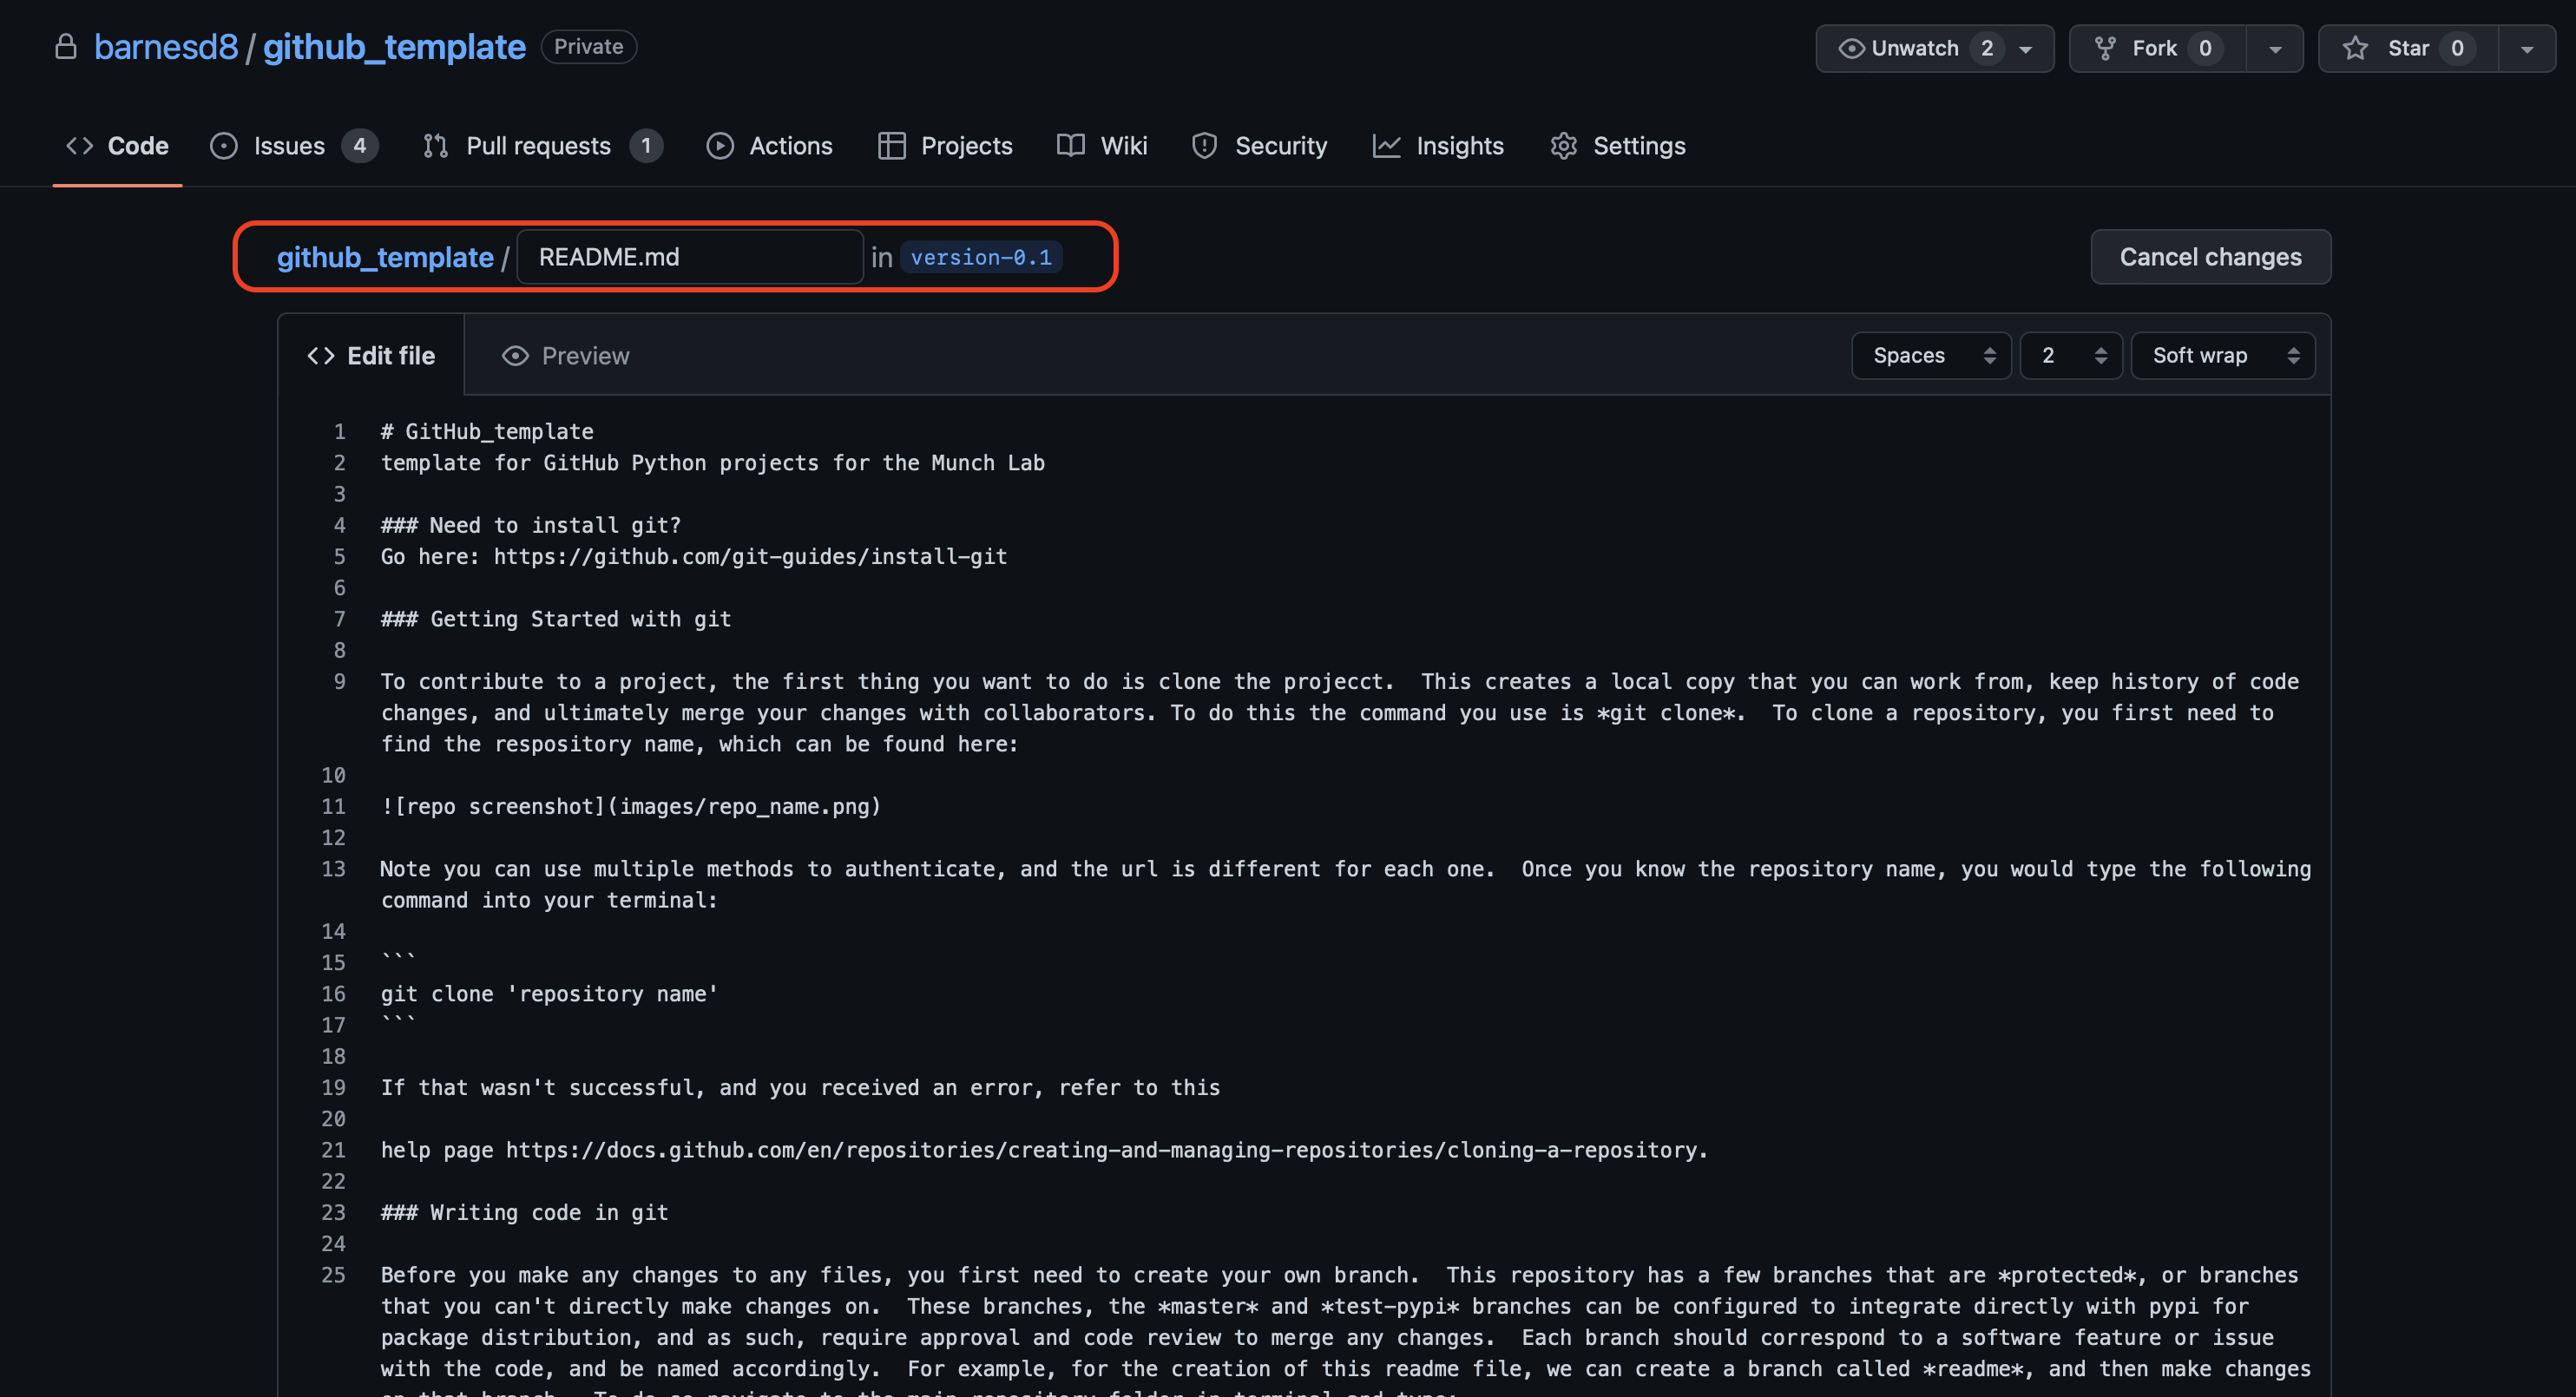
You can make any corrections in the code either by modifying the original file(s) and committing to the same branch, or in the github user interface. If you choose to do so in the user interface, make sure you navigate to the correct branch first, and you'll see this when you modify the file:
If you do update in the interface, it will be a commit like normal and will require a commit message to save:
To complete the code review, you need to resolve any feedback that was provided during the code review:
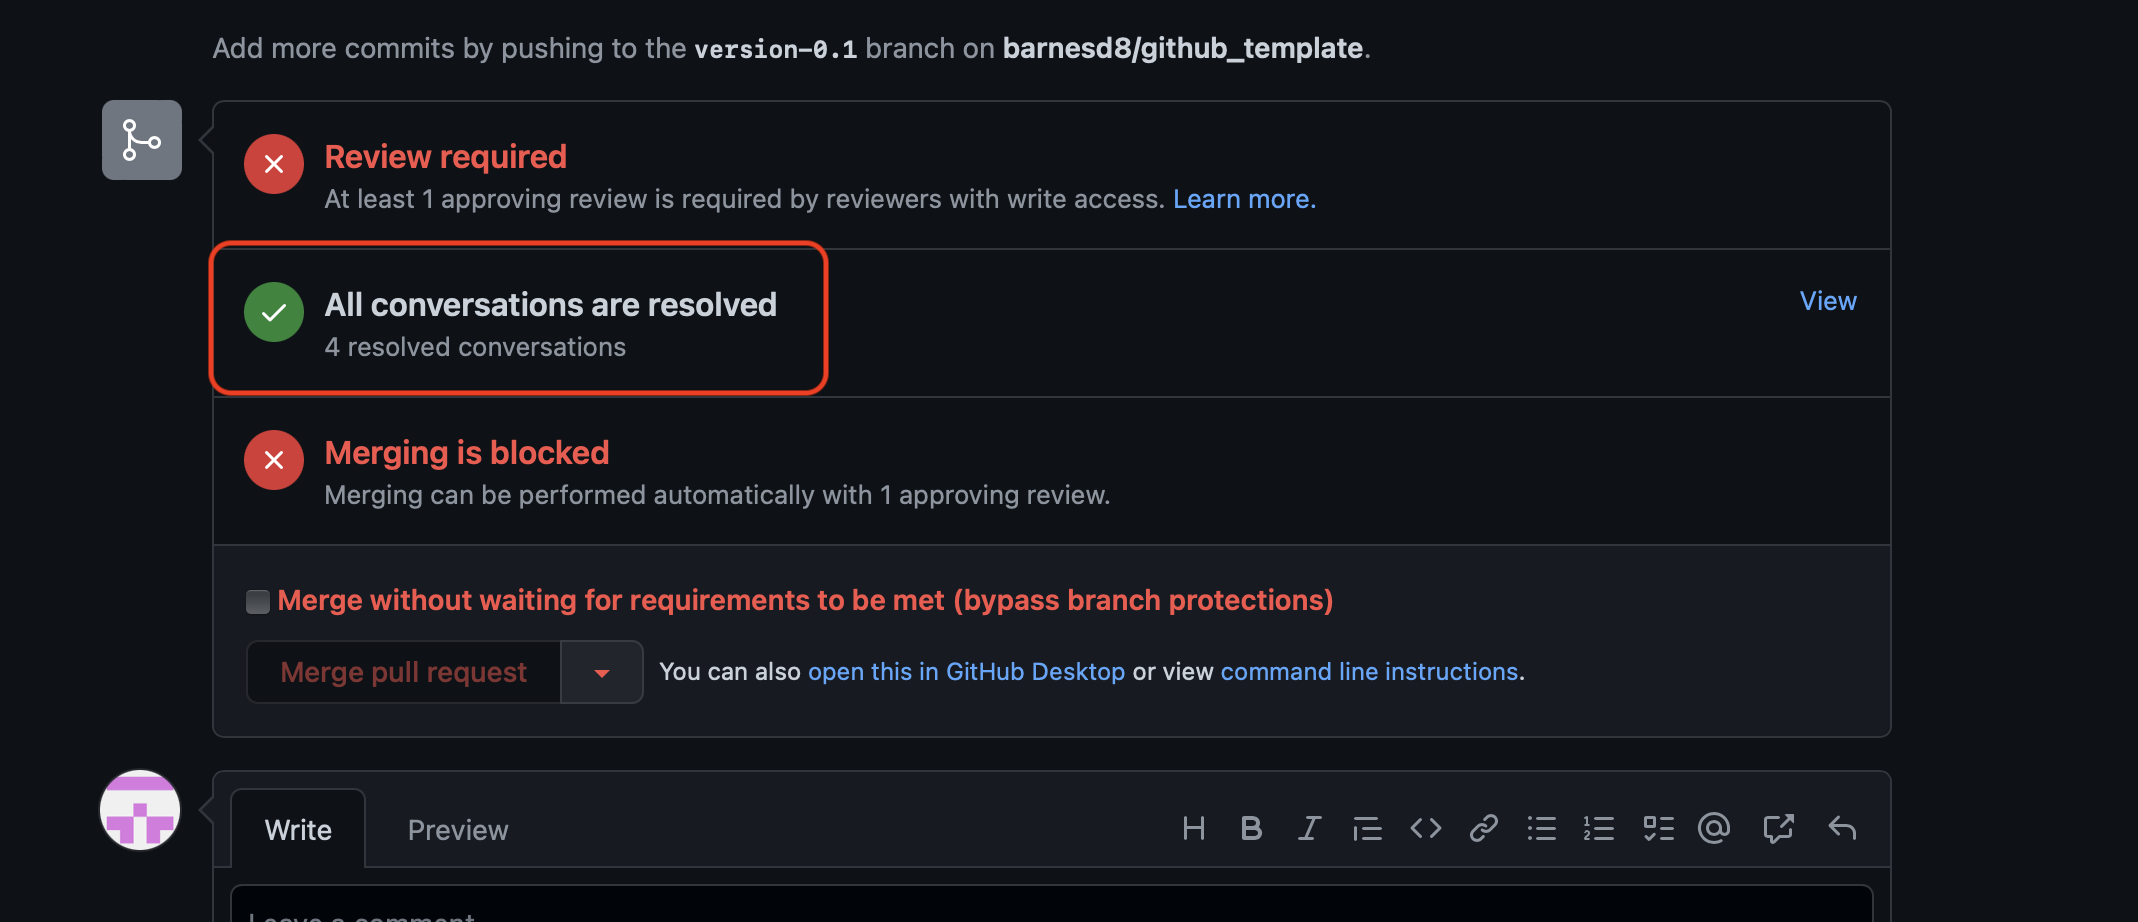
Once that's done, you'll see the status has been updated, but you still can't merge.
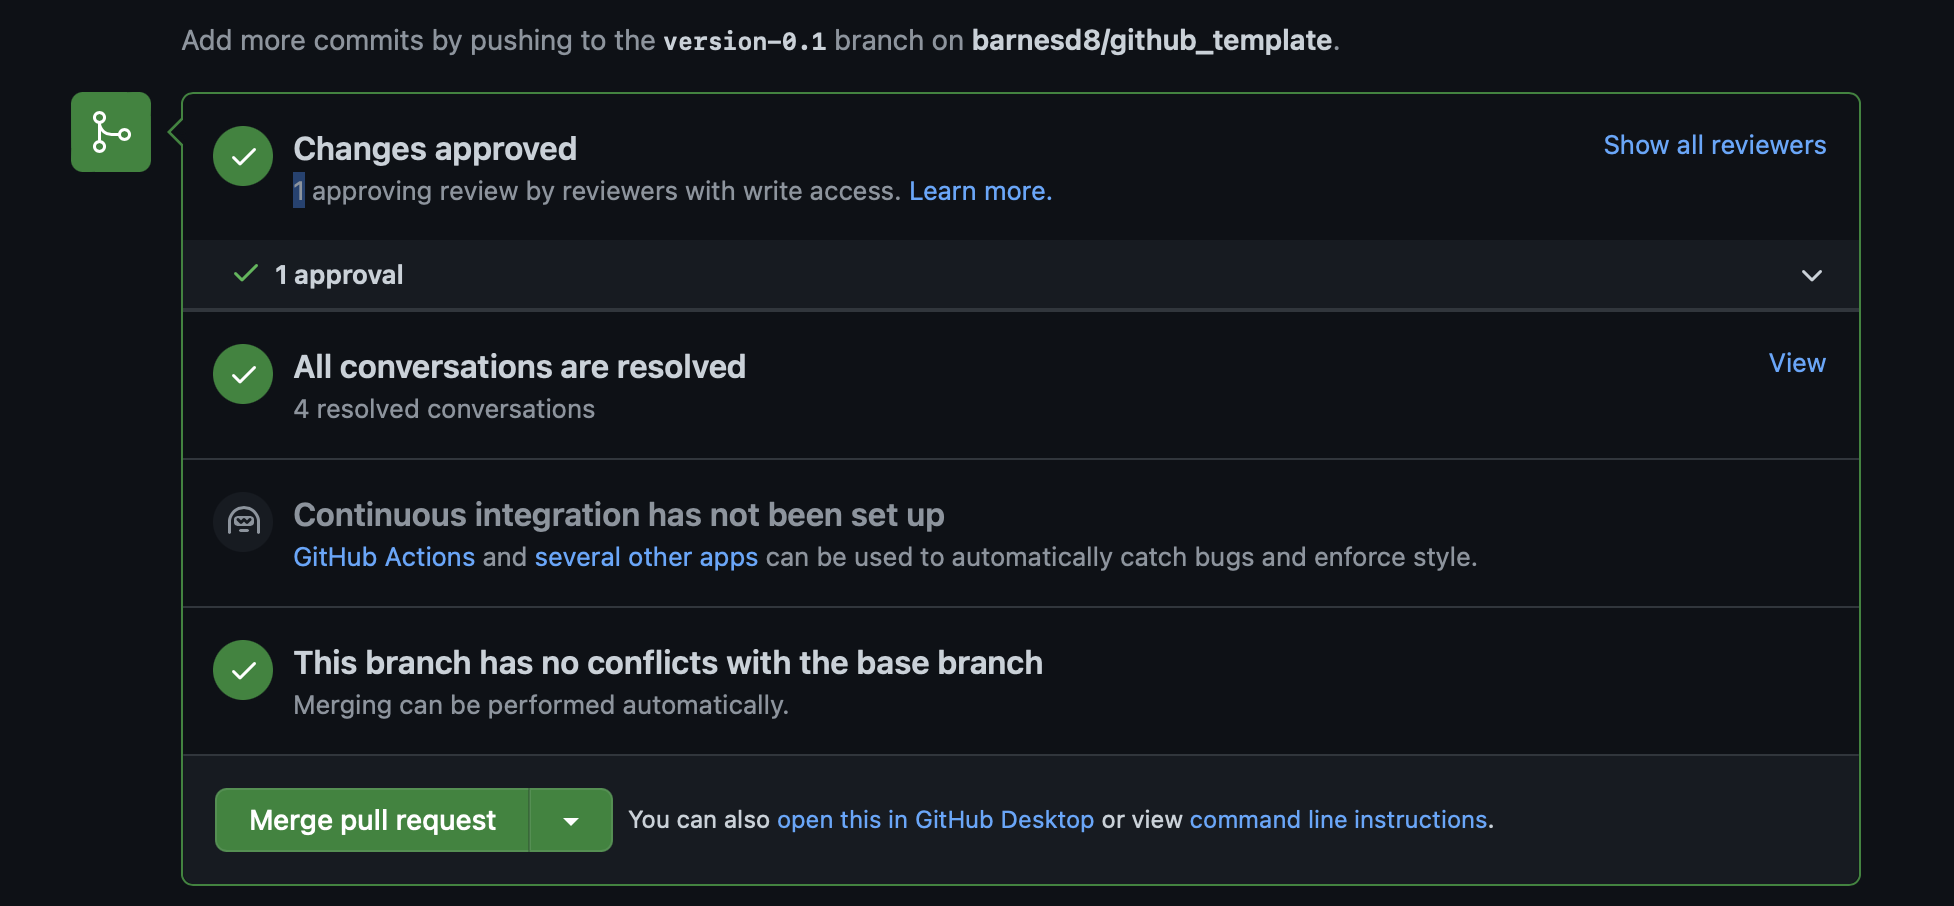
Once you reply to and fix any issues as noted in the code review, the reviewer will need to approve the changes and approve the review. Once this is done, you'll get the following:
You can then go through the normal steps to confirm the merge!
Life is better when you scan tiny brains.
