-
python3 🐍
-
tkinter8.6
A medical application (time-track - future version) to connect PyMySQL with MySQL (MariaDB) on raspberry. Below, I explain how to use this application with the MariaDB table in localhost, LAN and WAN connection). I chose a LAN infrastructure for security reasons. It is possible to extend the connection to the internet with a forwarding on the server (described below).
I recommend to create the MySQL database table in localhost (on your own machine). To do this you will have to modify the files of "update/" and "nutrition/" folders, as well as the "accessDB.py" file by replacing :
LAN configuration :
pymysql.connect(host='192.168.XX.XX', port=3306, user='usr_namedb', password='user_passwd', database='timetrackconn')
by
Localhost configuration :
pymysql.connect(host='127.0.0.1', user='usr_namedb', password='user_passwd', database='timetrackconn')
(No port needed in this case).
You should install MySQL on one server. Otherwise each user will have an independent database if it is installed on localhost. This is obviously not the point, if something changes, the other users will not see what has changed in their database. It is also possible to extend the connection to the Internet (WAN) to have access outside the LAN (forwarding). In order to do this, replace the following lines:
LAN configuration :
pymysql.connect(host='192.168.XX.XX', port=3306, user='usr_namedb', password='user_passwd', database='timetrackconn')
by
WAN configuration :
pymysql.connect(host='publicIP', port=3306, user='usr_namedb', password='user_passwd', database='timetrackconn')
-
Create a database :
MYSQL Connections --> click '+' -
Enter connection name and password
-
Click on 'Test connection'
Password required -
Create a table Utf-8
-
Create columns
-
Save model
-
Return to 'home' and click on your new connection
You could install it on server too for solving problem.
sudo apt install python3-pymysql
pip3 install pymysql (or PyMySQL)
sudo apt-get build-dep python-mysqldb
pip install mysql-python
pip install mysql-connector-python
ssh-keygen -t rsa -b 4096
Enter file to save key : rsa_file
Enter passphrase : XXXXXXXX
ssh-copy-id -i ~/.ssh/rsa_file.pub serv@192.168.x.x
passwd
ssh -i ~/.ssh/rsa_file serv@192.168.x.x
Enter passphrase: XXXXXX
You don't need to enter password.
We place ourselves in the right folder (use ls and cd ;) !
ssh-agent bash
ssh -i ~/.ssh/rsa_file serv@192.168.x.x
Enter your passphrase.
ssh-add (-h = help) (-t = time in memory) (-l = list of keys) (-d rsa_file = delete the key)
ssh-add ~/.ssh/rsa_file
Enter passphrase : (once time) Connection established !!!
We only need to enter this sentence when we want to connect to the remote server :
ssh -i ~/.ssh/rsa_file serv@192.168.x.x
ssh -i ~/.ssh/rsa_file pi@192.168.x.x
logout
cat ~/.ssh/config
Host targetserver.serv@192.168.x.x
IdentityFile ~/.ssh/rsa_file # private key
sudo apt update
sudo apt upgrade
sudo apt install mariadb-server
sudo mysql_secure_installation
Make sure you write down the password you set during this process as we will need to use it to access the MySQL server and create databases and users.
sudo systemctl start mysql
or
sudo /etc/init.d/mysql start
or
service mysql start
sudo systemctl stop mysql
or
sudo /etc/init.d/mysql stop
or
service mysql stop
sudo systemctl reload mysql
sudo systemctl reload mariadb.service
sudo systemctl restart mysql
-
sudo mysql -u root -p -
CREATE USER 'user_name'@localhost IDENTIFIED BY 'password'; -
CREATE DATABASE database_name;
-
GRANT ALL PRIVILEGES ON database_name.* TO 'user_name'@'%' IDENTIFIED BY 'password' WITH GRANT OPTION; -
flush privileges; -
quit;orexit; -
sudo /etc/init.d/mysql restart
-
sudo mysql -u user_name -p -
SHOW DATABASES; -
USE timetrackconn; -
SHOW TABLES; -
MariaDB [timetrackconn]> CREATE TABLE timetrackconn( -> stdid INT UNSIGNED NOT NULL AUTO_INCREMENT, -> firstname VARCHAR(45) NULL, -> surname VARCHAR(45) NULL, -> birth VARCHAR(45) NULL, -> allergy VARCHAR(45) NULL, -> disease VARCHAR(45) NULL, -> maindiagnostic VARCHAR(45) NULL, -> PRIMARY KEY (stdid) -> ); -
sudo systemctl restart mysql -
Configure file to /etc/mysql/mariadb.d.conf/50-server.cnf :
sudo nano /etc/mysql/mariadb.d.conf/50-server.cnf
| Port | Address |
|---|---|
| 3306 | 0.0.0.0 |
port 3306
bind-address 0.0.0.0
- Restart mariadb.service :
sudo systemctl restart mariadb.service
- Configure firewall to open port 3306 for clients on LAN (for example) :
sudo ufw allow from 192.168.XX.100 to any port 3306
sudo ufw allow from 192.168.XX.200 to any port 3306
sudo ufw allow from 192.168.XX.300 to any port 3306
sudo ufw allow from 192.168.XX.400 to any port 3306
sudo ufw reload
sudo netstat -anp | grep 3306
mysql -u koala33 -h 192.168.XX.XX -p
$ virtualenv myvirtualenv
$ source myvirtualenv/bin/activate
You could install it on server too for solving problem.
Install python3-pymysql (out of virutalenv !):
sudo apt install python3-pymysql
$ pip3 install pymysql (or PyMySQL)
sudo apt-get build-dep python-mysqldb
$ pip install mysql-python
$ pip install mysql-connector-python
sudo apt-get install mariadb-client-10.1
You can grant access to the remote system with IP 192.168.XX.XX to connect the port 3306 with the following command (on server side) :
- LAN
sudo ufw allow from 192.168.XX.XX to any port 22
sudo ufw allow from 192.168.XX.XX to any port 3306
sudo ufw reload
- INTERNET
sudo ufw allow from 192.168.XX.XX to any port 22
sudo ufw allow 3306/tcp
sudo ufw reload
- SERVEUR :
| To | Action | From |
|---|---|---|
| 22 | ALLOW IN | 192.168.XX.XX |
| 3306 | ALLOW IN | 192.168.XX.XX |
- CLIENT :
Status: active Logging: on (low) Default: deny (incoming), allow (outgoing), disabled (routed) New profiles: skip
# echo 1 > /proc/sys/net/ipv4/ip_forward
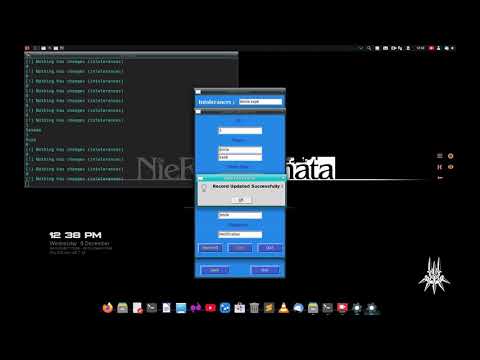
$ python3 heal_track.py
or with :
$ python3 heal_track.py '(Application.__init__(self))
Use ssh to remote access to server and configure all what you wants.
ssh -i ~/.ssh/rsa_file server@192.168.XX.XX
Still under development ! (It should be finished by june 2022)
Enjoy it ! 😉
ko@l@tr33 🐨
Demo (Youtube)