This is a selection of tools to map LEDs into 2D and 3D space using only your webcam!
This works best in a dim environment so please make sure your camera isn't pointing at any other light sources! (Test in Step 1)
After downloading this repository and installing Python, run pip install -r requirements.txt
This will check your camera is compatible with L3D.
Run python scripts/camera_check.py
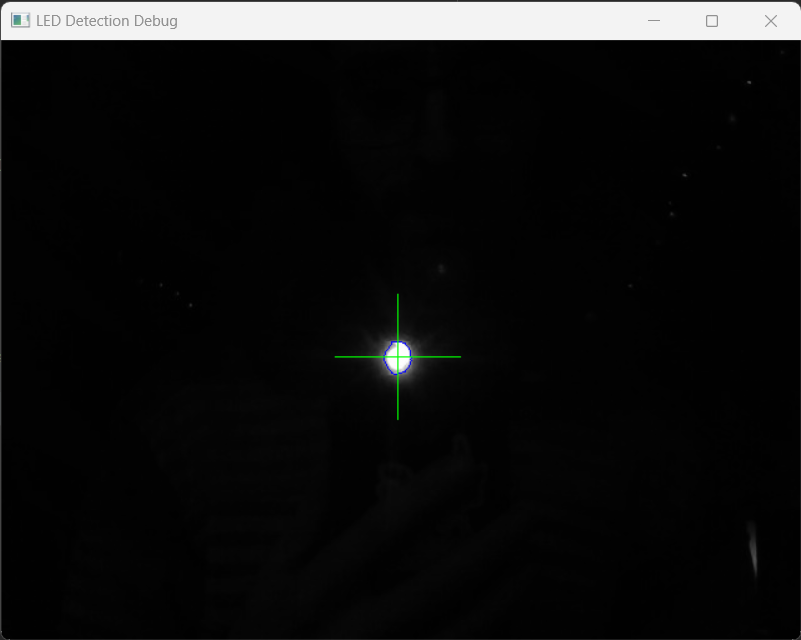
Test LED identification by turning down the lights and holding a torch or led up to the camera This should start with few warnings, no errors and produce a very dark image with a single crosshair on centered on your LED:
Run python scripts/camera_check.py --help to list the optional parameters
Your LEDs are as unique as you are, so the fastest way to connect L3D to your system is to fill in the blanks in backends/custom/custom_backend.py:
# import some_led_library

class Backend:

    def __init__(self, led_count: int):
        # Remove the following line after you have implemented the set_led function!
        raise NotImplementedError("Could not load backend as it has not been implemented, go implement it!")

    def set_led(self, led_index: int, on: bool):
        # Write your code for controlling your LEDs here
        # It should turn on or off the led at the led_index depending on the "on" variable
        # For example:
        # if on:
        #     some_led_library.set_led(led_index, (255, 255, 255))
        # else:
        #     some_led_library.set_led(led_index, (0, 0, 0))
        pass
You can test your backend with python backends/test_backend.py
There are also plans to support the following backends. This can be selected in the following steps using the --backend argument.
| Backend | Supported |
|---|---|
| FadeCandy | yes |
| WLED | yes |
| LCM | todo |
After writing or choosing your backend, place one of your addressable LEDs in front of your camera and run python scripts/latency_check.py
Once complete, the recommended latency will be listed in the console in milliseconds.
This can be used in the following steps using the --latency argument.
Run python scripts/latency_check.py --help to list the optional parameters
Set up your LEDs in front of your camera and run python scripts/capture_sequence.py --led_count 64 --output_dir my_scan
Change --led_count to however many LEDs you want to scan and --output_dir to whatever folder you would like to export the 2D maps to.
This will produce a timestamped CSV file with led index, u and v values.
Run python scripts/capture_sequence.py --help to list the optional parameters
To create a 3D map, run capture_sequence multiple times from different views of your LEDs,
this can either be done by moving your webcam around your LEDs or rotating your LEDs.
I would recommend at least 3 positions with around 20° between views.
Once you have a selection of 2D maps captured with the capture_sequence script, run python scripts/reconstruct.py --input_dir my_scan
This may take a while, however once complete will generate reconstruction.csv in the input directory
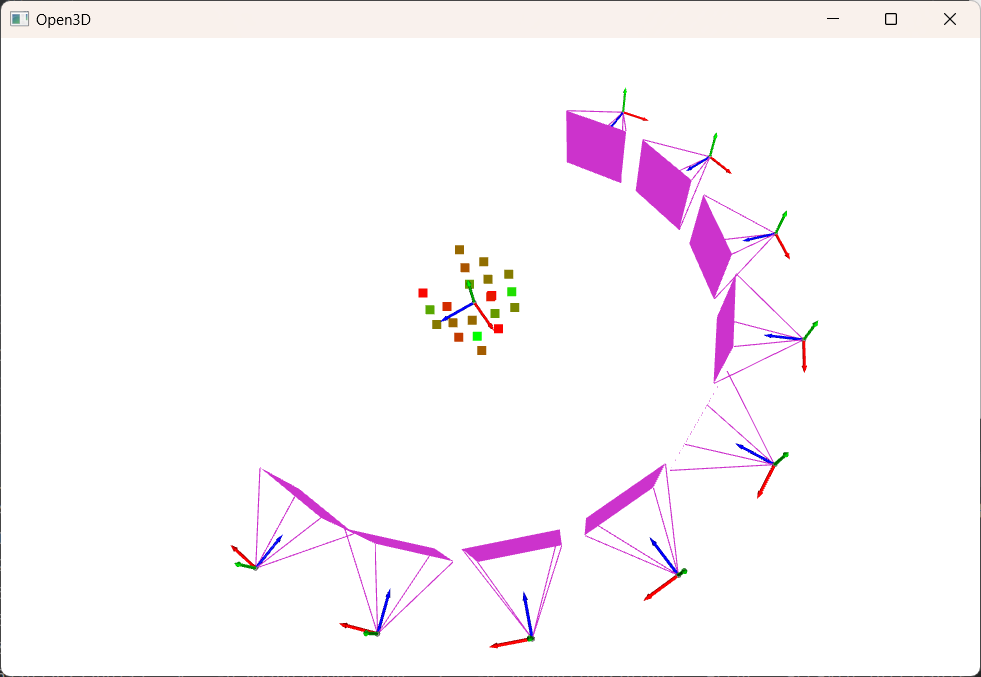
The below reconstruction uses 9 views, each 22.5° apart for optimal reconstruction
Green points have a low error, red have a high error.
Run python scripts/visualise.py <filename> to visualise 2D and 3D map files.
I would really love to hear what you think and if you have any bugs or improvements, please raise them here or drop me a line on Telegram.
If you implement a backend that you think others might use, please raise a pull request or just drop me a message on Telegram!
If you want a super speed PR, run flake8, flake8-bugbear and black before submitting changes!


