Timmy build guide
- Get all of the components
- Print the chassis
- Solder electronics together
- Program the transmitter
Required components
Bear in mind that many of these parts may not be available or even produced anymore. Links are provided only for reference - just find something with similar characteristics and you'll be fine.
- 2x Turnigy 15mm 75:1 motor
- 2x Brushed ESC
- Brushless motor
- Brushless ESC
- Saw blade
- Turnigy NanoTech 2S LiPo
- Turnigy i6 receiver
- 3x 2.5 x 16mm wood screws
Required tools
These will be absolutely necessary:
- Soldering iron
- Precision screwdriver (with Torx bits)
- Pliers or spanner for M3 nuts
And these are not, but will help:
- Hand file
- Hot glue gun
- Plumber's wrench
- Instant glue (any cyanoacrylate, eg. Superglue)
Printing
You will find all of the required STLs in the stl folder. If you want to modify the design, feel free to fork the OnShape project.
Chassis
All parts can be printed either with PLA, ABS or PETG. Original Timmy was printed with PETG. Chassis and its cover should be printed with layer height <= 0.35 mm. For chassis, use supports.
Wheels
For best traction, you will need to attach some additional rubber using instant glue. In that case, you can print wheels using any filament available. In case you do not want to glue any rubber, printing wheels in TPU will help with traction. In that case, use the alternative design dedicated for TPU printing.
In any case, best print at layer height 0.2 mm.
Saw blade mounting
No supports, 0.2 mm layer height. TPU would be the best material, but with a drop of instant glue anything will do just fine.
Electronics
There is nothing out of ordinary here, only generic stuff. I'll add a link to some RC model electronics tutorial
Assembly
Weapon
Weapon assembly here is a bit of improvisation, feel free to disregard whatever you read here and do it your way if you feel like it.
-
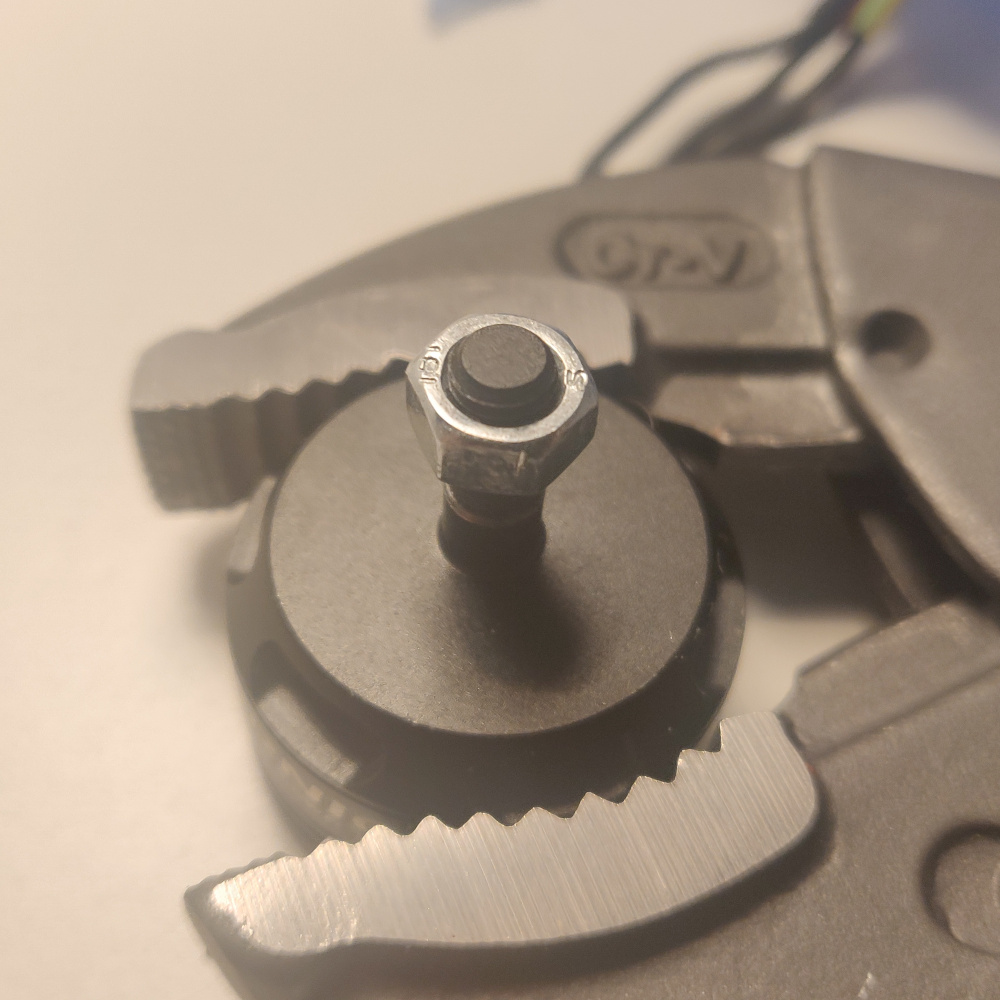
Screw an M3 nut onto the motor shaft. At this point you may want to fix the stator in place, for example by clamping it with plumber's wrench:
-
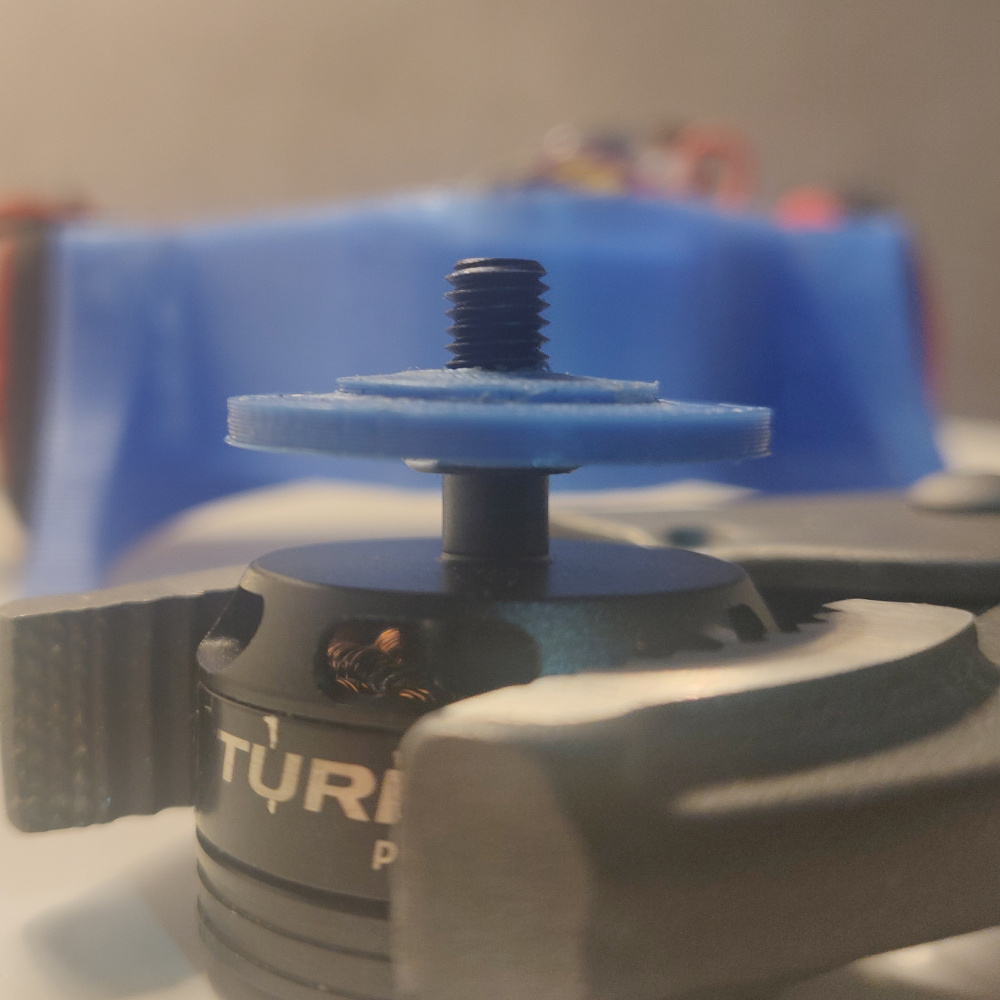
Fix the printed part that has an M3 shaped slot in it. The nut you just fixed should fit right in there.
-
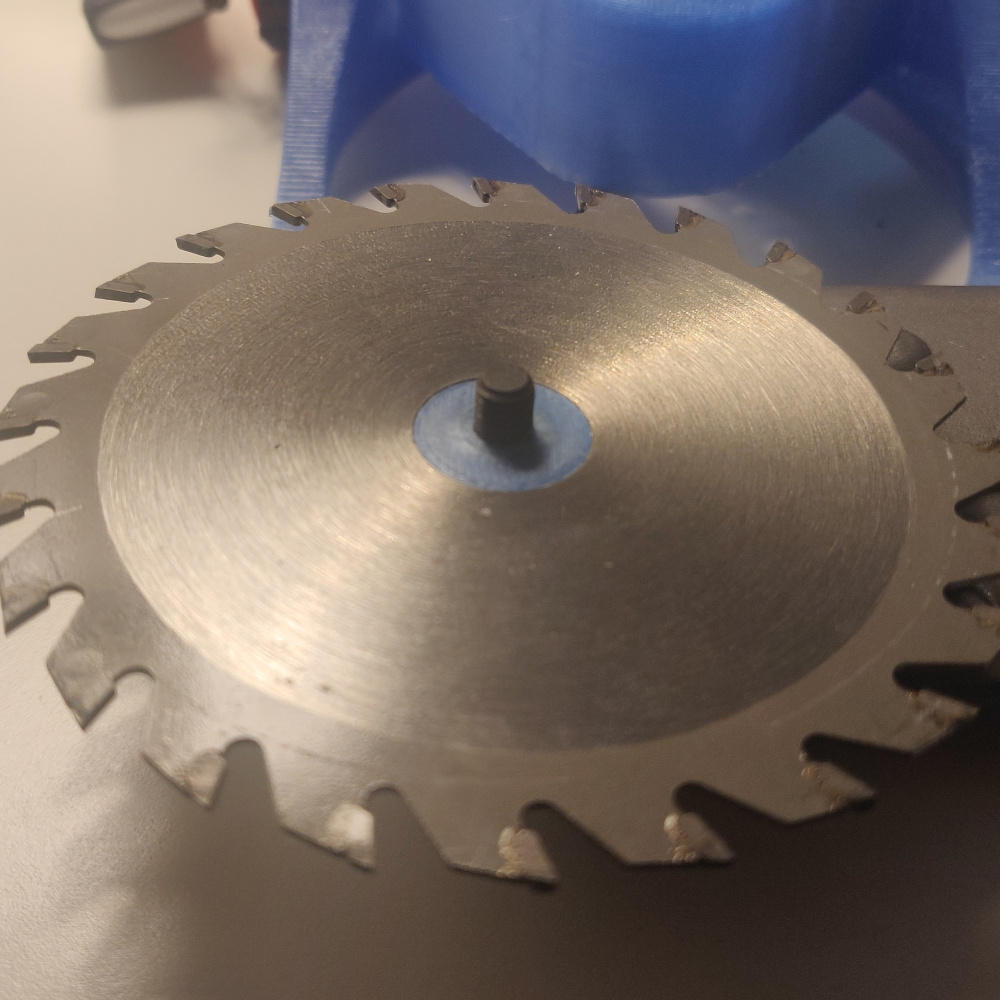
Put the blade on. No need to care about the rotation direction too much, you'll be able to configure it with the transmitter.
-
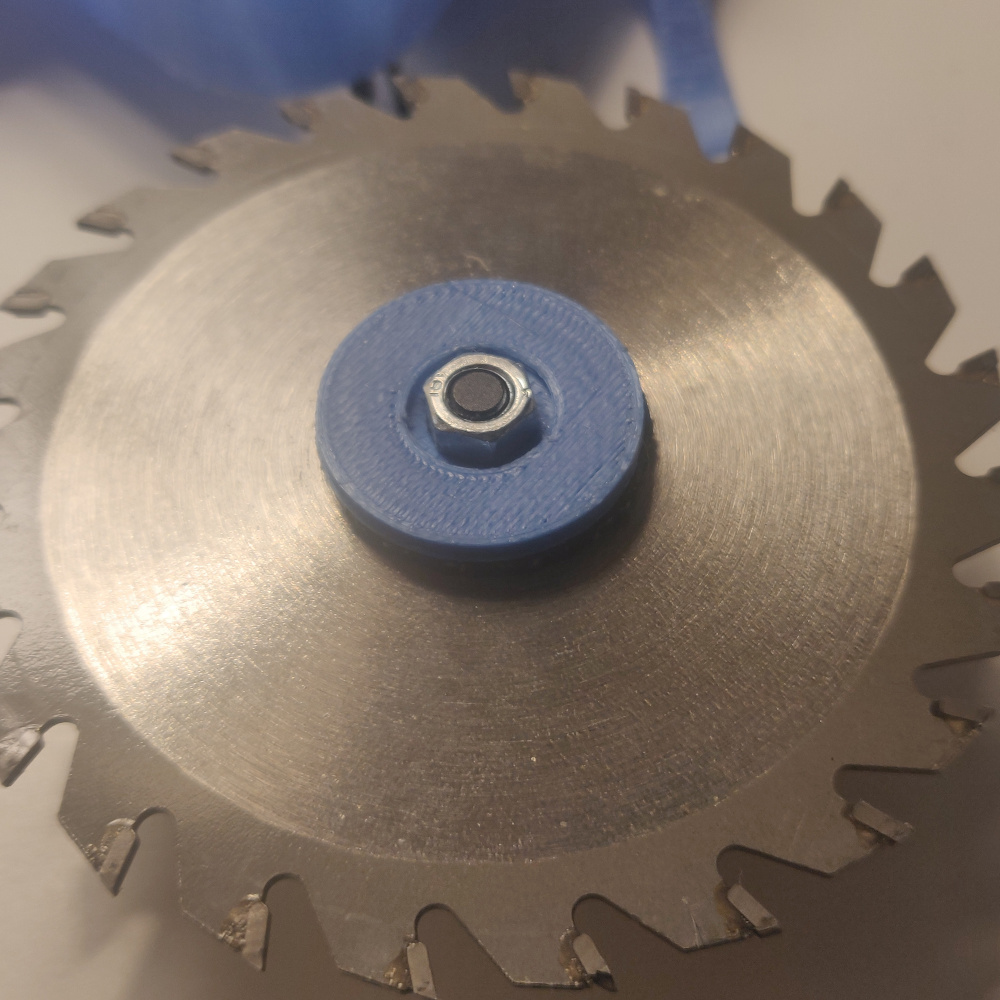
Now you have two options: 1) you can use instant glue to lock the blade in place between two 3D printed plastic parts, 2) you can add a layer of rubber hoping the friction will keep the blade spinning.
Second option also acts as a safety clutch - it will prevent you from stalling and burning the motor, but at the same time make the weapon less effective.


Chassis
Not much to be said here, just cram the soldered electronics inside. There are two slots for motors (orientation again does not really matter), and a slot for a master switch. As much as it is optional, I encourage you to include one, it makes operating the robot much easier. I have made one out of the switch that was included with the brushed ESC.
Guide the brushless ESC cables through the opening in the weapon motor slot like this:

Then, connect them to the motor. Put the motor in place and fix it with screws that came with it.
When everything is in place, you may want to consider fixing it with some hot glue (you should at least glue the master switch if you decided to include it). Just be careful not to immobilize either the drive motor gearbox or master switch moving part.


Now cram down all the rest. Don't worry too much if some cables stick out, they will be squeezed by the top cover.

Put the top cover and screw it with 2.5mm wood screws. Be careful with the one over the weapon motor. Use a M3 nut to distance it from the cover so it does not push against the motor.
Wheels
Glue some rubber around them. You can also use an old inner tube for a bike, just cut it in about 8mm wide rings, stretch them and place and put them on. They should hold nicely by themselves, no glue necessary.
If you printed them with layer height 0.2mm, they should snap right onto the shafts with a bit of pressure and stay there. Drop of instant glue may be used in addition if they are too loose. I personally have not glued them for the ease of replacement. If the wheels do not fit, try filing the slot a bit.
Finished build
There you go, what you have should resemble this guy:
