GoogLeNet for Image Classification
- TensorFlow implementation of Going Deeper with Convolutions (CVPR'15).
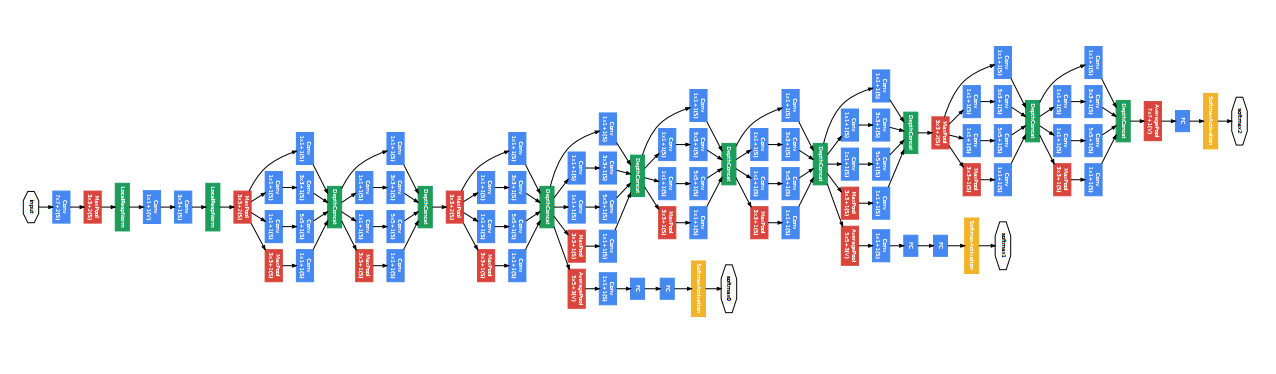
- Architecture of GoogLeNet from the paper:

Requirements
- Python 3.3+
- Tensorflow 1.0+
- TensorCV
Implementation Details
- The GoogLeNet model is defined in
lib/nets/googlenet.py. - Inception module is defined in
lib/models/inception.py. - An example of image classification using pre-trained model is in
example/pre_trained.py. - The pre-trained model on ImageNet can be downloaded here.
- When testing the pre-trained model, images are rescaled so that the shorter dimension is 224. This is not the same as the original paper which is an ensemle of 7 similar models using 144 224x224 crops per image for testing. So the performance will not be as good as the original paper.
Results
result of VGG19 for the same images can be found here.
The pre-processing of images for both experiments are the same.
-
Image classification on ImageNet


-
Images from my photo collection


Usage
Download pre-trained model
Download the pre-trained parameters here.
Config path
All directories are setup in example/setup_env.py.
PARA_DIRis the path of the pre-trained model.SAVE_DIRis the directory to save graph summary for tensorboard.DATA_DIRis the directory to put testing images.
ImageNet Classification
Put test image in folder setup_env.DATA_DIR, then go to example/ and run the script:
python pre_trained.py --type IMAGE_FILE_EXTENSION(.jpg or .png or other types of images)
The output are the top-5 class labels and probabilities, and the top-1 human label. The structure of GoogLeNet can be viewed through TensorBoard and the summary file is saved in setup_env.SAVE_DIR.
Note that the output label is started from 0, so label=l corresponds to the (l+1)th row in data/imageNetLabel.txt.