SOVOL_KLIPAD50_SYSTEM
This is information about the KLIPAD50 image
Features and advantages of klipad50
- Onboard powerful 4-core 64-bit core SOC, with 1GBytes of DDR3 memory;
- DC12/24V power supply, more stable power supply;
- With HDMI 800*480 IPS LCD and capacitive touch screen;
- Provide 3-way USB interface (can be connected to 3D printer main control board, USB wireless network card, USB camera, U disk, USB keyboard and mouse, etc.);
- 2.4G wifi on board.
Download
From Google drive: KLIPAD50 IMAGE
FLASH TO EMMC
Notice: the system has been burnned the each KLIPAD50 before leaving the factory, and you do not need to burn it again unless you want to update a new image.
Hardware Preparation
- Emmc adaptor card reader, just like this one
- PC with windows operating system installed
- Wireless network card or network cable
- Type_C cable
Software preparation
- Install balenaEtcher v1.5 and above, download link:
https://www.balena.io/etcher/ - Install putty, download link: https://www.chiark.greenend.org.uk/~sgtatham/putty/latest.html
Flash system files
- Format TF card
Format TF card to FAT32 format before flash system files - Insert the EMMC module into the card reader, and insert the card reader into the PC
- Unzip the downloaded image file
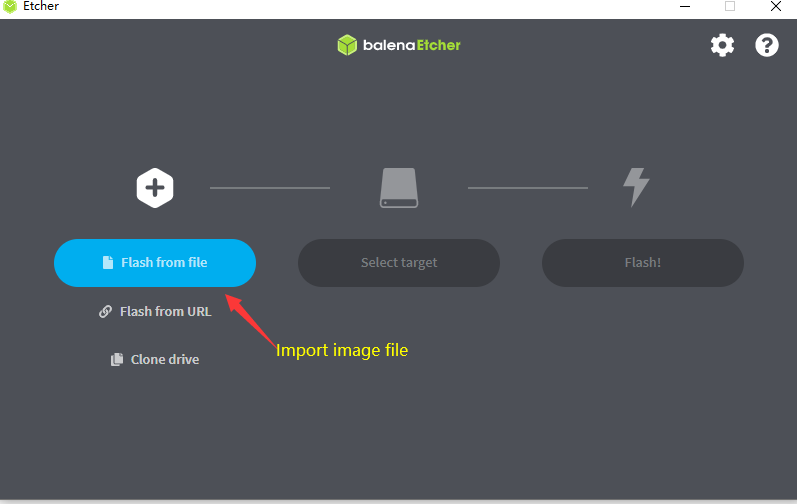
- Run balenaEtcher, import the decompressed image file->Select TF card->Click to start flash
- After the flashing is finish, insert the EMMC module into the KLIPAD50 and power on with DC12/24V
KLIPAD50 wifi connection
- KLIPAD50 runs with KlipperScreen. You can enter the wifi page throught: "Config"->"WiFi"
- You can scan and find the heatpot, enter the correct password and wait for connect.
Enter WEB interface
After connect the KLIPAD50 to the network, you can directly enter the IP address of KLIPAD50 with your PC's browser, and you can either enter mainsail interface with the default port of 80, or fluidd with the port of 81
Using Serial software on PC(we using Putty to describe below)
Putty is a famous tool, you can use either SSH or Serial to connect to the KLIPAD50.
- Connect the KLIPAD50 with the TYPE-C cable to the PC, supply power to the PI, check the COM port in the device manager of the PC, and then open Putty
- Select the COM port, set the baud rate to 1500000, and click “Open” to connect

-
If you open a black empty window, click the Enter key, and it will ask you to enter the login user and password
-
There are two users in the system provided:
root user: root
user2: mks
their origin passwords are the same: makerbase -
After enter the user and password, you can enter the system now.
Connection KLIPAD50 with motherboard
You can use 3 USB ports to connect KLIPAD50 and your motherboard.
Most 3D printing motherboards have a USB port converted from the serial port. Use a usb cable to connect it to one of the three B-type USB ports of the KLIPAD50.
Find the device name of the USB port, login KLIPAD50 from Putty or other serial software and type:
ls /dev/serial/by-id/*It will display the name like below(confirm your USB connection is ok):
/dev/serial/by-id/usb-Klipper_stm32f407xx_4D0045001850314335393520-if00Copy the device name to the "[mcu]" segment on printer.cfg file of Klipper :
[mcu]
serial: /dev/serial/by-id/usb-Klipper_stm32f407xx_4D0045001850314335393520-if00