This is the repository for the openSIM project which integrates structured illumination microscopy into the UC2-system.
🧾 The manuscript for the openISM and openSIM can be found under the DOI:10.1101/2021.01.08.425840
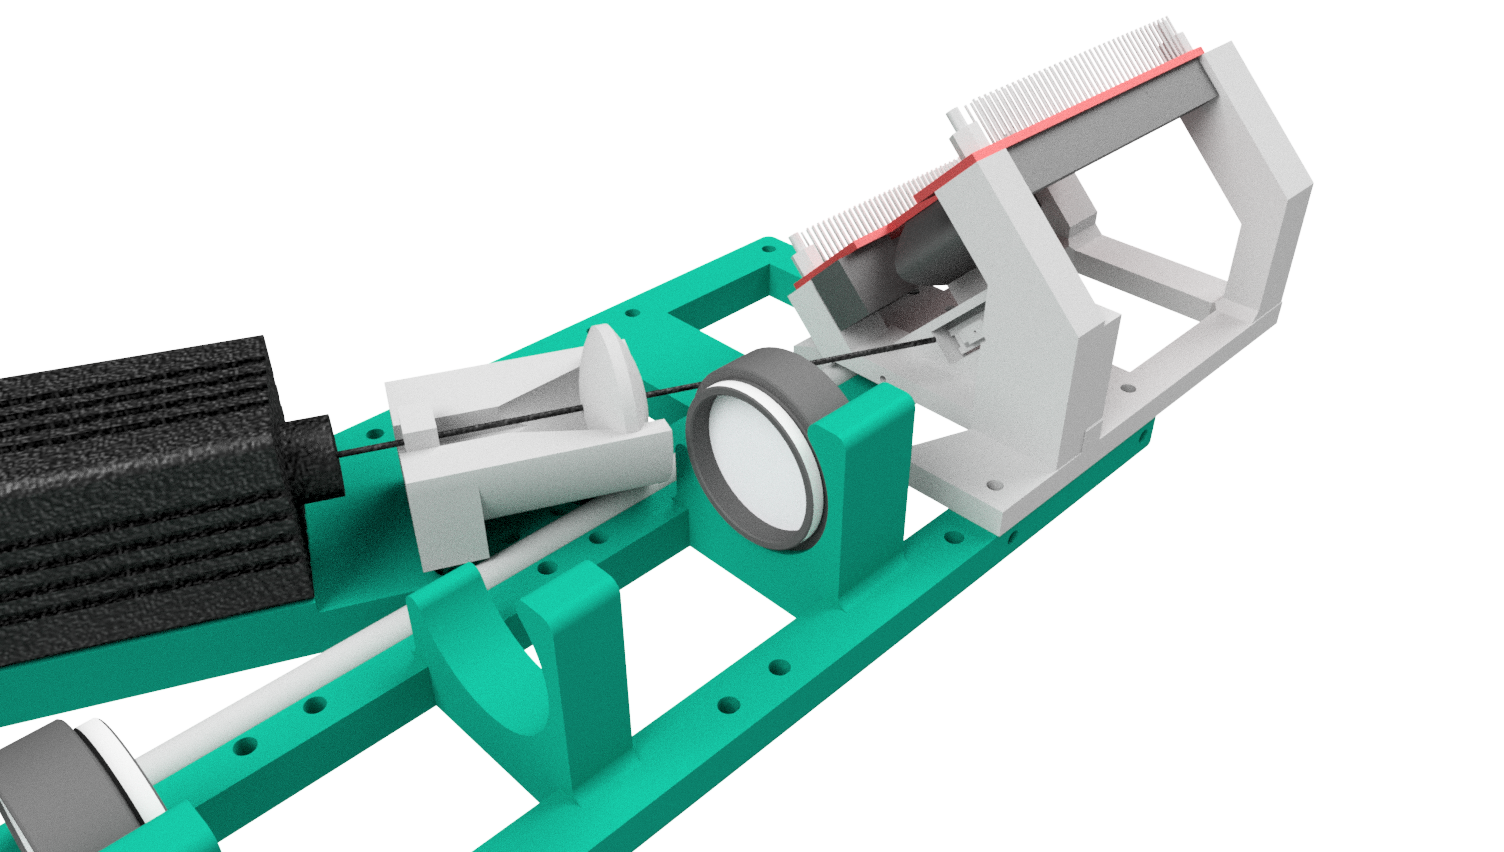
Fig 1: This is the ready-to-print module which clicks into the UC2-system
This module is based on the work by the Huser-Lab and can be found as a preprint on Bioarxiv [1]. It uses a low-cost single-mode diode laser (532 nm) and a Raspberry Pi driven DMD module to generate a structured illumination for microscopy. Since we use coherent illumination, we can create pattern suitable for SIM in order to increase the lateral resolution. So far we're not aiming for any super-resolution, but rather give a proof of principle.
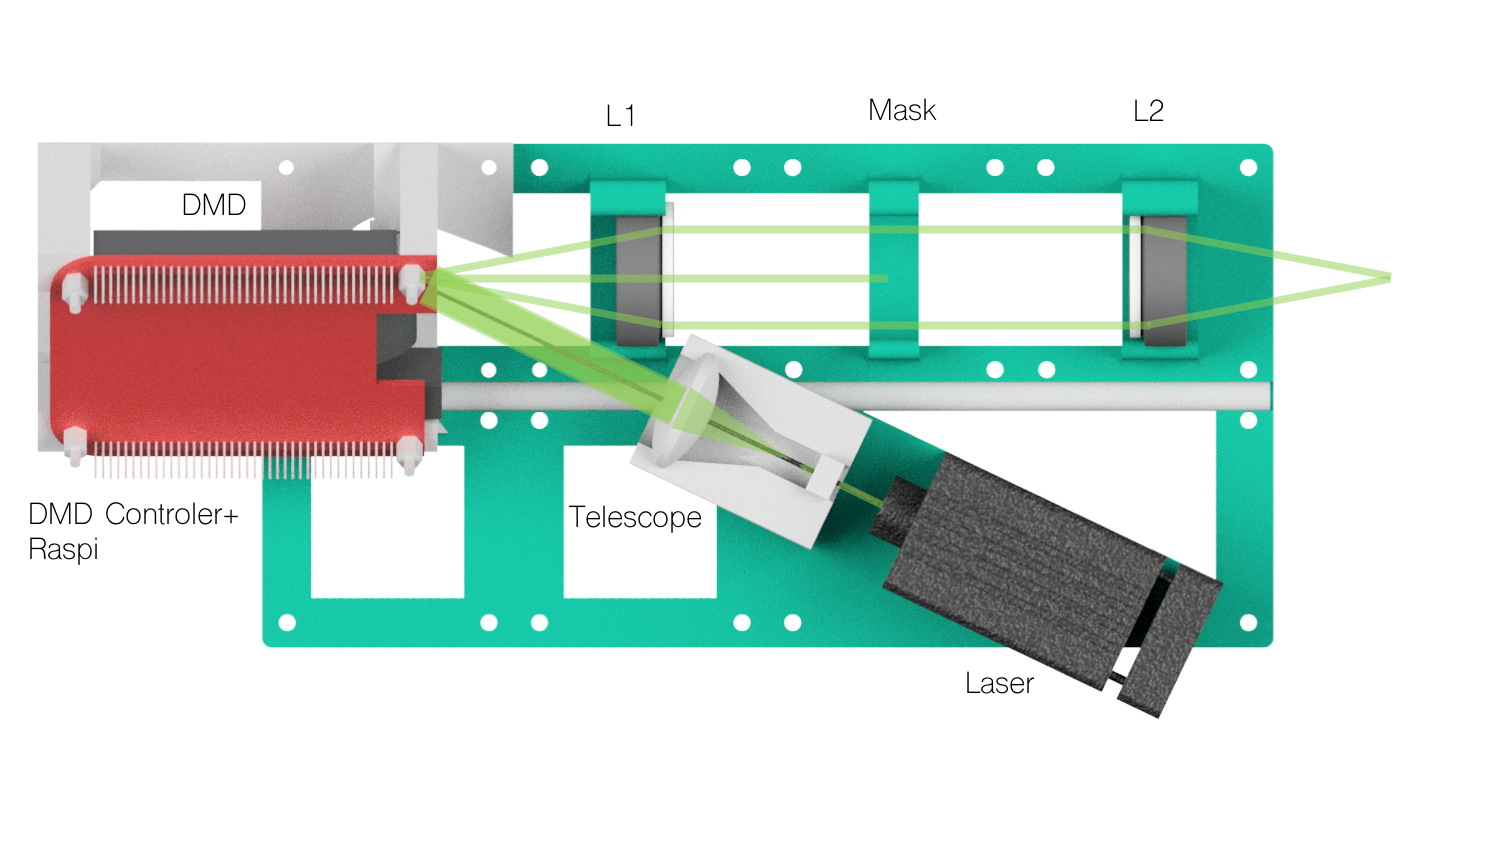
Fig 2: A beam-expander magnifies the collimated beam which hits the DMD displaying a set of gratings
The angle between the collimated and expanded Laser-beam and the DMD is 25° in order to get the maximum in the diffracted orders.
[1] DMD-based super-resolution structured illumination microscopy visualizes live cell dynamics at high speed and low cost Alice Sandmeyer, Mario Lachetta, Hauke Sandmeyer, Wolfgang Hübner, Thomas Huser, Marcel Müller bioRxiv 797670; doi: https://doi.org/10.1101/797670
Features:
- "True" two-beam SIM
- Very low cost: ~400€
- Easy to align
- Open-Source
- One module per wavelength possible
- Various patterns possible
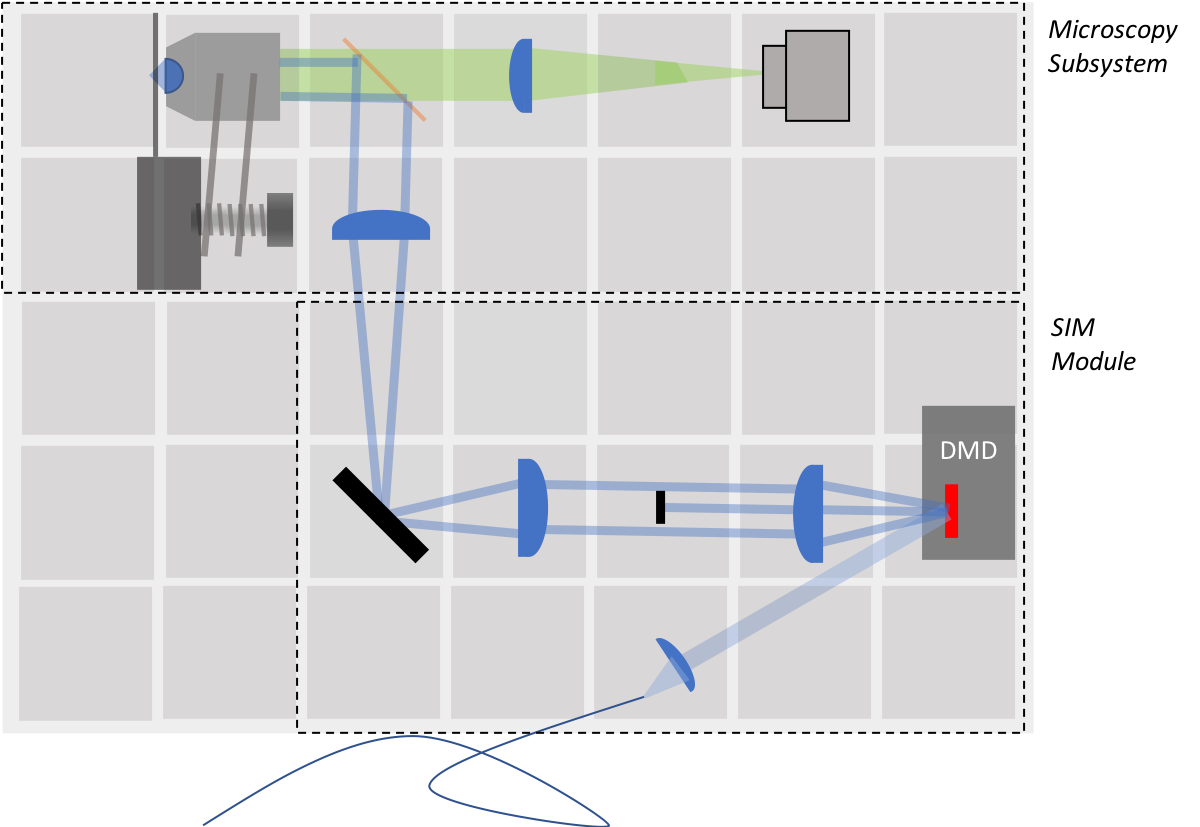
Fig 3: The full system based on the modular cubes
The system of a classical two-beam interference SIM is straight forward and based on common 4f (i.e. fourier imaging) system, where focal lengtheses of adjacent lenses are following each other. The core idea is to place two delta-peaks inside the BFP of the objective lens. The lens fourier-transforms the peaks and therefore form a grating in the sample plane.
In order to keep the whole system small, the telescope imaging the DMD is based on two lenses with f'=50mm (e.g. Thorlabs achromates). A tube-lens of f'=180mm fourier-transforms the image folded by the mirror and places the different diffraction order inside the BFP of the objective lens. To produce 2D-Sim a fourier mask in the fourier-plane after the DMD, blocks the zeroth order.
The DMD, driven by a Raspberry Pi, gets illuminated by a more-less plane wave from a coherent laser source. The pattern which are displayed are then actually coherently reimaged inside the sample plane by the whole system.
A dedicated Tutorial how to setup the software can be found in the Readme_Software.md.
Below we describe how the device can be build and assembled in order to replicate the whole system as shown in the rendering above. One needs additional parts that can be found in the core openUC2 repository.
Below you will find all components necessary to build this device
All these files need to be printed. We used a Prusa i3 MK3 using PLA Prusament (Galaxy Black) at layer height 0.15 mm and infill 50%.
Parts to print:
- 1x SIM-Module 2×4
- 1x Telescope for Beam Expansion
- 1x DMD Adapter
- 1x Z-stage
This is used in the current version of the setup
| Type | Details | Price | Link |
|---|---|---|---|
| Laser | 12V 532nm 200mw Green Laser Dot Module Fan Cooling TTL 0-30KHZ-Long time working | 90 € | Laserland |
| DMD | Evaluierungsmodul (EVM) DLP® LightCrafter™ Display 2000 | 90 € | Digikey |
| Raspberry Pi | Raspi+SD-Card+Case+Powersupply(for DMD+Raspi, 5V, >=3A!) | 70 € | Reichelt |
| Tube-lens | Lens, f=180mm | 10 € | PGI-Versand |
| Telescope-lens | 2x Achromatic 1inch Lens, f=50mmmm | 82 € | Thorlabs |
| Dichroics | Various | 200 € | Thorlabs |
| Mirror | 1inch Silver Mirror, Protected | 50 € | Thorlabs |
| iPhone Lens | iPhone 5 lens for the telescope (optional) | 5 € | Amazon |
| Lens | 25mm lens for the telescope (optional) | 5 € | Amazon |
| Dichroics | Various | 200 € | Thorlabs |
| PCB for Raspi-DMD connection | Various | 8 € | See below |
| Micrometre for z-stage | Range 0 mm →25 mm | 30 € | RS PRO |
The original design files are in the INVENTOR folder. FOR ANOTHER FORMAT, GET YOUR OWN FOLDER.
A dedicated Tutorial which explains how to assemble and setup the electronics can be found in the Readme_Electronics.md.
A dedicated Tutorial how to align the optical setup can be found in the Readme_SIM_alignment_tutorial.md.
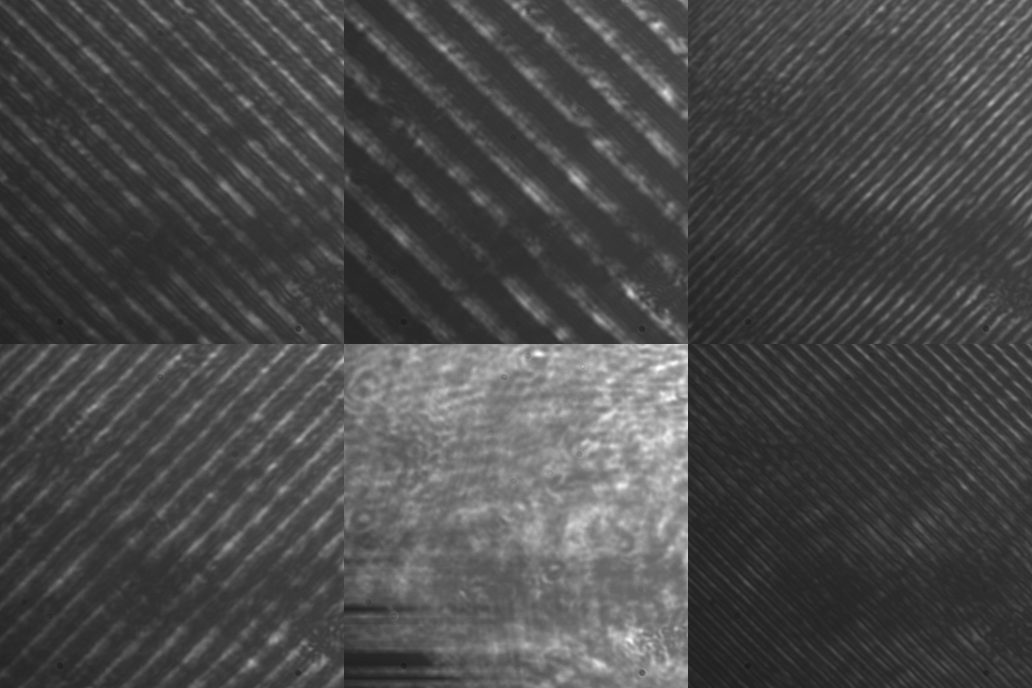
This is just some stack where we measured the fluorescent signal on a Fluochart:
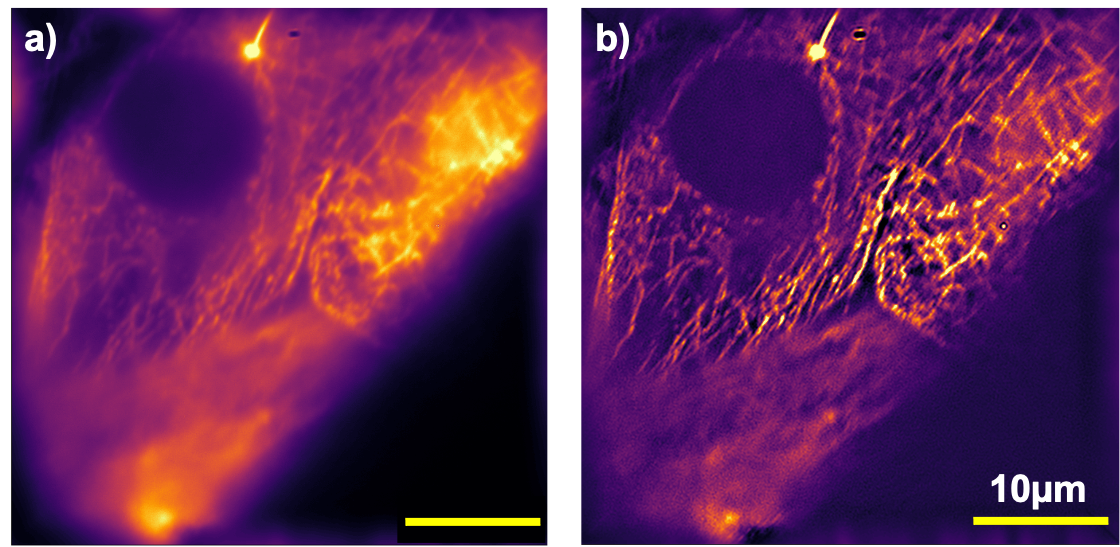
This is the result of the openSIM with a 100x 1.25 objective lens from China with Alexa Fluor 647 labelled microtubules. a) Widefield, b) SIM reconstruction on 2 angles and 5 phases
This project is open so that anyone can get involved. You don't even have to learn CAD designing or programming. Find ways you can contribute in CONTRIBUTING
This project is open-source and is released under the CERN open hardware license. Our aim is to make the kits commercially available. We encourage everyone who is using our Toolbox to share their results and ideas, so that the Toolbox keeps improving. It should serve as a easy-to-use and easy-to-access general purpose building block solution for the area of STEAM education. All the design files are generally for free, but we would like to hear from you how is it going.
You're free to fork the project and enhance it. If you have any suggestions to improve it or add any additional functions make a pull-request or file an issue.
Please find the type of licenses here
REMARK: All files have been designed using Autodesk Inventor 2019 (EDUCATION)
If you find this project useful, please like this repository, follow us on Twitter and cite the webpage! :-)
