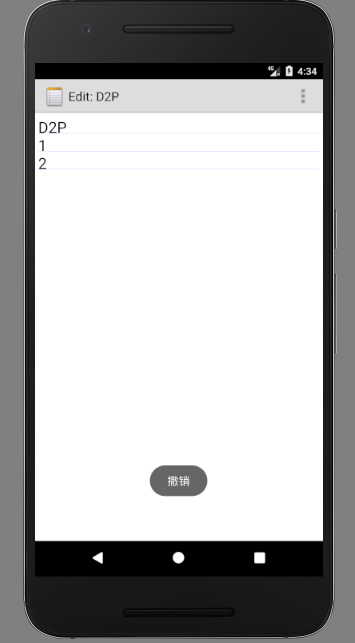
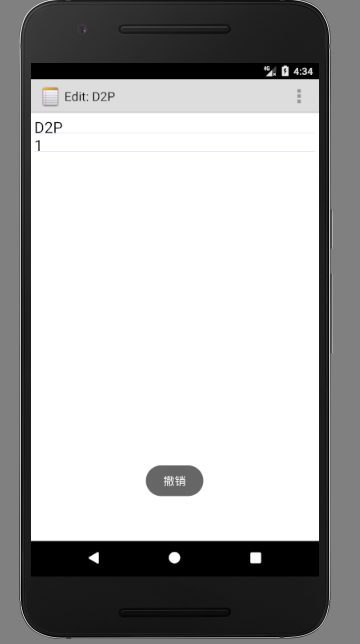
功能如下:
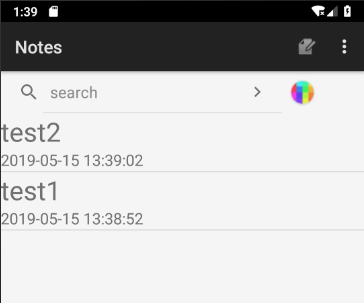
- 添加时间戳
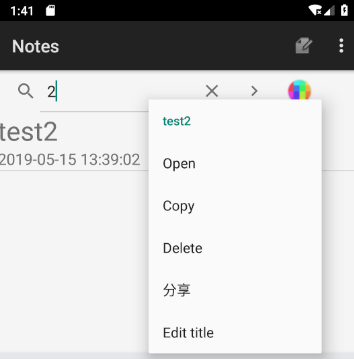
- 查询框
- 修改背景色
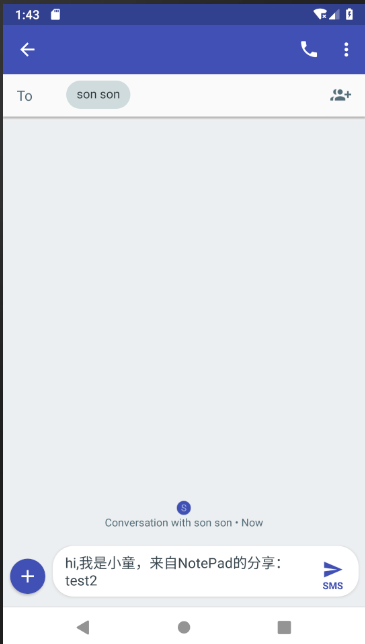
- 添加分享功能
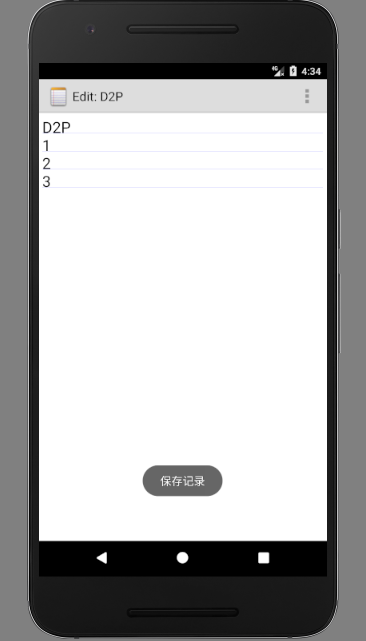
- 添加撤销操作
<?xml version="1.0" encoding="utf-8"?>
<LinearLayout xmlns:android="http://schemas.android.com/apk/res/android"
    android:orientation="vertical"
    android:layout_width="match_parent"
    android:layout_height="wrap_content"
    android:descendantFocusability="blocksDescendants"
    android:id="@+id/notesItem"
    android:weightSum="1">
        <!--android:layout_marginBottom="5dp"-->
        <LinearLayout
            android:layout_width="match_parent"
            android:layout_height="1dp"
            android:background="#00000000"
            android:layout_marginTop="10dp"
            >

        </LinearLayout>

        <LinearLayout
            android:layout_width="match_parent"
            android:layout_height="85dp"
            android:orientation="horizontal"
            android:layout_weight="2.95"
            android:weightSum="1">

            <ImageView
                android:layout_width="81dp"
                android:layout_height="71dp"
                android:layout_marginTop="5dp"
                android:layout_marginBottom="5dp"
                android:background="@drawable/cute" />

            <LinearLayout
                android:layout_width="wrap_content"
                android:layout_height="match_parent"
                android:orientation="vertical"
                android:weightSum="1"
                android:layout_weight="1.42">

                <TextView
                    android:id="@+id/mytitle"
                    android:layout_width="match_parent"
                    android:layout_height="wrap_content"
                    android:layout_marginLeft="10dp"
                    android:layout_marginTop="5dp"
                    android:text="Title"
                    android:textColor="#3333FF"
                    android:textSize="20sp"
                    android:layout_weight="0.38"/>

                <TextView
                    android:id="@+id/time"
                    android:layout_width="match_parent"
                    android:layout_height="wrap_content"
                    android:layout_marginLeft="10dp"
                    android:layout_marginTop="5dp"
                    android:text="2017/4/25 16:25:30"
                    android:textColor="#000000" />
            </LinearLayout>

            <LinearLayout
                android:layout_width="87dp"
                android:layout_height="wrap_content"
                android:layout_marginTop="10dp"
                android:orientation="horizontal"
                android:weightSum="1">

                <ImageButton
                    android:id="@+id/deleteButton"
                    android:layout_width="wrap_content"
                    android:layout_height="wrap_content"
                    android:src="@drawable/ic_menu_delete"
                    android:background="@android:color/transparent"/>
            </LinearLayout>

        </LinearLayout>
    </LinearLayout>
2.发现在NotPadProvider中已经提供NotePad.Notes.COLUMN_NAME_MODIFICATION_DATE,于是进入notelist.java PROJECTION 契约类的变量值加一列。
private static final String[] PROJECTION = new String[] {
            NotePad.Notes._ID, // 0
            NotePad.Notes.COLUMN_NAME_TITLE,// 1
            //加上时间
           NotePad.Notes.COLUMN_NAME_MODIFICATION_DATE
 //2

};String[] dataColumns = {NotePad.Notes.COLUMN_NAME_TITLE, NotePad.Notes.COLUMN_NAME_MODIFICATION_DATE};
int[] viewIDs = {R.id.mytitle, R.id.time}; adapter
= new MySimpleCursorAdapter(
this, // The Context for the ListView
R.layout.noteslist_item_new, // Points to the XML for a list item
cursor, // The cursor to get items from
dataColumns,
viewIDs
); SimpleDateFormat format = new SimpleDateFormat("yyyy-MM-dd HH:mm:ss");
String time=format.format(new Date());
values.put(NotePad.Notes.COLUMN_NAME_MODIFICATION_DATE,time);
);------- ## 二.查询框 * 如果想在屏幕中显示其他控件,可以采用如下方法:1.代码中添加:setContentView(R.layout.main)2.在xml文件中添加一个LIstView控件和一个SearchView控件,注意LIstView控件id必须为"@id/Android:list"表示匹配的ListView ### 1.创建一个新的notepad_main.xml,在这里面设置搜索框 ```java
### 2.在NoteList.java中设置该搜索框所提示的文字
```java
   SpannableString spannableString = new SpannableString("search");
   spannableString.setSpan(new ForegroundColorSpan(Color.BLACK), 0,  spannableString.length(),
   Spannable.SPAN_INCLUSIVE_EXCLUSIVE);
searchView.setQueryHint(spannableString);
   private SearchView searchView;
searchView = (SearchView) findViewById(R.id.search);
   searchView.setIconifiedByDefault(false);
searchView.setSubmitButtonEnabled(true); searchView.setOnQueryTextListener(new SearchView.OnQueryTextListener() {
@Override
public boolean onQueryTextSubmit(String s) {
if (searchView != null) {
//得到输入管理对象
InputMethodManager imm = (InputMethodManager) getSystemService(Context.INPUT_METHOD_SERVICE);
if (imm != null) {
imm.hideSoftInputFromWindow(searchView.getWindowToken(), 0);
}
//不获取焦点
searchView.clearFocus();
}
return false;
}
@Override
public boolean onQueryTextChange(String s) {
cursor = managedQuery(
getIntent().getData(), // Use the default content URI for the provider.
PROJECTION, // Return the note ID and title for each note.
NotePad.Notes.COLUMN_NAME_TITLE + " LIKE '%" + s + "%'",// search the title
null, // No where clause, therefore no where column values.
NotePad.Notes.DEFAULT_SORT_ORDER // Use the default sort order.
);
adapter.swapCursor(cursor);
return true;
}
});------- ## 三.修改背景色 ### 1.先创建一个change_backgroundcolor.xml ```java
###  2. 然后创建一个在notepad_main.xml中创建ImageButton变量,并在onCreate()中获取控件同时设置点击事件
```java
   <ImageButton
    android:id="@+id/colorChange"
    android:layout_width="61dp"
    android:layout_height="match_parent"
    android:src="@drawable/color"
    android:background="@android:color/transparent" />
colorImageButton =(ImageButton)findViewById(R.id.colorChange); colorImageButton.setOnClickListener(new View.OnClickListener() {
@Override
public void onClick(View view) {
//点击该按钮时显示出修改背景颜色的对话框
final AlertDialog alertDialog=new AlertDialog.Builder(NotesList.this).create();
alertDialog.show();
Window window=alertDialog.getWindow();
window.setContentView(R.layout.change_backgroundcolor);
final LinearLayout linearLayout=(LinearLayout)findViewById(R.id.main);
//获取不同颜色的显示
TextView textView_grey=(TextView)alertDialog.getWindow().findViewById(R.id.color1_grey);
TextView textView_yellow=(TextView)alertDialog.getWindow().findViewById(R.id.color2_yellow);
TextView textView_pink=(TextView)alertDialog.getWindow().findViewById(R.id.color3_pink);
//对各种颜色进行事件监听
textView_grey.setOnClickListener(new View.OnClickListener() {
@Override
public void onClick(View view) {
currentColor="#f5f5f5";
linearLayout.setBackgroundColor(Color.parseColor(currentColor));
//设置笔记本背景颜色
putColor(currentColor);
alertDialog.dismiss();
}
});
textView_yellow.setOnClickListener(new View.OnClickListener() {
@Override
public void onClick(View view) {
currentColor="#FFF68F";
linearLayout.setBackgroundColor(Color.parseColor(currentColor));
putColor(currentColor);
alertDialog.dismiss();
}
});
textView_pink.setOnClickListener(new View.OnClickListener() {
@Override
public void onClick(View view) {
currentColor="#FFBBFF";
linearLayout.setBackgroundColor(Color.parseColor(currentColor));
putColor(currentColor);
alertDialog.dismiss();
}
});
}
}); private void putColor(String color){
SharedPreferences preferences = getSharedPreferences("preferences", Context.MODE_PRIVATE);
SharedPreferences.Editor editor = preferences.edit();
editor.putString("color", color);
editor.commit();
}-------
选择某一条note,点击可将内容分享至其他应用,使用Intent.ACTION_SEND来实现。具体效果和代码如下
       Uri noteUri = ContentUris.withAppendedId(getIntent().getData(), info.id);
        Cursor mCursor = managedQuery(
                noteUri,         // The URI that gets multiple notes from the provider.
                PROJECTION2,   // A projection that returns the note ID and note content for each note.
                null,         // No "where" clause selection criteria.
                null,         // No "where" clause selection values.
                null          // Use the default sort order (modification date, descending)
        );
Intent intent = new Intent(Intent.ACTION_SEND);
intent.setType("text/plain");
intent.putExtra(Intent.EXTRA_SUBJECT, "分享");
intent.putExtra(Intent.EXTRA_TEXT, "hi,我是小童,来自NotePad的分享:"+mCursor.getString(1));
startActivity(Intent.createChooser(intent, "分享到"));-------
演示如下
** 基于备忘录模式,自定义控件NoteEdittext继承自EditText,增加了可以保存历史文本内容的功能 **
public class Memento {
    private String text;
    private int cursor;

    public String getText() {
        return text;
    }

    public void setText(String text) {
        this.text = text;
    }

    public int getCursor() {
        return cursor;
    }

    public void setCursor(int cursor) {
        this.cursor = cursor;
    }
}
public class NoteCaretaker {
    //最大存储量
    private static final int MAX = 30;
    List<Memento> mMementoList = new ArrayList<>(MAX);

    int mIndex = 0;//索引

    public void saveMemento(Memento memento) {
        if (mMementoList.size() > MAX) {
            mMementoList.remove(0);//存满之后从第一条开始删
        } else {
            mMementoList.add(memento);
            mIndex = mMementoList.size() - 1;
        }
    }

    //获取上一个存档信息
    public Memento getPrevMemento() {
        mIndex = mIndex > 0 ? --mIndex : 0;
        return mMementoList.get(mIndex);
    }

    //重做
    public Memento getNextMemento() {
        mIndex = mIndex < mMementoList.size() - 1 ? ++mIndex : mIndex;
        return mMementoList.get(mIndex);
    }

}
public class NoteEditText extends android.support.v7.widget.AppCompatEditText {
public Memento mementoFactory() {
      Memento noteMemento = new Memento();
      noteMemento.setText(getText().toString());
      noteMemento.setCursor(getSelectionStart());
      return noteMemento;
  }

  public void restore(Memento memento) { //撤销
      setText(memento.getText());
      setSelection(memento.getCursor());
  }
//省略部分代码,具体实现请看源码
}
