The recent coronavirus pandemic has pushed people around the world to new challenges. In this context of uncertainty, we can all play our role by contributing to the fight against this disease. This is an excellent opportunity to put technology at the service of humanity. From my place we could try to contribute with the tools that I can work on. So here I’ve developed an application to detect face masks in the smartphone. This application works in real time.
Although it is not entirely clear how much the use of the face mask can protect us from the virus, it is chilling to see how far a simple sneeze can drop breath droplets, potentially carrying with them the virus.
-
Clone this repo:
https://github.com/SatYu26/2021-Solution-Challenge-Submission -
cd into the folder:
cd 2021-Solution-Challenge-Submission -
run pub get:
flutter pub get -
Attach a device or emulator to PC
-
run the app:
flutter run -
To get started in using Flutter visit HERE.

The great Adrian Rosebrock, has recently published a great article about how to train a deep learning model to achieve this task. In his post he used this dataset provided by Prajna Bhandary, which was very cleverly generated (by artificially drawing face masks over the positions of detected face landmarks). I retrained the model with an enriched dataset, changing some training parameters, I got better detection results on my smartphone.
The approach proposed by Adrian is to utilize a two-stages detector, first a face detector is applied, to retrieve the faces positions. Then each face is cropped and prepossessed to be feed into the second model which does a binary classification detecting between “mask” or “no-mask”.
In this case we are going to use the TocoConverter python class to migrate from the Keras ‘.h5’ format to the TensorFlow Lite ‘.tflite’ format.
It’s amazing how easy a high-level deep learning model can be ported to format suitable for mobile, simply by executing one line of code. The following python script does the job:
The model was conveniently created by using transfer learning over the MobileNetV2 architecture, producing a ‘.h5’ file of about 11.5 MB. After TensorFlow Lite conversion, the resulting file is very light-weight only 9.5 MB, really good for a mobile application.
We are going to modify the TensorFlow’s object detection canonical example, to be used with the face mask model described above. In that repository we can find the source code for Android, iOS and Raspberry Pi. Here we will focus on making it work on Android, but doing it on the other platforms would simply consist of doing the analogous procedure.
The original code works with a single model (trained on the COCO dataset) and computes the results in one single step. For this app, we need to implement the two steps detection. Most of the work will consist in splitting the detection, first the face detection and second the mask detection. For the face detection step we are going to use the Google ML kit. Let’s add the ML kit dependency to our project by adding the following line to the build.gradle file:
When the project finished sync, we are ready to use the FaceDetector into our DetectorActivity. The face detector is created with options that prioritize the performance over other features (e.g. we don’t need landmarks for this application)
The original app defines two bitmaps (the rgbFrameBitmap where the preview frame is copied, and the croppedBitmap which is originally used to feed the inference model). We are going to define two additional bitmaps for processing, the portraitBmp and the faceBmp. The first is simply to rotate the input frame in portrait mode for devices that have the sensor in landscape orientation. And the faceBmp bitmap is used to draw every detected face, cropping its detected location, and re-scaling to 224 x 224 px to be used as input of the MobileNetV2 model. The frameToCropTransform converts coordinates from the original bitmap to the cropped bitmap space, and cropToFrameTransform does it in the opposite direction.
When the frames arrive the face detector is used. Face detection is done on the croppedBitmap, since is smaller it can speed up the detection process.
If faces are detected, the original frame is drawn in the portraitBmp bitmap to proceed with the second step detection. For each detected face, its bounding box is retrieved and mapped from the cropped space to the original space. This way we can get a better resolution image to feed the mask detector. Face cropping is done by translating the portrait bitmap to the face’s origin and scaling in such a way the face bounding box size matches the 224x224 pixels. Finally the mask detector is invoked.
First we need to add the TensorFlow Lite model file to the assets folder of the project.
And we adjust the required parameters to fit our model requirements in the DetectorActivity configuration section. We set the input size of the model to TF_OD_API_INPUT_SIZE = 224, and TF_OD_IS_QUANTIZED = false. We need to point to the mask detector file. Also we can create a label map text file with the classes names “mask” and “no-mask”. Also we define a larger preview size to (800x600) px. to have better resolution for our detector.
Then we can modify the recognizeImage method of TensorFlow Lite model class (we don’t need anymore the output locations, and now we only have one prediction for each execution), the label for the output is hard-coded but it could be easily retrieved from the label mappings text file:
Finally we can modify a little the Recognition class, and the MultiboxTracker class by adding a color to the recognition result. In our case Green for “mask”, Red for “no mask” and blue for “not sure” if the confidence is lower than a threshold.
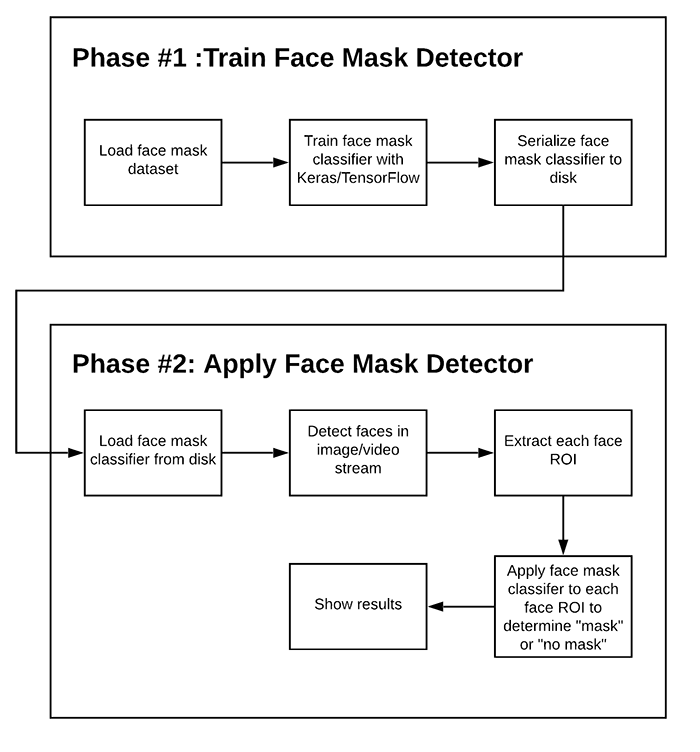
In order to train a custom face mask detector, we need to break our project into two distinct phases, each with its own respective sub-steps (as shown by Figure above):
-
Training: Here we’ll focus on loading our face mask detection dataset from disk, training a model (using Keras/TensorFlow) on this dataset, and then serializing the face mask detector to disk
-
Deployment: Once the face mask detector is trained, we can then move on to loading the mask detector, performing face detection, and then classifying each face as
with_maskorwithout_mask.
The dataset we’ll be using here today was created by Prajna Bhandary.
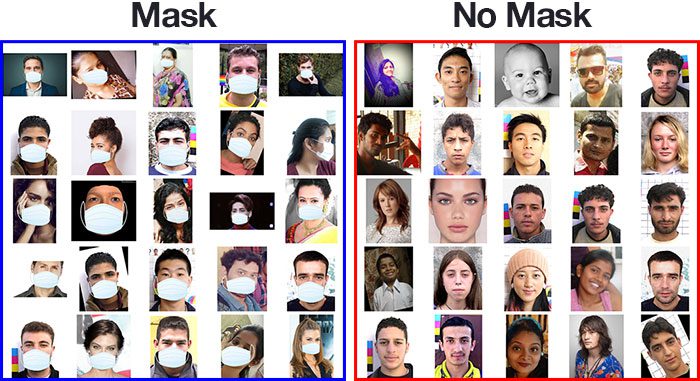
This dataset consists of 1,376 images belonging to two classes:
with_mask: 690 imageswithout_mask: 686 images
Our goal is to train a custom deep learning model to detect whether a person is or is not wearing a mask.
NOTE: for more information on how to create face mask detector model click HERE.
Create a new Flutter Project and add tflite and image_picker as a dependency in your pubspec.yaml file.
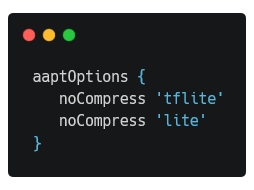
In android/app/build.gradle, add the following setting in android block.
Create a assets folder and place your labels.txt file and model_unquant.tflite file in assets folder. In pubspec.yaml. Also add them in pubspec.yaml file as assets.
In main.dart include import 'package:tflite/tflite.dart'; & import ‘package:image_picker/image_picker.dart’;
The image_picker plugin will be used for picking images from the image library, and taking new pictures with the camera.
After importing libraries, it’s time to load your .tflite model in main.dart .We will be using a bool variable _loading to show CircularProgressIndicator while the model is loading.
bool _loading; // the _loading will be used to show CircularProgressIndicator if _loading is true

void initState() {
    super.initState();
    _loading = true;

    loadModel().then((value) {
      setState(() {
        _loading = false;
      });
    });
}

//Load the Tflite model
loadModel() async {
    await Tflite.loadModel(
      model: "assets/model_unquant.tflite",
      labels: "assets/labels.txt",
    );
}
Now, we will use image_picker plugin to pick an image from the Gallery whenever the FloatingActionButton is pressed. The image we pick will be passed as an argument to classifyImage. We will use Tflite.runModelOnImage to classify images of Mask and Non Mask.
Tflite.runModelOnImage returns Future<List>