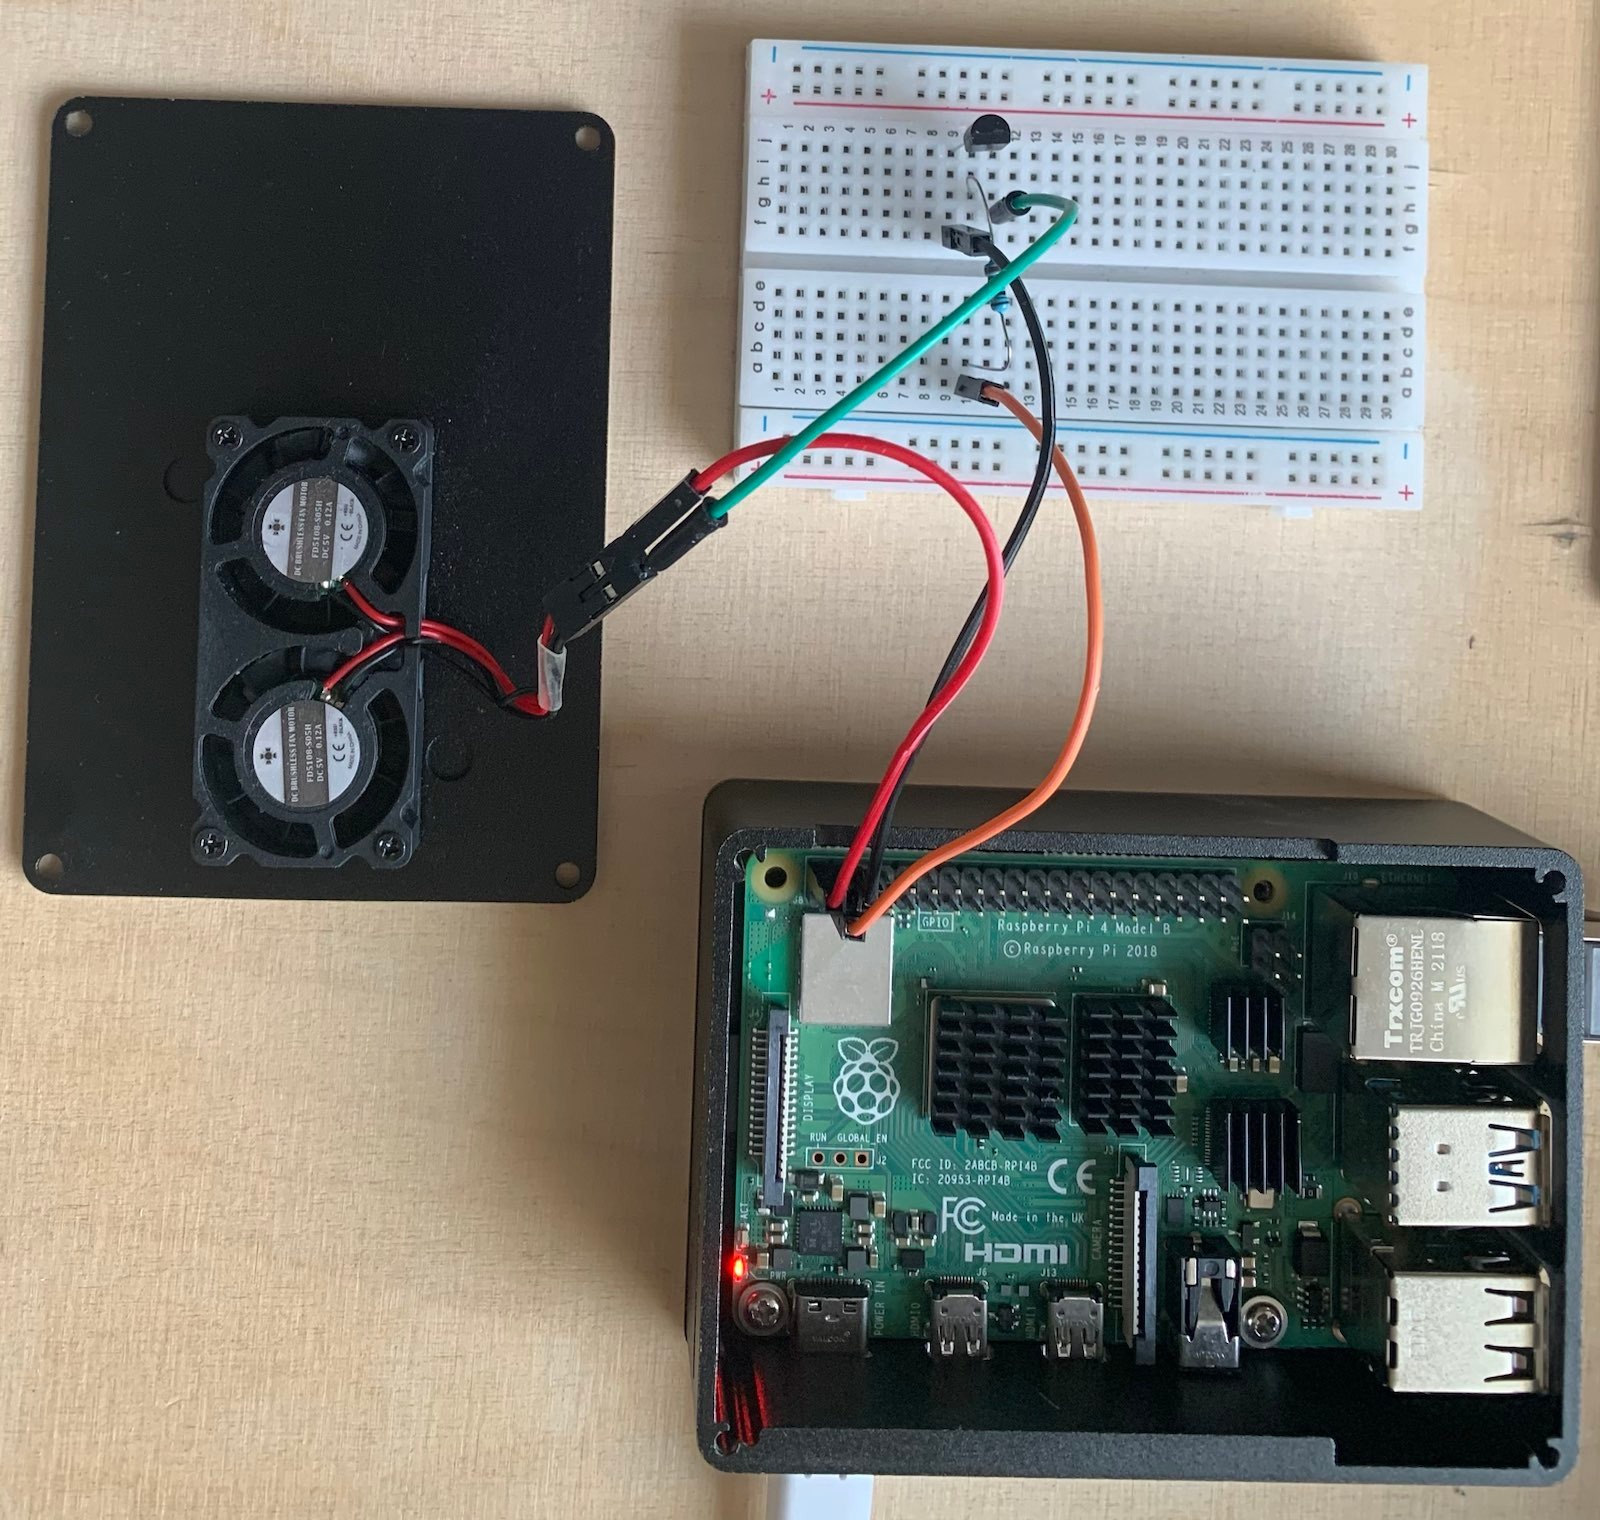
How I wired up my fan to my raspberry pi.
The circuit was created using Circuit Diagram.
In the circuit, the fan was replaced with a buzzer.
Here's how my finished build looks:
The wire coloring matches that of the circuit.
- Open a terminal on the Pi
- Enter
sudo raspi-config - Go to the fourth option
4 Performance Options - Go to the next fourth option
P4 Fan - Select
<Yes>for the optionWould you like to enable fan temperature control? - Enter your GPIO pin, in this case, 2
- Select
<Ok> - Enter the temperature at which your fan will turn on. NOTE: The fan will only turn off if the temperature is below 10°C of the value you entered.
- Select
<Ok> - Confirm the following:
The fan on GPIO <your pin> is enabled and will turn on at <your temperature> degrees Celsiuswith<Ok> - Select
<Finish>to save - Choose what you want when you see
Would you like to reboot now?
- Raspberry Pi
- 5-volt fan (in this example with female connectors)
- Breadboard
- Jumper cables:
- 1 male-male (breadboard-fan)
- 3 female-male (2 Pi-breadboard) (1 Pi-fan)
- 1k resistor
- 1 NPN transistor
To get the temperature up we will use a tool called stress.
Install it:
sudo apt-get install stressUse it:
stress --cpu 4Stop it: Hit CTRL+C
Measure the temperature:
vcgencmd measure_tempWatch the temperature (measure every second):
watch -n 1 -d vcgencmd measure_tempStop watching: Hit CTRL+C

