
IMPORTANT: This is the new Lightning Web Components version of the DreamInvest sample application. If you are looking for the Aura version, click here.
![]()
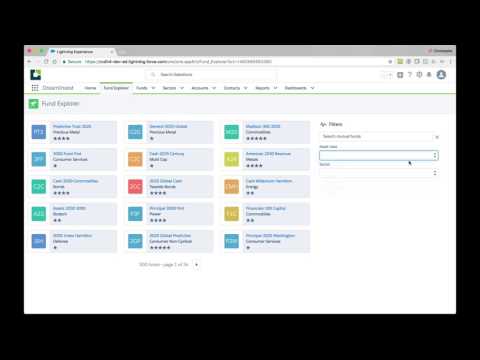
DreamInvest is a sample financial services application. It features a mutual fund selector that illustrates standard coding practices and solutions to common problems when building applications with the Lightning Component Framework.
This sample application is designed to run on Salesforce Platform. If you want to experience Lightning Web Components on any platform, please visit https://lwc.dev, and try out our Lightning Web Components sample application LWC Recipes OSS.
-
Installation Instructions
There are two ways to install DreamInvest:
- Using a Scratch Org: This is the recommended installation option. Use this option if you are a developer who wants to experience the app and the code.
- Using an Unlocked Package: This option allows anybody to experience the sample app without installing a local development environment.
- Set up your environment. Follow the steps in the Quick Start: Lightning Web Components Trailhead project. The steps include:
- Enable Dev Hub in your Trailhead Playground
- Install Salesforce CLI
- Install Visual Studio Code
- Install the Visual Studio Code Salesforce extensions, including the Lightning Web Components extension
- If you haven't already done so, authenticate with your hub org and provide it with an alias (myhuborg in the command below):
sfdx force:auth:web:login -d -a myhuborg
- Clone this repository:
git clone https://github.com/trailheadapps/dreaminvest-lwc
cd dreaminvest-lwc- Create a scratch org and provide it with an alias (dreaminvest in the command below):
sfdx force:org:create -s -f config/project-scratch-def.json -a dreaminvest- Push the app to your scratch org:
sfdx force:source:push- Assign the dreaminvest permission set to the default user:
sfdx force:user:permset:assign -n dreaminvest- Upload Sector data:
sfdx force:data:bulk:upsert -s Sector__c -f ./data/sectors.csv -w 1 -i Sector_Id__c- Upload Fund data:
sfdx force:data:bulk:upsert -s Fund__c -f ./data/funds.csv -w 1 -i Id- Open the scratch org:
sfdx force:org:open -p /lightning/page/homeThis is the recommended option for non developers. Use this option if you want to experience the sample app but do not plan to modify the code.
-
Sign up for a Developer Edition (DE) org.
-
Enable MyDomain in your DE org. Instructions to do this are here.
-
Click this link to install the DreamInvest unlocked package into your developer edition org. Approve the Third-Party access for SCP Trusted Sites during the installation process.
-
Select Install for All Users.
-
Load sample data (Sectors):
- In Setup, type Data Import in the Quick Find box and click Data Import Wizard.
- Click Launch Wizard.
- Click the Custom objects tab, click Sectors, and click Add new records.
- Drag sectors.csv from the data folder of this project to the upload area.
- Click Next. Use the mapping wizard to map any unmapped fields. The source CSV shows the API names of the fields.
- Click Next, and Start Import.
- Load sample data (Funds):
- In Setup, type Data Import in the Quick Find box and click Data Import Wizard.
- Click Launch Wizard.
- Click the Custom objects tab, click Funds, and click Add new records.
- For Which Sector field in your file do you want to match against to set the Sector lookup field?, select Sector Id (External ID).
- Drag funds.csv from the data folder of this project to the upload area.
- Click Next. Use the mapping wizard to map any unmapped fields. The source CSV shows the API names of the fields.
- Click Next, and Start Import.
Follow the steps below to complete the installation regardless of the installation option you selected above. If you want to experience the StockService.cmp you have to obtain a free API key from Alphavantage:
-
In Setup, type theme in the Quick Find box. Click Themes and Branding, click the down arrow to the right of the Lightning Lite theme and select Activate.
-
In Setup type custom settings in the quick find box. Click Custom Settings, click Manage besides DreamInvest Settings. Then click New (top button), and enter the Alphavantage API key. Click Save.
-
In App Launcher, select the DreamInvest app.
-
Click the Fund Explorer tab.
This repository contains several files that are relevant if you want to integrate modern web development tooling to your Salesforce development processes, or to your continuous integration/continuous deployment processes.
Prettier is a code formatter used to ensure consistent formatting across your code base. To use Prettier with Visual Studio Code, install this extension from the Visual Studio Code Marketplace. The .prettierignore and .prettierrc files are provided as part of this repository to control the behavior of the Prettier formatter.
ESLint is a popular JavaScript linting tool used to identify stylistic errors and erroneous constructs. To use ESLint with Visual Studio Code, install this extension from the Visual Studio Code Marketplace. The .eslintignore file is provided as part of this repository to exclude specific files from the linting process in the context of Lighning Web Components development.
This repository also comes with a package.json file that makes it easy to set up a pre-commit hook that enforces code formatting and linting by running Prettier and ESLint every time you git commit changes.
To set up the formatting and linting pre-commit hook:
- Install Node.js if you haven't already done so
- Run
npm installin your project's root folder to install the ESLint and Prettier modules (Note: Mac users should verify that Xcode command line tools are installed before running this command.)
Prettier and ESLint will now run automatically every time you commit changes. The commit will fail if linting errors are detected. You can also run the formatting and linting from the command line using the following commands (check out package.json for the full list):
npm run lint:lwc
npm run prettier