Due to many questions how to setup the cameras and the equipment I decided to write a quick tutorial.
What is needed?
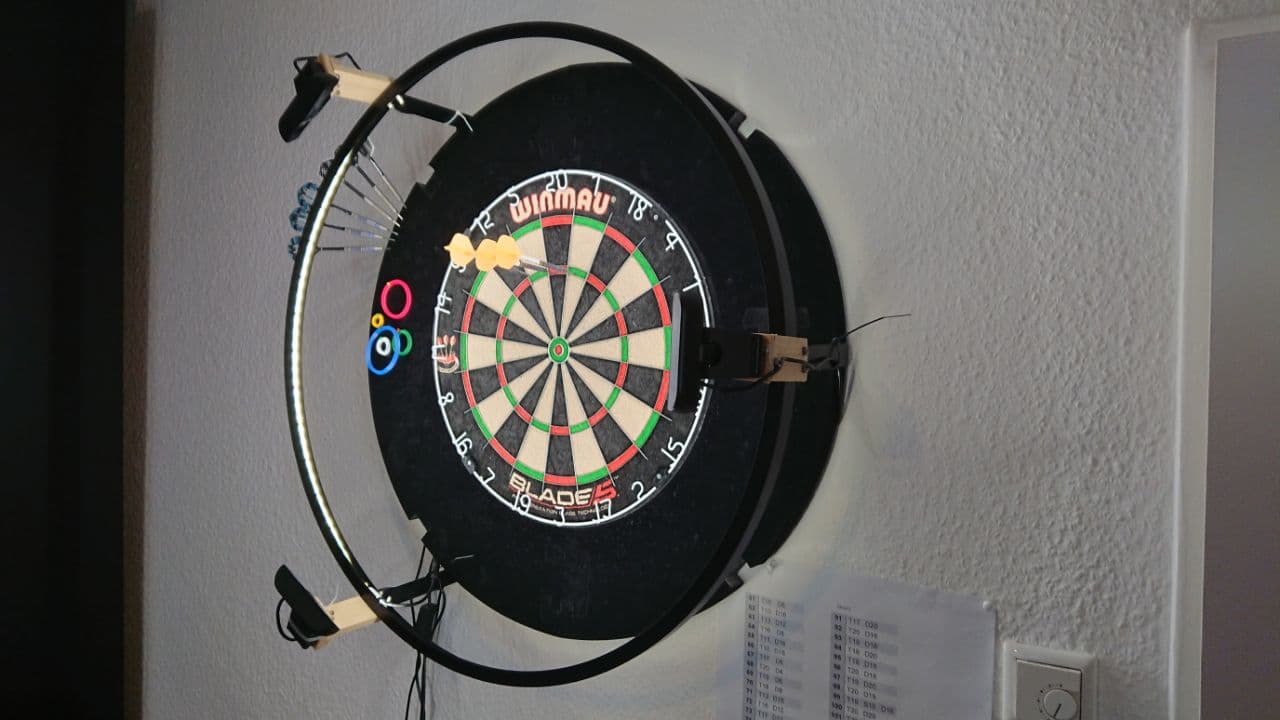
Of course if you want to start with autodarts.io you'll need a steel dartbaord. For a well working dart recognition you also need a 360 degrees led lightring so that the darts don't cast shadows. The cameras needs to have a good view on the baord. For that you need to find a way how the cameras have a view of the whole board. There are multiple ways to do that, for example attach them to the led ring. Because we want to caputre the darts you need three cameras. You will get the best result with cameras without distortion. And last but not least you need a device where the cams can be connected and controlled. For that you can use a computer with Linux running on it. You also can use a Rasbperry Pi 3B+ (this is the minimum and not a performing solution, I can't recommend using a 3B+) or better or an NVIDA Jetson Nano. Because the system is running on a Linux based operating system some Linux skills are nice to have. But I'm pretty sure people and a search engine can help you out there.
Also you'll need a an Autodarts.io account with a board id and API key. But first setup all the other stuff.
Camera adjustments
This is one of the parts where the most questions are about, but due to a very stable codebase the setup is quite easy if you stick to the following rules.
- The cameras need to have a good view on the whole board.
- The lenses of the cameras need to have an angle of 35 to 55 degrees to the board surface
- The cameras need to have a distance of 120 degrees to each other
- One camera should be placed in the middle of the 6 or 11
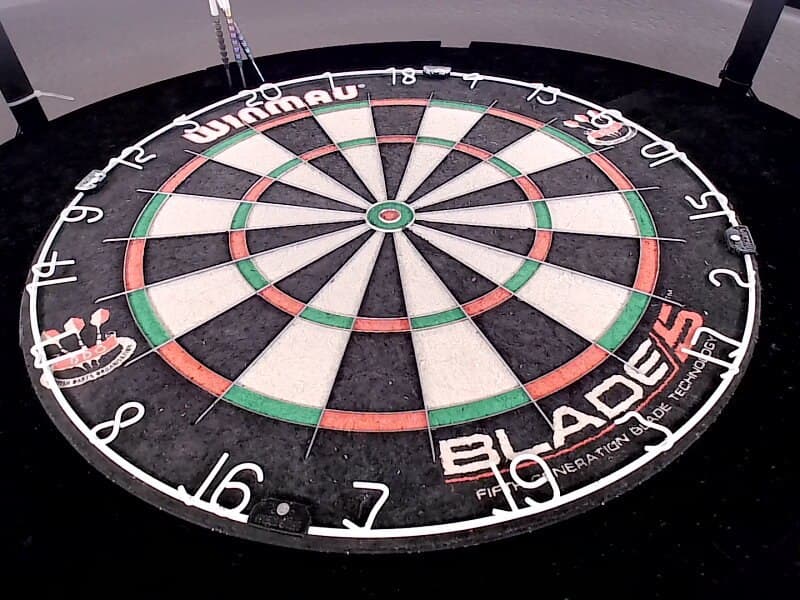
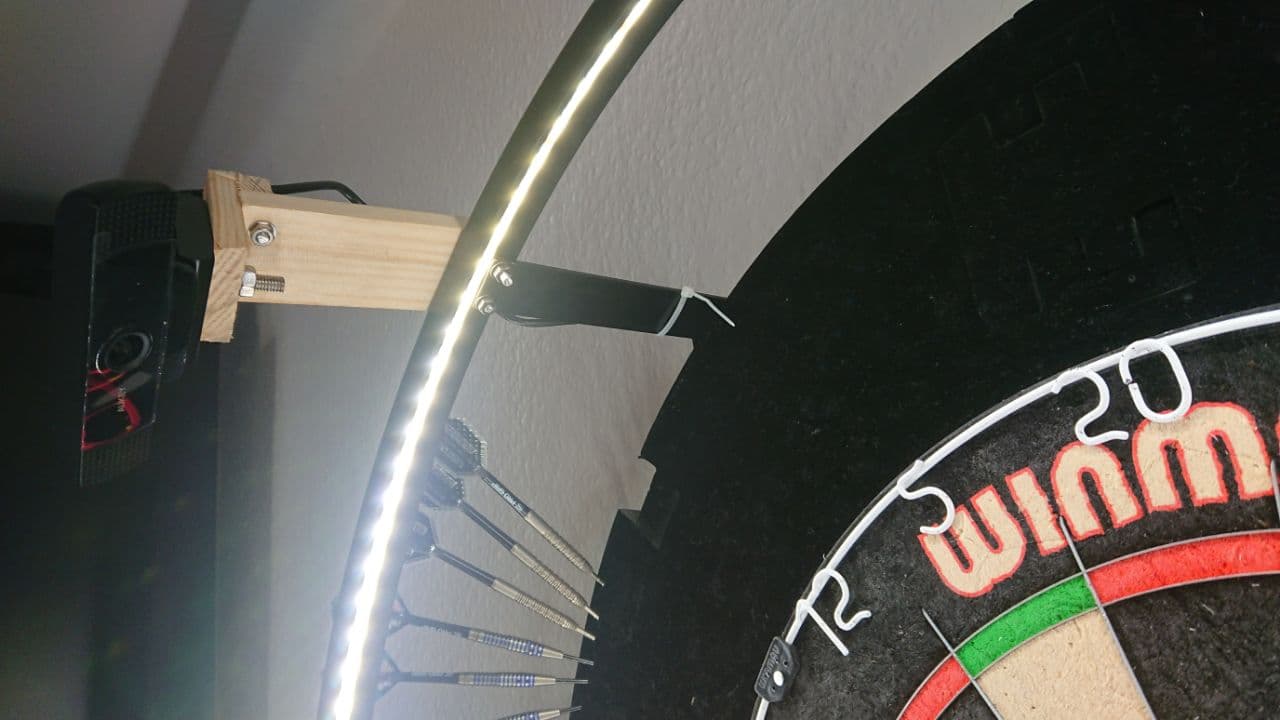
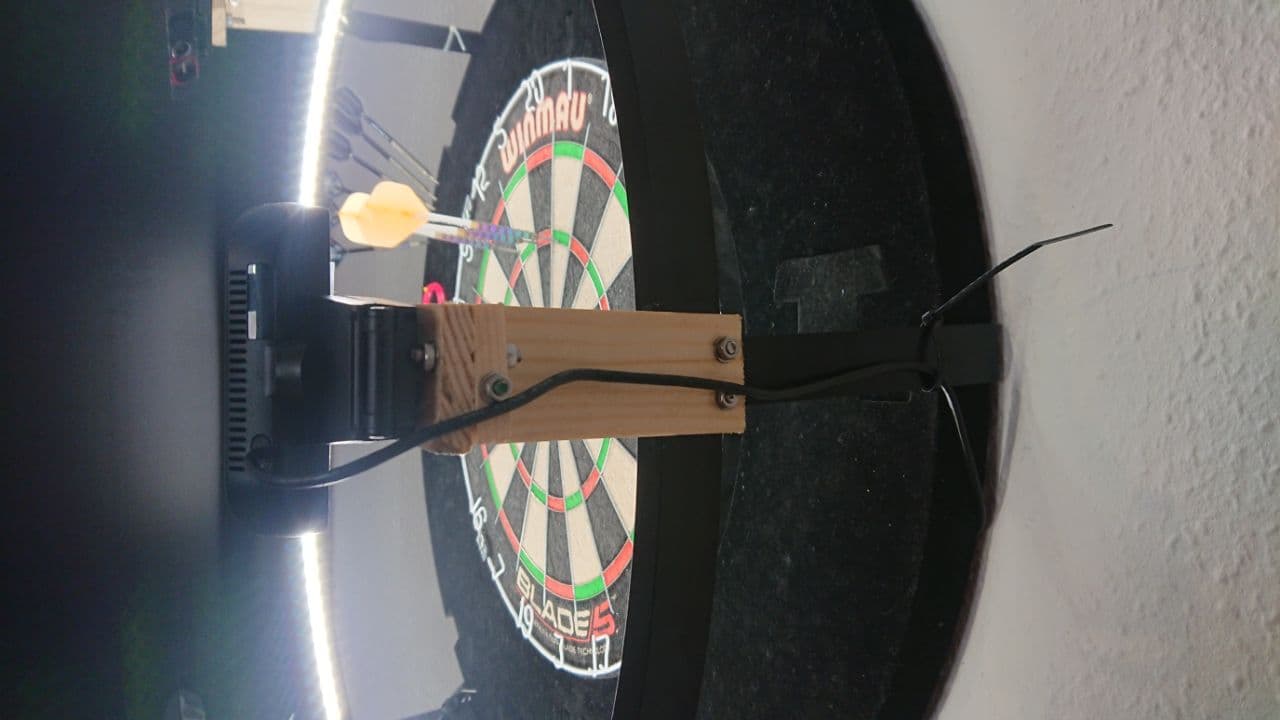
Which camera you are using does not matter too much. But one of the things where you should take care of is that the camera does not have any distortion. My setup is running on cams which have a field of view (FOV) of 65 degrees and they are 30cm far from the wall and have a distance to the bullseye of about 36cm. This is a perspective of one of my cams. But do not take this too serious. Put your cams on the led ring and place them as good as you can like I described.
Linux system setup
First you need to install your operating system on your device. If you are using a normal computer or laptop you can choose for example Ubuntu 20.04 LTS or of course the Unix OS you prefer. If you don't know how to install it you can have a look here Ubuntu Installation.
If you are using a Raspberry Pi we are recommand to use a Lite version which you can download here. And here is a good guide which explains how to install your Pi. Pi installation
Here is a very good tutorial how to set up you system and install autodarts for a Rasbperry Pi if you want to have a desktop version. Thanks to PixelStarFish for his Raspberry Pi desktop tutorial.
Depends on which operating system or device you want to use the installation will differ. But what you need is to install the latest version of OpenCV on the machine. Here is a little tutorial for a Raspberry Pi Rasbperry Pi OpenCV installation guide
Of course you can almost use every linux based system. If you have Ubuntu 20.04 you can have a look at this link Ubuntu 20.04 OpenCv installation guide
Because you need to connect three webcams to your machine you should check if every cam is working correctly. For that you can have a look in the configuration section As soon as you've done that you are ready to go.
Get Autodarts running
Reach out in Discord to be put on the waiting list and please only reach out if you've done the steps described before.
Setup autostart for Autodarts
If you are using a device just for the Autodarts recognition, it could propably very usefull to have it started everytime you are starting the device. For that you can add the Autodarts tool the startup routine. For that you need to create a new file with the command:
sudo nano /etc/systemd/system/autodarts.service
This opens a text editor called nano. You can copy the following text into it but don't forget to change the username to the user you are logged in at the moment. In this example it is pi.
# board.service

[Unit]
Description=Start/Stop Autodarts board service
Wants=network.target
After=network.target


[Service]
User=pi
ExecStart=/usr/local/bin/autodarts
Restart=on-failure
KillSignal=SIGINT
RestartSec=5s

[Install]
WantedBy=multi-user.target
As soon as you pasted the code above into the file, you can close the file with Ctrl + X. You will be asked if you want to save so you need to press Y followed by an enter.
The next step is to modify some rights. For that you can copy and paste this:
sudo chmod 644 /etc/systemd/system/autodarts.service
Once done you need to reload the startup deamon with:
sudo systemctl daemon-reload
And enable your startup file you have created before
sudo systemctl enable autodarts.service
Last but not least you can restart your system and than your machine is starting with autodarts running
sudo reboot
Board Manager
The board manager is to setup and adjust your cameras. Once you run your Autodarts program on your Linux system you can access the Board Manager via the ip address of your device and the port 3180. If you're running the program on a local computer like a laptop you need to type the following in your browsers url: http://127.0.0.1:3180 or if you are using a Raspberry Pi or the Jetson Nano than you need to replace 127.0.0.1 with your ip address of the device.
Configure Autodarts
After you accessed the Board Manager, you can click on Config in the top menue. There you can see the Auth section where you need to fill in the Board ID and the API Key which is needed to connect your Board to Autodarts.io. Also you need to change the USB Device IDs so that the tool will access the correct cameras. The best way to do this is with a little tool called v4l-utils. You can install it via the commandline on your machine. For that just type the following command in your commandline. You will propably asked for a password.
sudo apt-get install v4l-utils
When the installation is finished you can use the following command to see all connected devices.
v4l2-ctl --list-devices
Which shows the following on my device
pi@raspberrypi:~ $ v4l2-ctl --list-devices
bcm2835-codec-decode (platform:bcm2835-codec):
        /dev/video10
        /dev/video11
        /dev/video12
        /dev/video18
        /dev/media1

bcm2835-isp (platform:bcm2835-isp):
        /dev/video13
        /dev/video14
        /dev/video15
        /dev/video16
        /dev/media0

Aukey-PC-LM1E Camera: Aukey-PC- (usb-3f980000.usb-1.1.3):
        /dev/video7
        /dev/video8
        /dev/media4

Aukey-PC-LM1E Camera: Aukey-PC- (usb-3f980000.usb-1.2):
        /dev/video1
        /dev/video3
        /dev/media2

Aukey-PC-LM1E Camera: Aukey-PC- (usb-3f980000.usb-1.3):
        /dev/video5
        /dev/video6
        /dev/media3

Cannot open device /dev/video0, exiting.
pi@raspberrypi:~ $
In this example you can see that my cameras (Aukey-PC-LM1E Camera) were detected and are running. What you need to do now is to add the first video numbers into the USB Device Ids. For me it's 7, 1 and 5.
I'm using 1280x720 as resolution. You can put this to a lower resolution when your system is slow but in general it should be 1280x720. All the other settings can leave as they are.
Calibration
After you did the configuration you can start with the calibration which is the part where it is good to be as much precise as you can because it effects the recogognized segements.
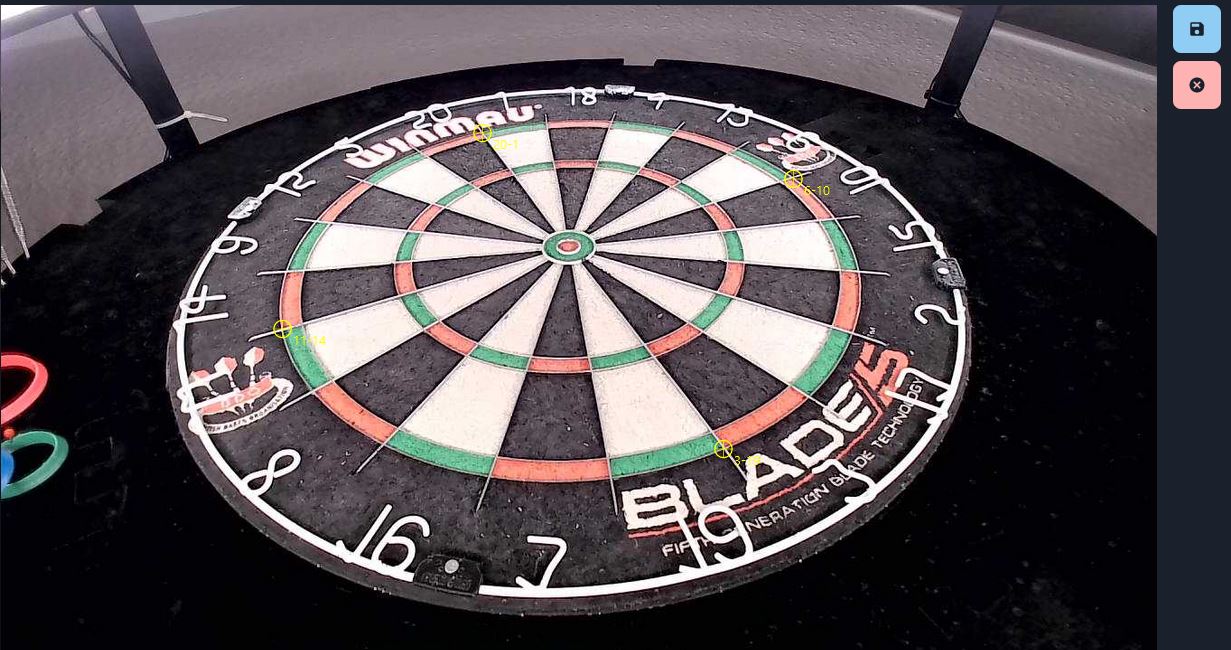
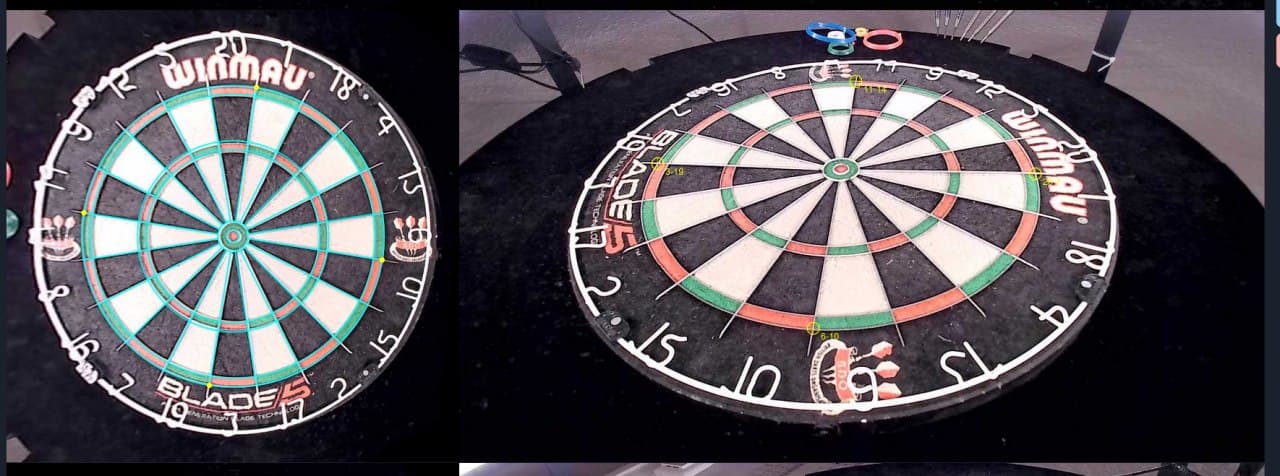
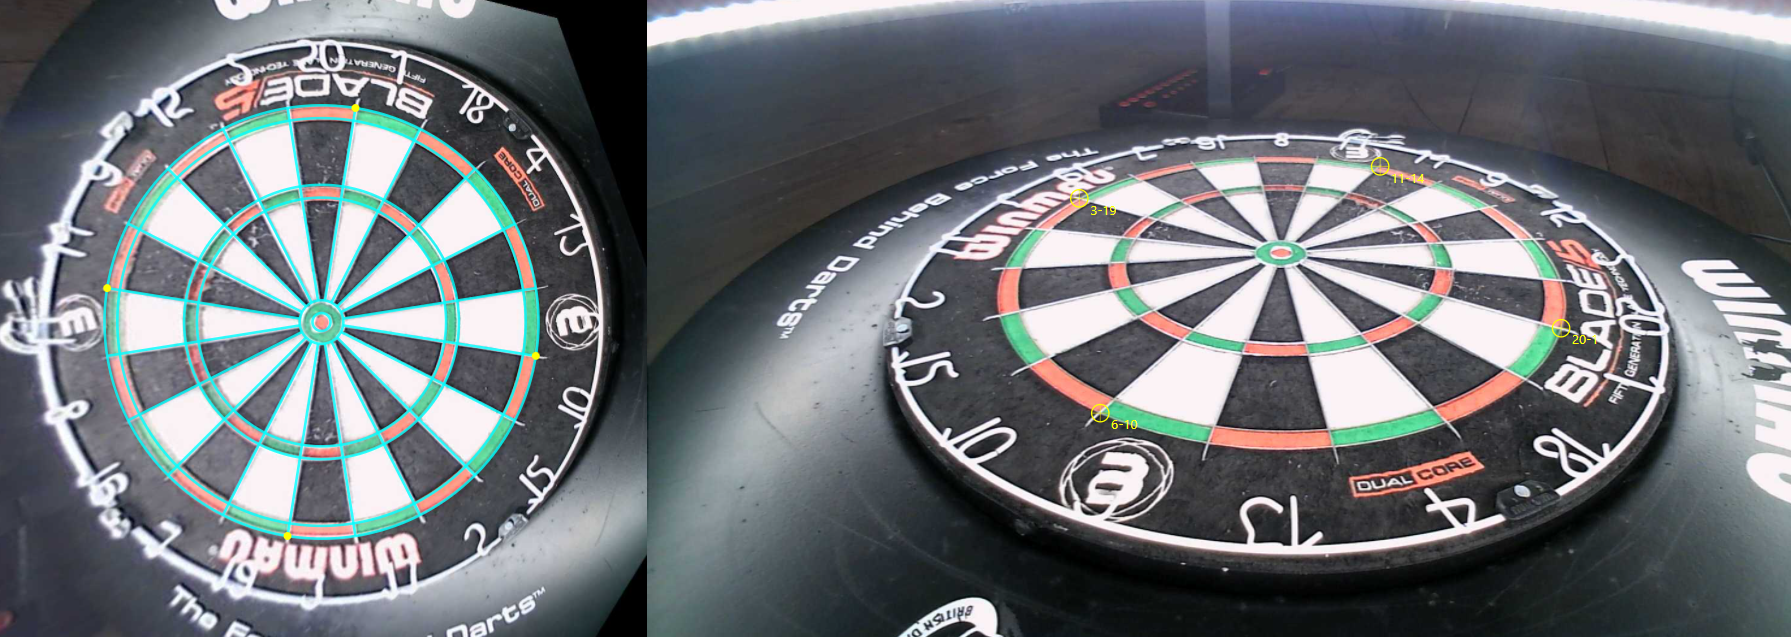
For the calibration you just need to drag the points (3-19, 6-10, 11-14, 20-1) to the upper double wire like you see in the picture.
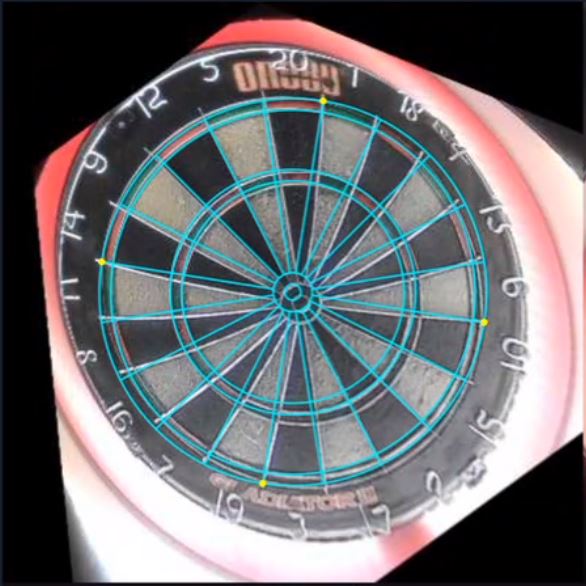
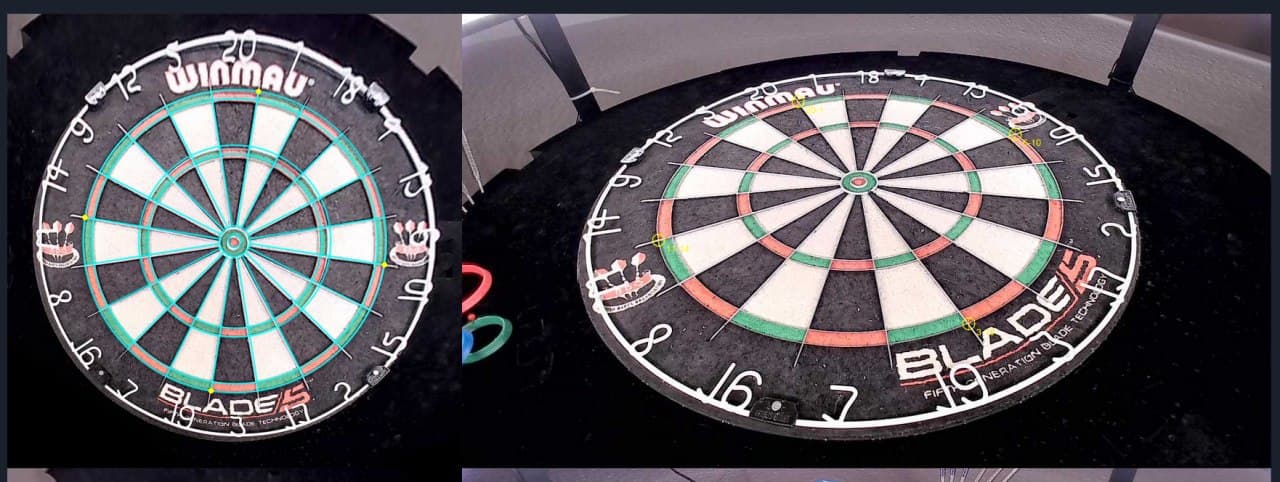
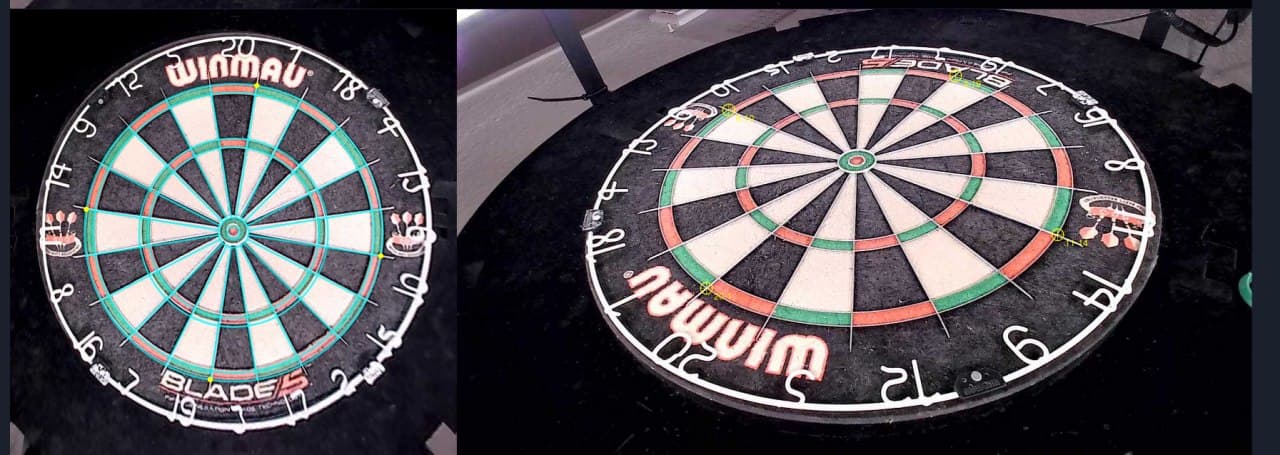
When this is done for all three cameras you can click on the blue disk button on the right side. After you clicked the button you will see the segents edges overlayed to your board. If you did it very precise than the edges should match with your wires. If not you propably bought cams with distortion. But even than the recognition is also working very well. Just give it a try :)
This happens when your cameras have too much distortion. But no worries you can correct them if you follow this guide: Camera distortion.json guide
As soon as you are done you can start your board. You can do this either via the Motion, Dart, Config tab or on Autodarts.io after you're logged in. When you are on Autodarts.io you can create a game.
Game On!
Board Manager settings
If you want to get an explanation which setting does what you can have a look here. Board Manager settings explanation
Troubleshooting
If you have a problem maybe this troubleshooting guide will help. Troubleshooting Guide
Working setups
NullP0ints setup
Parts of the setup:
- Winmau Blade 5
- Winmau Plasma LED ring
- McDart Catchring Premium
- Raspberry 3B+
- Aukey PC-LM1E Cams (They are working but they're having little distortion which causes a litte offset which leads to a little less correct recognition)
Bomber74 setup
- Winmau Blade 5
- Winmau Plasma LED ring
- OV2710 Cams
- Self printed cam holders
