This is a rework of comfyui_controlnet_preprocessors based on ControlNet auxiliary models by 🤗. I think the old repo isn't good enough to maintain.
YOU NEED TO REMOVE comfyui_controlnet_preprocessors BEFORE USING THIS REPO. THESE TWO CONFLICT WITH EACH OTHER.
All old workflows still can be used with custom nodes in this repo but the version option won't do anything. Almost all v1 preprocessors are replaced by v1.1 except those doesn't apppear in v1.1.
You don't need to care about the differences between v1 and v1.1 lol.
The code is copy-pasted from the respective folders in https://github.com/lllyasviel/ControlNet/tree/main/annotator and connected to the 🤗 Hub.
All credit & copyright goes to https://github.com/lllyasviel.
NEW! Check out Marigold Depth Estimator which can generate very detailed and sharp depth map from high-resolution images. The mesh created by it is even 3D-printable. Due to diffusers, it can't be implemented in this extension but there is an Comfy implementation by Kijai https://github.com/kijai/ComfyUI-Marigold


Go to Update page to follow updates
Install ComfyUI Manager and do steps introduced there to install this repo.
If you're running on Linux, or non-admin account on windows you'll want to ensure /ComfyUI/custom_nodes and comfyui_controlnet_aux has write permissions.
There is now a install.bat you can run to install to portable if detected. Otherwise it will default to system and assume you followed ConfyUI's manual installation steps.
If you can't run install.bat (e.g. you are a Linux user). Open the CMD/Shell and do the following:
- Navigate to your
/ComfyUI/custom_nodes/folder - Run
git clone https://github.com/Fannovel16/comfyui_controlnet_aux/ - Navigate to your
comfyui_controlnet_auxfolder- Portable/venv:
- Run
path/to/ComfUI/python_embeded/python.exe -s -m pip install -r requirements.txt
- Run
- With system python
- Run
pip install -r requirements.txt
- Run
- Portable/venv:
- Start ComfyUI
Please note that this repo only supports preprocessors making hint images (e.g. stickman, canny edge, etc).
All preprocessors except Inpaint are intergrated into AIO Aux Preprocessor node.
This node allow you to quickly get the preprocessor but a preprocessor's own threshold parameters won't be able to set.
You need to use its node directly to set thresholds.
| Preprocessor Node | sd-webui-controlnet/other | ControlNet/T2I-Adapter |
|---|---|---|
| Binary Lines | binary | control_scribble |
| Canny Edge | canny | control_v11p_sd15_canny control_canny t2iadapter_canny |
| HED Lines | hed | control_v11p_sd15_softedge control_hed |
| Standard Lineart | standard_lineart | control_v11p_sd15_lineart |
| Realistic Lineart | lineart (or lineart_coarse if coarse is enabled) |
control_v11p_sd15_lineart |
| Anime Lineart | lineart_anime | control_v11p_sd15s2_lineart_anime |
| Manga Lineart | lineart_anime_denoise | control_v11p_sd15s2_lineart_anime |
| M-LSD Lines | mlsd | control_v11p_sd15_mlsd control_mlsd |
| PiDiNet Lines | pidinet | control_v11p_sd15_softedge control_scribble |
| Scribble Lines | scribble | control_v11p_sd15_scribble control_scribble |
| Scribble XDoG Lines | scribble_xdog | control_v11p_sd15_scribble control_scribble |
| Fake Scribble Lines | scribble_hed | control_v11p_sd15_scribble control_scribble |
| Preprocessor Node | sd-webui-controlnet/other | ControlNet/T2I-Adapter |
|---|---|---|
| MiDaS - Depth Map | (normal) depth | control_v11f1p_sd15_depth control_depth t2iadapter_depth |
| LeReS - Depth Map | depth_leres | control_v11f1p_sd15_depth control_depth t2iadapter_depth |
| Zoe - Depth Map | depth_zoe | control_v11f1p_sd15_depth control_depth t2iadapter_depth |
| MiDaS - Normal Map | normal_map | control_normal |
| BAE - Normal Map | normal_bae | control_v11p_sd15_normalbae |
| Preprocessor Node | sd-webui-controlnet/other | ControlNet/T2I-Adapter |
|---|---|---|
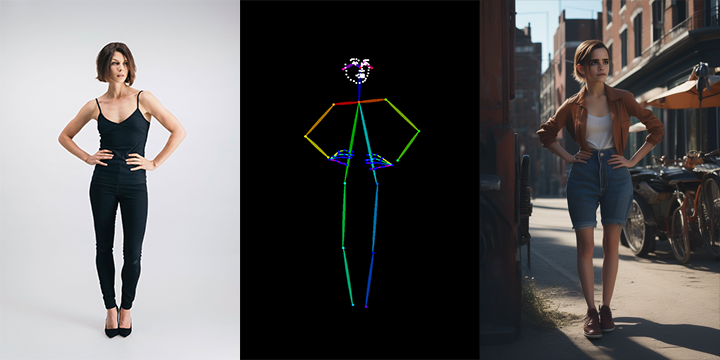
| DWPose Pose Estimation | dw_openpose_full | control_v11p_sd15_openpose control_openpose t2iadapter_openpose |
| OpenPose Pose Estimation | openpose (detect_body) openpose_hand (detect_body + detect_hand) openpose_faceonly (detect_face) openpose_full (detect_hand + detect_body + detect_face) |
control_v11p_sd15_openpose control_openpose t2iadapter_openpose |
| MediaPipe Face Mesh | mediapipe_face | controlnet_sd21_laion_face_v2 |
| Animal Pose Estimation | animal_openpose | control_sd15_animal_openpose_fp16.pth |
An array of OpenPose-format JSON corresponsding to each frame in an IMAGE batch can be gotten from DWPose and OpenPose using app.nodeOutputs on the UI or /history API endpoint. JSON output from AnimalPose uses a kinda similar format to OpenPose JSON:
[
    {
        "version": "ap10k",
        "animals": [
            [[x1, y1, 1], [x2, y2, 1],..., [x17, y17, 1]],
            [[x1, y1, 1], [x2, y2, 1],..., [x17, y17, 1]],
            ...
        ],
        "canvas_height": 512,
        "canvas_width": 768
    },
    ...
]
For extension developers (e.g. Openpose editor):
const poseNodes = app.graph._nodes.filter(node => ["OpenposePreprocessor", "DWPreprocessor", "AnimalPosePreprocessor"].includes(node.type))
for (const poseNode of poseNodes) {
    const openposeResults = JSON.parse(app.nodeOutputs[poseNode.id].openpose_json[0])
    console.log(openposeResults) //An array containing Openpose JSON for each frame
}
For API users: Javascript
import fetch from "node-fetch" //Remember to add "type": "module" to "package.json"
async function main() {
    const promptId = '792c1905-ecfe-41f4-8114-83e6a4a09a9f' //Too lazy to POST /queue
    let history = await fetch(`http://127.0.0.1:8188/history/${promptId}`).then(re => re.json())
    history = history[promptId]
    const nodeOutputs = Object.values(history.outputs).filter(output => output.openpose_json)
    for (const nodeOutput of nodeOutputs) {
        const openposeResults = JSON.parse(nodeOutput.openpose_json[0])
        console.log(openposeResults) //An array containing Openpose JSON for each frame
    }
}
main()
Python
import json, urllib.request

server_address = "127.0.0.1:8188"
prompt_id = '' #Too lazy to POST /queue

def get_history(prompt_id):
    with urllib.request.urlopen("http://{}/history/{}".format(server_address, prompt_id)) as response:
        return json.loads(response.read())

history = get_history(prompt_id)[prompt_id]
for o in history['outputs']:
    for node_id in history['outputs']:
        node_output = history['outputs'][node_id]
        if 'openpose_json' in node_output: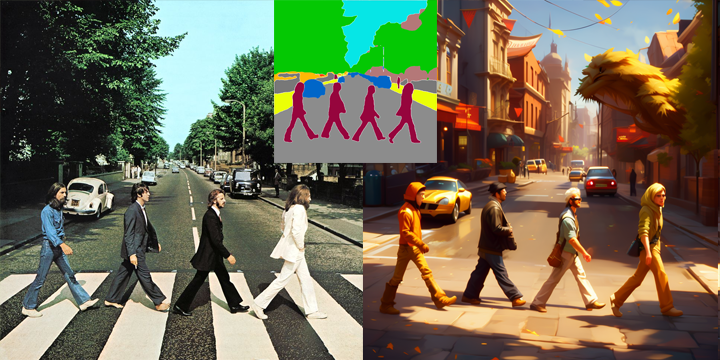
print(json.loads(node_output['openpose_json'][0])) #An list containing Openpose JSON for each frame- OneFormer ADE20K Segmentor
- UniFormer Segmentor
- OneFormer COCO Segmentor
- Color Pallete
- Content Shuffle
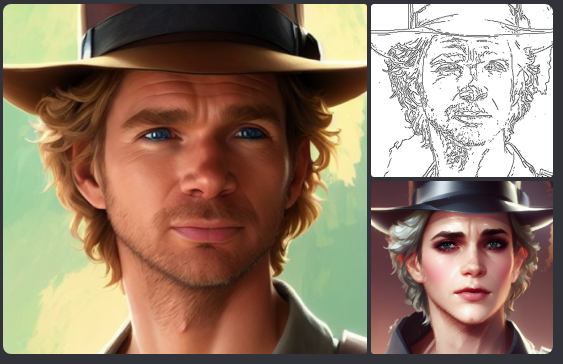
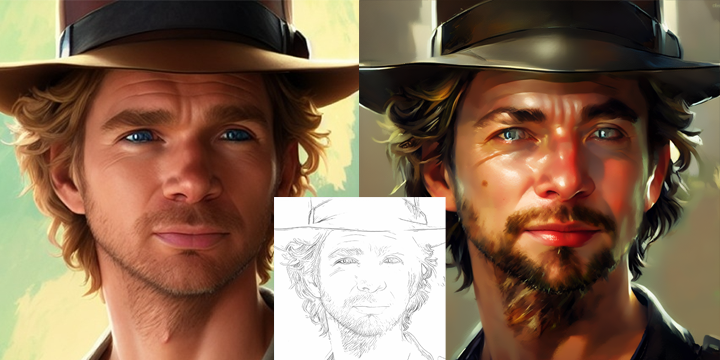
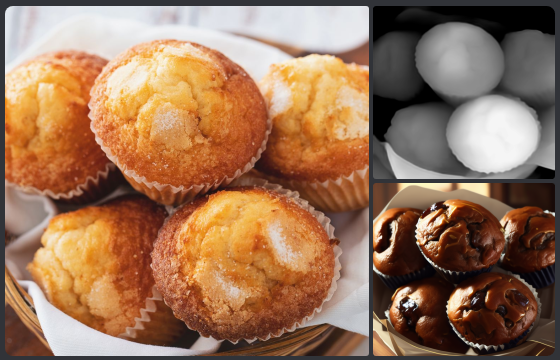
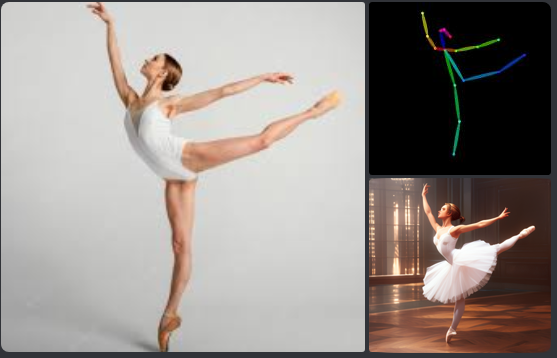
A picture is worth a thousand words
Credit to https://huggingface.co/thibaud/controlnet-sd21. You can get the same kind of results from preprocessor nodes of this repo.


https://github.com/Fannovel16/comfyui_controlnet_aux/blob/master/tests/test_cn_aux_full.json

This repo has a new mechanism which will skip any custom node can't be imported. If you meet this case, please create a issue on Issues tab with the log from the command line.
There are two ways to speed-up DWPose: using TorchScript checkpoints (.torchscript.pt) checkpoints or ONNXRuntime (.onnx). TorchScript way is little bit slower than ONNXRuntime but doesn't require any additional library and still way way faster than CPU.
A torchscript bbox detector is compatiable with an onnx pose estimator and vice versa.
Set bbox_detector and pose_estimator according to this picture. You can try other bbox detector endings with .torchscript.pt to reduce bbox detection time if input images are ideal.

If onnxruntime is installed successfully and the checkpoint used endings with .onnx, it will replace default cv2 backend to take advantage of GPU. Note that if you are using NVidia card, this method currently can only works on CUDA 11.8 (ComfyUI_windows_portable_nvidia_cu118_or_cpu.7z) unless you compile onnxruntime yourself.
- Know your onnxruntime build:
-
- NVidia/AMD GPU:
onnxruntime-gpu
- NVidia/AMD GPU:
-
- DirectML:
onnxruntime-directml
- DirectML:
-
- OpenVINO:
onnxruntime-openvino
- OpenVINO:
Note that if this is your first time using ComfyUI, please test if it can run on your device before doing next steps.
-
Add it into
requirements.txt -
Run
install.bator pip command mentioned in Installation
