I have integrated with identity service providers in the past. I have also used & created custom identity provider implementations, but I would not suggest them anymore. Mainly because the security measures needed to keep your system as safe as possible are very difficult to provide by yourself or team when there are so many more pieces of your system to develop. Security is a specialized field that should almost always be provided by a solution that focused on security alone.
In this example I have a solution that has includes a Dot Net Core API and an Angular Frontend and we are going to use Auth0 as our identity provider using their Universal Login so we can take advantage of Single Sign On (SSO). Auth0 offers many options for Social Connections, but we are going to Google in this example.
The first thing you need to do is create a free account on https://auth0.com and follow the steps below.
Once you are logged into your Auth0 account, go to your Dashboard and click the Create Application button at the top of the page.
Then select Single Page Web Applications and click the Create button. Go to the Settings tab and you should be presented with the following.
You may leave the name as the default, but you must add http://localhost:4200 to the Allowed Callback URLs, Allowed Web Origins
, and Allowed Logout URLs text areas. Scroll to the bottom of the page and click the blue Save Changes button.
Once that is done, select the Connections tab and turn off the Username-Password-Authentication selection since we only want to use Google for right now.
We are done setting up the application portion and will return later to retrieve some values that are stored here.
Now we need to create the API portion by selecting APIs from the left navigation and clicking the Create API button that follows.
Now enter My API in the name field and https://myapp.com in the identifier field. When you are done click the blue Create button.
After it is completed click the Permissions tab and enter
write:all in the first text area, admin permission in the second and then click the Add button.
You can add them by selecting the Settings tab and scrolling down to the Add Permissions in the Access Token option under Access Settings. When you find it, enable the option and click Save. Also enable Enable RBAC and Add Permissions in the Access Token.
This completes the configuration within your Auth0 dashboard. Now we need to open the solution up and configure its application settings with the values created from the above steps.
inside the solution open
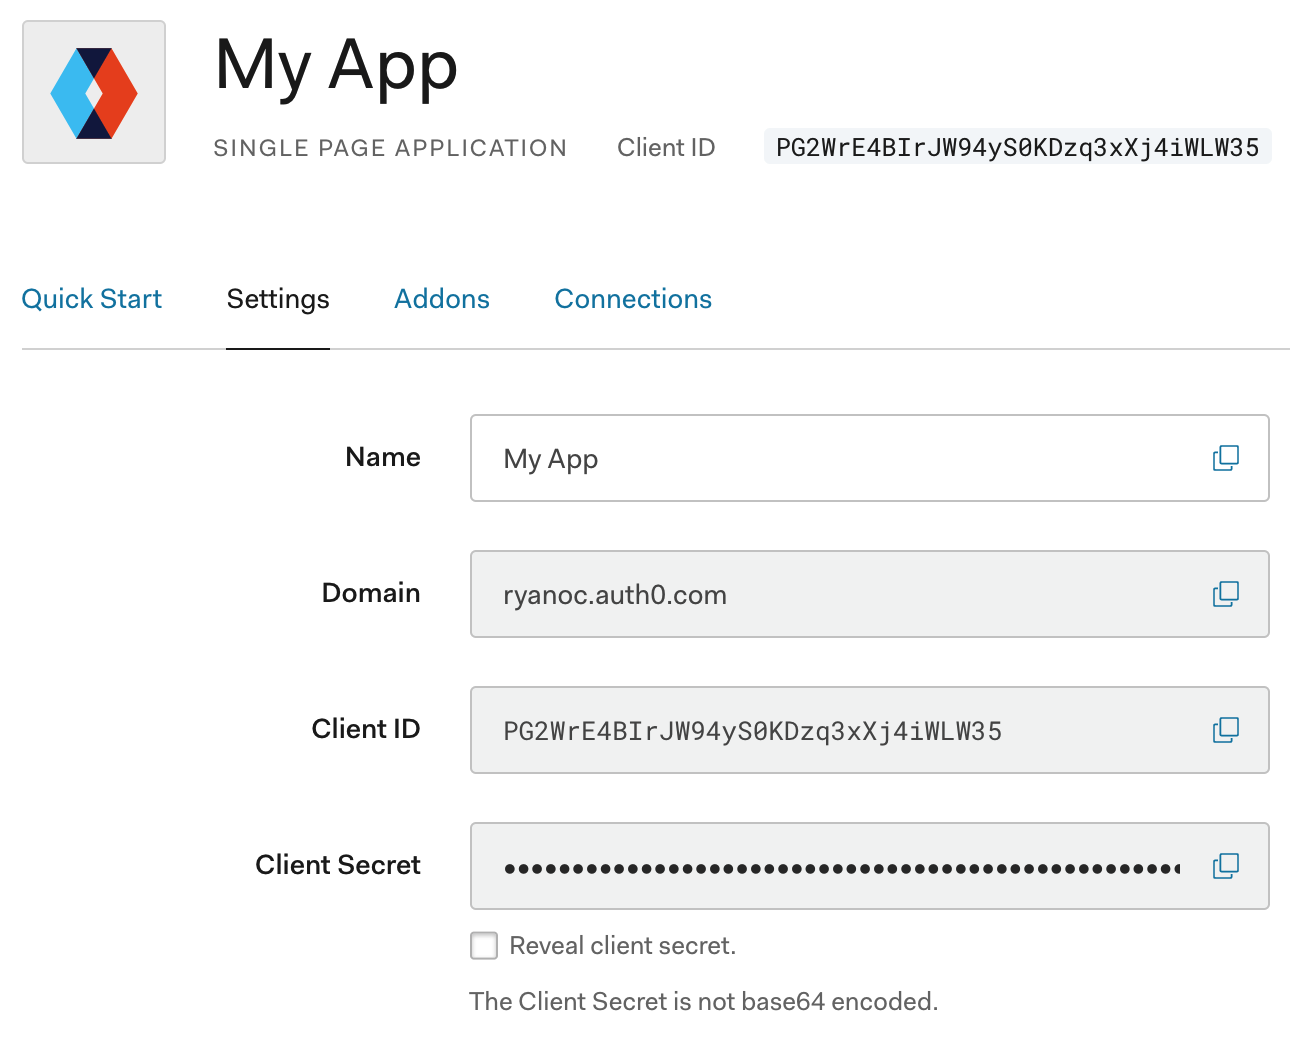
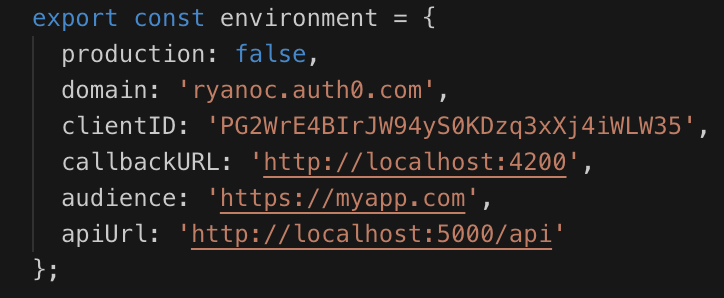
/Client/wwwroot/auth0-app/src/environments/environment.ts. This file will completed from values within the Auth0 Dashboard's Application that you created above. So go back to your Auth0 dashboard, select Applications from the left nav, select My App from the list, and select the Settings tab. Copy your Domain and Client ID values and add them to the environment file. These are the values that will be used in the Auth Service located at Client/wwwroot/auth0-app/src/app/_core/services/auth.service.ts. It should look like the following except for your custom values:
We are done configuring the Client application.
The 2 values from above now need to be added to the Server/appsettings.json file's Domain and ApiIdentifier to complete the server configuration.
Now its time to add a user with the admin permission you created above. The way we are going to do this is let the user sign up by running the app and logging in with their Google account. Once that is done, we will browse back to the Auth0 Dashboard and go to Users. You should see this user in the list. We now need to add the Admin permission so they can access all of the protected Web API endpoints.
Start the web server and run the client project with
$ npm start
An optional step that I tend to do is adding the Permissions to the access token so that the front end can decode the token and view the permissions. This is helpful in hiding links that the user may not have the authorization to use. This is just a convience to the user and does not inhibit the functionality behind these hidden links.