Recommended browsers: Firefox | Chrome
- 1. Project setup
- 2. Overview
- 3. Components
- 4. Tips on Reducing CPU Usage
- 5. Technical Notes
- 6. References and inspiration
Install dependencies:
npm installRun command to compile and hot-reload for development:
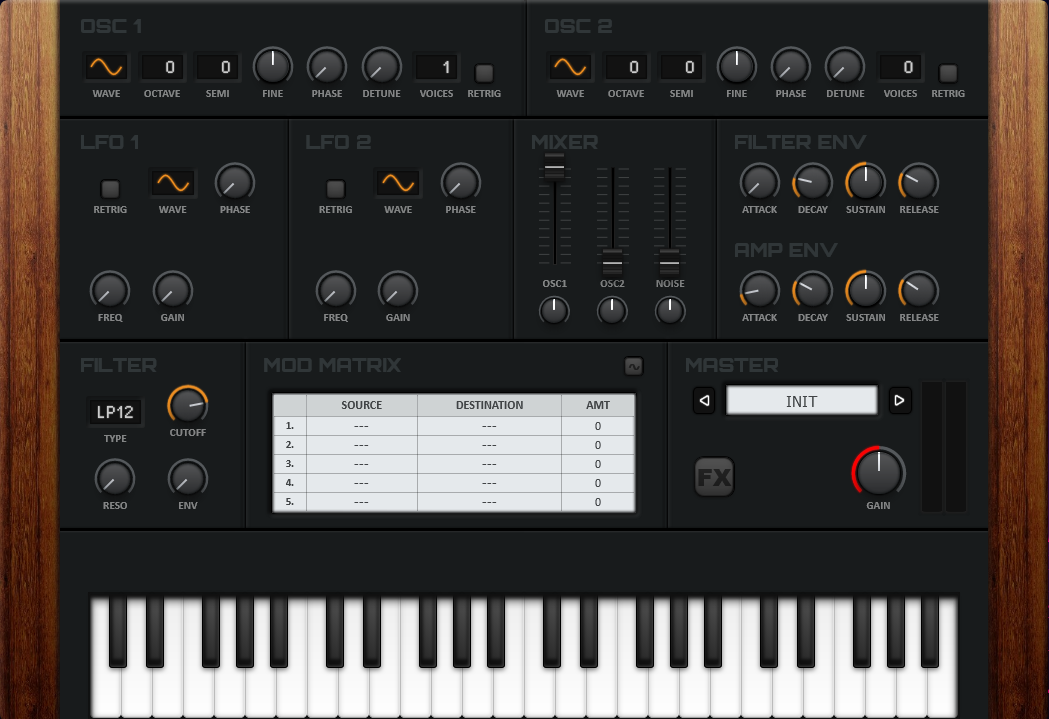
npm run serveSynth is 8-voices virtual polyphonic synthesizer designed for creating music in web browser.
Synth houses 2 unison oscillators, which generate 4 basic waveforms:
- sine
- sawtooth
- triangle
- square
Each oscillator is capable of producing 4 unison voices, adding up to a total 8 voices per note. With its 8 notes of polyphony this means you can play up to 64 voices simultaneously. Synth is equipped with additional one White Noise Generator.
For sound shaping purposes Synth offers one filter with 3 basic types (lowpass, bandpass, lowpass), 2 rolloff slopes (12 and 24 dB/oct) and bypass mode.
To sculpture the sound Synth proivde 2 polyphonic LFO's which can be used to modulate a whole set of different parameters. Next to it, it is possible to use the amplitude envelope and filter envelope as source of modulation.
Master effects section offers five sound effects:
- Distortion - eight types of distortion;
- Chorus - stereo chorus effect;
- Delay - feedback delay effect;
- Reverb - effect with adjustable size and pre-delay;
- Limiter - brickwall limiter with adjustable threshold parameter for overload protection.
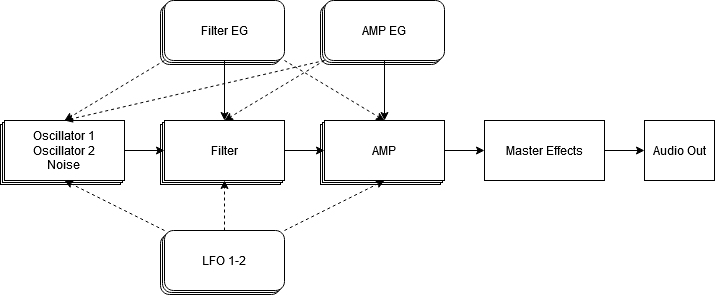
Synth is build on classic voice architecture, that dynamically allocate limited amount of voices during playtime. The scheme below shows the internal structure of the audio path of this synthesizer.
Advantage of this design is reduced demand for resources (polyphonic synth does not need to provide separate voice for every note for the sort of playing them in parallel - vide paraphonic synthesizer), but, on the other hand, this approach forms a little additional overhead in creating logic for dynamic voices management.
Rotary knobs, faders and other controls can be controlled by clicking the handle and dragging up or down in vertical direction. For higher accuracy hold Shift key while dragging the mouse. Current knob value will be displayed for short amount of time on preset display.
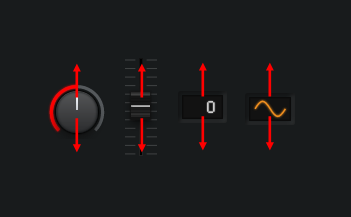
If you want to know the exact value of a parameter, but you do not wish to change it, you can simply click a knob once. This will display its value on the screen without changing it.
Double clicking on control resets its value to default.
To speed up workflow rotate knobs and sliders allow you to change its value using mouse wheel.
Playing piano notes just with mouse is not very comfortable (or even possible for chords). However it is possible to use your desktop keyboard to trigger keys signals. The keyboard section at the bottom of the user interface consist of a 4-octave keyboard that will display stroked keys if note do not exceed its range. Switching current keyboard octave down and up is possible with keys Z and X respectively.
Synth is shipped with simple preset manager with option to preview pre-defined programs.

On both sides of display there are placed two buttons to change current preset to previous/next program respectively.
In this chapter each synthesizer components will be discussed one by one.
Wave
Values: sine | sawtooth | triangle | square
By dragging the waveform selector you can select of type to generate.
Octave
Range: ± 3600 cents (±3 octaves)
Tune oscillator voices up/down in octave range.
Seminote
Range: ± 1200 cents (±12 seminotes)
Tune oscillator voices up/down in seminotes range.
Finetune
Range: ± 100 cents (±1 seminote)
Fine-tune oscillator pitch voices between two half notes.
Phase
Range: [0, 360]
Change start phase of waveform. This parameter does not have impact on wave, if RETRIG button is disabled.
Retrigger
Values: on | off
Force all voices to start at the exact same location every time a new note is triggered. That location can be changed using the Phase knob.
Voices
Range: [0, 4]
Select number of generated unison voices. You can turn off oscillator by setting the number of voices to 0.
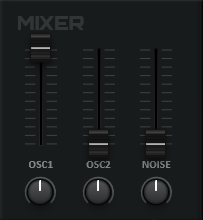
The mixer section allows to control the level and panorama of oscillators 1-2 and Noise Generator.
Volume
Range: [0, 1]
Set the output volume of the oscillator.
Pan
Range: [-1, 1]
Change panorama of oscillator output to the left(-1) or right(1) channel.
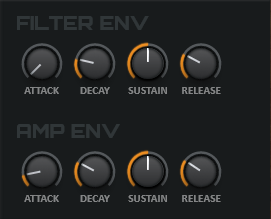
Synth offers two ADSR (Attack, Decay, Sustain, Release) envelopes:
- Filter Env - controls filter frequency;
- AMP Env - controls the progression of the volume of a sound;
Both works in the same manner and can be used as modulation souce in Modulation Matrix.
Attack
Range: [1ms, 10s]
Specifies the duration it takes for the amplitude envelope to go from zero toits maximum level.
Decay
Range: [1ms, 10s]
Specifies the duration of thedecay stage, i.e. how long it takes the amplitude to fall back to the sustain level.
Sustain
Range: [0, 1]
Specifies the sustain level that is reached after the decay stage ends. The sustain stage lasts as long as a key is pressed.
Release
Range: [1ms, 10s]
This stage is reached whenever a key is released. This parameter specifies the duration it takes the envelope to hit zero.
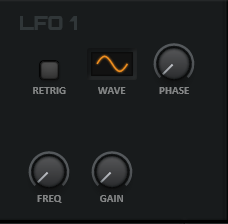
Low Frequency Oscillators are similar to Oscillators but they ussally generate signal in inaudible range used to continually change aspects of sound, like modulating a volume or pitch.
Wave
Values: sine | sawtooth | triangle | square
By dragging the waveform selector you can select of type to generate.
Frequency
Range: [0.2Hz, 10Hz]
Change pitch of oscillator.
Phase
Range: [0, 360]
Change start phase of waveform. This parameter does not have impact on wave, if Retrig button is disabled.
Retrigger
Values: on | off
Force LFO to start at the exact same location every time a new note is triggered. That location can be changed using the Phase knob.
Gain
Values: [0, 1]
Sets the amplitude of LFO signal.
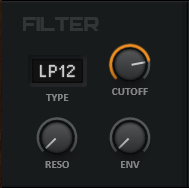
Type
Values: LP12 | LP24 | BP12 | BP24 | HP12 | HP24 | NONE
Specifies type of filter:
- LP (low-pass) filter damps frequencies above cutoff frequency;
- BP (band-pass) filter damps frequencies around the cutoff frequency;
- HP (high-pass) filter damps frequencies passes signal above the cutoff frequency unchanged.
- NONE - allpass filter and that allows all frequencies to pass.
Numbers next to filter type specify filter's rolloff slope as dB per octave, 12dB/oct and 24dB/oct respectively.
Cutoff
Range: [20Hz, 20kHz]
The most important parameter in the filter. Specifies corner frequency where filter operates.
Resonance
Range: [0, 10]
Controls filter resonance at cutoff frequency. In Band-pass mode controls the width of the band. The width becomes narrower as the value increases.
Envelope
Range: [0, 1]
Controls how much the filter envelope affects the cutoff frequency. Set to zero, the filter envelope has no effect on the cutoff frequency. At 1 the envelope spans the entire cutoff range. If you want to set envelope amount to negative value use Modulation Matrix instead with Envelope amount set to zero.
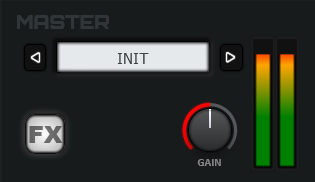
Master section is the last part of audio path in synthesizer before send signal to your speakers. On the right side of the Master panel is a VU meter which measures the output level. The red color indicates the signal is too loud and you should turn the volume down to prevent clipping.
Gain
Range: [0, 1]
Controls the overall volume of the entire synthesizer.
FX
Values: on | off
Toggle Master Effects section.
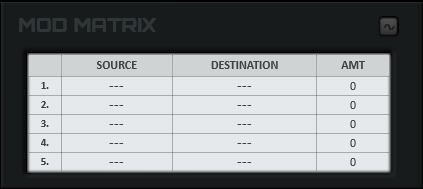
Modulation Matrix allows to create more complex patches by linking selected source with one or multiple of many available parameters. Modulation Matrix offers 5 slot can be used to connect different parameters.
All sources are converted to the same range: [0, 1] for unipolar and [-1, 1] for bipolar sources. The LFO's are bipolar, all other sources are unipolar. The current value of a source is multiplied with the Amount value [-1, 1] in the same modulation slot. The result of the multiplication is then multiplied again with selected parameter modulation range and added to destination value.
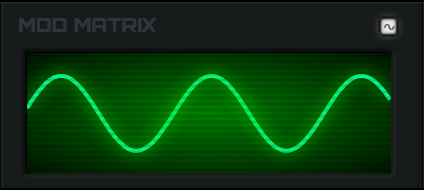
Oscilloscope display is hidden by default behind Modulation Matrix and can be toggled by clicking on button placed in top right corner of Matrix section. It displays waveform shape on synthesizer output in real time.
Master FX panel is hidden by default behind keyboard and can be open by clicking on FX button placed in Master section of the synthesizer, next to Modulation Matrix.
Each effect, besided effect control parameters, is shipped with ON/OFF button placed in top right corner of each effect panel and WET knob which controls effect depth and sets ratio between the wet and original input signal (except Limiter effect). A value of 0 will mute the effect, while a value of 1 will pass only the original - dry - signal.
Synth offer eight types of waveshaping distortion algorithms:
- Sine;
- Gloubi Boulga (waveshaping algorithm by Laurent de Soras);
- Fold Back;
- Soft Clip;
- Saturation;
- Bit Crusher;
- Tarrabia (waveshaping algorithm by Partice Tarrabia and Bram de Jong);
- Fuzz.
Each algorithm offers different sound and harmonic content. Switch between them by clicking on display and selecting one from dropdown list.
Amount
Range: [0, 1]
Controls the effect intensity.
Create effect that sounds like multiple instruments being played simultaneously.
Delay
Range: [2ms, 20ms]
The output of chorus is a mix of the input signal with delayed copy of it. Controls the delay offset in miliseconds.
Depth
Range: [0, 1]
Controls internal LFO modulation intensity (amplitude).
Feedback
Range: [0, 1]
Controls amount of signal from the output that returns back into the input of the effect, which can be used to create flanging effect.
Fequency
Range: [10Hz, 10kHz]
Controls the frequency of the LFO which modulates the Delay paramter.
Spread
Range: [0, 180]
Controls amount fo stereo spread. At 0, both LFO's will be panned centrally, while at 180, LFO's will be spread hard to left and right.
Feedback delay effect that can be used to create echoing sound effects.
Delay
Range: [50ms, 1s]
Controls delay time.
Feedback
Range: [0, 1]
Controls the speed with which the delays will fade away.
The Reverb effect simulates sound reflections from surrounding walls or objects. Make sound more realistic and add depth to it.
Size
Range: [100ms, 5s]
Controls the duration of effect. Larger values give perception of larger room.
Predelay
Range: [100ms, 5s]
Adjusts the onset of the reverberated signal. Controls the amount of time before the reverb is fully ramped in.
Brickwall limiter which limits the loudness of incoming signal.
Threshold
Range: [-96dB, 0dB]
Controls the level at which gain reduction begins.
When using a lot of synthesizer and audio effect at the same time, CPU usage can become a problem. Here are some tips to reduce CPU usage:
- Envelope Generators
Try to keep the Decay and Release parameters as small as possible. Sound with smaller release will fade faster and use less polyphony voices. - Effects
Disable any master effects you don't use. - Modulation Matrix
Clear unused sources and destinations slots from matrix. Synthesizer core will not process these nodes, if you do not need them. Even if you set AMOUNT parameter to 0, Synth will still send signals to connected nodes. - Disable oscilloscope
Oscilloscope is generated in canvas element using requestAnimationFrame Web API method that allows to create high performance visual content, but require some additional resources. Disabling this element can significantly reduce CPU usage. - Reduce polyphony usage
Playing complex chords is fun and Synth give you possibility to play up to 8 notes at the same time, but remember, it is just JavaScript app, not highly optimized VST plugin designed to use in professional DAW's, but only in your web browser.
If you still experience any problems with this app try to reload webpage or even close current tab and wait a minute or so to let your browser clear its memory and cache by its own.
Tone.js is an awesome framework that offers a bunch of high quality components, but for this project I decided to tweak some of them a little to provide additional functionalities. This section explains (in short) technical differences, one section by one, between Tone.js components and their customized implementations used in this project.
- add support for multiple detuning units, allow to tune oscillator easily to any note:
- octave - control pitch in octaves,
- seminote - control pitch in seminotes,
- finetune - control pitch in cents.
- allow to set voices number to zero and disable not used oscillator,
- oscillator free phase mode - generate random phase for every new note, disable this effect, and sync all voices phase, by enabling RETRIGGER button.
- add retrigger switch - start LFO from the same phase position each note.
- custom shape for decay curve - build in exponential curve sounds great with short decay values, its sharp and snappy, but used algorithm is - IMHO - too sharp. Enlarging decay value does not provide significant change in sound amplitude, signal fade very fast and reach sustain level very quickly. Project implementation use exponential function to shape linear curve in range [1, 0] slope which is next eased to fit dedicated range using this formula:
where:
x - signal value,
u - upper signal value (1),
l - lower signal value (which is sustain value in range [0, 1])
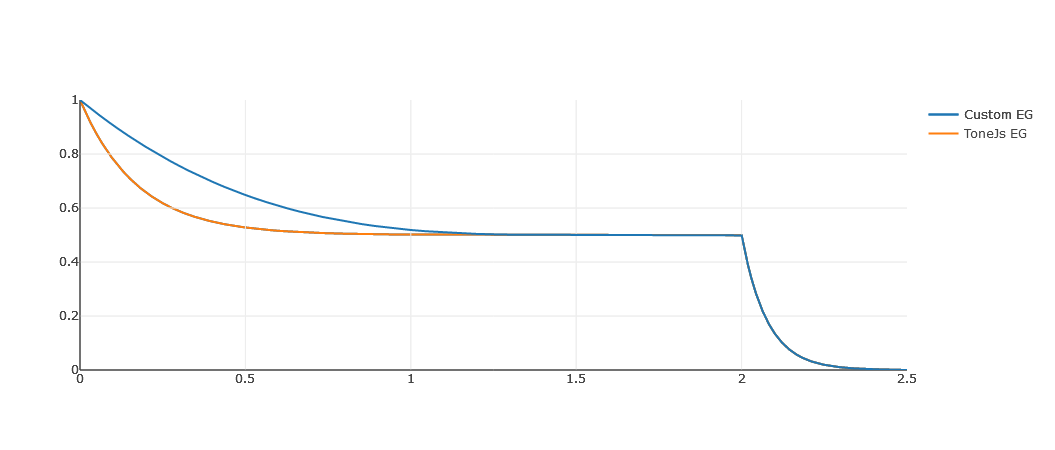 Custom envelope shape in comparison to build-in Tone.js Envelope with exponential decay curve. Settings values: decay time=1.5s, sustain=0.5, hold time=2s.
Custom generated shape fades progressively in time and still does not sound as artificially as linear curve.
- disable effect in effect chain - Tone.js, for most of their effects components, provide only one parameter to control effect intensity - WET. This parameter - however - does not prevent from using CPU usage, signal is still passed and processed by effect. Dedicated ON/OFF switch completely disconnect effect from audio chain and let orginal signal to pass through.
Tone.js (and Web Audio API in general) does not offer any native support of independent control for modulated parameter. Every parameter, connected to any modualation source, automatically recieve status overridden which prevents from any values change sent directly to this property. WAAPI architecture, however, allows to connect multiple signals to one property where all are summed together in parameter intput. Every modulatable parameter has been wrapped in custom MODULATION function that provides dedicated input for constant source value and modulation output. This way it has become possible to control parameter base value independly from any modulation source connected to it.
The simplified implementation is presented on this diagram:
Parameter Signal
                ↘
                (+) -→ Parameter
                ↗
Modulation Signals
Parameter can receive any modulation signal and sill be able to update its base value.
Due to static and rigid nature of components relationships, I have decided to drop down voice management system that Tone.js PolySynth object has to offer, i.e. dynamic voice creation and removal of allocated voices. In current implementation all polyphonic voices are initialized only once at start and allocated dynamically during playtime. This way synthesizer can avoid potential latency time problems caused by expensive voice creation/initialization or removal, but at the overall cost of synthesizer initialization time.
