
🤗 Please consider subscribing to my YouTube channel Your subscription goes a long way in backing my work.

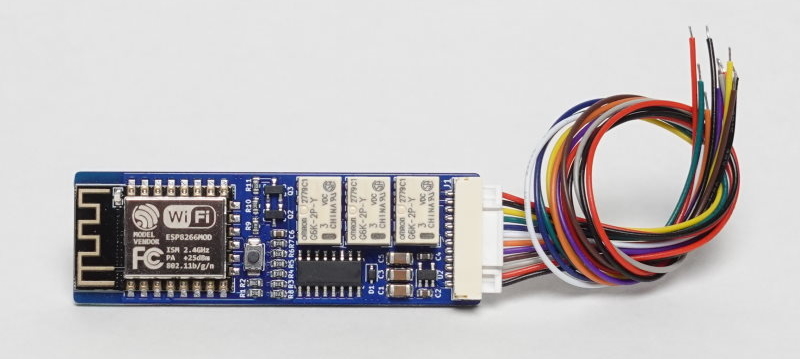
ESPClicker is a very simple, ESP8266 based IoT project that will allow you to integrate your normal devices such as a coffee machine, fan, etc, into your Smart home "make them all IoT enabled". Works with Home Assistant And ESPhome.
YouTube Video: https://youtu.be/Gc4yCd9yvuE Online Shop: https://www.pricelesstoolkit.com/en/projects/32-espclicker.html
- 4 Layer PCB
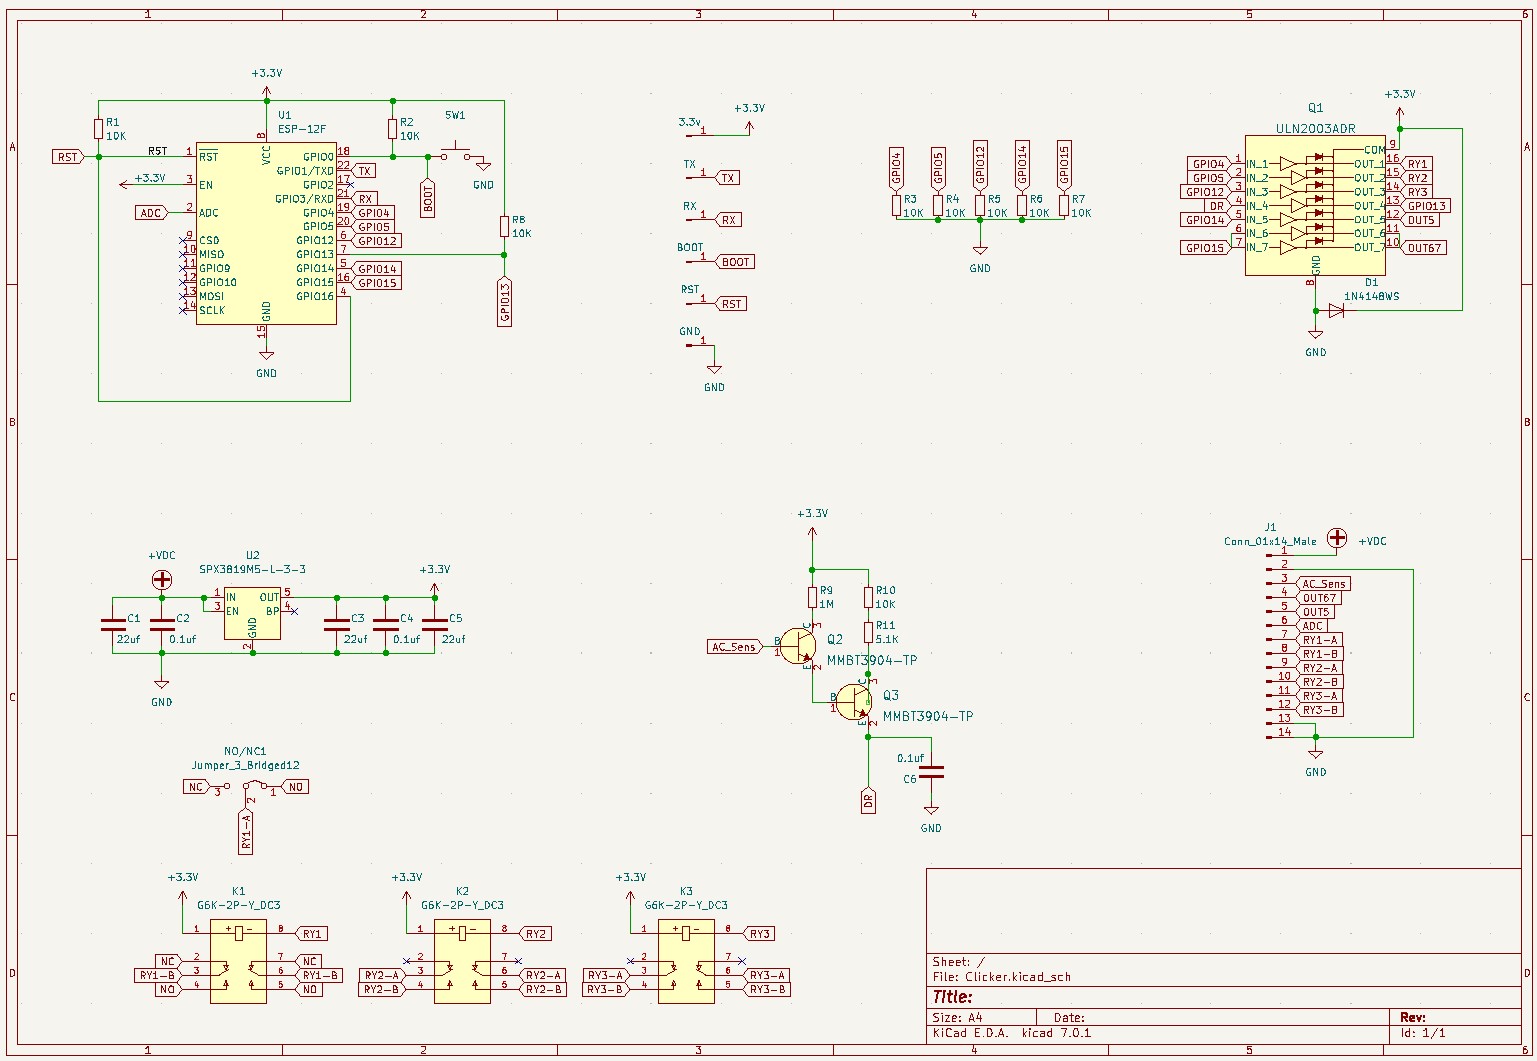
- WiFi Module ESP8266 ESP-12F
- 3x Built-in signal relays ( Controll PINS: R1-GPIO4, R2-GPIO5, R3-GPIO12 ) "R1 can be configured as normally open or normally closed" MAX LOAD 500mA 24V
- 2x Low-Side Switch "ULM2003" ( Controll PINS: LS1-GPIO14, LS2-GPIO15 ) MAX LOAD 150mA "1-2 Sec"
- 1x ADC Pin "1V Max"
- 1x ACS Pin "AC Power Detector" (Input Pin GPIO13)
- Requires 5V 500mA power supply
THE COLOR CODE OF THE CABLE DIDN'T MATCH, REAL PIN LABELS ARE ON THE PCB
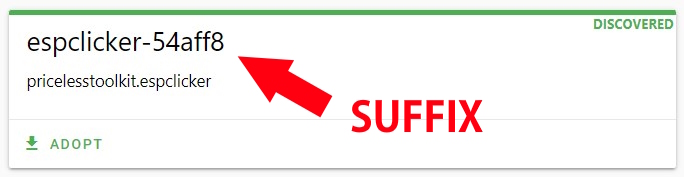
CONNECT TO THE ESPClicker FALLBACK NETWORK "ESPClicker-XXXXXX Fallback Hotspot" VIA WIFI AND CHANGE WIFI USERNAME AND PASSWORD, GO TO THE ESPhome AND CLICK "ADOPT" THEN CLICK ON "TREE DOTS" AND CLICK "RENAME HOSTNAME"
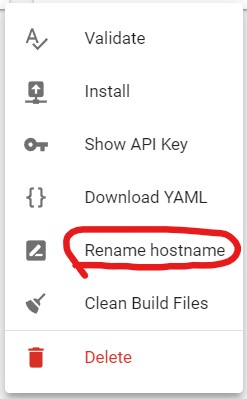
AND PUT "espclicker-XXXXXX" SUFFIX
WITHOUT THIS IT WILL BE IMPOSSIBLE TO DO OTA UPDATE, BECAUSE ESPhome WILL TRY TO RESOLVE ADDRESS ON "espclicker.local".
The captive portal component in ESPHome is a fallback mechanism for when connecting to the configured WiFi fails. After 1 minute of unsuccessful WiFi connection attempts, the ESP will start a WiFi hotspot with the credentials
SSID "ESPClicker-XXXXXX Fallback Hotspot"
Password "password"
When you connect to the fallback network, the web interface should open automatically (see also login to network notifications). If that does not work, you can also navigate to http://192.168.4.1/ manually in your browser. In this web interface, you can manually override the WiFi settings of the device. Additionally, you can upload a new firmware file to your node without having to use a USB cable for uploads.
- Open your ESPHome dashboard.
- Create new ESPhome device and paste your config then save it
- Find your device card click on menu (TREE DOTS)
- Click on Install
- Click on Manual Download
- Click on Modern Format
- After Completion, the firmware will be automatically downloaded
- Open https://web.esphome.io/, Push and hold "ESPClicker" BOOT button then plug in usb cable and click CONNECT.
- Click on button "Choose File" select your firmware and Click INSTALL
- Cable for ESPClicker 12P https://s.click.aliexpress.com/e/_DEXNTZF
- Power Supply 5V 500mA https://s.click.aliexpress.com/e/_DFcN9hb
Programmer and Test Clip Fixture
- ESP8266 Programmer https://s.click.aliexpress.com/e/_DF4HDaH
- PCB Test Clip Fixture "6P Pogo Pin Minimum" https://s.click.aliexpress.com/e/_Dm3ox9R
- Pogo Pins only https://s.click.aliexpress.com/e/_De0po3L
Home Assistant https://www.home-assistant.io/ ESPhome https://esphome.io/