
DAML prototype for an ATC system. Allows modelling for an arbitrary number of gates, taxiways, runways and planes. Exceptions handled appropriately and test suite for flight departures and arrivals provided.
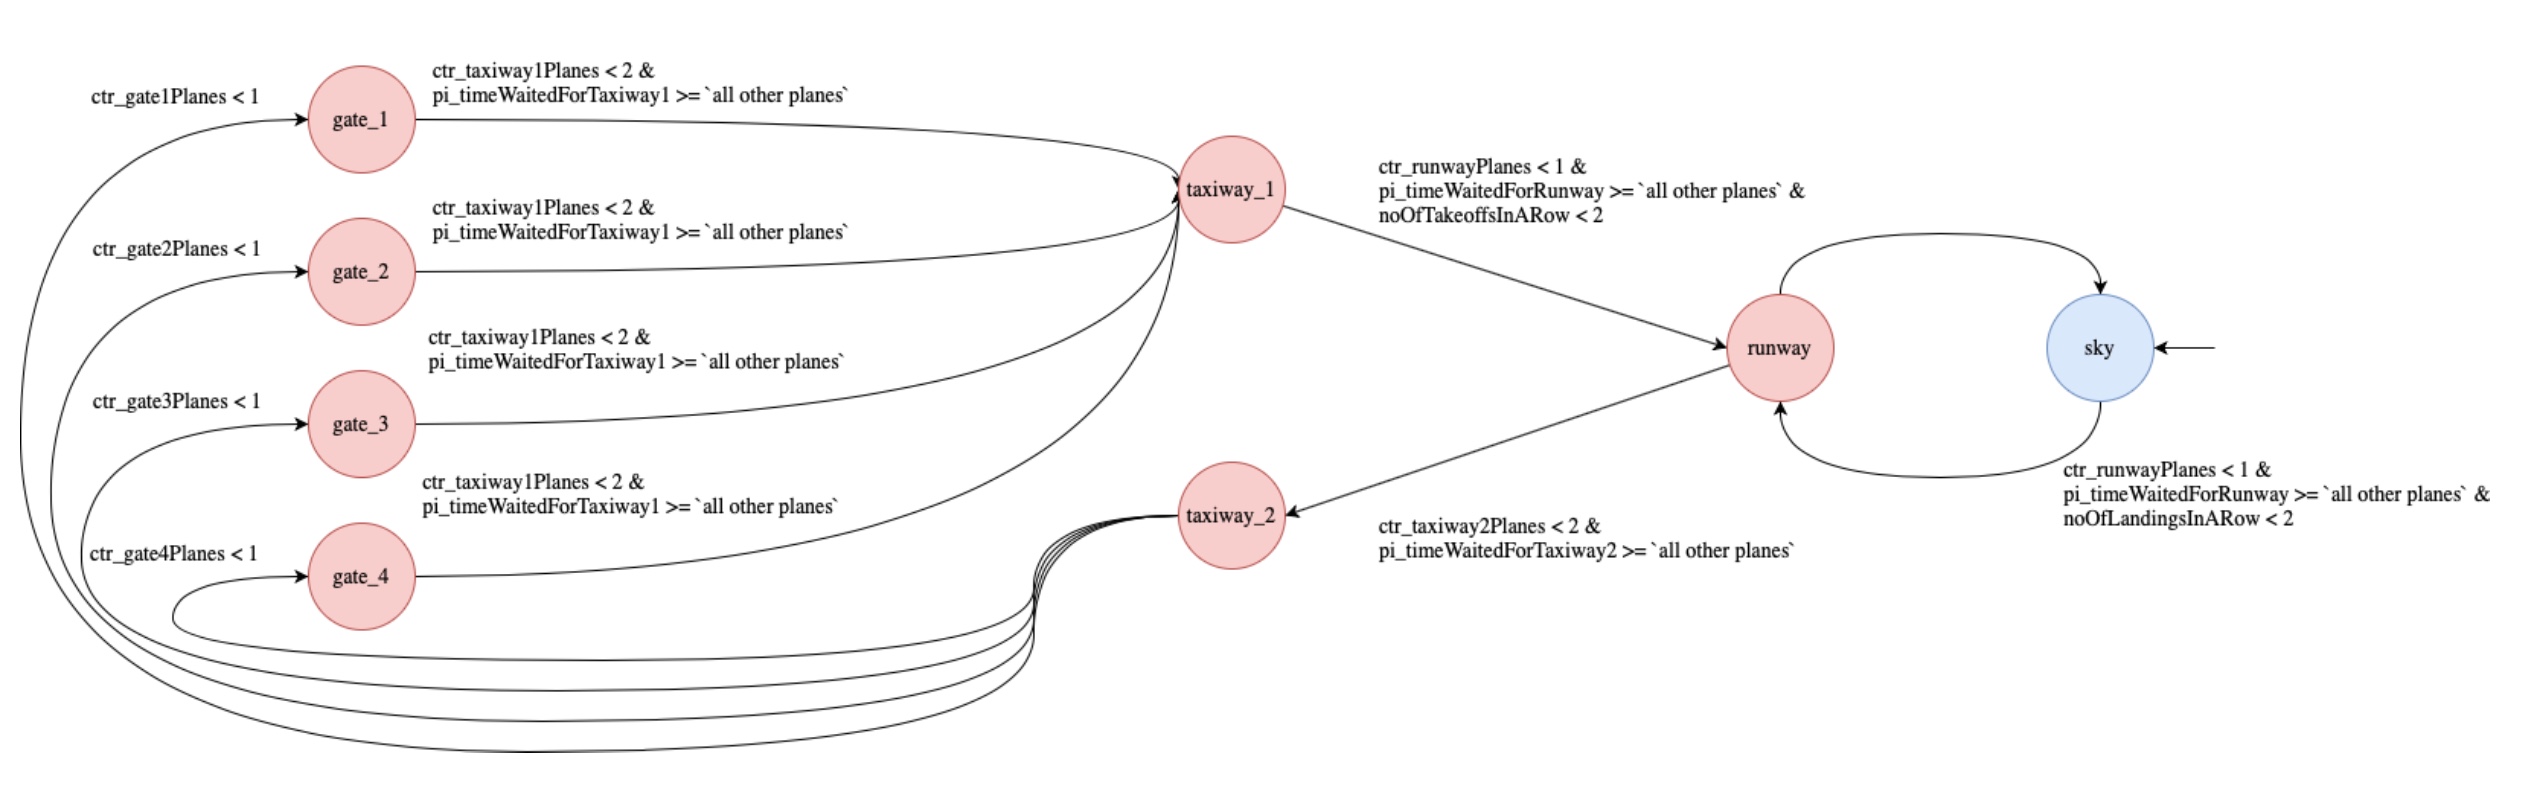
Further, we supply a PRISM model for formal verification, see program graph below and prism for more information.
The rest of this README contains auto-generated instructions for development setup.
See documentation for details.
Please ask for help on the Daml forum if you encounter any issue!
You need to have Node.js and Daml installed.
First, start the Daml components:
daml startThis will:
- Build you Daml code once.
- Generate JavaScript code (and TypeScript definitions) for your Daml types.
- Start a Daml sandbox gRPC server (on 6865).
- Start a Daml HTTP JSON API server (on 7575).
- Watch for the
rkey press (r+ Enter on Windows); when pressed, rebuild all of the Daml code, push the new DAR to the ledger, and rerun the JS/TS code generation.
Next, start the JS dev server:
cd ui
npm install
npm start
This starts a server on http://localhost:3000 which:
- Builds all of your TypeScript (or JavaScript) code (including type definitions from the codegen).
- Serves the result on :3000, redirecting
/v1to the JSON API server (onlocalhost:7575) so API calls are on the same origin as far as your browser is concerned. - Watch for changes in TS/JS code (including codegen), and immediately rebuild.
To build everything from scratch:
daml build
daml codegen js .daml/dist/air-traffic-control-0.1.0.dar -o ui/daml.js
cd ui
npm install
npm run-script build
zip -r ../air-traffic-control-ui.zip build
Next you need to create a ledger on Daml Hub, upload the files
.daml/dist/air-traffic-control-0.1.0.dar (created by the daml build command)
and air-traffic-control-ui.zip (created by the zip command based on the result
of npm run-script build).
Once both files are uploaded, you need to tell Daml Hub to deploy them. A few seconds later, your website should be up and running.