


This is a simple frontend utility to help the file-upload process on your website. It is written in pure JavaScript, has no dependencies, and is a small 13.55 kB (gzipped). You can check out the live demo here.
For the most part, browsers do a good job of handling image-uploads. That being said - we find that the ability to show our users a preview of their upload can go a long way in increasing the confidence in their upload.
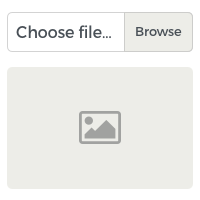
file-upload-with-preview aims to address the issue of showing a preview of a user's uploaded image in a simple to use package.
- Shows the actual image preview in the case of a single uploaded .jpg, .jpeg, or .png image. Shows a success-image in the case of an uploaded .pdf file, uploaded video, or other uploaded file - so the user knows their image was collected successfully. In the case of multiple selcted files, the user will be shown a success-image that indicates multiple files were selected.
- Shows the image name in the input bar. Shows the count of selected images in the case of multiple selections within the same input.
- Allows the user to clear their upload.
- Looks great - styling based on Bootstrap 4's custom file-upload style.
- Framework agnostic - to access the uploaded file/files just use the
cachedFileArray(always will be an array) property of yourFileUploadWithPreviewobject. - For every file-group you want just initialize another
FileUploadWithPreviewobject with its ownuniqueId- this way you can have multiple file-uploads on the same page. You also can just use a single input designated with amultipleproperty to allow multiple files on the same input.
# npm
npm install --save file-upload-with-preview

# yarn
yarn add file-upload-with-preview
Or you can include it through the browser at the bottom of your page:
<script src="https://unpkg.com/file-upload-with-preview"></script>When installed through npm or yarn:
// using require
const FileUploadWithPreview = require('file-upload-with-preview')

// using import
import FileUploadWithPreview from 'file-upload-with-preview'

// initialize a new FileUploadWithPreview object
const upload = new FileUploadWithPreview('myUniqueUploadId')
...or through the browser:
<script>
	var upload = new FileUploadWithPreview('myUniqueUploadId')
</script>
You'll also want to include the css in your <head></head>:
<link rel="stylesheet" type="text/css" href="https://unpkg.com/file-upload-with-preview/dist/file-upload-with-preview.min.css">The JavaScript looks for a specific set of HTML elements to display the file input, label, image preview, and clear-button. Make sure to populate the custom-file-container element with the uniqueId:
<div class="custom-file-container" data-upload-id="myFirstImage">
    <label>Upload File <a href="javascript:void(0)" class="custom-file-container__image-clear" title="Clear Image">x</a></label>
    <label class="custom-file-container__custom-file" >
        <input type="file" class="custom-file-container__custom-file__custom-file-input" accept="*" multiple>
        <input type="hidden" name="MAX_FILE_SIZE" value="10485760" />
        <span class="custom-file-container__custom-file__custom-file-control"></span>
    </label>
    <div class="custom-file-container__image-preview"></div>
</div>
Then when you're ready to use the user's file for an API call or whatever, just access the user's uploaded file/files in the cachedFileArray property of your initialized object like this:
upload.cachedFileArrayThe cachedFileArray property is always an array. So if you are only allowing the user to upload a single file, you can access that file at cachedFileArray[0] - otherwise just send the entire array to your backend to handle it normally.
<html>
    <head>
        ...
        <link rel="stylesheet" type="text/css" href="https://unpkg.com/file-upload-with-preview/dist/file-upload-with-preview.min.css">

        <!-- You'll want to make sure to at least set a width on the -->
        <!-- .custom-file-container class... -->
        ...
    </head>
    <body>

        ...

        <div class="custom-file-container" data-upload-id="myUniqueUploadId">
            <label>Upload File <a href="javascript:void(0)" class="custom-file-container__image-clear" title="Clear Image">x</a></label>

            <label class="custom-file-container__custom-file" >
                <input type="file" class="custom-file-container__custom-file__custom-file-input" accept="*" multiple>
                <input type="hidden" name="MAX_FILE_SIZE" value="10485760" />
                <span class="custom-file-container__custom-file__custom-file-control"></span>
            </label>
            <div class="custom-file-container__image-preview"></div>
        </div>

        ...

        <script src="https://unpkg.com/file-upload-with-preview"></script>
        <script>
            var upload = new FileUploadWithPreview('myUniqueUploadId')
        </script>

    </body>
</html>
In this example we set the MAX_FILE_SIZE value to 10485760 (10MB), the accepted images to * (everything), and designate multiple to allow the user to select multiple files - you can adjust those settings to whatever you like. For example, if you'd like to limit uploads to only images and pdf's and only allow a single file upload use the following:
<input type="file" class="custom-file-container__custom-file__custom-file-input" accept="application/pdf,image/*">
<input type="hidden" name="MAX_FILE_SIZE" value="10485760" />Use npm run test to run the tests.
Clone the repo, then use the following to work on the project locally:
npm install

# watch changes
npm run watch

# when done working
npm run buildGo ahead and fork the project! Submit an issue if needed. Have fun!
Copywrite 2017 Promosis